
Take a Break with Azure Functions
So, it’s the Holidays. The office is empty, the boss is away, and you’ve got a bit of free time on your hands. How about learning a new skill and having some fun?
Azure Functions are a serverless technology that executes code based on various triggers (i.e. a URL is called, an item is placed on a queue, a file is added to blob storage, a timer goes off.) There’s all sorts of things you can do with Azure Functions, like running high CPU-bound calculations, calling various web services and reporting results, sending messages to groups – and nearly anything you can imagine. But unlike traditional applications and services, there’s no need to set up an application host or server that’s constantly running, waiting to respond to requests or triggers. Azure Functions are deployed as and when needed, to as many servers as needed, to meet the demands of incoming requests. There’s no need to set up and maintain hosting infrastructure, you get automatic scaling, and – best of all – you only pay for the cycles used while your functions are being executed.
Want to have a go and try your hand at the latest in web technologies? Follow along to get started with your own Azure Functions.
In this post I’ll show you how to create an Azure Function that triggers every 30 minutes and writes a note into your slack channel to tell you to take a break. We’ll create a new Function app, generate the access token for Slack, then run the function locally.
Prerequisites:
- Visual Studio 2017 (v15.5 or above) with Azure development workload
- Access to a Slack workspace
Create a Function App (Timer Trigger)
We all know how important it is to take regular breaks if you spend all day sitting at a desk, right? So, in this tutorial, we’ll use a Timer Trigger function to post a message to a Slack channel at regular intervals to remind you (and your whole team) to take a break. A Timer Trigger is a type of Azure Function that is triggered to run on regular time intervals.
Just run it
If you want to skip ahead and run the function locally, fetch the source from this repo, insert the appropriate Slack channel(s) and OAuth token in the local.settings.json file, start the Azure Storage Emulator, then Run (or Debug) the Functions app in Visual Studio.
Step-by-step guide
- Open Visual Studio 2017 and select File->New Project.
- Select Azure Functions under the Visual C# category.
- Provide a name (e.g. TakeABreakFunctionApp) and press OK. The New Function Project dialog will open.
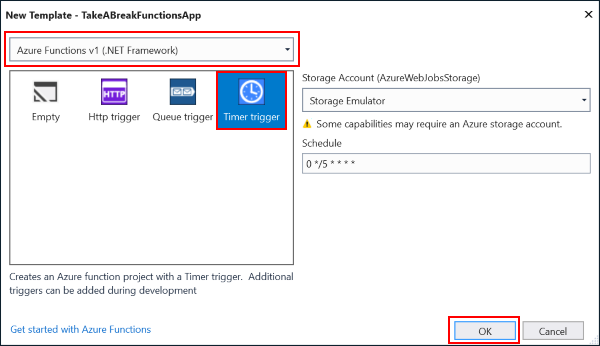
- Select Azure Functions v1 (.NET Framework), chose Timer trigger and press OK.
Note: This will also work with Azure Functions v2, but for this tutorial I’ve chosen v1, since v2 is still in preview.
A new solution is created with a Functions App project and single class called Function1 that contains a basic Timer trigger.
- Edit Function1.cs.
- Add helper methods:
- Env (for fetching environment variables)
- SendHttpRequest (for sending authenticated http requests)
- SendMessageToSlack (for generating and sending the appropriate Slack request – based on environment variables)
- Update method: Run
- Change the return type to async Task.
- Add an asynchronous call to the SendMessageToSlack method.
- Update Chron settings for the TimerTrigger attribute.
- Add appropriate Using statements.
- Add helper methods:
- Edit local.settings.json.
Add the following environment variables.
- SlackbotUrl – The URL for the Slack API to post chat messages
- SlackOAuthToken – An OAuth token that grants permission for your app to send messages to a Slack workspace. – See below for help generating a Slack OAuth token.
- ChannelToNotify – The Slack channel to send messages to

The completed code should look like this:
using System;
using System.Net.Http;
using System.Net.Http.Headers;
using System.Threading.Tasks;
using Microsoft.Azure.WebJobs;
using Microsoft.Azure.WebJobs.Host;

namespace TakeABreakFunctionsApp
{
    public static class Function1
    {
        [FunctionName("Function1")]
        public static async Task Run([TimerTrigger("0 */30 * * * *")]TimerInfo myTimer, TraceWriter log)
        {
            log.Info($"C# Timer trigger function executed at: {DateTime.Now}");
            await SendMessageToSlack("You're working too hard. How about you take a break?", log);
        }

        private static async Task SendMessageToSlack(string message, TraceWriter log)
        {
            // Fetch environment variables (from local.settings.json when run locally)
            string channel = Env("ChannelToNotify");
            string slackbotUrl = Env("SlackbotUrl");
            string bearerToken = Env("SlackOAuthToken");

            // Prepare request and send via Http
            log.Info($"Sending to {channel}: {message}");
            string requestUrl = $"{slackbotUrl}?channel={Uri.EscapeDataString(channel)}&text={Uri.EscapeDataString(message)}";
            await SendHttpRequest(requestUrl, bearerToken);
        }

        private static async Task SendHttpRequest(string requestUrl, string bearerToken)
        {
            HttpClient httpClient = new HttpClient();
            httpClient.DefaultRequestHeaders.Authorization = new AuthenticationHeaderValue("Bearer", bearerToken);
            HttpResponseMessage response = await httpClient.GetAsync(requestUrl);
        }

        private static string Env(string name) => Environment.GetEnvironmentVariable(name, EnvironmentVariableTarget.Process);
    }
}Your local.settings.json should look something like this: (Your SlackOAuthToken and ChannelToNotify variables will be specific to your Slack workspace.)
{
  "IsEncrypted": false,
  "Values": {
    "AzureWebJobsStorage": "UseDevelopmentStorage=true",
    "AzureWebJobsDashboard": "UseDevelopmentStorage=true",
    "SlackbotUrl": "https://slack.com/api/chat.postMessage",
    "SlackOAuthToken": "[insert your generated token]",
    "ChannelToNotify": "[your channel id]"
  }
}
Your Functions app is now ready to run! You just need to grab an authorization token for your Slack workspace.
Generate an OAuth token for your app to send messages to your Slack workspace
Before you can post a message to a Slack workspace, you must first tell Slack about the app and assign specific permissions for the app to send messages as a bot. Once you’ve installed the app to the Slack workspace, you will be issued an OAuth token that you can send with your http requests. For full details, you can follow the instructions here. Otherwise, follow the steps below.
- Click here to register your new Functions app with your Slack workspace.
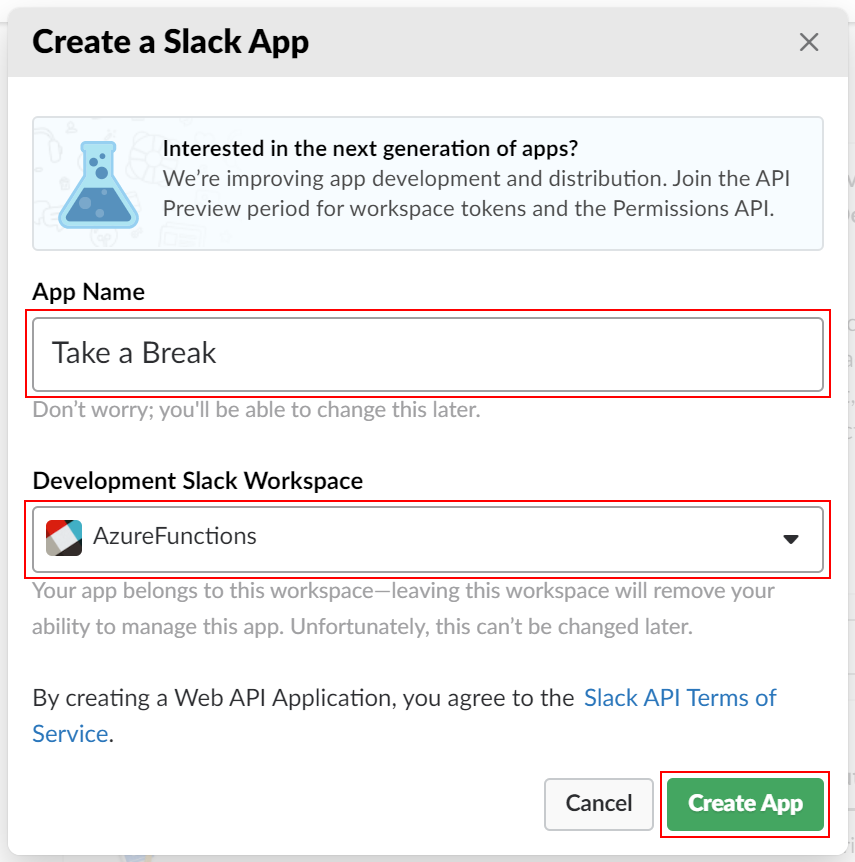
- Provide a name (e.g. “Take a Break”) and select the appropriate Slack workspace, then press Create App.
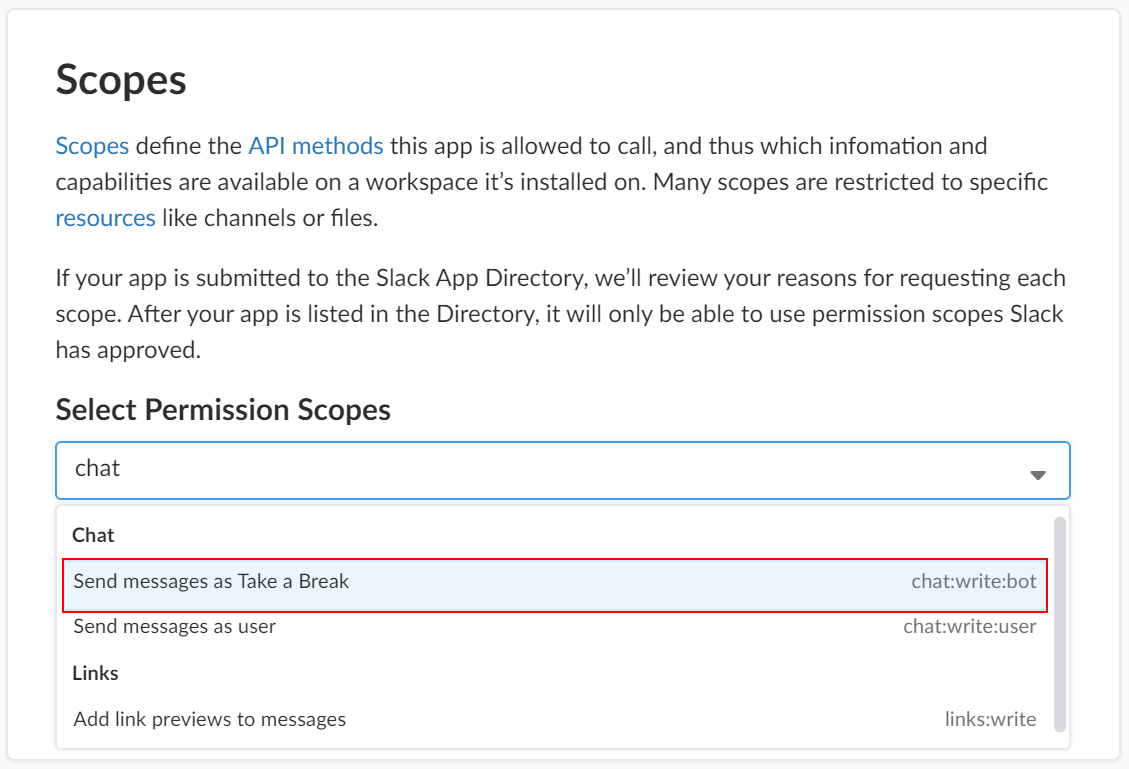
- Select OAuth & Permissions from the navigation menu on the left.
- In the OAuth & Permissions page, scroll down to Scopes, select the permission chat:write:bot, then select Save Changes.
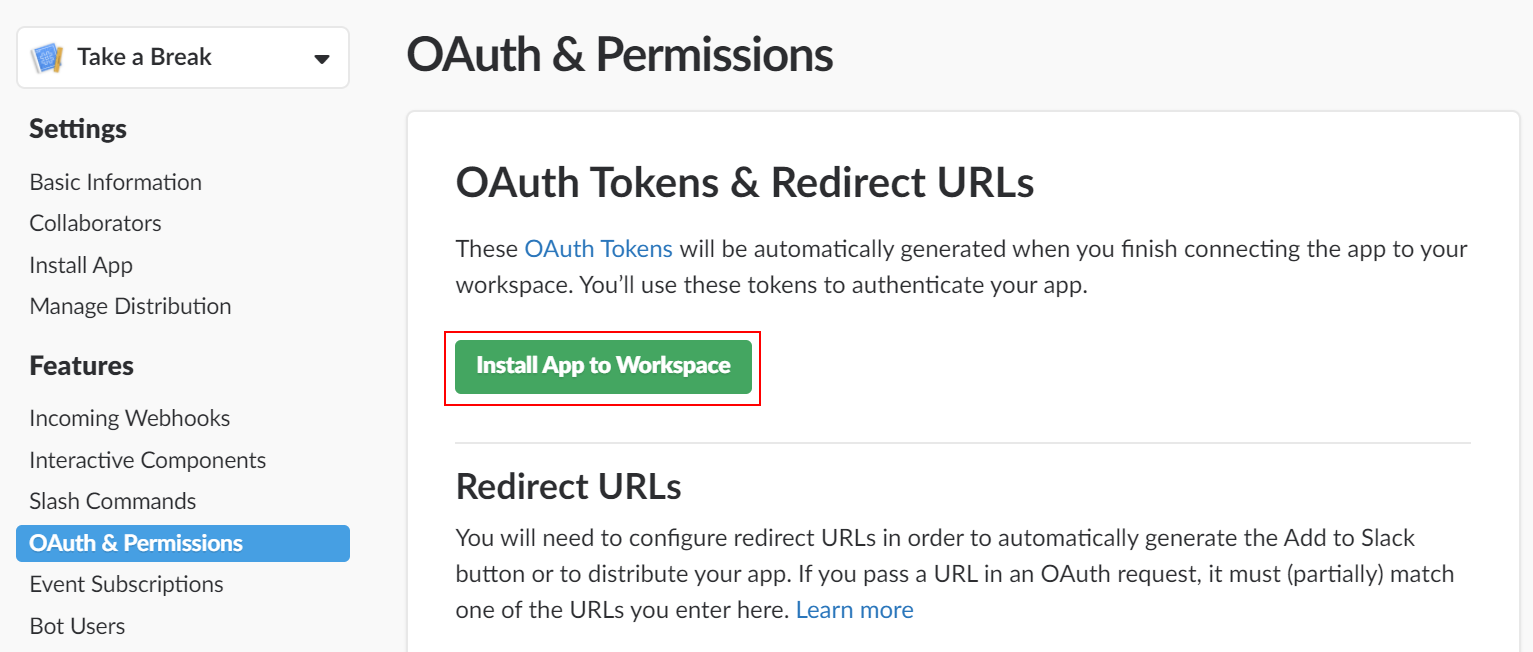
- After the scope permissions have been created and the page has refreshed, scroll to the top of the OAuth & Permissions page and select Install App to Workspace.
- A confirm page opens. Review the details, then click Authorize.
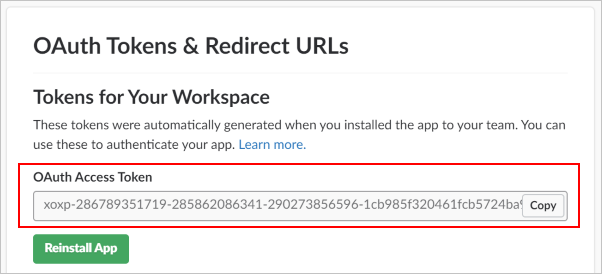
- Your OAuth Access Token is generated and presented at the top of the page.
- Copy this token and add it to your local.settings.json as the value for SlackOAuthToken.
Note: The OAuth access token is a secret and should not be made public. If you check this token into a public source control system like GitHub, Slack will find it and permanently disable it!
When the app is registered with Slack, the Slack API management page opens for the new app.
Run your Functions App on your local machine
Now that you’ve registered your app with Slack and have provided a valid OAuth token in your local.settings.json, you can run the Function locally.
Start the local Storage Emulator
You can configure your function to use a storage account on Azure. But if your app is configured to use development storage (which is the default for new Functions), then it will run against the local Azure Storage Emulator. Therefore, you’ll need to make sure the Storage Emulator is started before running your Functions app.
- Open the Windows Start Menu and search for “Storage Emulator”.
Microsoft Azure Storage Emulator will launch. You can manage it via the icon in the Windows System Tray.
Start the Function app from Visual Studio
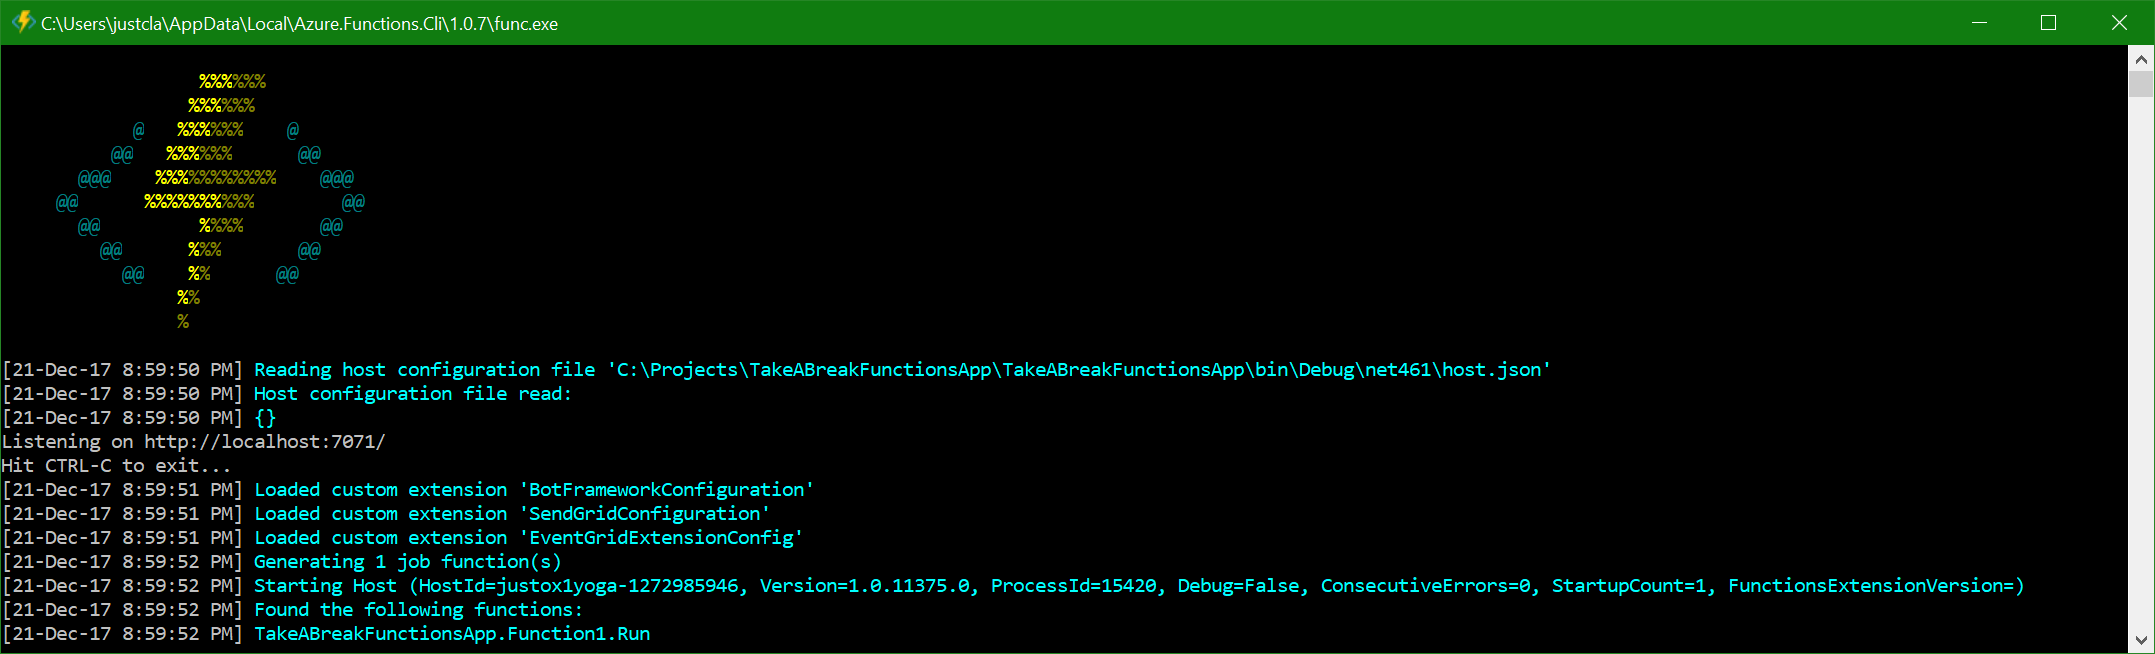
- Press Ctrl+F5 to build and run the Functions app.
- If prompted, update to the latest Functions tools.
- A new command window launches and displays the log output from the Functions app.
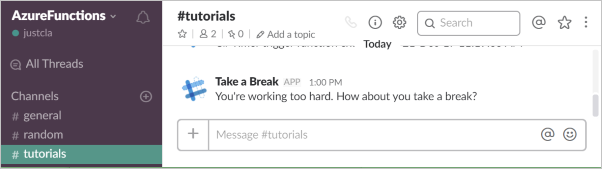
After a certain period of time, the Timer trigger will fire and send a message to your Slack workspace.

You should see the message appear in the appropriate Slack channel.
Feel free to play around with the Timer Chron options in the Run method’s attributes to configure the function to execute at the intervals you’d like. Here are some example Chron settings. Trigger Chron format: (seconds minutes hours days months years) (“0 */15 6-20 * * *”) = Every 15 minutes, between 06:00 AM and 08:59 PM (“0 0 0-5,21-23 * * *”) = Every hour from 12:00 AM to 06:00 AM and 09:00 PM to 12:00 AM
Congratulations! You’ve written a working Azure Functions App with a Timer trigger function.
What’s next?
Publish your Functions App to the cloud
So that your Functions app is always available, and can be accessed globally (eg. For Http trigger types), you can publish your app to the cloud. This article describes the process of publishing a Functions app to Azure.
Experiment with other Functions types There’s an excellent collection of open-source samples available here. Poke around and see what takes your interest.
Tell us about your experience with Azure Functions We’d love to hear about your experience with Azure Functions. If you’ve got a minute, please complete this short survey. As always, feel free to leave comments and questions in the space below.
Happy holidays!
Justin Clareburt Senior Program Manager Visual Studio and .NET
 Light
Light Dark
Dark
0 comments