
Building Single Page Applications on ASP.NET Core with JavaScriptServices
This is a guest post by Steve Sanderson
These days, many developers are building Single-Page Applications (SPAs) using frameworks such as Angular or React. These are powerful frameworks that produce a great end-user experience, but we often hear that building these applications is complicated. It can be a challenge to integrate server-side and client-side code well, or even just to choose a productive project setup in the first place.
Our goal is to make ASP.NET Core the best server-side platform for these kinds of projects. So, we recently shipped three new NuGet packages that are intended to simplify SPA development and add powerful, useful features:
Microsoft.AspNetCore.SpaTemplates plugs into dotnet new, providing project templates for Angular 2, Aurelia, Knockout, React, and React+Redux applications.
Microsoft.AspNetCore.SpaServices is how SpaTemplates-produced projects work internally. It provides useful features for SPA applications, such as server-side rendering for Angular and React applications, plus integration with Webpack build middleware.
Microsoft.AspNetCore.NodeServices is how SpaServices works internally. It’s a low-level library that gives a fast, robust way for ASP.NET Core applications to run arbitrary JavaScript code on the server.
Collectively, these features go by the name JavaScriptServices. You’ll find the source code, issue tracker, and documentation on the JavaScriptServices GitHub repository.
Prerequistes
To work with these technologies, first make sure you’ve installed the following:
- Or, if you’re on Windows, you can install the latest Visual Studio 2017 RC, which includes it. Be sure you have VS2017 build 26206 or later – older versions won’t work.
Getting started
The easiest way to get started is by using one of the project templates we’ve made available. These plug into the standard dotnet new command, and work on Windows, Mac, and Linux.
To install the Single Page Application (SPA) templates, run the following command:
dotnet new --install Microsoft.AspNetCore.SpaTemplates::*
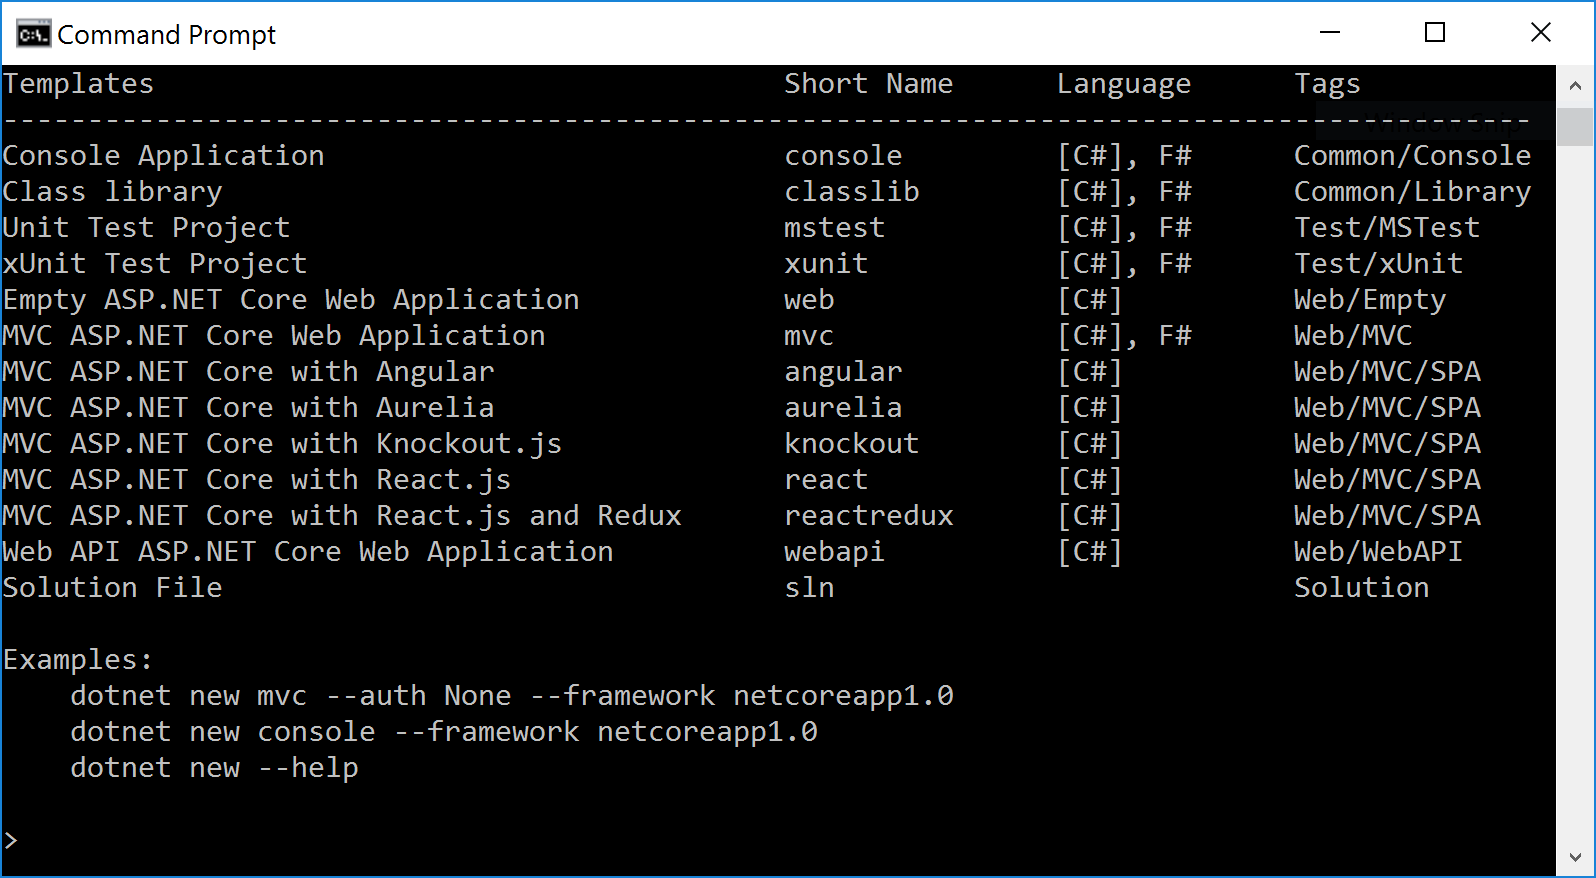
One this is installed, you’ll see that dotnet new now can produce projects based on angular, aurelia, knockout, react, and reactredux:
To actually generate a new project, first create an empty directory for it to go into, cd to that directory, and then use dotnet new to create your project. For example:
dotnet new angular
There are two ways to run your new project: via the command line, or via Visual Studio (Windows only).
Option 1: Running via the Command Line
To run your project on the command line, you must first restore both the .NET and NPM dependencies. Execute the following commands:
dotnet restore
npm install
Then, set an environment variable to tell ASP.NET to run in development mode:
$Env:ASPNETCORE_ENVIRONMENT = "Development"
cmd.exe in Windows, execute setx ASPNETCORE_ENVIRONMENT "Development", and then restart your command prompt to make the change take effect
export ASPNETCORE_ENVIRONMENT=Development
Finally, you can start your new app by running dotnet run. It will listen on port 5000, so point your browser to http://localhost:5000 to see it.
Option 2: Running in Visual Studio 2017 RC
If you’re on Windows and want to use Visual Studio 2017 RC, you can simply open your newly-generated .csproj file in Visual Studio. It will take care of restoring the .NET and NPM dependencies for you (though it can take a few minutes).
When your dependencies are restored, just press Ctrl+F5 to launch the application in a browser as usual.
Alternative: Creating a SPA project via Yeoman
If for some reason you’re stuck on older (pre-RC4) versions of .NET Core tooling, or if you need to use Visual Studio 2015, then instead of using the dotnet new command, you can use Yeoman to create your new project. You’ll need .NET Core SDK 1.1 and Node.js version 6 or later.
To install Yeoman and these templates, open a command prompt, and then run the following:
npm install -g yo generator-aspnetcore-spa
Then, cd to an empty directory where you want your project to go, and then run Yeoman as follows:
yo aspnetcore-spa
Once your new project is created, Yeoman will automatically fetch its .NET and NPM dependencies. You can then set the ASPNETCORE_ENVIRONMENT variable as described above, then run your project by executing dotnet run.
Your new Single-Page Application project
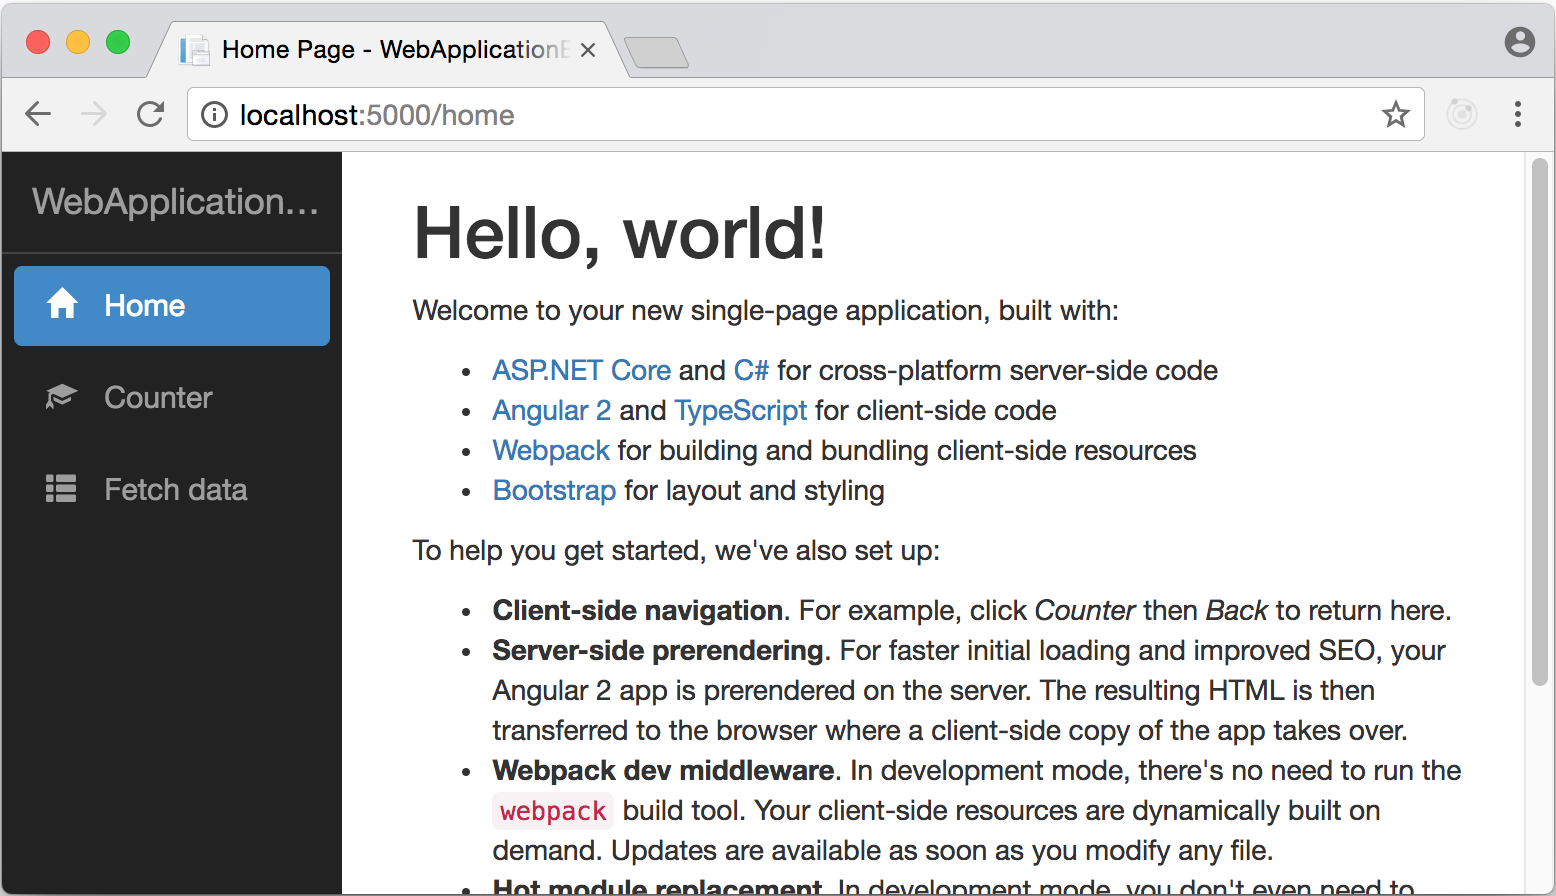
Whichever way you choose to create and run your project, here’s how it will initially look:
Let’s now look at some of the features in the templates.
Server-side prerendering
If you’re using the Angular or React+Redux template, then you will have server-side prerendering. This makes your application’s initial UI appear much more quickly, because users don’t have to wait for their browser to download, evaluate, and execute large JavaScript libraries before the application appears. This works by executing Angular/React/etc components on the server as well as on the client. To a limited extent, it means your SPA can even work with JavaScript disabled in the browser, which is great for ensuring your app is accessible to all search engine crawlers.
As a quick (but artificial) demo to prove this is working, just try disabling JavaScript in your browser. You’ll still be able to load the page and navigate around. Bear in mind that only navigation works without JavaScript, not any other user actions that are meant to execute JavaScript.
The primary use case for server-side prerendering is to make your page appear extremely quickly, even if the user has a slow network connection or a slow mobile device, and even if your SPA codebase is very large. The client-side code will download in the background, and then takes over execution as soon as it’s loaded. This feature solves what is otherwise a significant drawback of large SPA frameworks.
Webpack dev middleware
These projects all use Webpack as a front-end build system, because it’s the dominant system used by Angular/React/etc developers. One of its powerful features is the ability, during development, to keep running in the background and incrementally recompile any modified code extremely quickly.
Webpack dev middleware is integrated into these projects via SpaServices. As long as your application is running in the Development environment, you can modify your client-side code (e.g., the TypeScript, or in Angular, the html files that are compiled into your components), and the updated version is almost immediately available to the browser. You don’t have to run any build commands manually.
Hot Module Replacement
Hot Module Replacement (HMR) takes the dev middleware feature a step further. It sets up a live link between the Webpack dev middleware service and your application running in your local browser. Whenever your source files change and the dev middleware provides an incremental update, HMR pushes it to your local browser immediately. It does thiswithout causing a full page reload (because that might wipe out useful state, such as any debugging session you have in progress). It directly updates the affected modules in your running application.
The purpose of this is to give you a faster, more productive development experience. To see it working, just edit one of the TypeScript or HTML files in your /ClientApp directory. You’ll see the corresponding update appear in your browser right away.
If you’re using React or React+Redux, your application state will br preserved through the update. If you cause a compiler error, its details will appear as an overlay in your browser. Once you fix the compiler error, your application will resume, still preserving its previous in-memory state.
Note: HMR is currently available in all the templates except for the Aurelia one. We aim to add it to the Aurelia template soon.
Efficient production builds
These project templates are set up to build your client-side assets (TypeScript, bundled HTML, CSS, etc.) in two different modes:
Since this is achieved using Webpack 2, you can easily edit the Webpack configration files to set up whatever combination of build options you require, or to enable support for compiling LESS/SASS or other popular front-end file types and languages. See the webpack.config.js file at the root of the project, and Webpack 2 documentation for details of the available options. There’s a guide to enabling LESS support in the SpaServices documentation.
Invoking Webpack manually
The dev middleware feature means you don’t normally need to invoke Webpack manually. But if you do want to run Webpack manually on the command line, you can run the following:
webpack --config webpack.config.vendor.js
webpack
The first line repackages all of your vendor dependencies, i.e., third party libraries such as Angular or React and all their dependencies. You only need to run this if you modify your third-party dependencies, such as if you update to a newer version of your chosen SPA framework.
The second line (running webpack with no parameters) rebuilds your own application code. Separating your own application code from your vendor dependencies makes your builds much faster.
These commands will produce development-mode builds. If you want to produce production-mode builds, then also pass the flag --env.prod when invoking Webpack.
Publishing for deployment
To deploy your application to production, you can use the publish feature which is built into dotnet command line tooling and Visual Studio. For example, on the command line, run:
dotnet publish -c Release
This will produce a ready-to-deploy production build of your application. It includes .NET code compiled in Release mode, and invokes Webpack with the --env.prod flag to produce a production build of front-end assets. Equivalently, you can use the Publish option from Visual Studio’s Build menu.
Learn more
Learn more about SpaServices and see other usage examples at the SpaServices online documentation.
Using NodeServices directly
Even if you’re not building a single-page application, it can be extremely useful to be able to run JavaScript on the server in certain cases. Why would you want to do this? Primarily, because a huge number of useful, high-quality Web-related open source packages are in the form of Node Package Manager (NPM) modules. NPM is the largest repository of open-source software packages in the world, and the Microsoft.AspNetCore.NodeServices package means that you can use any of them in your ASP.NET Core application.
Of course, this is how SpaServices works behind the scenes. For example, to prerender Angular or React components on the server, it needs to execute your JavaScript on the server. It does this via NodeServices, which starts up a hidden Node.js instance and provides a fast and robust way of making calls into it from .NET.
Walkthrough: Using NodeServices
For this walkthrough, first create a new application with ASP.NET Core 1.1.0 or later.
Next, add a reference to Microsoft.AspNetCore.NodeServices using one of these techniques:
dotnet add package Microsoft.AspNetCore.NodeServices
project.json-based project, you can edit your project.json file to add a reference to Microsoft.AspNetCore.NodeServices and then run dotnet restore
Next, configure ASP.NET’s dependency injection (DI) system to make it aware of NodeServices. In your Startup.cs file, in the ConfigureServices method, add the following line:
services.AddNodeServices();
You’re now ready to receive instances of INodeServices in your application. INodeServices is the API through which .NET code can make calls into JavaScript that runs in a Node environment. Let’s start just by getting back a string from JavaScript.
In HomeController.cs, at the top, add the line using Microsoft.AspNetCore.NodeServices;. Now amend its About method as follows, so that it makes a call into Node.js and awaits the result:
If you run your application now and try to browse to the about page, you’ll get an error saying Cannot find module ‘myNodeModule.js’. This is because NodeServices tried to invoke your JavaScript code, but no such code was found. Of course, you need to create a file with that name.
At the root directory of your project, add a file called myNodeModule.js, containing the following:
Finally, display the result by editing your Views/Home/About.cshtml view so it emits the ResultFromNode value:
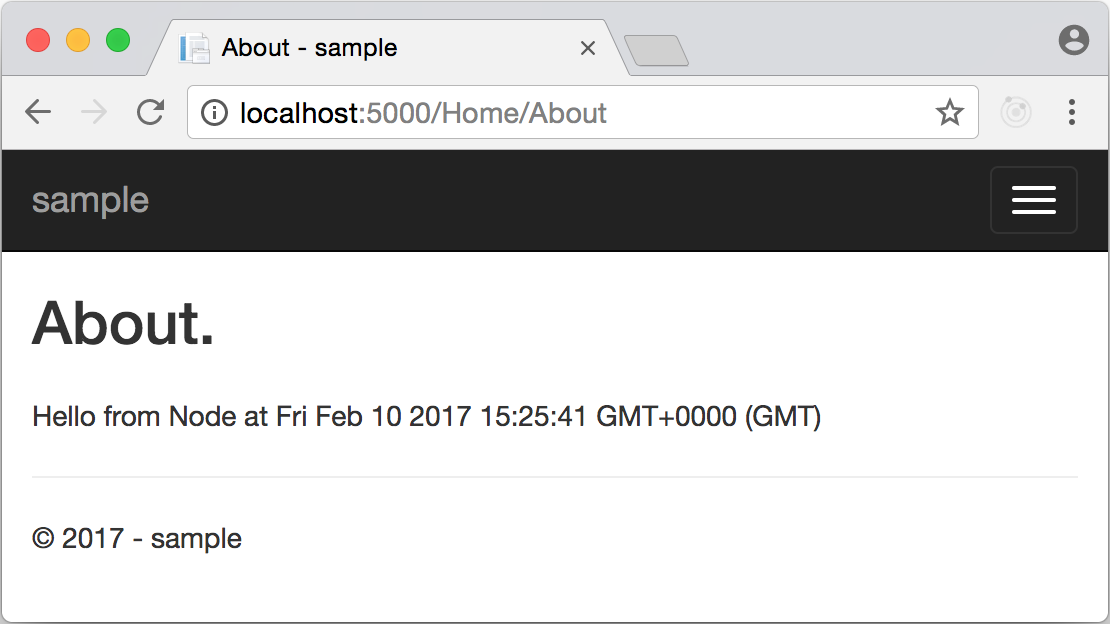
Now you’ll see your JavaScript code was executed on the server, the result went back to your .NET code, and is displayed to the visitor:
Since you can now run arbitrary server-side JavaScript in your application, you have access to the entire NPM ecosystem. This provides new ways of solving many problems, including dynamic transpilation of TypeScript/SASS/ES2017, image/audio manipulation, or running on the server many libraries that would otherwise run in the browser.
Example: Rendering charts/graphs on the server
Imagine you want to display some charts and graphs in your web pages. These need to be constructed dynamically using data from some backend database or web service.
There are various ways to approach this. One popular choice today is to have the server send raw data values to the browser, and then use a client-side library to actually draw the charts. For example, you could use the extremely popular chartist.js library.
This works well, but there may be cases where you don’t want to depend on executing client-side code for this (you might want to avoid that overhead for the browser, or can’t rely on JavaScript being enabled and not blocked on all your customers’ devices).
NodeServices lets you continue using Chartist, but run it on the server, so that browsers don’t need to run any JavaScript code to get the graphs. To do this, following on from the previous example, add the Chartist library to your project by running the following in a command line:
npm install --save node-chartist
Next, you can amend your About method to pass some data and options from .NET code into your Node.js module:
The options and data objects, when JSON-serialized, will be in exactly the correct format for Chartist. You can learn more about the available chart types and option in Chartist’s documentation.
The next job is to update myNodeModule.js so that it receives the options and data parameters, and passes them through to Chartist. When it gets back the rendered chart, it can return it to the .NET code::
If you know JavaScript, you’ll recognize that Chartist’s generate function returns a Promise object. This code uses the then method to pass the result – which in this case is a string of SVG markup – back to .NET via the supplied callback parameter. In effect, the Node.js module you’re writing here is a simple adapter between .NET code and (in this case) the Chartist library.
There are two final things you need to do to see the graph in your page:
About.cshtml, replace @ViewData["ResultFromNode"] with @Html.Raw(ViewData["ChartMarkup"]). You need to use Html.Raw because Chartist will return SVG markup.
Views/Shared/_Layout.cshtml file, in the <head> element, add a reference to a suitable stylesheet for the Chartist charts. This is how you control the color scheme and visual style. For example, use the default Chartist CSS file available via CDN: <link rel="stylesheet" href="http://cdn.jsdelivr.net/chartist.js/latest/chartist.min.css">
Now when you run your application and visit the About page, you’ll see your chart:

This looks identical to how Chartist would render the same data on the client, except now it involves no client-side code for the browser to execute. Chartist is relatively simple. If it turns out that your requirements are too sophisticated for it, you could switch to the incredibly powerful D3.js, because that also supports running in Node and therefore works with NodeServices.
Summary
Of course, rendering charts is just one example. NodeServices allows ASP.NET Core developers to make use of the entire NPM ecosystem, which gives rise to a huge range of possibilities.
You can read more about the APIs in NodeServices (for invoking Node.js code from .NET) at the NodeServices project on GitHub. Similarly, you can read more about the APIs in SpaServices (a package of SPA-specific helpers, e.g., for server-side prerendering) at the SpaServicesProject on GitHub.
Try it out
We hope these new features will make it easier for you to build sophisticated, modern web applications that combine .NET and JavaScript code.
Please let us know if you have feedback on the features, or encounter any problems when using them, by posting to the issues list on the JavaScriptServices GitHub repo.
 Light
Light Dark
Dark
2 comments
*** I think it is important to point out that this functionality has been essentially deprecated. ***
https://github.com/aspnet/Announcements/issues/289
Many parts (screen-shots I think) in “Walkthrough: Using NodeServices” and “Example: Rendering charts/graphs on the server” are missing, please update, I can’t understand the remaining parts without them. Thanks.