
VB Universal Windows App Part 1: Getting Started
This is Part 1 of the “VB Universal Windows App” series:
- > Part 1: Setting up the universal Windows app in the Dev Centers, and in VS Solution Explorer
- Part 2: Sharing XAML, Assets and Code
- Part 3: Local and Roaming settings, and In-App purchases
- Part 4: Sound effects with SharpDX
- Part 5: How to call platform-specific APIs from common code
- Download full source code
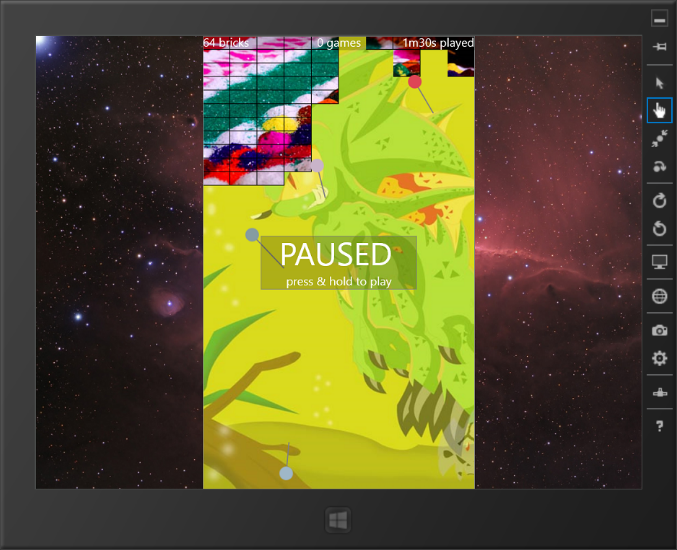
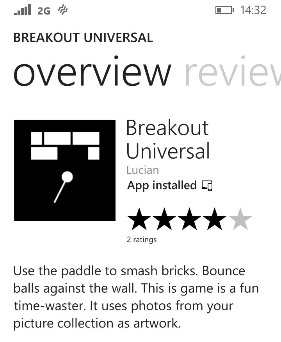
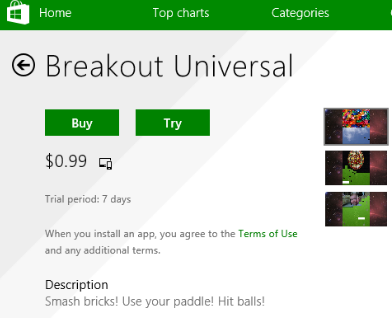
Recently in April 2014, Microsoft announced Universal Windows Apps. I thought I’d take an old Silverlight paddle game and turn it into a VB Universal Windows App. Here’s how the finished game looks, on devices and in the stores:
|
|
|
|
|
|

What is a Universal Windows App?
A “universal Windows app” is a great end-user experience. It means the user of your app can buy the app on Phone, say, and it counts as purchased on Store as well. The user can make an in-app purchase on one device and it counts as purchased on the other. The user’s settings can roam from one device to another. Customers expect that the Windows and Windows Phone versions of the app will have roughly equivalent functionality, at least as far as that makes sense, but they also expect a “look and feel” on each device that is tailored to that device.
Under the hood, you the developer still have to submit two different app-packages to the two stores.
But what you’ll do is re-use as much code as possible between the two apps – re-use your code, your XAML, your assets. The developer “happy place” is when most of your work is done in common, when a bugfix or feature for one device also works on the other device without effort or testing. That’s what we’ve made considerably easier for VB, C#, C++ and JS in recent updates to Visual Studio.
To get started:
- Install Visual Studio 2013 Update 2
- Install Roslyn End User Preview
(Roslyn isn’t strictly necessary, but it includes a few general-purpose enhancements that help universal app authoring.)
Start at the Dev Center
We’ll start by registering our app, and our in-app purchase, at the two dev centers
|
Windows Dev Center |
Windows Phone Dev Center |
|
|
|
|
|
|


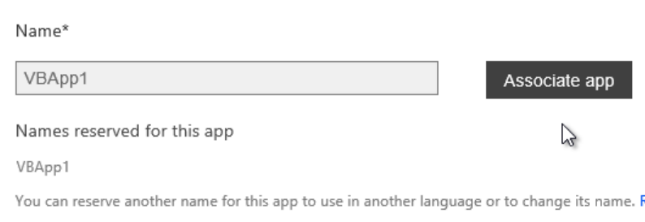

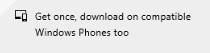
The important thing is to register the app under the same name in both dev centers. This is how the stores know that it’s a universal app. And they’ll show little “universal” badges in the two store listings.

Pro Tip: In the Windows Store, space in search-results is limited, and if too much space is taken up with the words “Free trial” or “Discount” then there won’t be room to show the badge. After all, the word “free” is better at enticing customers than the universal badge!
In concrete terms, “universal Windows app” means that if an app in the Windows store is registered with the same name as an app in the Windows Phone store, then…
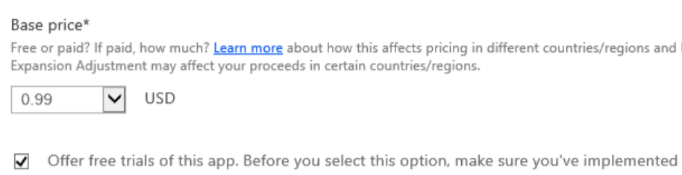
- If a user buys your app in one store, then it counts as bought in the other store as well. (So, it makes sense for you to pick the same price in both stores!)
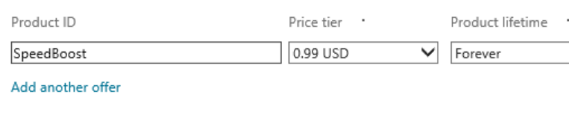
- If a user buys a durable in-app purchase in one store, then a durable in-app purchase with the same identifier counts as bought in the other store as well. (So, be careful to type in identical names for your in-app purchases – and again it makes sense to pick the same price in both stores!)
- Any data that the app saves under ApplicationData.Current.RoamingSettings or RoamingFolder on one device will be synced to apps with the same name on other devices. (Neither end-user nor developer can force syncing to happen. Generally it happens promptly on Windows, and after about 10 minutes on Windows Phone).
Set up the project for code-sharing
We’re going to submit two appx-packages to the two stores. But we’ll set up our solution in Visual Studio so as to re-use as much as possible between the two apps, thanks to newly enhanced Portable Class Libraries.
|
|
|
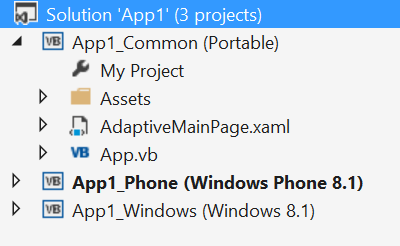
- File > NewProject > OtherProjectTypes > VisualStudio > Blank Solution
- Solution > AddNewProject > VB > Store > Phone > BlankApp “App1_Phone”
- Solution > AddNewProject > VB > Store > Windows > BlankApp “App1_Windows”
- Solution > AddNewProject > VB > Store > Windows > ClassLibrary(Portable) “App1_Common”
- App1_Phone > AddReference > Solution > App1_Common
- App1_Windows > AddReference > Solution > App1_Common
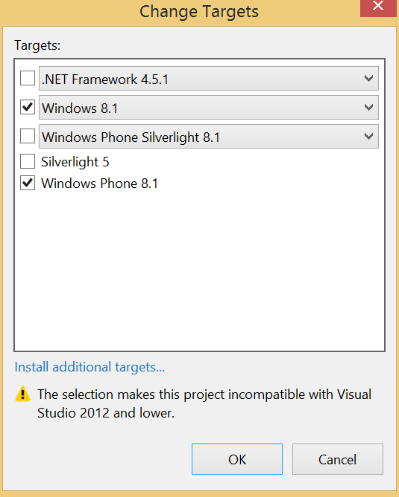
We’re using Portable Class Libraries (PCLs) for the common code. This builds on an important enhancement PCLs that came in VS2013 Update2. Prior to this, PCLs could only contain code and resources, and could only make calls to .NET APIs.
But now, if a PCL only targets Windows 8.1 and Windows Phone 8.1, then it can also include XAML and Assets, and can also make calls to WinRT APIs. That’s good, because we’re going to re-use XAML, and re-use assets, and re-use code that calls WinRT APIs.
Pro tip: don’t call your projects “App1.Windows” and “App1.Phone” with a dot in them. This will create your projects with a default namespace called “App1.Windows” and “App1.Phone”, so if you tried to invoke an API called Windows.Application.Current then it’d look inside your “Windows” namespace not the real one!
Pro tip: the question of how to re-use code effectively is a deep one, with no “one-size-fits-all” solution. In VS2013 Update2 and with Roslyn we’ve improved two solutions for VB and C#, “PCLs” and “LinkedFiles”. This blog series uses both. We also introduced a new solution that’s only in C# for the time being, “SharedProjects”, which are an easier way to manage a group of LinkedFiles within VisualStudio. SharedProjects will make their way into VB in the next release of Visual Studio.
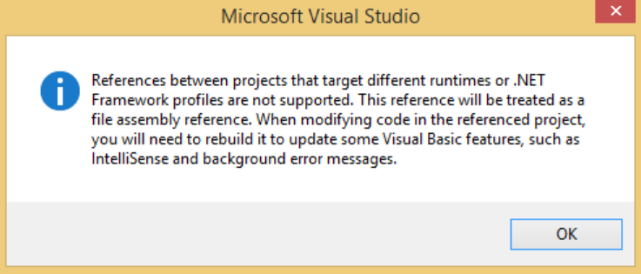
In steps 5 and 6, you might see the dialog below. Assuming you have Roslyn installed, you can ignore it. The Roslyn preview fixes the underlying issue, but hasn’t yet got rid of the dialog. (Without Roslyn, doing GoToDef from an app to the PCL will take you to ObjectBrowser not to the source code of your PCL).
Conclusion
In today’s blog post “Part 1” we’ve set the groundwork by registering the app in both dev centers, and creating the basic structure in Solution Explorer. Stay tuned for tomorrow’s post “Part 2”, where we share XAML, Assets and Code between the two versions of the app.
—
Lucian
 Light
Light Dark
Dark
0 comments