
Publish to Azure in Visual Studio 2017
This week, those of you using Visual Studio 2017 RC will be getting an update notification. This is a refresh of RC, with a whole lot of improvements and fixes (based on your feedback), and a selection of features that didn’t quite make the initial RC release.
For Python support, we’ve largely focused on bugfixes. There were 34 bugs resolved for this refresh, which we hope will give you a noticeably more stable and performant product.
However, there was one big and dramatic change that we want to draw some attention to, as it may impact your workflow. While many Python developers are quite happy never publishing a web site or service to Azure, there are also many who do it either for themselves or for work. With this update, we’ve changed how publishing works, and while it should now be more predictable and reliable, it may also require some more configuration to get from a web project to a functional site.
In this post, we’ll take a quick look at how publishing worked before this change, and some of its problems and limitations, and then see how to use the new approach most efficiently.
Before
Magic!
Let’s be honest, publishing to Azure – particularly Azure App Service – was fairly magical. Anyone who has configured a web server before knows that there is a lot of configuration, deployment, routing, rewriting, filtering and logging that we never made you do. In fact, we went to a lot of trouble to hide the fact that we were generating a web.config for you so that you could go from a single .py file to a working web site without having to think. We would even “deploy” your virtual environment automatically by copying the files and rebasing it against a preinstalled copy of Python.
As it turns out, this makes things really hard to debug. When your site doesn’t work, not only do you need to understand how the web server (typically IIS) and Python work, you also need to learn about all of our magic and how to influence or avoid it. It also becomes very difficult to deploy your site without using Visual Studio, such as from a continuous integration system.
Visual Studio 2017 will unwind most of this magic, making your deployments accurately reflect what you see on your development and test machines. Every file that ends up on the server will also exist on your local machine, and can be easily modified or replaced if necessary.
Limits
When you implement magic configuration, you need to either test against every possible environment or restrict the environments that will work. When we originally set up publishing for Python, we chose to restrict it to only those environments available on Azure App Service. At the time, this was 32-bit Python 2.7 and Python 3.4. If you try and publish with a different version active, you will simply receive and error and will not be able to continue.
Again, this turned out to be a bad idea (see our earlier post on this subject for the details). It meant that upgrading the preinstalled copies of Python became impossible, since people were relying on specific versions, and that you needed a matching local environment, making it completely impossible to deploy from a macOS or Linux system.
Visual Studio 2017 removes the error check here, and also the publishing steps that depended on matching the environment. As a result, you will need to manually deploy a Python runtime of your choice and install packages (details below), but you gain complete freedom of versions, architectures, and the ability to republish your site without affecting the runtime environment.
WebPI
For those using Cloud Service rather than App Service, publishing is done through a Cloud Project rather than the Python project. However, the PowerShell scripts to install Python and configure the machines were part of the Python project templates.
For obtaining Python and some common packages, these scripts would use the Web Platform Installer (WebPI), which was developed to support IIS. We provided some copies of the Python installer in the WebPI feeds so that they could be easily installed onto a web server. While WebPI still works just fine, it does not align well with the Python community and we are moving to a more flexible approach.
Visual Studio 2017 will provide new versions of the PowerShell scripts for deploying Cloud Services to Azure. Since these are part of your project, existing projects will not automatically get the changes. However, Cloud Service web roles are likely to be affected by the other changes to web.config generation.
After
Simple Copy
In Visual Studio 2017, the “Publish” command on web projects and the packaging step for Cloud Service projects perform simple copies of the files in your project. This means that if you do not have it in your project, it won’t be on your machine. It also means that if you modify a file on your local machine and publish, we will not overwrite your modifications anymore.
We no longer try to copy virtual environments to the remote machine. This makes publishing much faster and more reliable, but makes you responsible for getting Python and any packages you need onto the server. There are details below on how to do this for Azure App Service and Cloud Service.
Templates
Since we no longer generate files automatically for you, we have added a number of templates to help you create them. These templates can be found under the Add New Item menu for your project.
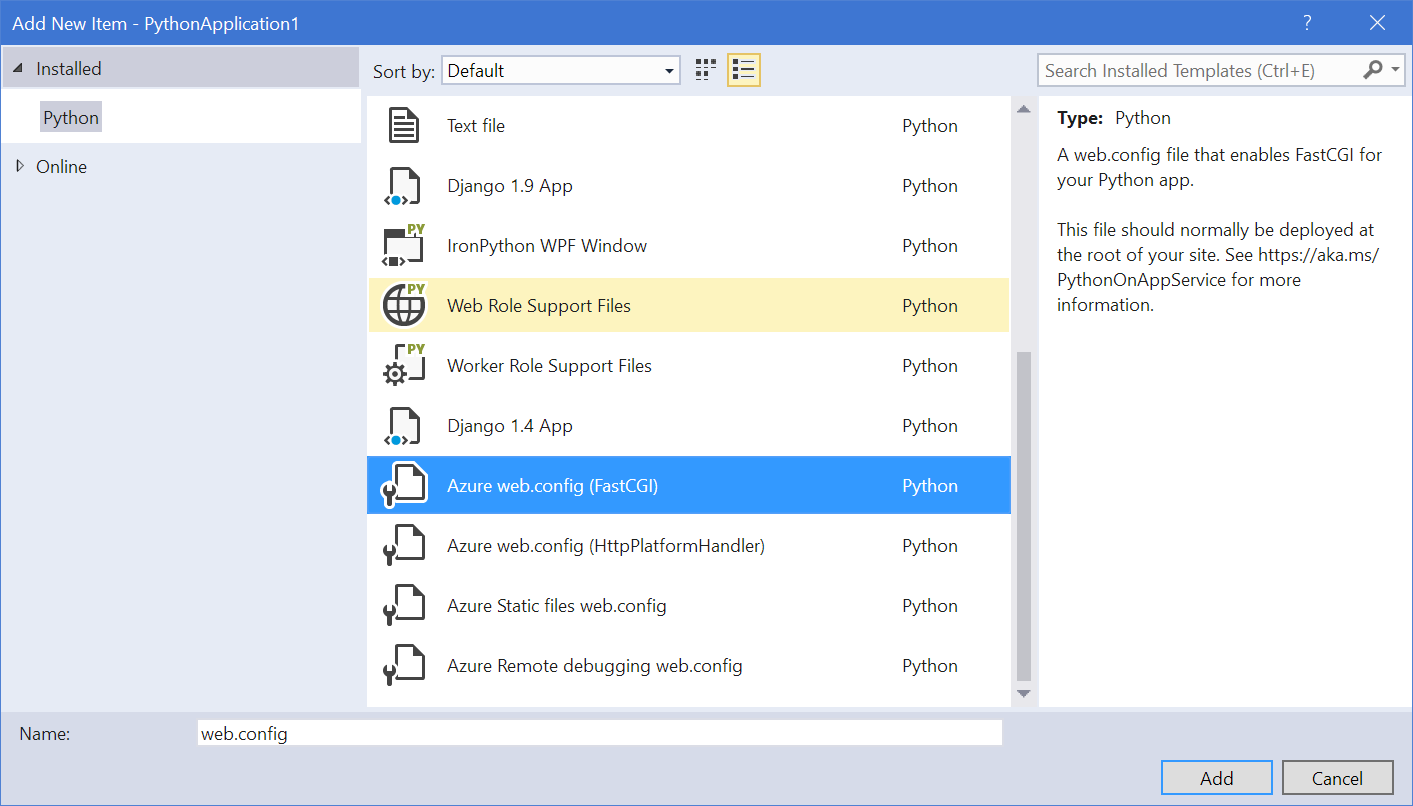
Each template includes more information about how to use it, and you can (and likely should) make modifications to the files added. Here is a quick overview of the new and updated ones.
- Azure web.config (FastCGI)
- Adds a web.config file for when your app provides a WSGI object to handle incoming connections.
- Azure web.config (HttpPlatformHandler)
- Adds a web.config file for when your app listens on a socket for incoming connections.
- Azure Static files web.config
- When you have one of the above web.config files, add this to a subdirectory to exclude it from being handled by your app.
- Azure Remote debugging web.config
- Adds the files necessary for remote debugging over WebSockets.
- Web Role Support Files
- Contains the default deployment scripts for Cloud Service web roles.
- Worker Role Support Files
- Contains the default deployment and launch scripts for Cloud Service worker roles.
Site Extensions
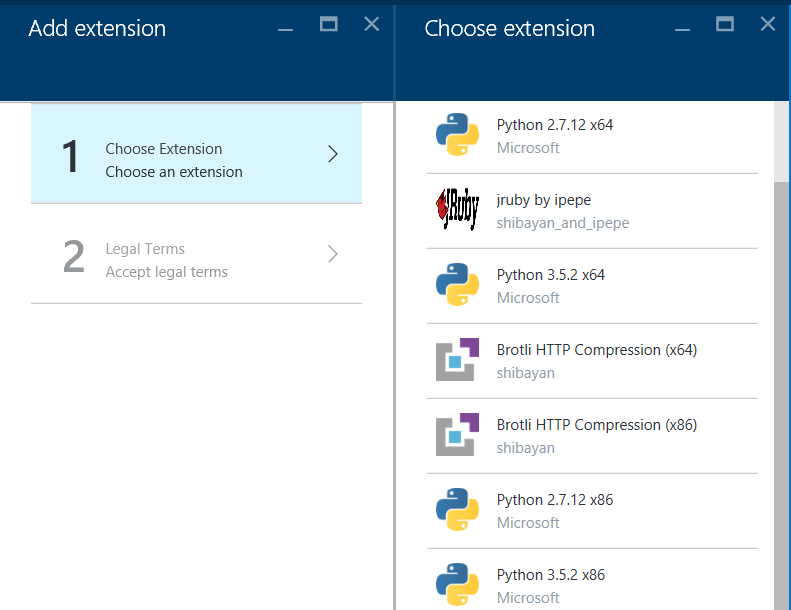
Our recommended method for deploying Python to Azure App Service is to use our site extensions. These packages are based on the official Python releases and optimised for use on Azure. We maintain packages for recent versions of Python and new 2.7 releases, and you can also publish your own extensions to use as part of your deployments.
A site extension can be deployed through the Azure Portal on the blade for your web app:
If you are using JSON deployment templates, you can specify the site extension as a resource of your site:
{
  "resources": [
    {
      "apiVersion": "2015-08-01",
      "name": "[parameters('siteName')]",
      "type": "Microsoft.Web/sites",
      ...
      "resources": [
        {
          "apiVersion": "2015-08-01",
          "name": "python352x64",
          "type": "siteextensions",
          "properties": { },
          "dependsOn": [
            "[resourceId('Microsoft.Web/sites', parameters('siteName'))]"
          ]
        },
      ...
Or you can log in through the development console and upload any files you like.
Currently, the recommended way to install packages is to use the development console after installing the site extension and executing pip directly. Using the full path to Python is important, or you may execute the wrong one, and there is generally no need to use a virtual environment.
D:homePython35python.exe -m pip install -r D:homesitewwwrootrequirements.txt
D:homePython27python.exe -m pip install -r D:homesitewwwrootrequirements.txt
Nuget
Our updated deployment scripts for Azure Cloud Service now use the Python nuget packages rather than the WebPI feed. These packages are built as part of the official Python release and are unmodified from what is released on python.org. The scripts will automatically run pip to install a requirements.txt file if you include one in the root of your project.
You can replace the deployment scripts in your existing project by deleting or renaming the bin directory and then adding either of the Web Role Support Files or Worker Role Support Files templates described above.
As the scripts are added directly to your project, you can also freely modify them to install a different version of Python, to install from a different installer, or to perform whatever tasks you like. You can also add more startup tasks directly to the ServiceConfiguration.csdef file in your cloud project.
By default, the steps performed by ConfigureCloudService.ps1 are:
- Install FastCGI for IIS (web roles only)
- Install Python from nuget.org
- Install packages from requirements.txt
- Execute wfastcgi-enable and patch your web.config (web roles only)
The LaunchWorker.ps1 script simply locates a previously installed copy of Python and runs its arguments. You can modify the script location and arguments in the ServiceConfiguration.csdef file.
What’s next
While these changes do not necessarily enable any new Azure features, we believe they will make it easier to deploy complex systems and maintain those you are already running. Future updates to Visual Studio will add support for Azure services that we do not have right now, and we’re currently working on prioritising these.
If you have any requests for services you’d like to see made more easily available from Python in Visual Studio, leave us a comment below. You can also report issues with Visual Studio through the feedback tool in the product, or if it relates to Python support, on our github page.
 Light
Light Dark
Dark
0 comments