
Deploying Applications to Azure Container Service
In this blog post I will show you how to setup continuous delivery of a dockerized app by using Visual Studio Team Services (VSTS) to a Kubernetes cluster running in ACS.
Azure Container Service (ACS) allows to deploy and manage containers using Kubernetes, Docker Swarm, Mesosphere DC/OS orchestrators. You can now deploy these three orchestrators on Azure, by either using the portal, Azure Resource Manager template or Azure-CLI.
The Azure Container Registry (ACR) is an implementation of the open source Docker Registry. ACR is now available as an Azure Service and it is fully compatible with all the three orchestrators. ACR is used as a private registry to store Docker images for enterprise applications instead of having to use the public Docker Hub.
The end to end setup will include building a .NET Core application followed by building a container image and pushing the image to Azure Container Registry. In release, we will deploy the container image to the Kubernetes Cluster.
Prerequisites
- ACS Kubernetes cluster
- Azure Container Registry in the same Azure subscription
Code
Download/fork our .NET Core sample app. Upload your code to Team Services or you’re on-premises Team Foundation Server: either push your code to Git or check in your code to TFVC.
Build
- Open your team project in your web browser
- Create a build definition (Build & Release tab > Builds)
- Click Empty to start with an empty definition.
- In the repository tab of build definition make sure the repository selected is the one where you pushed (Git) or checked in (TFVC) your code
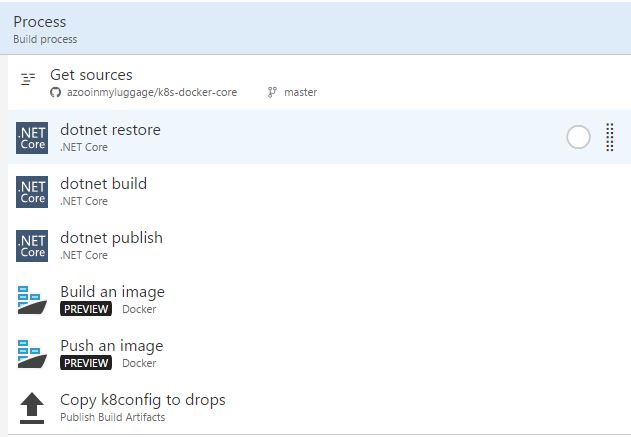
On the Tasks or Build tab, add these steps.

| dotnet restore | Restores the dependencies and tools of your project. Dotnet restore command uses NuGet to restore dependencies.
|
| dotnet build | Build the project and all its dependencies
The project will be built in release configuration. |
| dotnet publish | Pack the application and its dependencies into a folder for deployment to a hosting system.
The name of the output directory will be publish. |
| Docker: Build an image | This step will build the container image from the Dockerfile. Team Services has support for Docker compose as well.
You can also choose to add the ‘Latest’ tag as well to your image. |
| Docker: Push an image | This step will push the container image to a container registry.
|
| Build: Publish Kubernetes config files as Artifacts | Publish the Kubernetes configuration files used for creating deployment and service in the cluster. They are added to the repository.
We will use these files later to deploy to Kubernetes. |
You can add dotnet test command to run your unit tests as a part of your build. Similarly, Team Services has support for Docker compose as well and instead of using Dockerfile, compose can be used.

When you are working with a private registry (like ACR) and not with the Docker hub, you need to prefix the name of your image with the URL of your registry. In the Team Service Docker Tasks, you can just enable the “Qualify Image Name” option to enforce this.
Using $(Build.BuildId) tag on the image generated gives you traceability when the image gets deployed to an ACS cluster.
Enable continuous integration (CI)
On the Triggers tab, enable Continuous integration (CI). This tells the system to queue a build whenever someone on your team commits or checks in new code.
Save, queue, and test the build
Save and queue the build. Once the build is done, click the link to the completed build (for example, Build 1634), click Artifacts, and then click Explore to see the files produced by the build.
Release
- Open theReleases tab of the Build & Release hub, open the + drop-down in the list of release definitions, and choose Create release definition by using the Deploy to Kubernetes Cluster template.
- Select the build definition you created earlier as the source of artifact to be deployed.
- Make sure you add three instances of Deploy to Kubernetes task. Configure the Deploy to Kubernetes The task uses kubectl for running commands against a Kubernetes cluster.
- For running kubectl commands by using the task, first you need to create a service connection to Kubernetes cluster by providing the following details:
- A name of the connection
- Server url: you can get this detail from the Azure portal overview page of the ACS cluster. For example https://<cluster_ name>southcentralus.cloudapp.azure.com
- Kubeconfig: Copy paste the content of the master Kubernetes cluster configuration
- As a part of release we will be executing the following steps:
- Create a secret that cluster can use to connect to container registry
- Create a Kubernetes deployment and service
- Use the new images we built and pushed to container registry earlier to update the Kubernetes cluster
Here is how the release definition will look like:
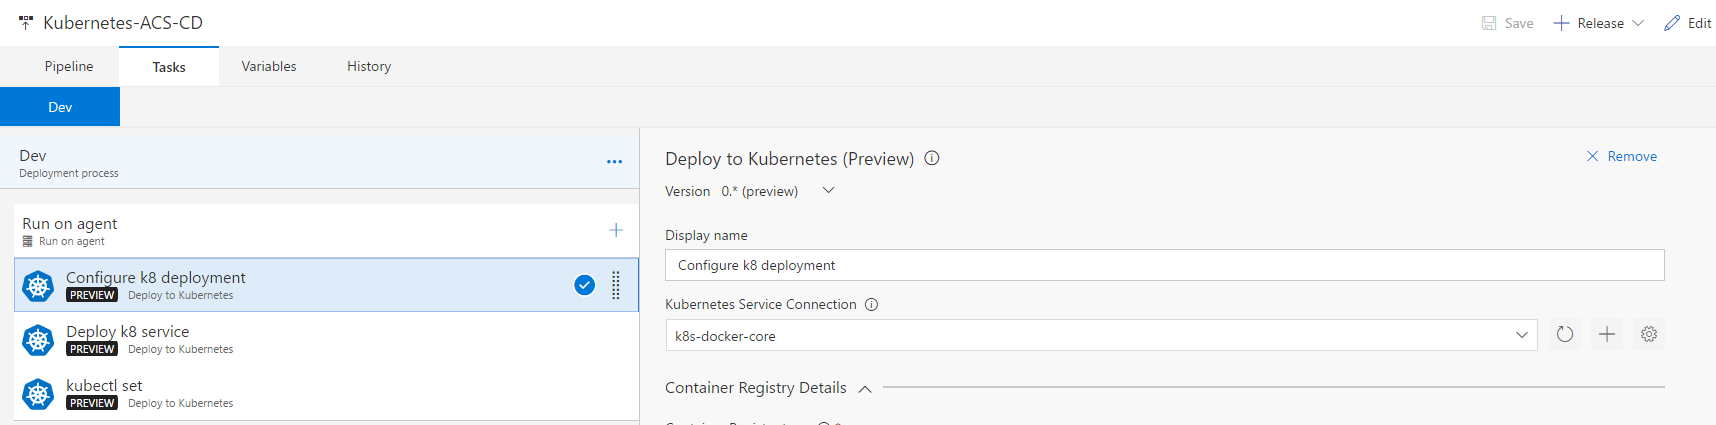
| Kubernetes: Create Deployment | In the first step we will create a new secret for use with Docker registries. The task takes the container registry connection details and creates a secret.
Now in the command section of the task let us create a deployment by using the deployment.yaml file |
| Kubernetes: Create Service | In the command section of the task let us create a service by using the service.yaml file
|
| Kubernetes: Update | Now update with the latest image
For example, in this case since we are using a private registry so the image name must be prefixed with the container registry name. And we used Build Id to tag our images too. So the image:tag value will be Your-acr-name.azurecr.io/docker-dotnetcore:$(Build.BuildId) docker-dotnetcore is the image name we used in build. |
- Type a name for the new release definition and, optionally, change the name of the environment from Default Environment to Dev. Also, set the deployment condition on the environment to “Automatically start after release creation”.
- Save the new release definition. Create a new release and verify that the application has been deployed correctly.
Next steps
In this example, we used the kubectl set image command along with Build Id as tag. Using Build Id as tag has an added advantage of trace-ability. Avoid using latest tag with the container image. An alternate approach is to modify the yaml file with the Build Id used to tag the image.
Kubernetes namespace allows complete separation of resources and management within the same cluster. So namespace can be used to create multiple environments like Dev, QA, Production in the same ACS Kubernetes cluster.
The Docker and Kubernetes task in Team services can help you setup an end to end CI – CD workflow. Do let us know your feedback/suggestions. Use the “send a smile” feature, comment on this post.
 Light
Light Dark
Dark
0 comments