Whirlwind Tour of Recurrent Neural Networks (PREREQUISITES)
Neural Networks. Deep Learning. TensorFlow. What are these buzzwords? What is the latest Artificial Intelligence craze? This advanced session contains cutting-edge information not easily found online, and does not require a PhD in Machine Learning to understand. Recurrent Neural Networks (RNNs) can be used to generate text that will look like its original training data. There are many articles out there that show hilarious end-results of such adventures, but start-from-scratch walkthroughs that show the raw code are hard to come by. This tutorial will show you how to install Torch-rnn, a set of recurrent neural network tools for character-based (i.e. single letter) learning and output, written by Justin Johnson.
Step 1) Windows 10
This guide assumes the use of 64-bit Windows 10. For this exercise, we will be using Torch, which runs on Mac as well as per this installation guide, but I have not tested this scenario.
You will need to install Docker, Bash on Ubuntu on Windows, Torch, and some libraries, which are described in the following steps. Please complete steps 1-7 prior to starting on the next blog post.
This article contains screenshots from a Windows 10 Enterprise PC with the Windows 10 Anniversary Update, and the Windows 10 Fall Creators Update. If you are using Windows 10, press the Windows Key+R and type “winver” to verify that the Version number if 1607 or higher. If your Version is lower, install the Windows 10 Anniversary Update and/or Fall Creators Update.
- Bash on Ubuntu on Windows is the preferred CLI for this workshop. We’ll be doing everything in the terminal – if you’ve never used the command-line, it would be good to learn a bit more about how that works before attempting this install.
https://www.windowscentral.com/how-install-bash-shell-command-line-windows-10
Step 2) Docker
If you have not already done so, please install Docker for Windows by downloading the installer executable from the Stable channel. To set up your local computer as a Docker host and access the Docker CLI commands, install Docker Engine before starting this workshop. https://docs.docker.com/docker-for-windows/install/
Step 3): Install Bash
Installing the Bash shell on Windows 10 has a few prerequisites, including making sure you have run the Windows 10 Anniversary Update on your machine, ensuring Developer mode is turned on in your Update & security Settings, and checking for the Windows Subsystem for Linux (beta) option in your Control Panel.
Please follow the guide on WindowsCentral.com, How to install Bash shell command-line tool on Windows 10, for complete the steps.
You check to see if your computer already has Bash installed by opening the Windows Start menu, typing a search for bash.exe, and selecting “Run command.”
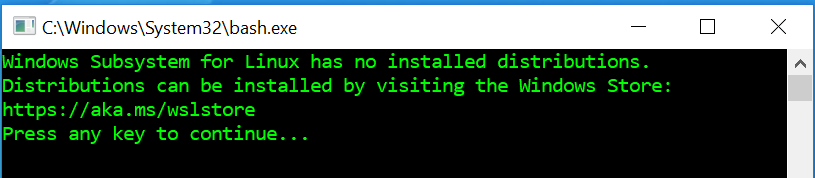
If you see the message, “Windows Subsystem for Linux has no installed distributions,” distributions can be installed by visiting the Windows Store here: https://aka.ms/wslstore 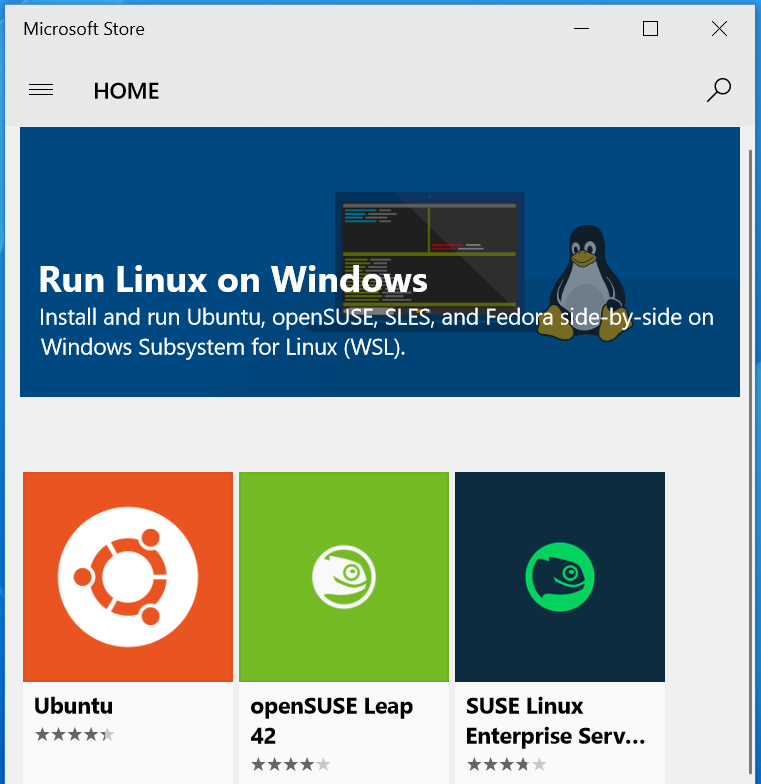

This is how you can download and install Bash from the Windows Store. Then you'll need to create a default UNIX user account. This account doesn't have to be the same as your Windows account.
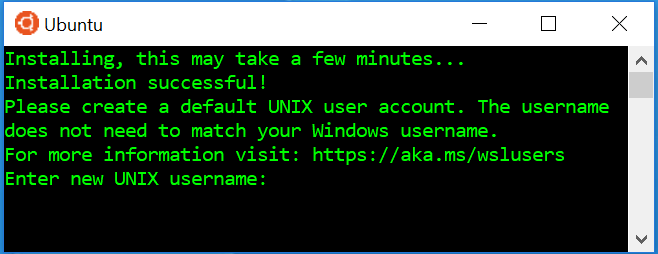
Enter the username in the required field and press Enter (you can't use the username "admin"). Close the "bash.exe" command prompt.
Now that you completed the installation and setup, you can open the Bash tool from the Start menu like you would with any other app.
Step 4) Install Torch
Visit github.com/jcjohnson/torch-rnn OR jeffreythompson.org/blog/2016/03/25/torch-rnn-mac-install OR https://torch.ch/docs/getting-started.html#_ for more instructions!
Run your Bash on Ubuntu on Windows shell as an administrator. First, go to your user’s home directory and type:
git clone https://github.com/torch/distro.git ~/torch --recursive
Hit Enter to clone a directory folder named “torch” inside Bash. This first command installs the basic package dependencies that LuaJIT and Torch require. (If prompted, follow the command to install git first.)
Change directories into this new folder location:
cd ~/torch
Install dependencies such as LuaJIT and LuaRocks, then use LuaRocks (the lua package manager) to install core packages like torch, nn and paths, as well as a few other packages:
bash install-deps;
This will take 10–20 minutes. When complete, type this line:
./install.sh
This may take several minutes. You just have to source it once to refresh your env variables. The installation script will detect what is your current shell and modify the path in the correct configuration file:
source ~/.bashrc
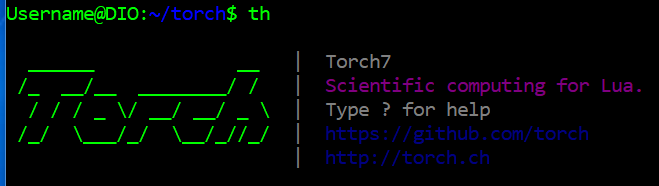
When done, test it with the command:
th
This should give you the Torch prompt. Use Control-c twice to exit, or type os.exit().
You can install Torch anywhere you like, but you’ll have to update all the paths in this tutorial to your install location.
Step 5) Install HDF5 Library for Lua
Torch-rnn comes with a preprocessor script, written in Python, that prepares our text for training. It will save our sample into an h5 and json file, but requires the HDF5 library to be installed.
You'll need to install the header files for Python 2.7 and the HDF5 library.
In Bash, go back to your home directory by typing:
cd ~/
Type:
sudo apt-get -y install python2.7-dev
Type in your password to grant permission. Next,
sudo apt-get install libhdf5-dev
Type “Y” at the yes/no prompt to grant permission here.
sudo apt-get install python-virtualenv
Type “Y” at the yes/no prompt to grant permission here.
Step 6) Clone Torch-rnn
In your Bash’s home directory, type:
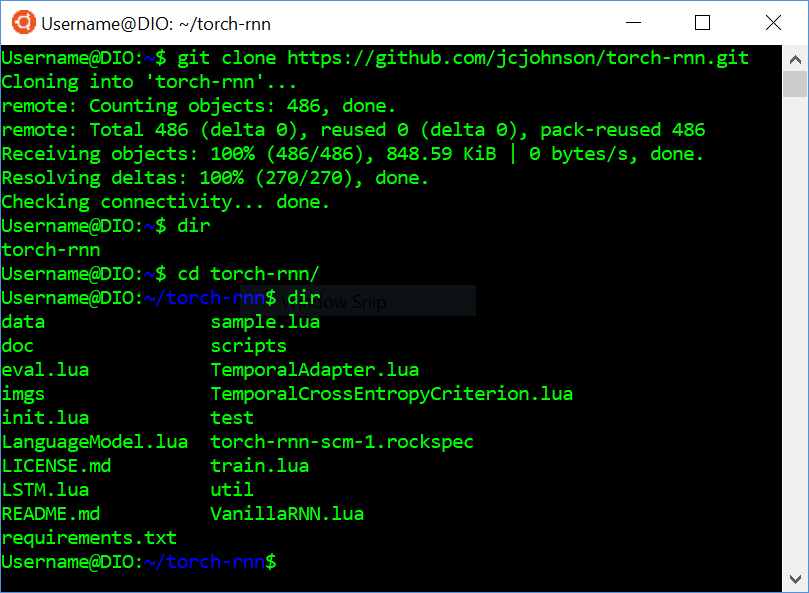
git clone https://github.com/jcjohnson/torch-rnn.git
This directory contains the files shown in this screenshot:
After installing torch, install/update the lua packages by running the following in the home directory:
 # Install most things using luarocks

luarocks install torch

luarocks install nn

luarocks install optim

luarocks install lua-cjson

# We need to install torch-hdf5 from GitHub

cd ..

git clone https://github.com/deepmind/torch-hdf5

cd torch-hdf5

luarocks make hdf5-0-0.rockspec
Step 7) Install HDF5 Library for Python
The preprocessing script is written in Python 2.7; its dependencies are in the file requirements.txt.
Install pip by typing:
sudo apt install python-pip
Then, in the torch-rnn folder, type:
sudo pip install -r requirements.txt
This should install requirements Cython, NumPy, argparse, h5py, and six.
We need to install HDF5 support for Python. You can do this using Pip:
sudo pip install h5py
Test that it works by importing the library:
 python
 import h5py
If it imports without error, you’re good! (Use “exit()” or Ctrl-D to exit Python.)
Next Steps:
If you want to actually train a model, continue reading here: A Whirlwind Tour of Recurrent Neural Networks (the hard way)
If you want to call a pre-trained model, continue reading here: A Whirlwind Tour of RNNs with Docker (the easy way)
Step 8) *OPTIONAL*: Install CUDA Support
Torch-rnn is built on Torch, a set of scientific computing tools for the programming language Lua, which lets us take advantage of the GPU, using CUDA or OpenCL to accelerate the training process. Training can take a very long time, especially with large data sets, so the GPU acceleration is a big plus.
Note: this step is only possible if your computer has an NVIDIA graphics card!
First: Download any version of Visual Studio 2017: https://www.visualstudio.com/downloads/
(Community, Professional, or Enterprise).
Download the CUDA tools with the network install: https://developer.nvidia.com/cuda-downloads.
“Bash on Ubuntu on Windows” Installation Instructions:
-
curl https://developer.download.nvidia.com/compute/cuda/repos/ubuntu1604/x86_64/cuda-repo-ubuntu1604_9.1.85-1_amd64.deb -
sudo dpkg -i cuda-repo-ubuntu1604_9.1.85-1_amd64.deb -
sudo apt-key adv --fetch-keys https://developer.download.nvidia.com/compute/cuda/repos/ubuntu1604/x86_64/7fa2af80.pub -
sudo apt-get update -
sudo apt-get install cuda
This will take 15-20 minutes.
In Bash, in your ~/torch-rnn folder, install "cutorch" by typing:
luarocks install cutorch
You may also need to run:
 git config --global user.email "you@example.com"

git config --global user.name "Your Name"