A Whirlwind Tour of Recurrent Neural Networks (no shortcuts)
Welcome to a Whirlwind Tour of RNNs!
PLEASE see this previous blog post for important information and prerequisites before continuing!
Step 1) Preprocess
Before you begin, you'll need to preprocess your data set, using the script "scripts/preprocess.py". This will generate an HDF5 file and JSON file containing a preprocessed version of the data.
Torch-rnn comes with a sample input file (all the writings of Shakespeare) that you can use to test everything. Of course, you can also use your own data; just combine everything into a single text file.
In the terminal, go to your Torch-rnn folder and run the preprocessor script:
python scripts/preprocess.py --input_txt data/tiny-shakespeare.txt --output_h5 data/tiny-shakespeare.h5 --output_json data/tiny-shakespeare.json
You should get a response that looks something like this:
 Total vocabulary size: 65
Total tokens in file: 1115394
  Training size: 892316
  Val size: 111539
  Test size: 111539
Using dtype <type 'numpy.uint8'>
This will save two files to the data directory (though you can save them anywhere): an h5 and json file that we’ll use to train our system.
Preprocessing Flags
The preprocessing script scripts/preprocess.py accepts the following command-line flags:
- --input_txt: Path to the text file to be used for training.
- Default is the tiny-shakespeare.txt dataset.
- --output_h5: Path to the HDF5 file where preprocessed data should be written.
- --output_json: Path to the JSON file where preprocessed data should be written.
- --val_frac: What fraction of the data to use as a validation set; default is 0.1.
- --test_frac: What fraction of the data to use as a test set; default is 0.1.
- --quiet: If you pass this flag then no output will be printed to the console.
Step 2) Train
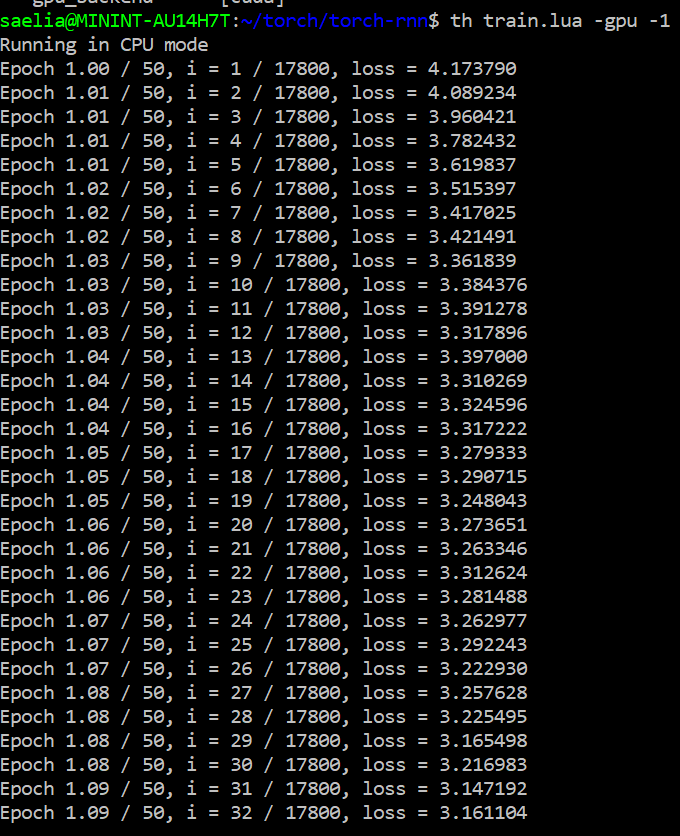
The next step could take at least an hour, perhaps considerably longer, depending on your computer and your data set. In the Torch-rnn folder and run the training script (changing the arguments if you use a different data source or saved them elsewhere):
th train.lua -input_h5 data/tiny-shakespeare.h5 -input_json data/tiny-shakespeare.json -gpu -1
Try adding "time" at the beginning to clock how long this takes:
time th train.lua -gpu -1 -input_h5 data/tiny_shakespeare.h5 -input_json data/tiny_shakespeare.json -max_epochs 25 -print_every 10 -checkpoint_every 100 -batch_size 1 -seq_length 50
Training Flags
The training script "train.lua" accepts the following command-line flags:
Data options:
- -input_h5, -input_json: Paths to the HDF5 and JSON files output from the preprocessing script.
- -batch_size: Number of sequences to use in a minibatch; default is 50.
- -seq_length: Number of timesteps for which the recurrent network is unrolled for backpropagation through time.
If you have a small body of text (under 2MB) you may want to try adding the following flags:
- -batch_size 1 -seq_length 50
Setting -batch_size somewhere between 1-10 should give better results with the output.
Model options:
- -init_from: Path to a checkpoint file from a previous run of train.lua. Use this to continue training from an existing checkpoint; if this flag is passed then the other flags in this section will be ignored and the architecture from the existing checkpoint will be used instead.
- -reset_iterations: Set this to 0 to restore the iteration counter of a previous run. Default is 1 (do not restore iteration counter). Only applicable if -init_from option is used.
- -model_type: The type of recurrent network to use; either lstm (default) or rnn.
lstm is slower but better. - -wordvec_size: Dimension of learned word vector embeddings; default is 64. You probably won't need to change this.
- -rnn_size: The number of hidden units in the RNN; default is 128. Larger values (256 or 512) are commonly used to learn more powerful models and for bigger datasets, but this will significantly slow down computation.
- -dropout: Amount of dropout regularization to apply after each RNN layer; must be in the range 0 <= dropout < 1. Setting dropout to 0 disables dropout, and higher numbers give a stronger regularizing effect.
- -num_layers: The number of layers present in the RNN; default is 2.
Optimization options:
- -max_epochs: How many training epochs to use for optimization. Default is 50.
- -learning_rate: Learning rate for optimization. Default is 2e-3.
- -grad_clip: Maximum value for gradients; default is 5. Set to 0 to disable gradient clipping.
- -lr_decay_every: How often to decay the learning rate, in epochs; default is 5.
- -lr_decay_factor: How much to decay the learning rate. After every lr_decay_every epochs, the learning rate will be multiplied by the lr_decay_factor; default is 0.5.
Output options:
- -print_every: How often to print status message, in iterations. Default is 1.
- -checkpoint_name: Base filename for saving checkpoints; default is cv/checkpoint. This will create checkpoints named - cv/checkpoint_1000.t7, cv/checkpoint_1000.json, etc.
- -checkpoint_every: How often to save intermediate checkpoints. Default is 1000; set to 0 to disable intermediate checkpointing. Note that we always save a checkpoint on the final iteration of training.
Benchmark options:
- -speed_benchmark: Set this to 1 to test the speed of the model at every iteration. This is disabled by default because it requires synchronizing the GPU at every iteration, which incurs a performance overhead. Speed benchmarking results will be printed and also stored in saved checkpoints.
- -memory_benchmark: Set this to 1 to test the GPU memory usage at every iteration. This is disabled by default because like speed benchmarking it requires GPU synchronization. Memory benchmarking results will be printed and also stored in saved checkpoints. Only available when running in GPU mode.
- Backend options:
- -gpu: The ID of the GPU to use (zero-indexed). Default is 0. Set this to -1 to run in CPU-only mode
- -gpu_backend: The GPU backend to use; either cuda or opencl. Default is cuda.
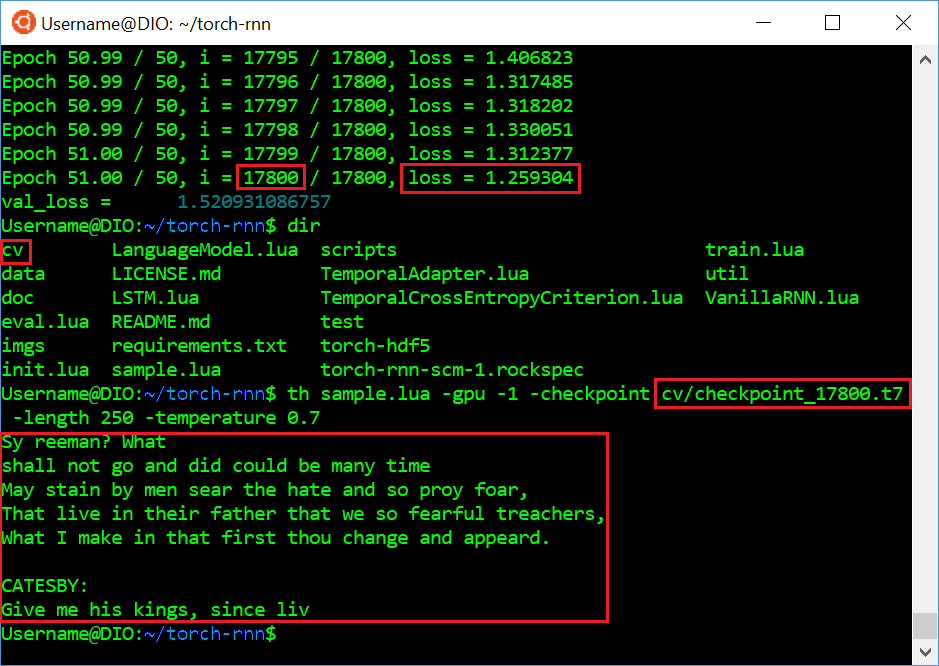
Step 3) Sample
th sample.lua -gpu -1 -checkpoint cv/checkpoint_900.t7 -length 250 -temperature 0.7
Sampling Flags
The sampling script sample.lua accepts the following command-line flags:
- -checkpoint: Path to a .t7 checkpoint file from train.lua
- -length: The length of the generated text, in characters.
- -start_text: You can optionally start off the generation process with a string; if this is provided, the start text will be processed by the trained network before we start sampling. Without this flag, the first character is chosen randomly.
- -sample: Set this to 1 to sample from the next-character distribution at each timestep;
set to 0 to instead just pick the argmax at every timestep. Sampling tends to produce more interesting results. - -temperature: Softmax temperature to use when sampling; default is 1.
Higher temperatures give noisier samples. Not used when using argmax sampling (sample set to 0). - -gpu: The ID of the GPU to use (zero-indexed). Default is 0. Set this to -1 to run in CPU-only mode.
- -gpu_backend: The GPU backend to use; either cuda or opencl. Default is cuda.
- -verbose: By default just the sampled text is printed to the console. Set this to 1 to also print some diagnostic information.