Ask Learn
Preview
Ask Learn is an AI assistant that can answer questions, clarify concepts, and define terms using trusted Microsoft documentation.
Please sign in to use Ask Learn.
Sign inThis browser is no longer supported.
Upgrade to Microsoft Edge to take advantage of the latest features, security updates, and technical support.
Note
Access to this page requires authorization. You can try signing in or changing directories.
Access to this page requires authorization. You can try changing directories.
Use Hyper-V differencing disks
使用Hyper-V差異虛擬磁碟
現在安裝個Windows Server虛擬機器(VM)通常要10到20GB的磁碟空間,若再安裝SQL Server則會更大,當我們需要建立多個VM時,可以使用Hyper-V的差異虛擬磁碟來節省磁碟空間。
差異虛擬磁碟(differencing disks)是共用一個parent disk(VHD or VHDX)作為base disk,差異虛擬磁碟只儲存與parent disk的差異,所以,每個VM若使用差異虛擬磁碟,就可以省下大量磁碟空間。
以下我們使用Windows 10 Pro Hyper-V的環境,設定一個Windows 2016 VM的差異parent disk來使用這個功能
1.首先新增一個暫時的VM,這個VM最後會刪除,我們只需要保留VHD檔
2.安裝作業系統,例如Windows Server 2016,可以參考下面這篇
https://blogs.msdn.microsoft.com/bradchen/2017/06/08/install-windows-server-2016/
3.Windows Update到最新hotfix。
4.安裝其他需要的軟體,例如 7-zip等工具。(之後透過差異磁碟所建立的VM就不需要再安裝一次)
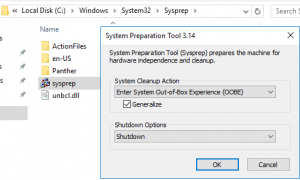
5.執行Sysprep工具,清除SID...等設定,sysprep執行完成後會自動關機。
%windir%\system32\sysprep\sysprep.exe
(Enter system out-of-box experience, enable generalize, shutdown option: shutdown)

Sysprep (System Preparation) Overview
https://technet.microsoft.com/en-us/library/hh825209.aspx
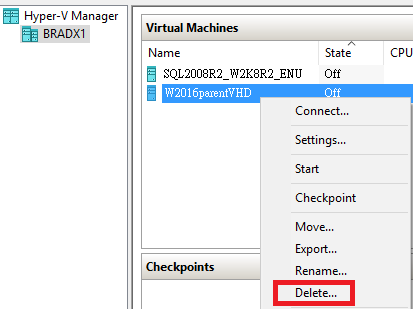
6.刪除這個暫時VM。(Hyper-V的刪除動作只會刪除VM設定檔,所以VHD檔(or VHDX檔)會保留下來)
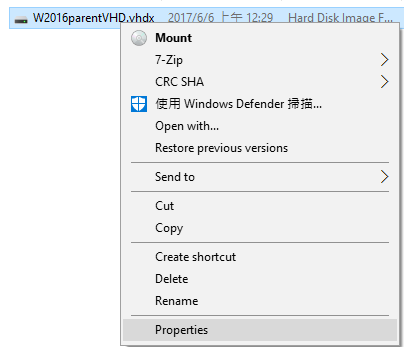
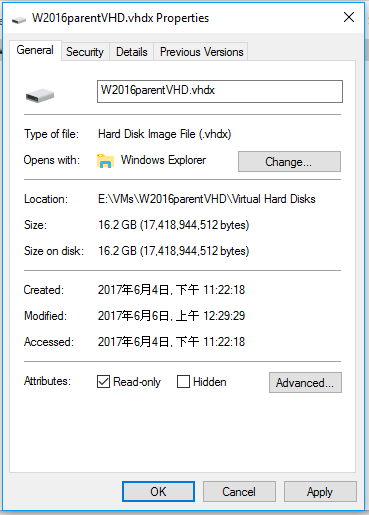
7.將VHD檔搬移到適當的位置,並設定Properties成唯讀(Read-only)。(此VHD檔(or VHDX檔)將作為差異磁碟的Parent磁碟,所以不可以被修改)
例如,我們將檔案搬移到 E:\VMs\W2016parentVHD\Virtual Hard Disks\W2016parentVHD.vhdx

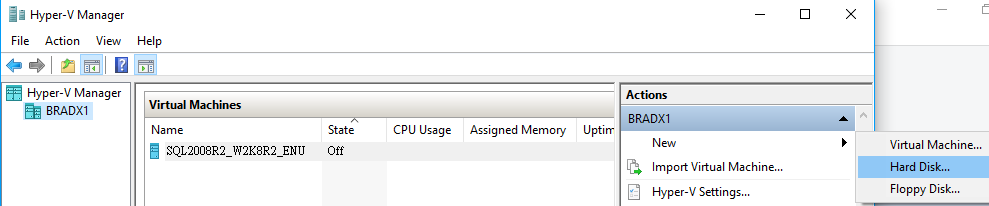
8.新增差異磁碟準備給新的VM使用。
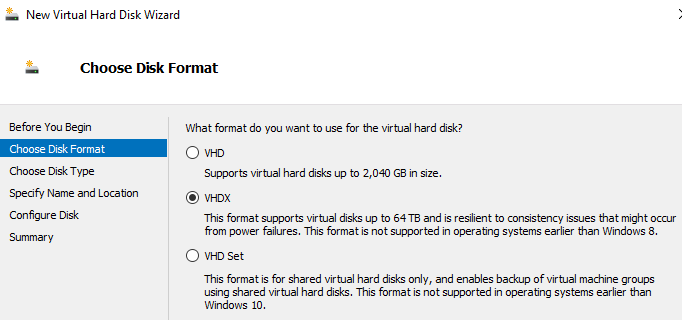
(1)新增虛擬磁碟並選擇格式,我們選擇VHDX。
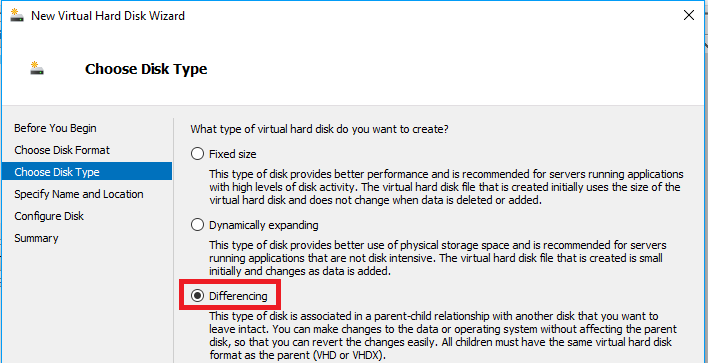
(2)選擇差異磁碟
(3)選擇放置的位置
(4)選擇Parent磁碟的位置(上面的步驟6的磁碟位置)

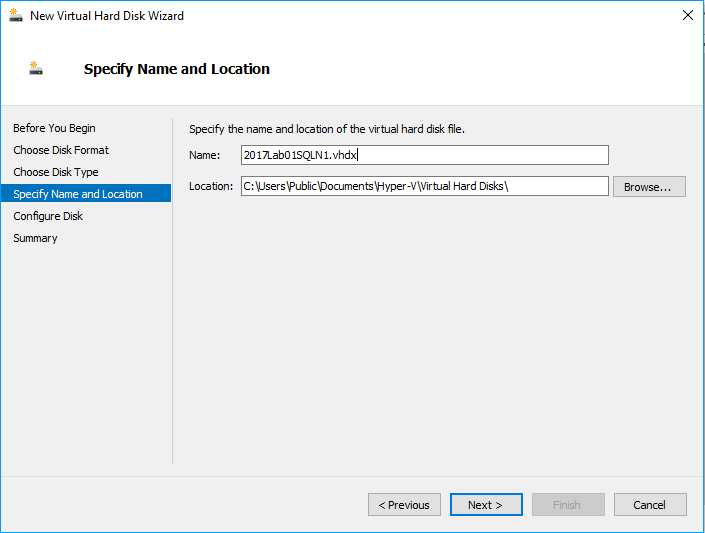
(5)完成後就會馬上產生一個很小的虛擬磁碟檔案
預設會產生在 C:\Users\Public\Public Documents\Hyper-V\Virtual Hard Disks\

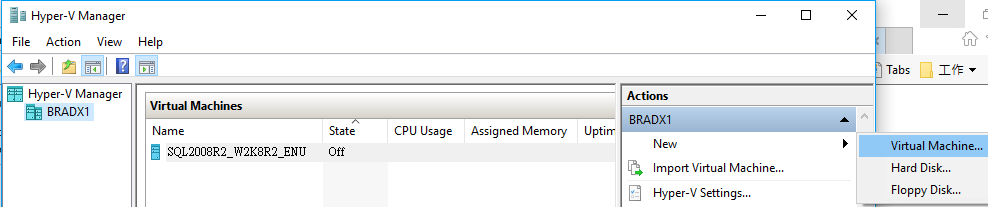
9.開始建立新的VM並使用差異磁碟
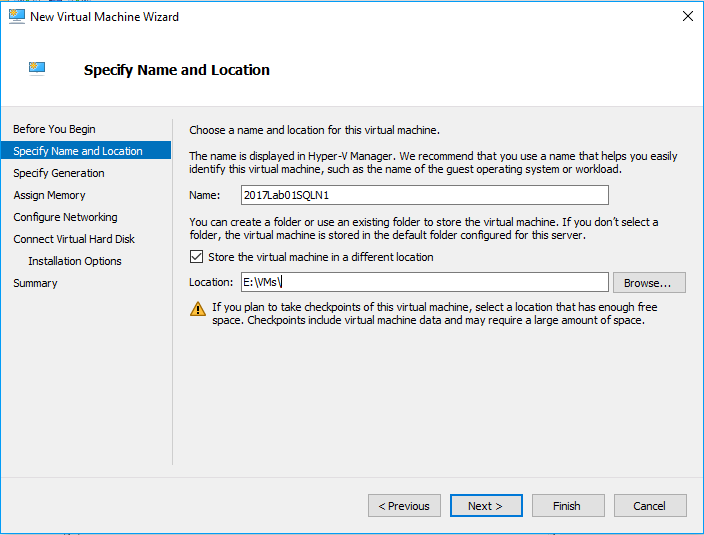
(1)新增虛擬機器Create VM,指定一個名稱與VM檔案的存放位置

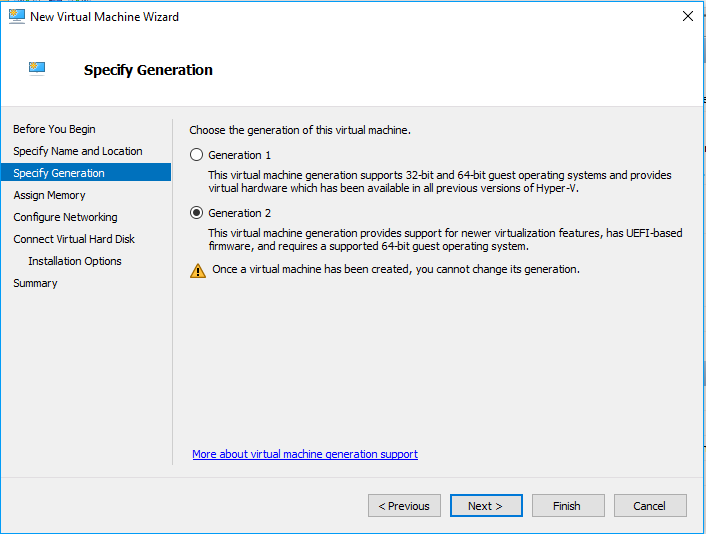
(2)選擇第幾代Generation版本的VM
(3)設定Memory記憶體大小(事後可以再調整)

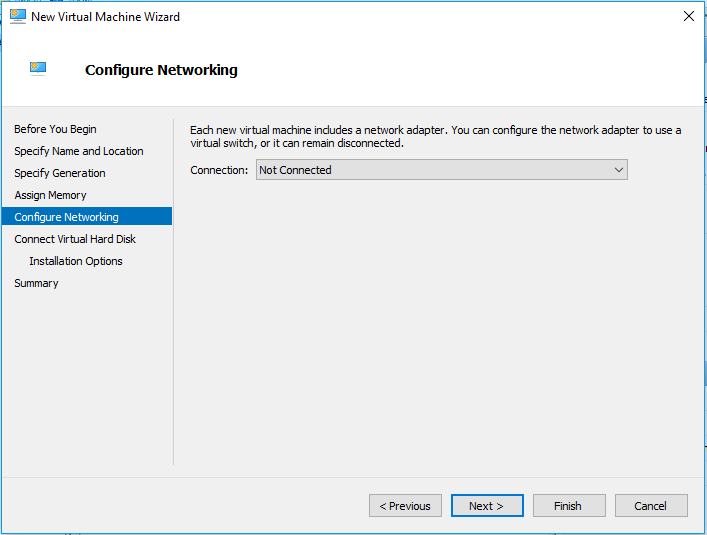
(4)設定Network網路(事後可以再調整)
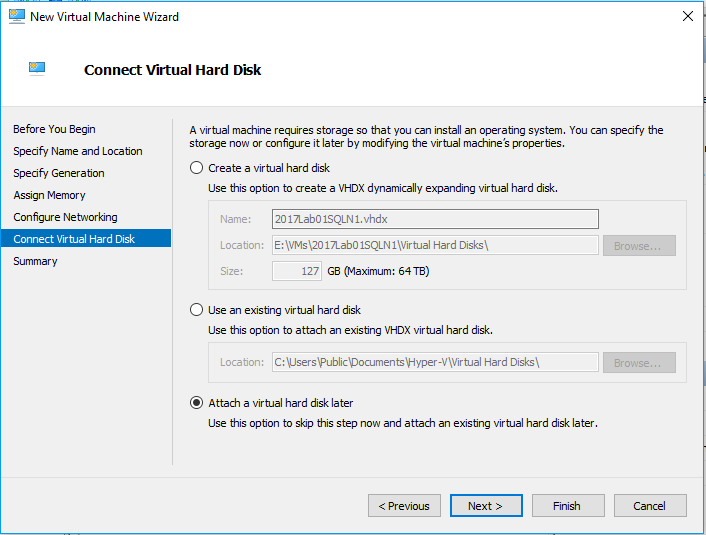
(5)設定Virtual Disk虛擬磁碟
此時請選擇第3項 [稍後連結虛擬硬碟]
PS.若你打算將所有虛擬磁碟都同一放在 C:\Users\Public\Public Documents\Hyper-V\Virtual Hard Disks\ 你可以選擇第2項 [使用現有的虛擬磁碟]然後選擇步驟8的(5)的差異磁碟
完成後此虛擬機器就會產生相關目錄與VM設定檔
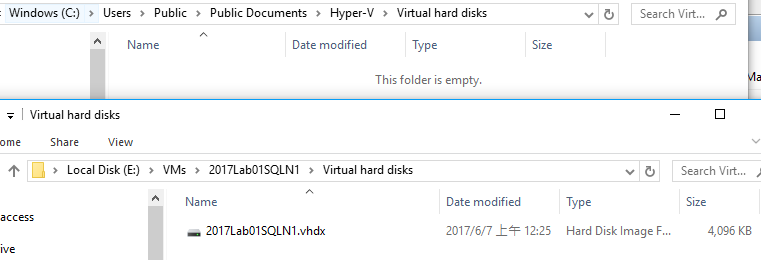
(6)搬移差異磁碟
因為我習慣將VM檔案都放在自己的目錄下,所以我們將差異磁碟複製到該VM的目錄下
將C:\Users\Public\Public Documents\Hyper-V\Virtual Hard Disks\2017Lab01SQLN1.vhdx
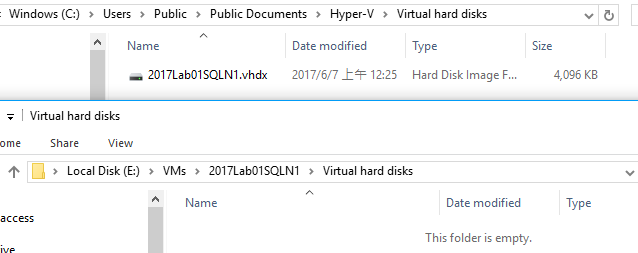
搬移到 E:\VMs\2017Lab01SQLN1\Virtual hard disks\ 目錄下
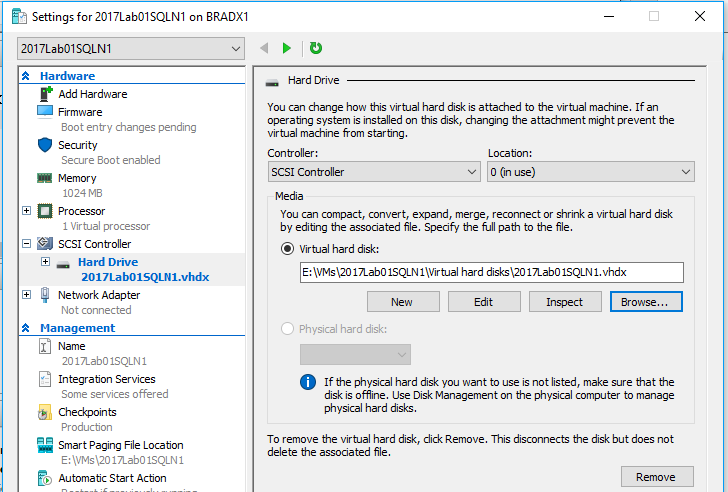
(7)附加差異磁碟到VM
修改VM設定,左邊選擇SCSI,右邊選擇Add新增磁碟(Hard Disk)
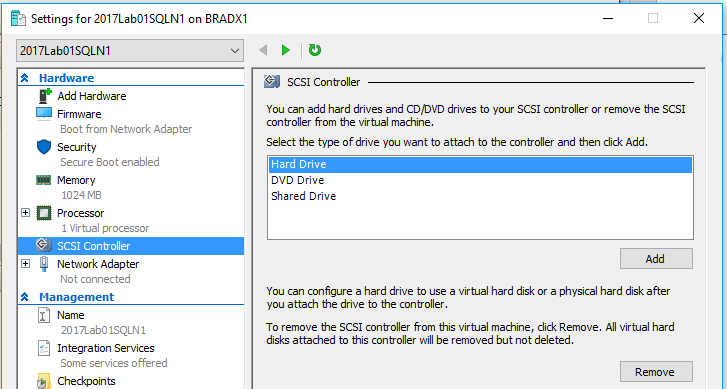
選擇步驟(6)的差異磁碟
以上就完成了建立虛擬機器的所有步驟
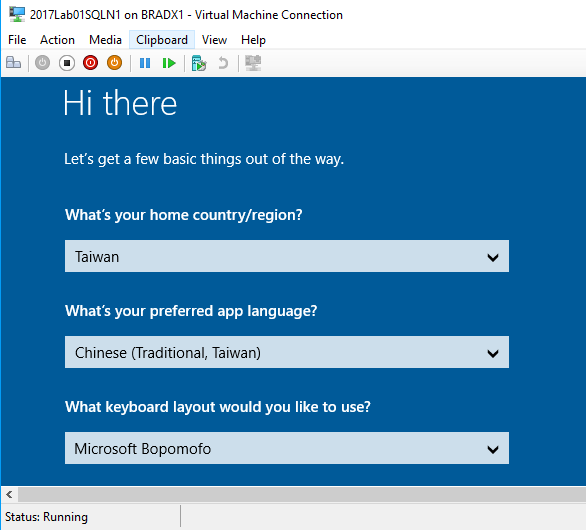
10.當你將VM開機,就會進入Windows已經安裝好的初始化設定畫面
選擇語系輸入法
接受版權宣告
設定Administrator密碼
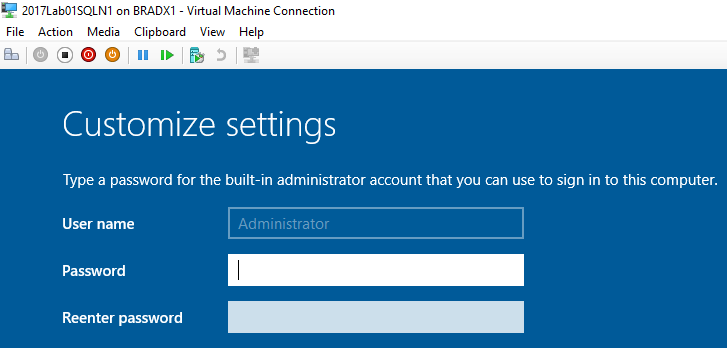
就可以進入登入畫面
PS.你可以重複步驟8到10,就可以建立多個VM,共用一個Parent Disk來節省磁碟空間
以上面步驟的VM,差異磁碟在沒有安裝其他軟體的狀況下約占用2.5GB

另外,Parent磁碟則是占用17GB(這個磁碟檔案是唯讀,將來不會成長)
Reference:
Hyper-V Virtual Machine (VM) Parent-Child Configuration Using Differencing Disks
https://social.technet.microsoft.com/wiki/contents/articles/1393.hyper-v-virtual-machine-vm-parent-child-configuration-using-differencing-disks.aspx
Step-by-Step: Creating Differencing Disks
https://blogs.technet.microsoft.com/canitpro/2013/05/28/step-by-step-creating-differencing-disks/
Using differencing disks
https://technet.microsoft.com/en-us/library/cc720381(v=ws.10).aspx
Ask Learn is an AI assistant that can answer questions, clarify concepts, and define terms using trusted Microsoft documentation.
Please sign in to use Ask Learn.
Sign in