Just 5 Steps Tutorial: "Smile Score Bot" by Microsoft Bot Framework and Cognitive Services
[日本語版はこちら]
Introduction
This is 5-Steps tutorial developing "Smile Score Bot" which analyzes smile face from photo and sends back its score (between 0~100%). It is based on Bot Framework C# template and some class libraries added to use easily Cognitive Services Emotion API.
Microsoft Cognitive Services is like "AI parts" which we can use via web API and quickly implement functions into our applications, such as analyzing photo & movie, exchange voice and text, understanding natural language input, etc.
Microsoft Bot Framework is framework for web-based communication engine development, and offers web app base as template and class libraries, as well as Bot Directory to distriute your bots like Windows App Store, and socket to communication tools such as Skype, Facebook Messenger, Kiks, Slack, etc.
[2017/03/27 update] Code changed due to Emotion API C# Class Library update
Requirement
- Microsoft Account
Need for Bot Directory registration and Cognitive Services Subscription, as well as Azure Subscription. (-> Create new Microsoft Account) - Visual Studio 2015
Enterprise, Pro or Community (free)。 - Bot Framework Template & Emulator
Download Bot Framework C# Template and place Visual Studio Template folder as downloaded as zip file. The folder must be as default: C:\Users\[Username]\Documents\Visual Studio 2015\Templates\ProjectTemplates\Visual C# .
Also Download and install Bot Framework Channel Emulator (for Windows) . - Azure Subscription
Use Azure App Services (API App) to host bot app. (->How to sign up Azure) - Cognitive Services Subscription
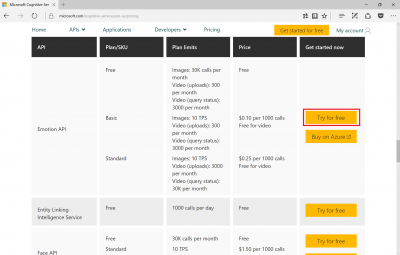
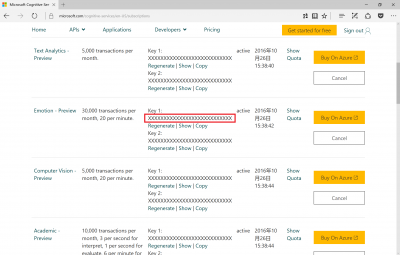
Go to Cognitive Services > Pricing and click [Try for Free] on Emotion API column, and subscribe. Use string which shows at "Keys" column (=Subscription Key)


Just 5 Steps Tutorial
- Step1: Create new bot app from Visual Studio template & add class libraries
- Step2: Code and test locally
- Step3: Publish on Azure
- Step4: Register to Bot Directory
- Step5: Configure Web Chat
Step1: Create new bot app from Visual Studio template & add class libraries
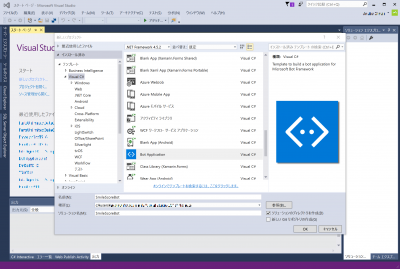
Start Visual Studio, select [File]>[New]>[Project] from top tool bar, and create new project. Select [Bot Application] template shown in middle column, input project name, and click [OK] to create.
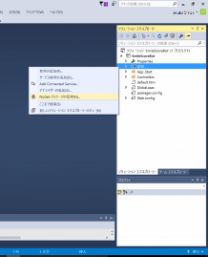
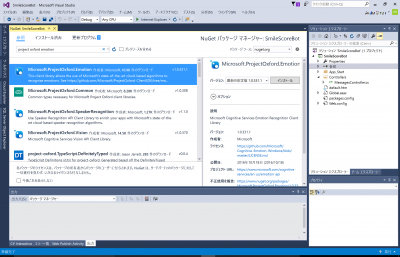
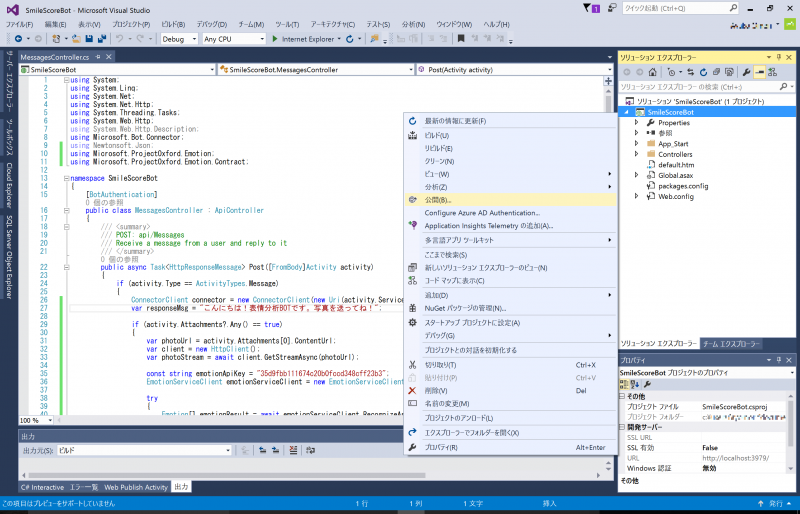
After new project created, select and right-click [Reference] from Solution Explorer, select [manage NuGet package]. Type "Project Oxford Emotion" on search bar at [Reference] tab, select and install Microsoft.ProjectOxford.Emotion.
Step2: Code and test locally
Click [Controllers] folder shown in Solution Explorer, show and edit MessageController.cs.
First, add reference to Microsoft.ProjectOxford.Emotion as below.
 using Microsoft.ProjectOxford.Emotion;
using Microsoft.ProjectOxford.Emotion.Contract;
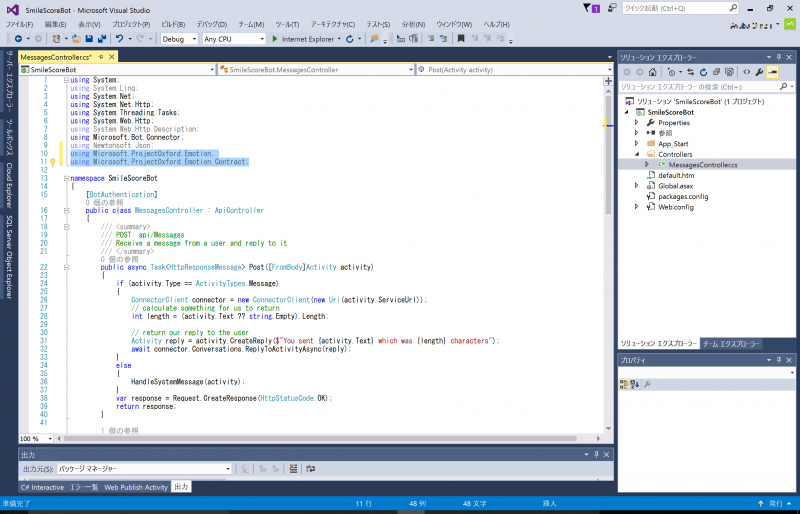
Next, edit code inside of Task<HttpResponseMessage> Post.
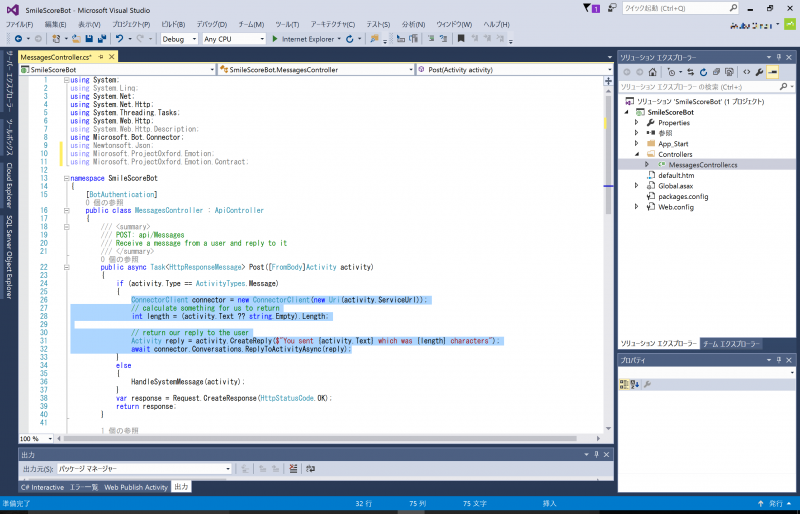
Edit inside of "if" section below;
 if (activity.Type == ActivityTypes.Message)
{
   :(Omitted)
}
else
Copy and replace your Emotion API Subscription key instead of YOUR_SUBSCRIPTION_KEY.
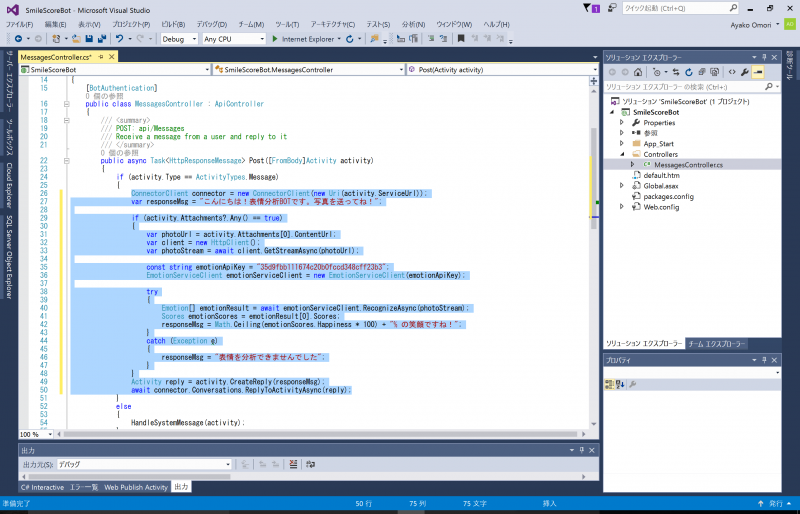
if (activity.Type == ActivityTypes.Message)
{
// Create ConnectorClient, set default reply message
ConnectorClient connector = new ConnectorClient(new Uri(activity.ServiceUrl));
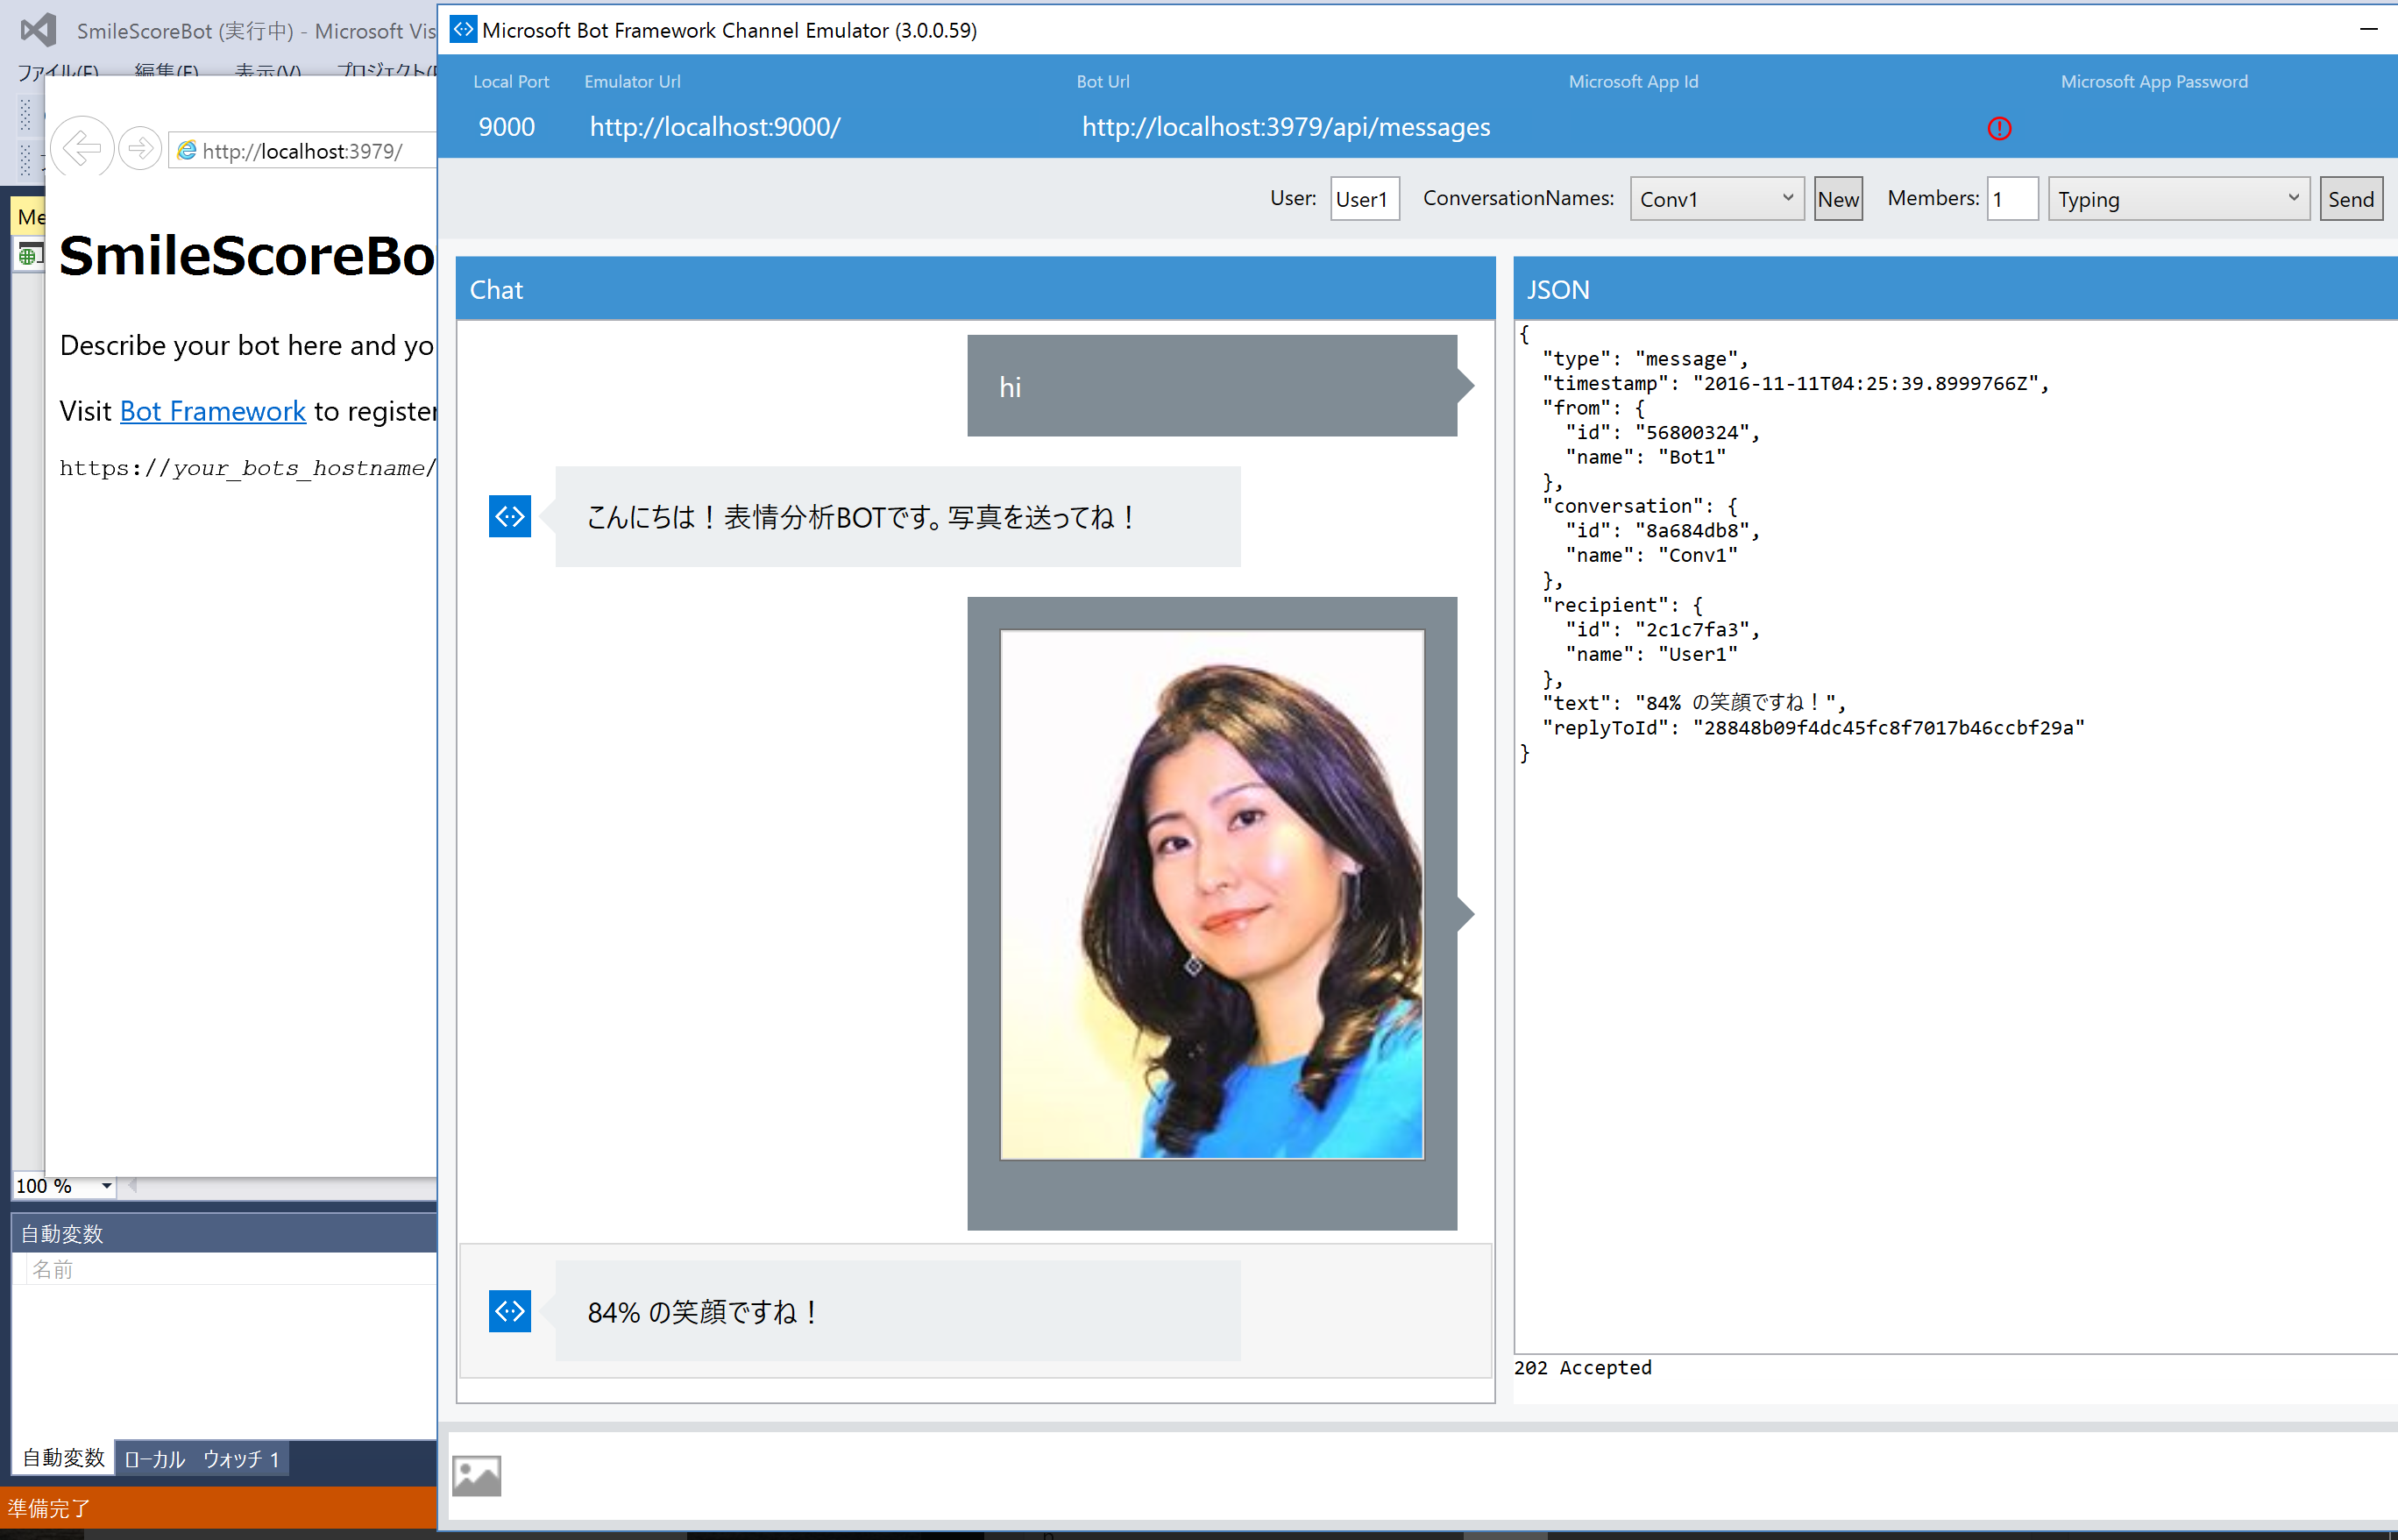
var responseMsg = "Hello, I'm Smile Score Bot. Send me face photo!";
// When attachment (photo file) exists with received message
if (activity.Attachments?.Any() == true)
{
// get file as Stream
var photoUrl = activity.Attachments[0].ContentUrl;
var client = new HttpClient();
var photoStream = await client.GetStreamAsync(photoUrl);
// Set Emotion API Subscription Key and create EmotionServiceClient
const string emotionApiKey = "YOUR_SUBSCRIPTION_KEY";
EmotionServiceClient emotionServiceClient = new EmotionServiceClient(emotionApiKey);
try
{
// Analyze photo, get only happiness score, set to reply message
Emotion[] emotionResult = await emotionServiceClient.RecognizeAsync(photoStream);
float score = emotionResult[0].Scores.Happiness;
responseMsg = Math.Ceiling(score * 100) + "% Smile!";
}
catch (Exception e)
{
responseMsg = "Sorry, failed to get score.";
}
// Return reply
Activity reply = activity.CreateReply(responseMsg);
await connector.Conversations.ReplyToActivityAsync(reply);
}
| before | → | after |
 |
 |
Select [Build]>[Build Solution] from Tool Bar and build solution. Finished build successful, Debug Run (press F5) at local environment. Your browser starts up and shows default page of bot app when ready.
Start Bot Framework Channel Emulator, type https://localhost:[your port#]/api/messages at [Bot URL] box.(Environment as below, bot app is working at https://localhost:3979/ , [Bot URL] should be https://localhost:3979/api/messages.) Type message or send picture, and check returns from bot app.
Step3: Publish on Azure
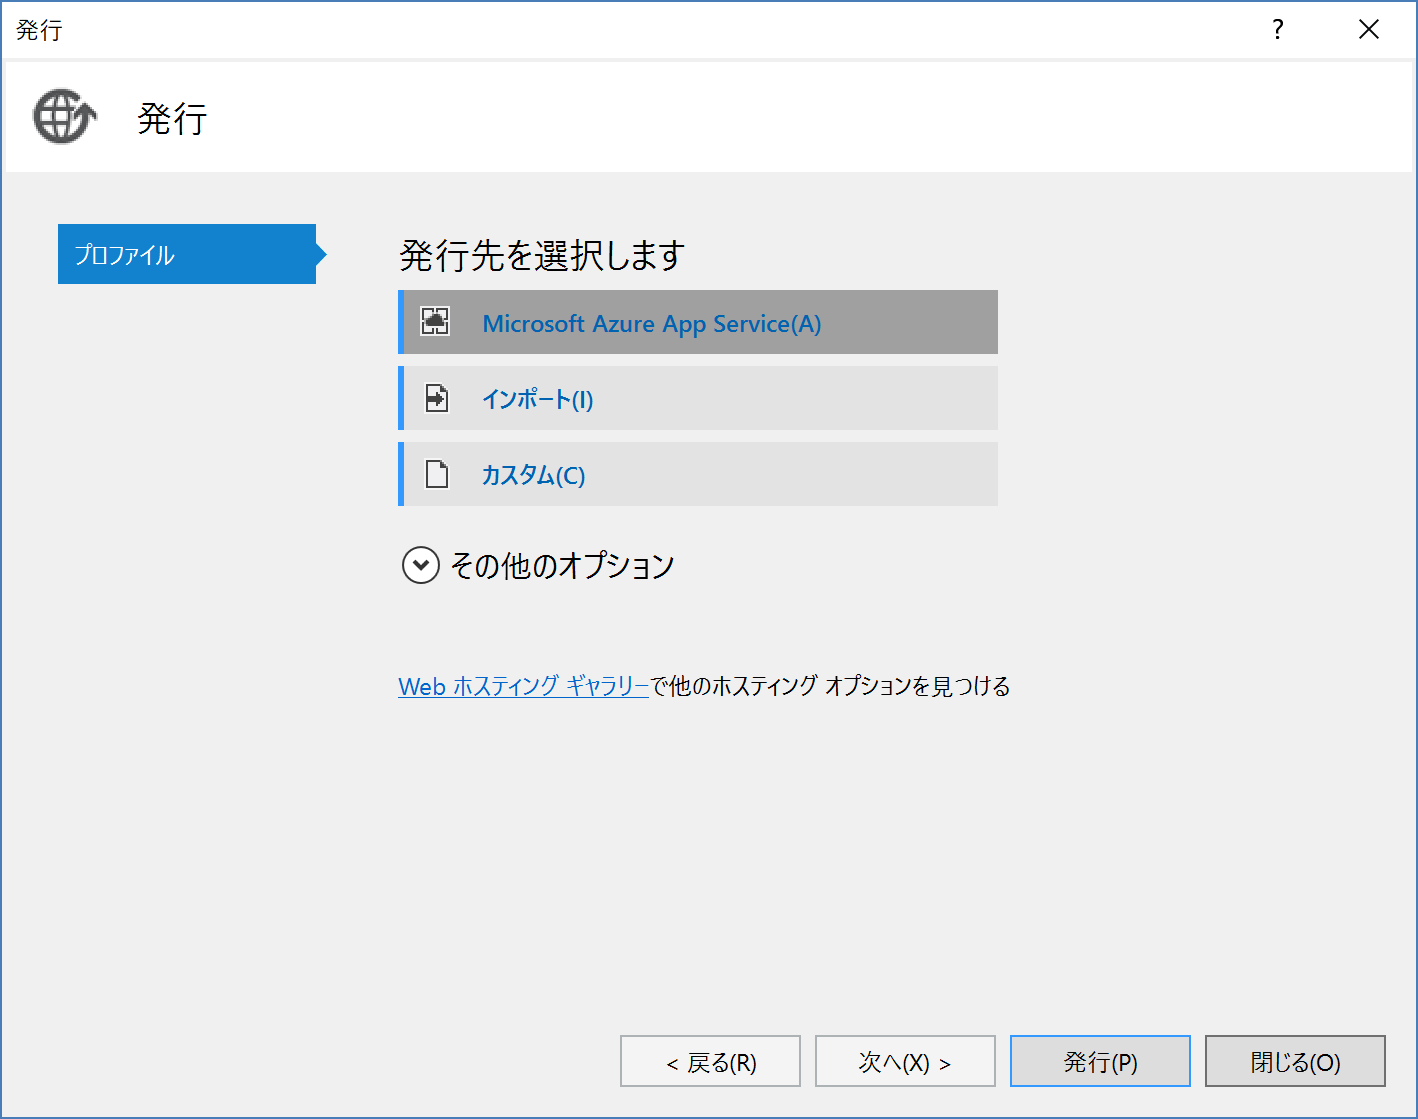
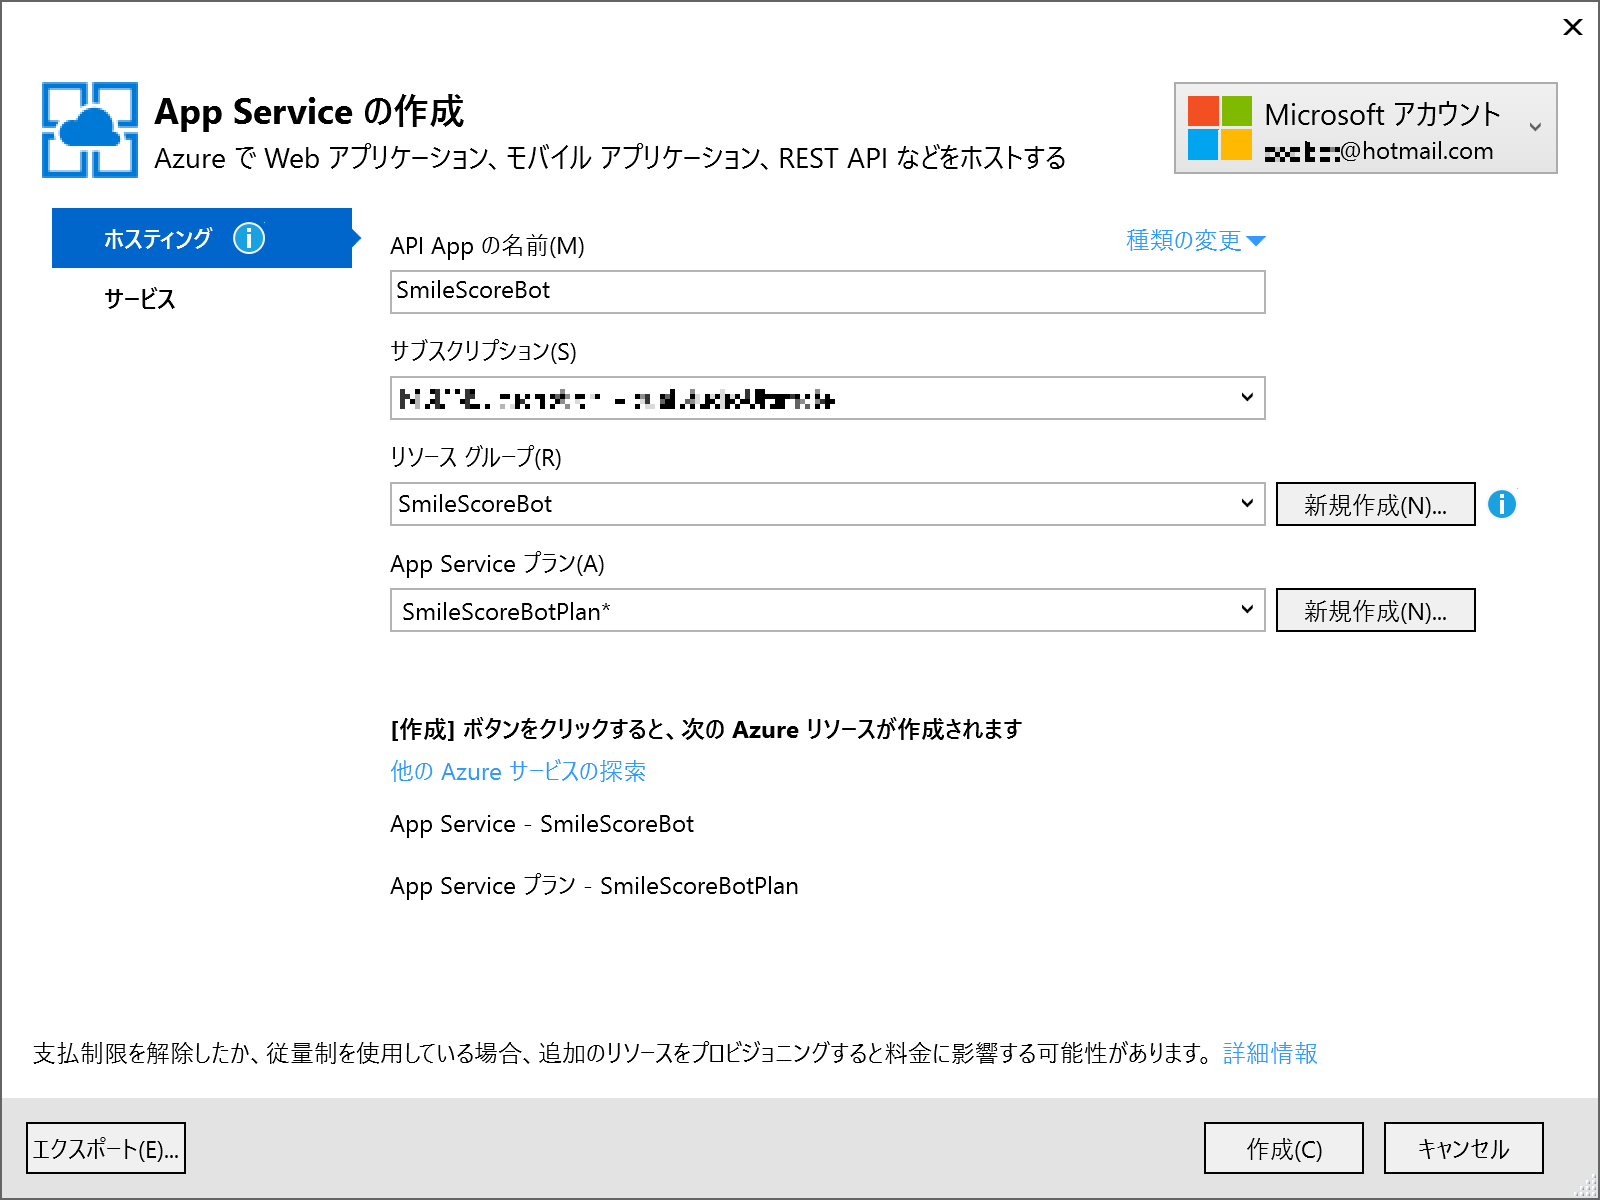
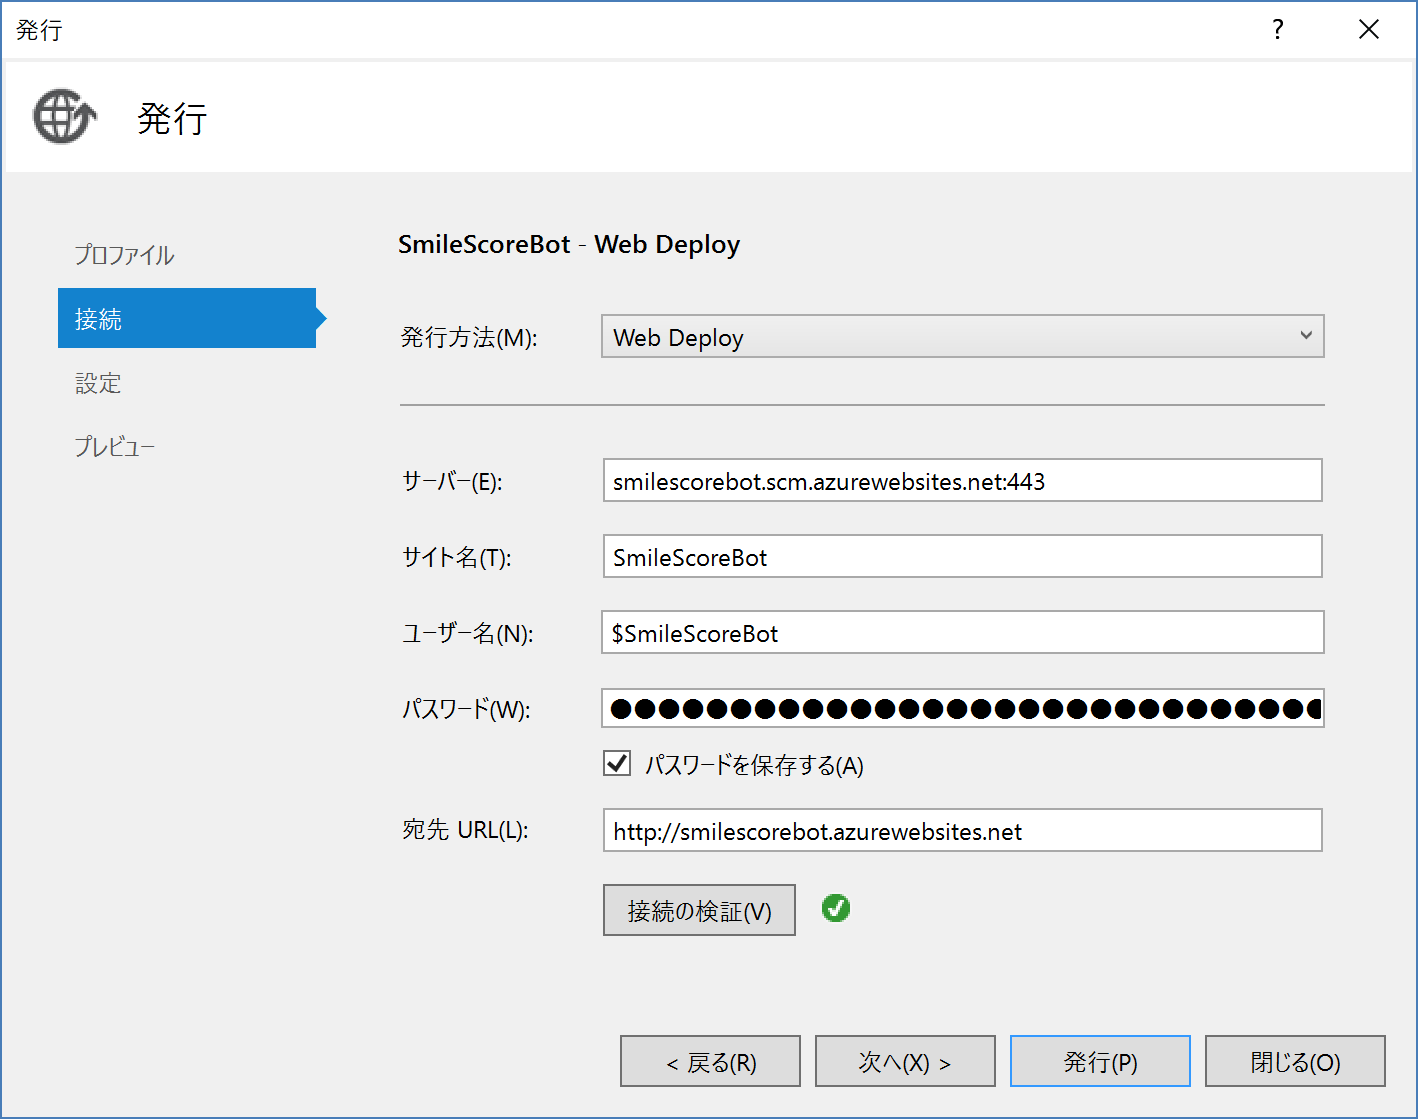
Publish bot app to Azure. Select project from Solution Explorer, right-click and select [Publish].
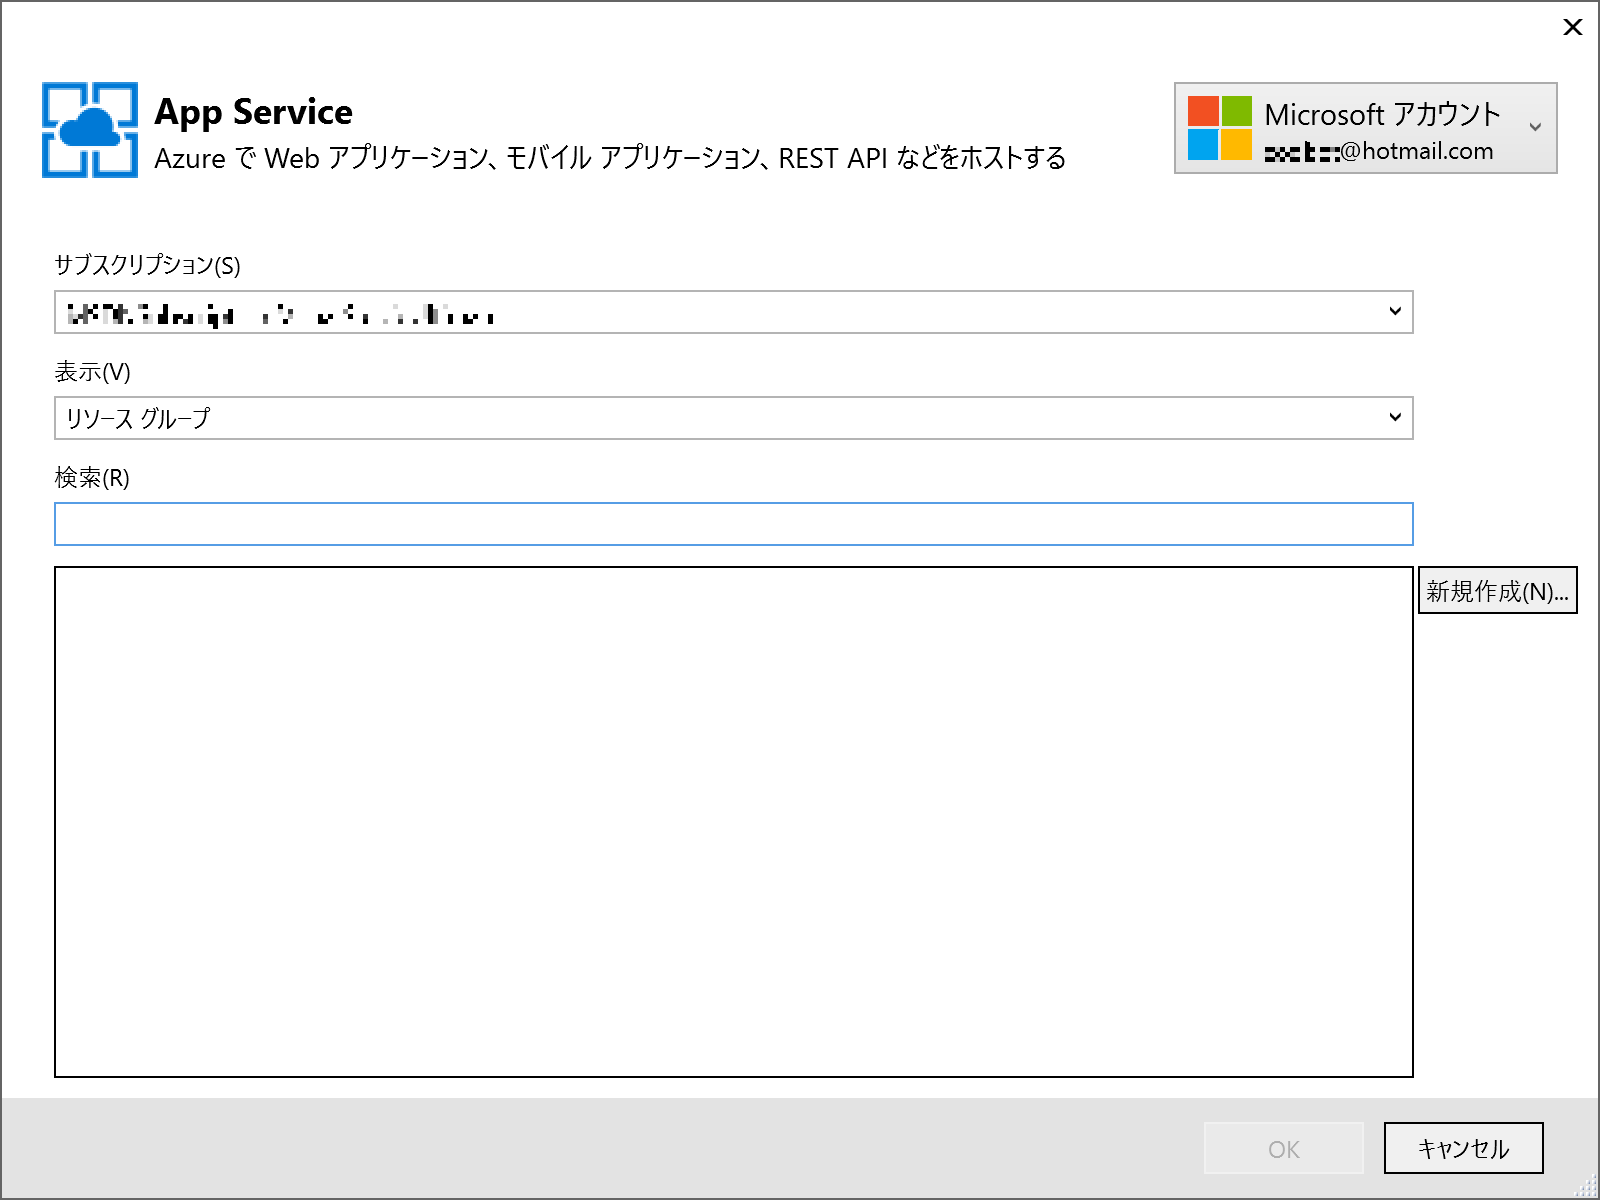
Select [Microsoft Azure App Service] to publish. Create Resource Group and App Service Plan as needed, type app name at [API App Name]. Click [Publish] and send to Azure. Published bot app URL should be https://[API App Name].azurewebsites.net.
Step4: Register to Bot Directory
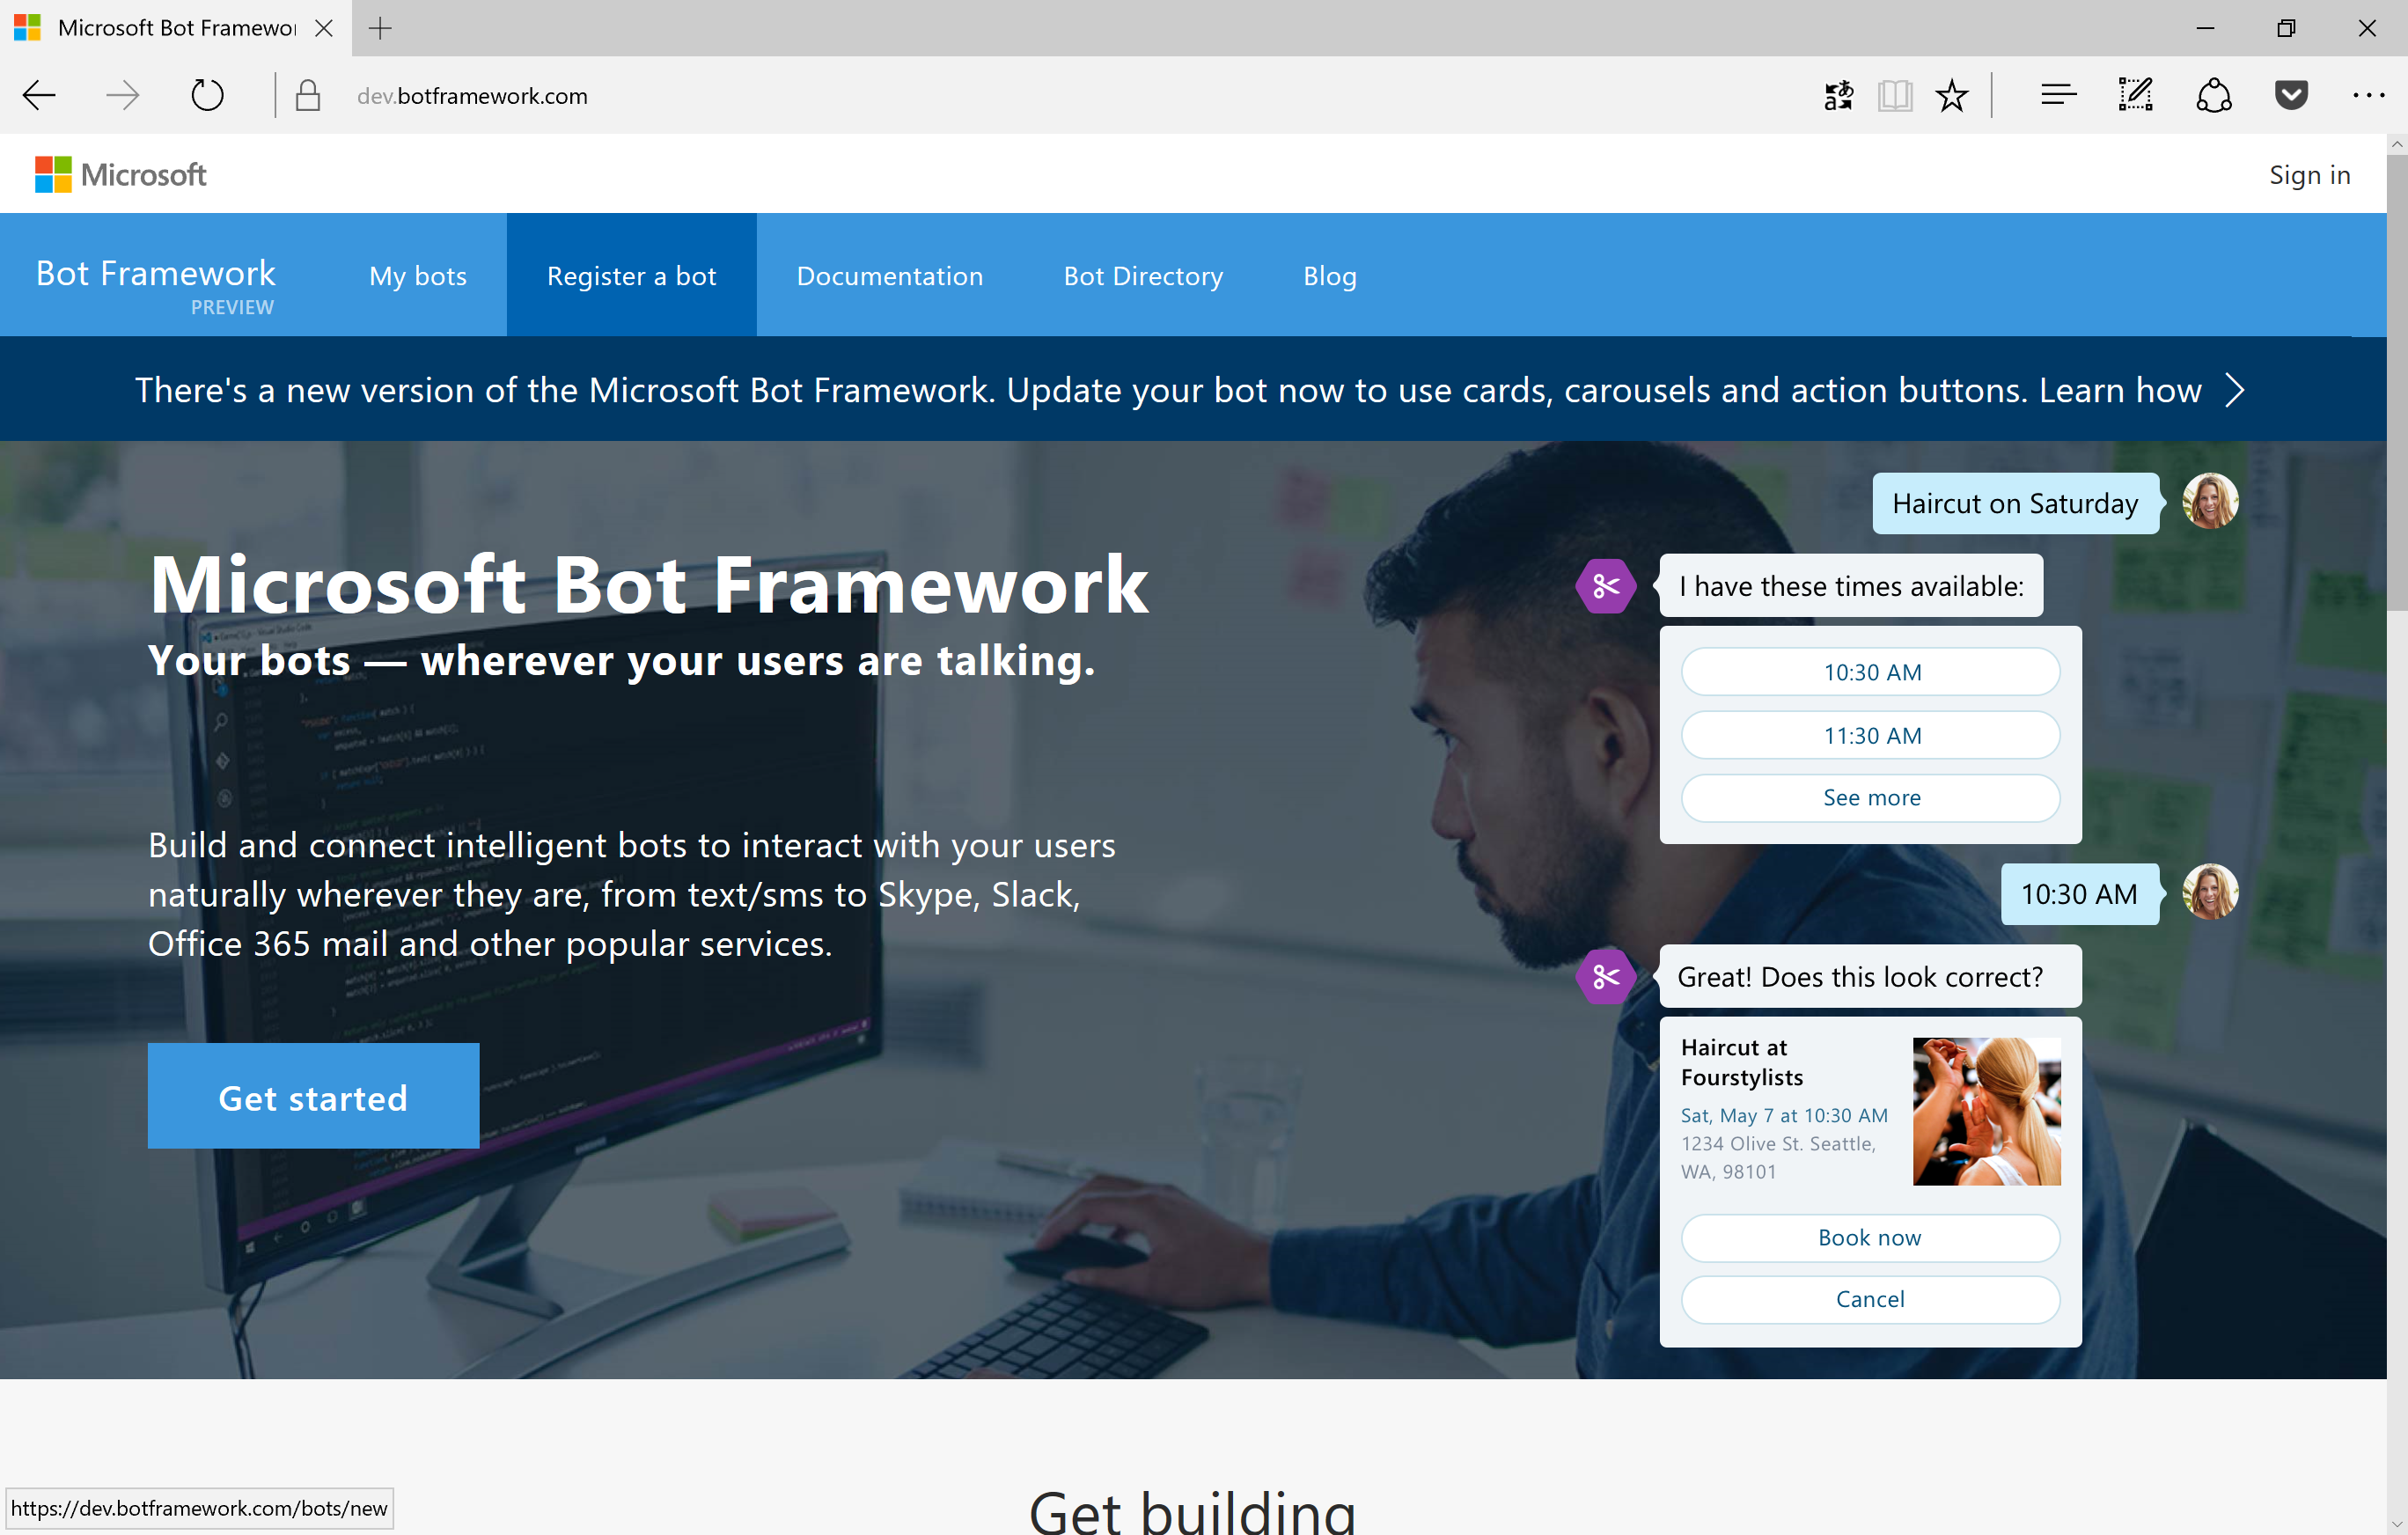
Go to Bot Framework Website (https://dev.botframework.com/) and register bot app published at Step3.
Click [Register a bot], and login with Microsoft Account.
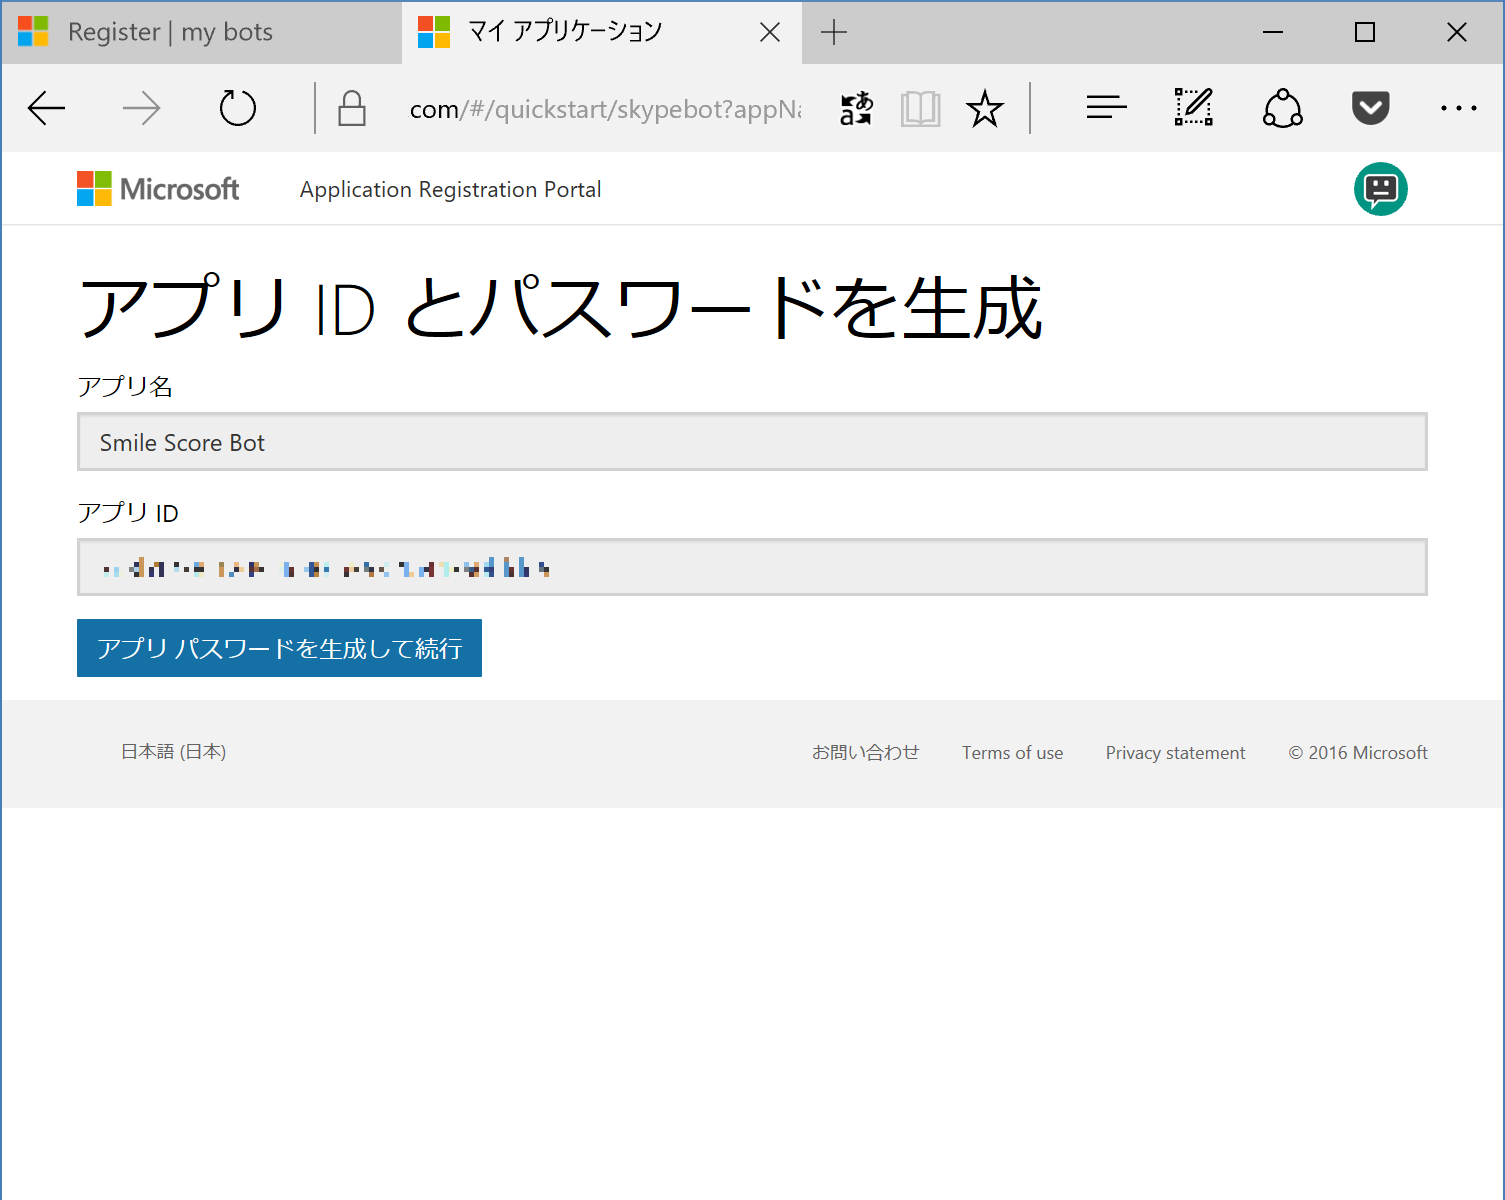
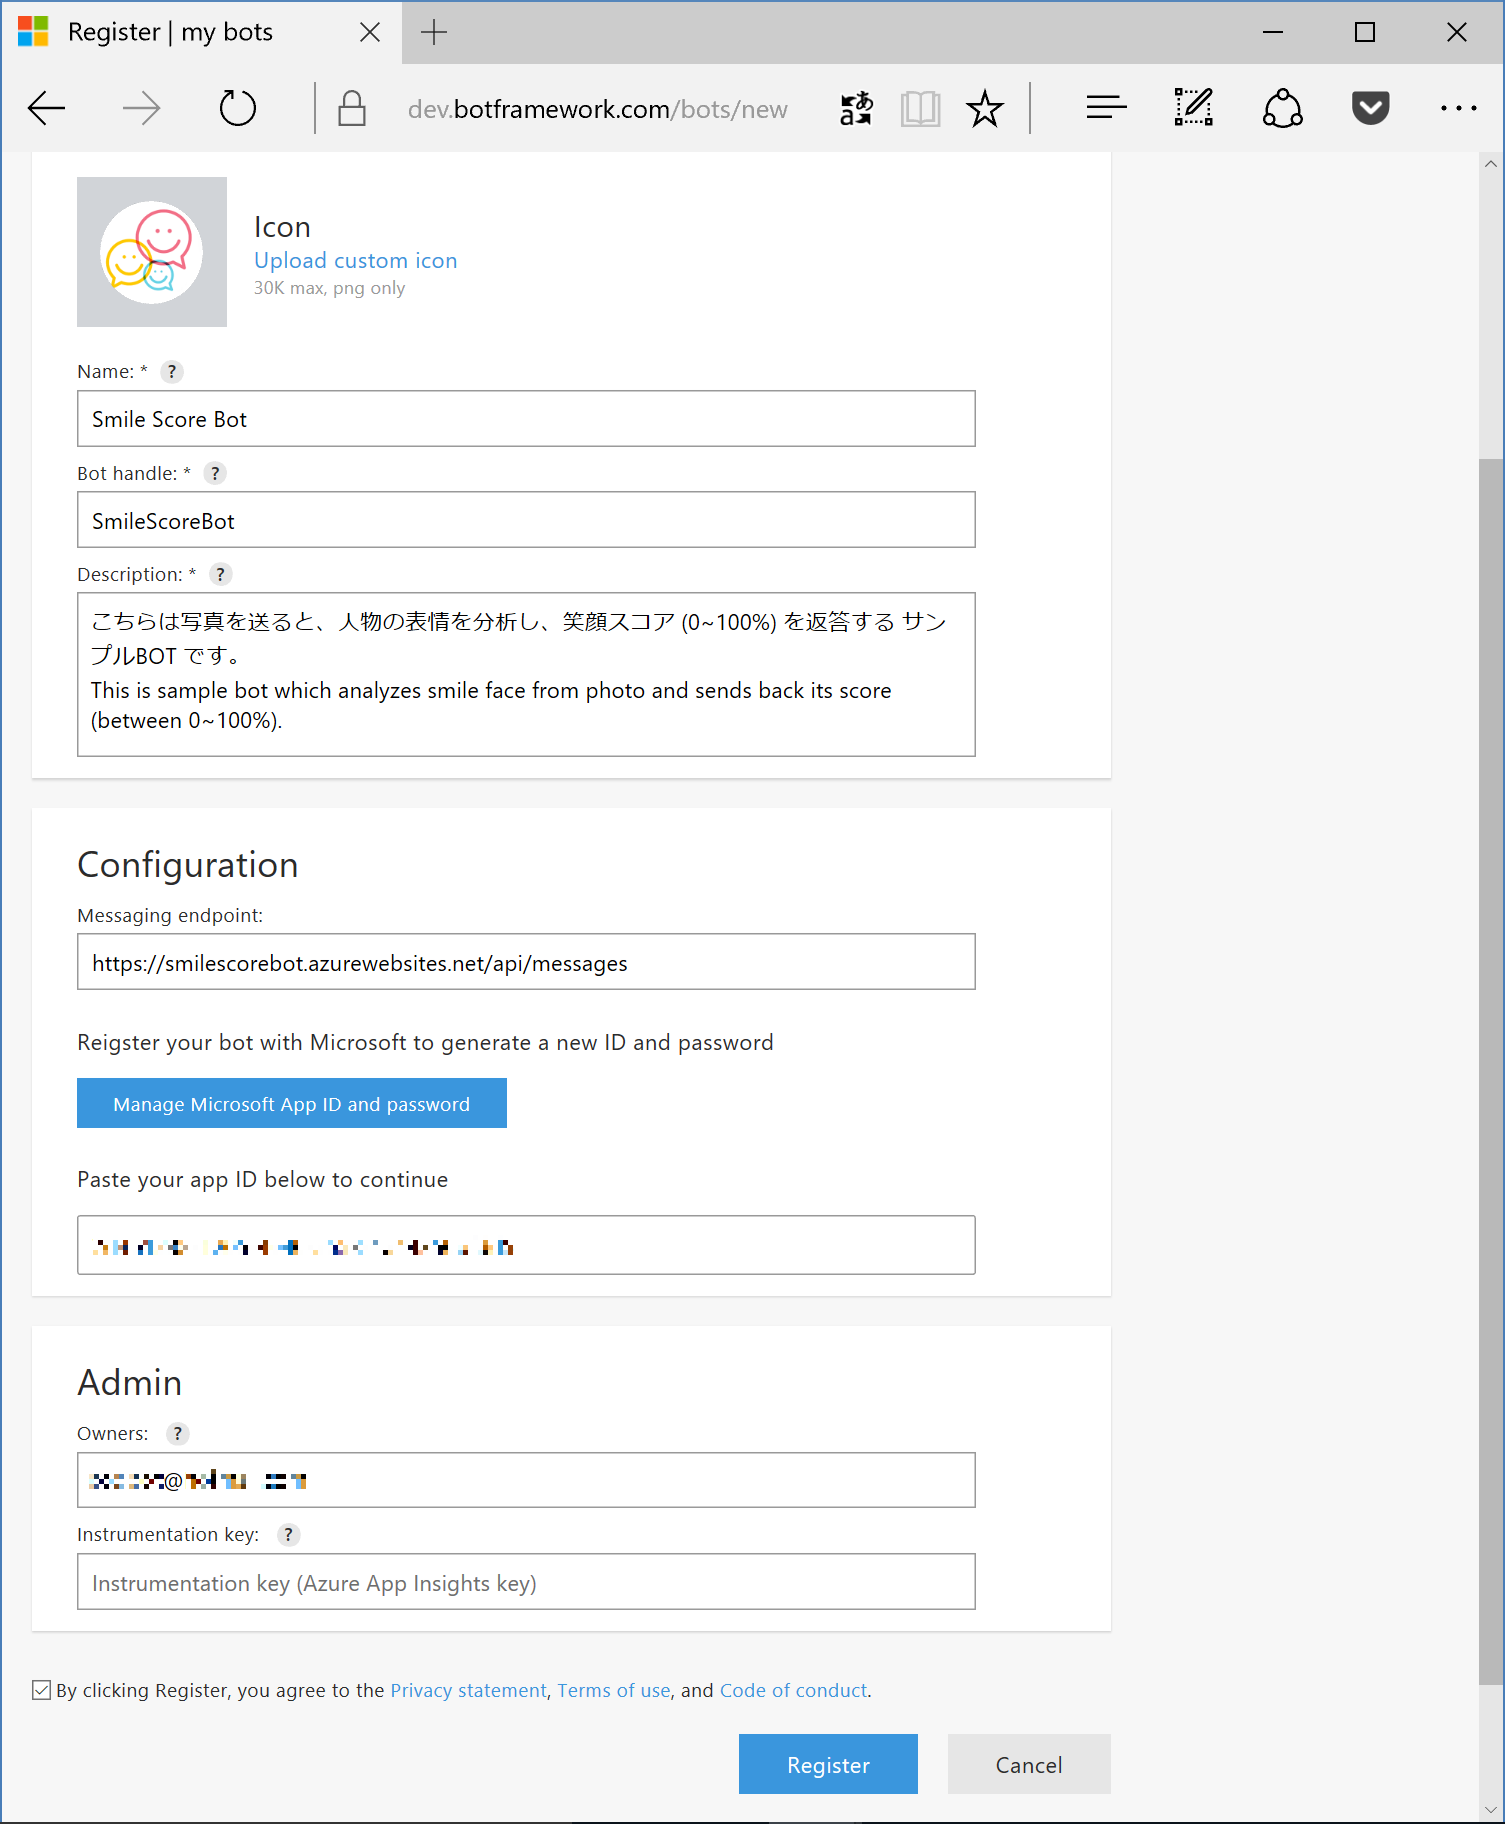
At [Bot Profile] section, fill Bot name (bot name shown in directory)、Bot handle (unique ID in directory. a.k.a. Bot ID), and Description (shown in directory). Type Messaging endpoint in [Configration] section as https://[API App Name].azurewebsites.net/messages/api を入力します (Dont't forget "https"). After filling above, click [Create Microsoft App ID and password].
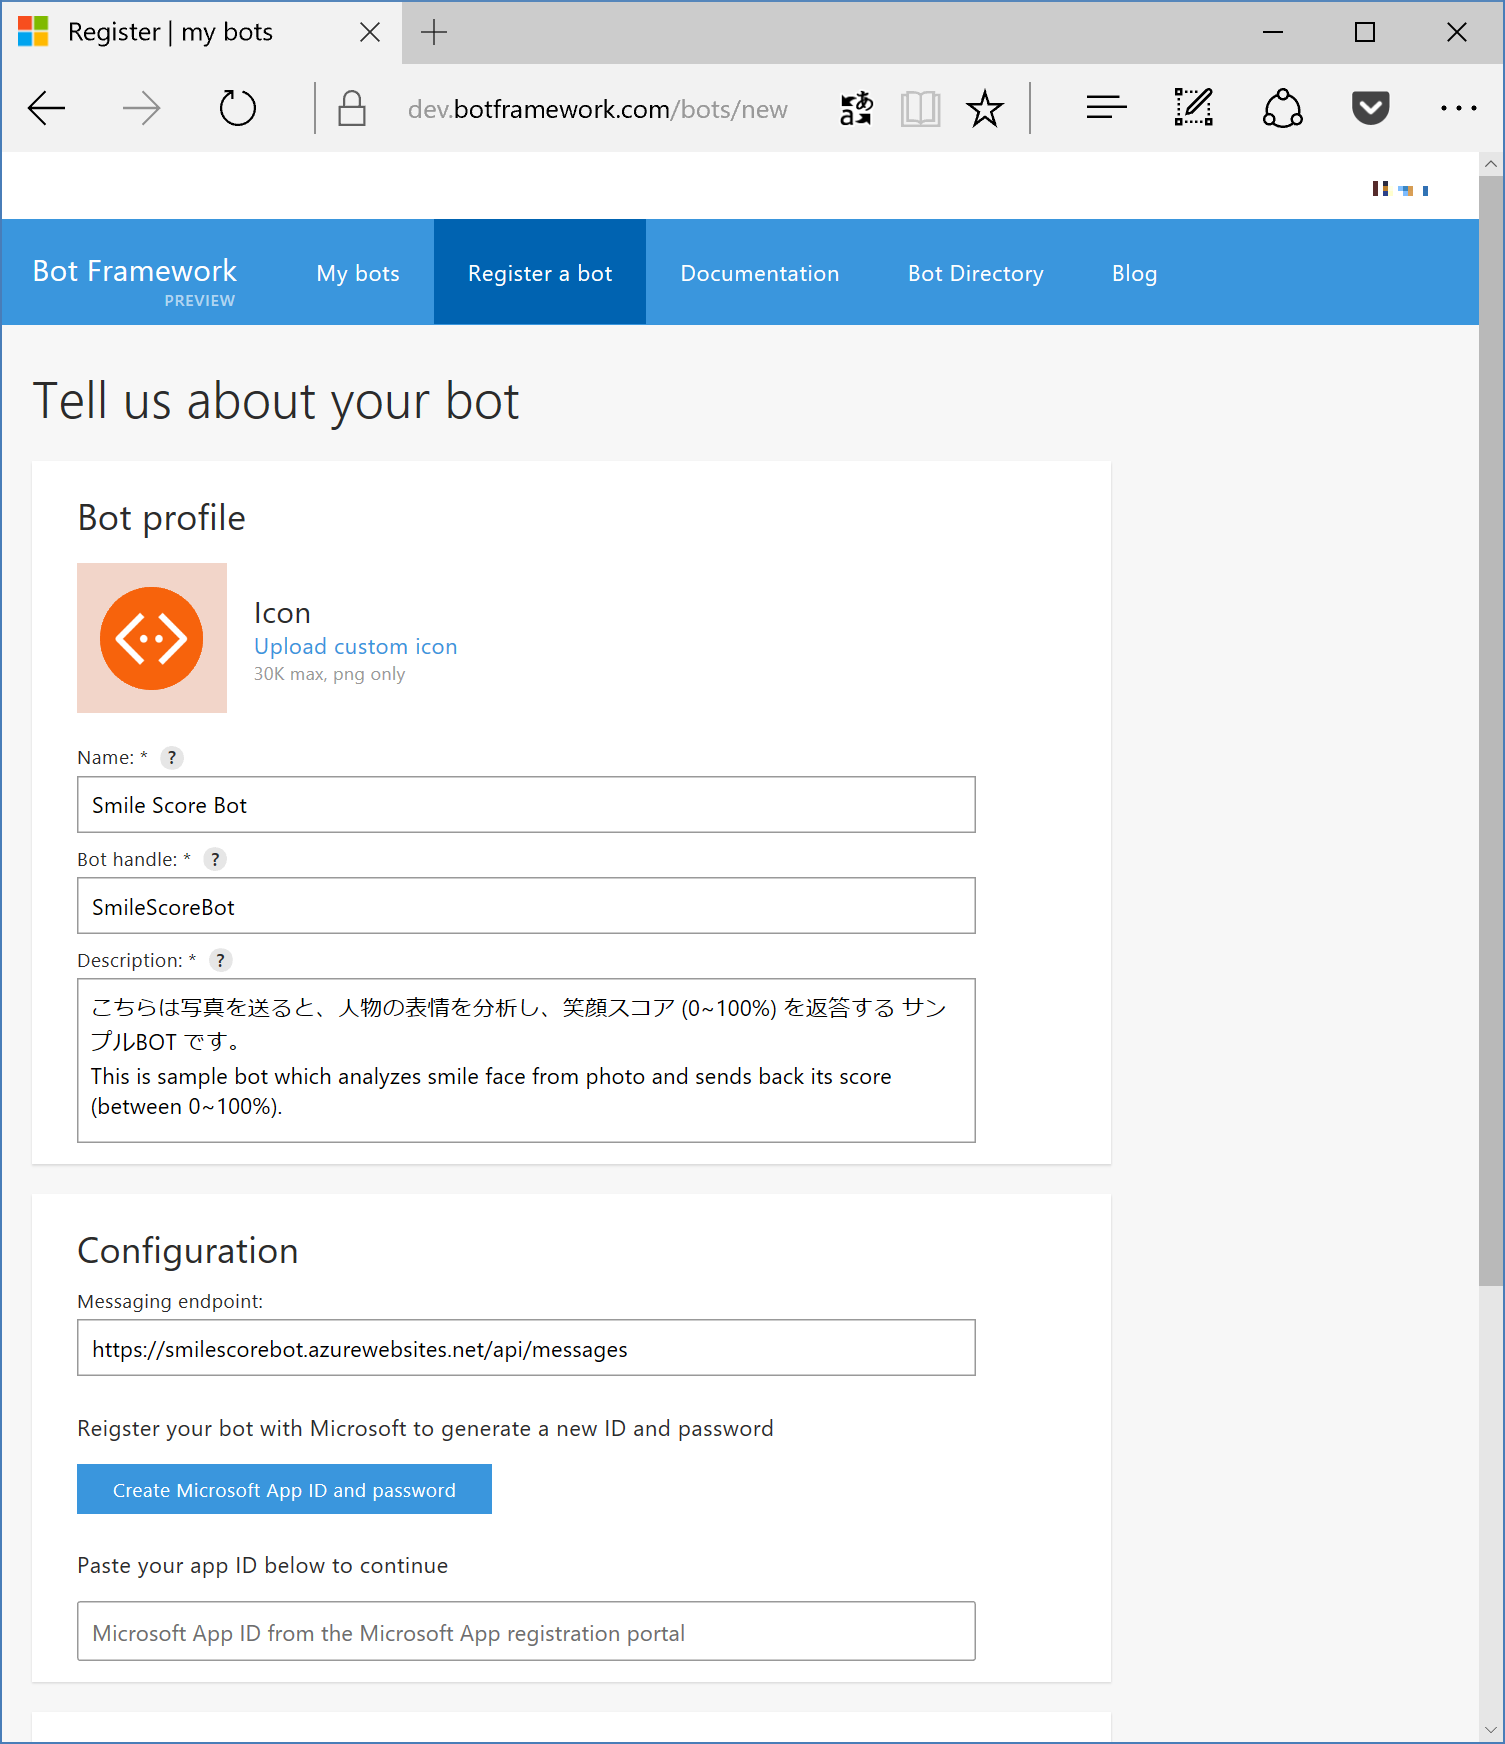
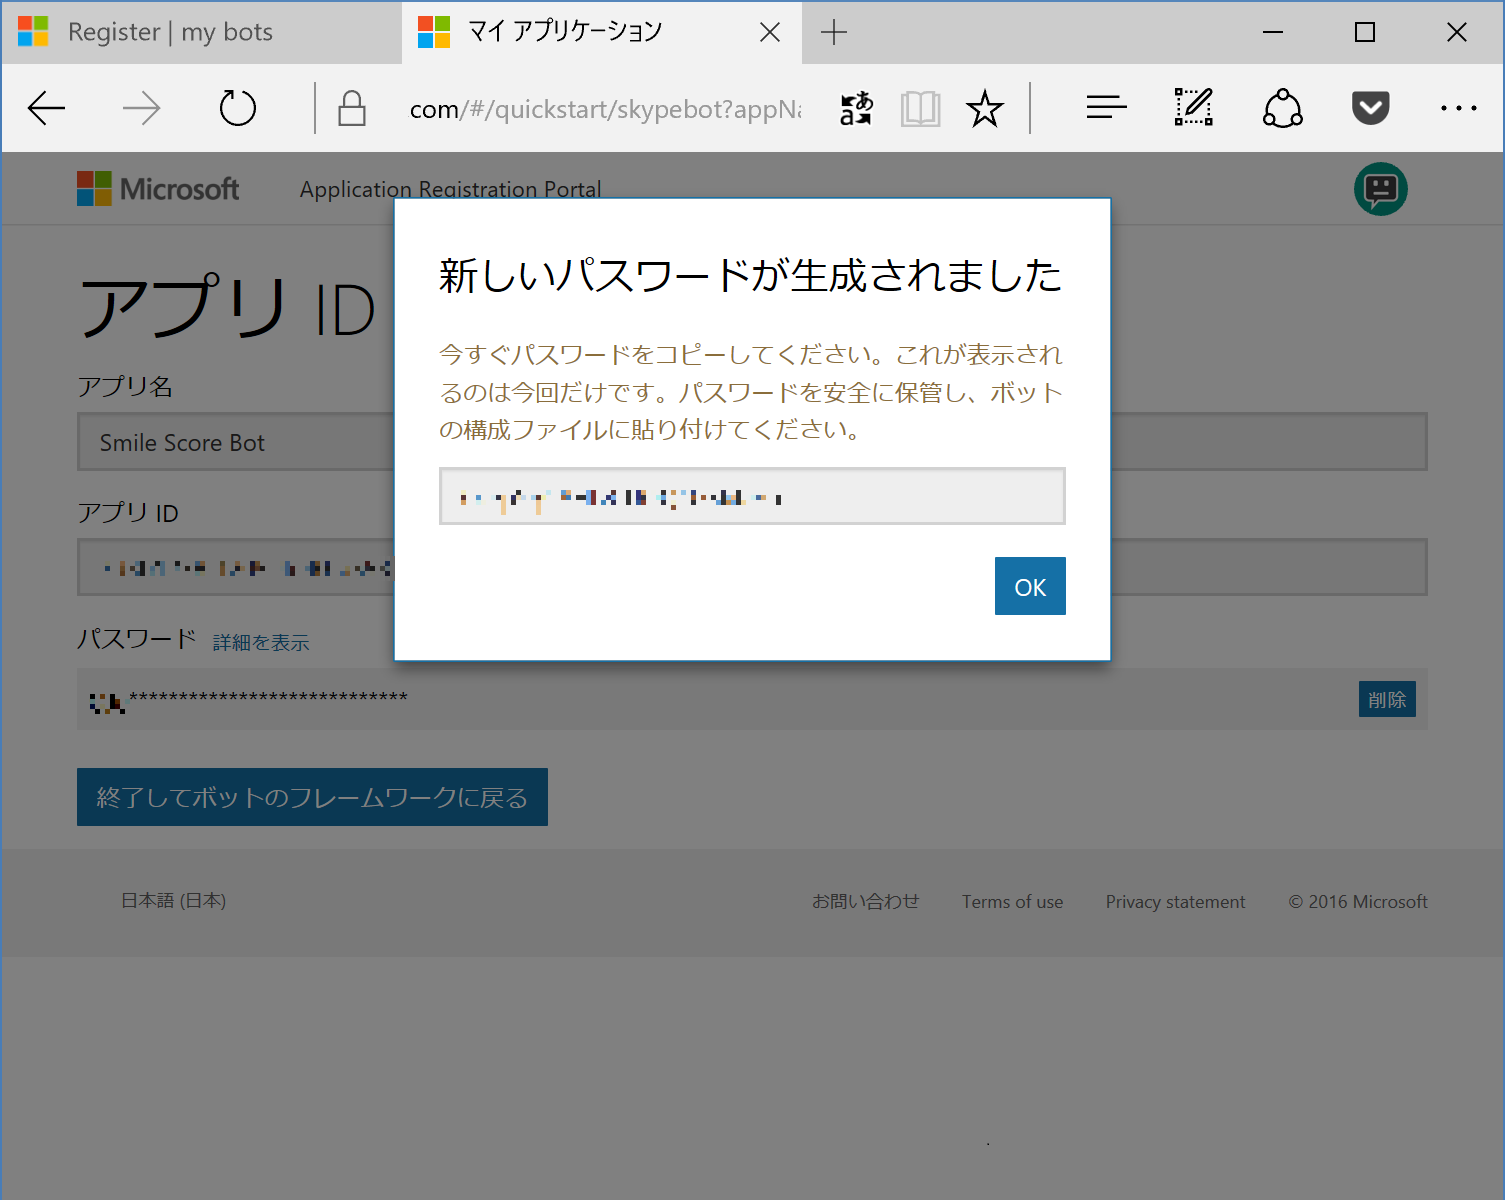
As App ID and App Password generation page shown, click [Generate App Password and continue]. Once password generated, copy this set of App ID and App Password and save locally. Click [OK] and back to original page.
App ID at [Configration] section is auto-filled now, check marked at Privacy Statement and other policies. Click [Register] and registration is done.
[Icon Designed by Freepik]
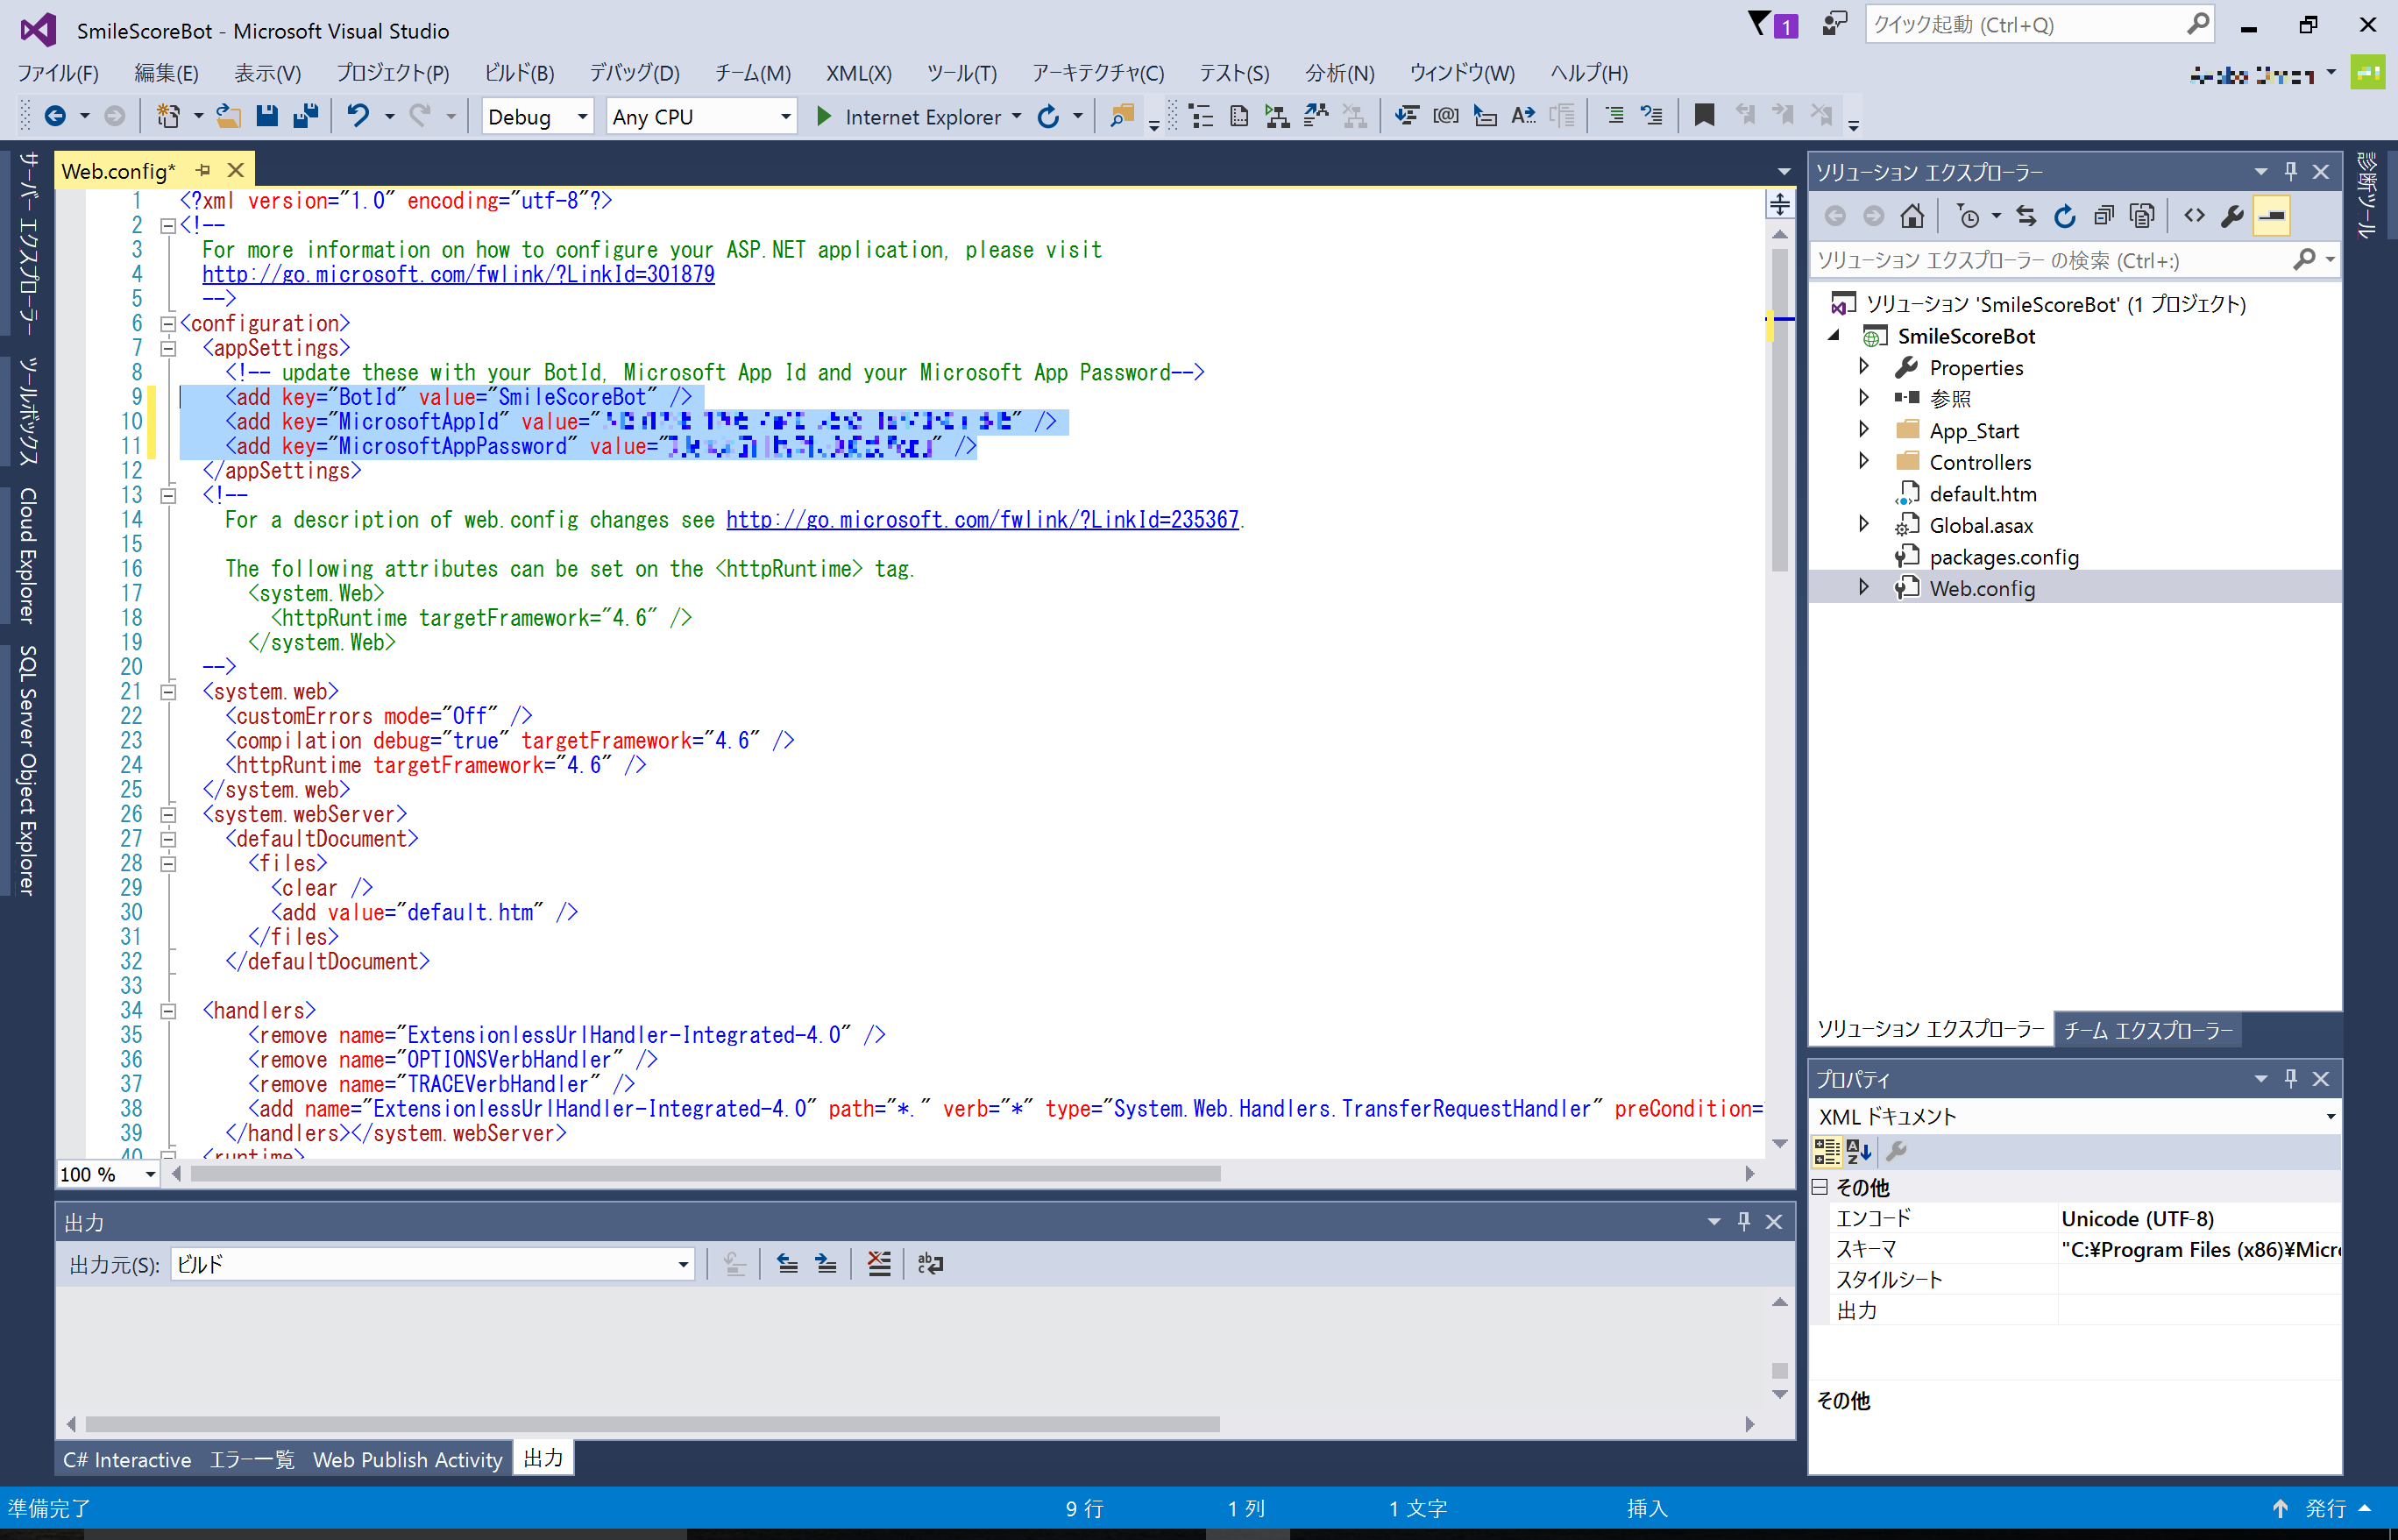
Go back to Visual Studio, update bot app with Bot ID, App ID and App Password.
Click and show Web.config, paste each value into "value" at code below;
 <configuration>
    <appsettings>
    <!-- update these with your BotId, Microsoft App Id and your Microsoft App Password-->
    <add key="BotId" value="YourBotID" />
    <add key="MicrosoftAppId" value="" />
    <add key="MicrosoftAppPassword" value="" />
    </appsettings>
:(Omitted)
Save project and re-publish to Azure as same step at Step3.
Step5: Configure Web Chat
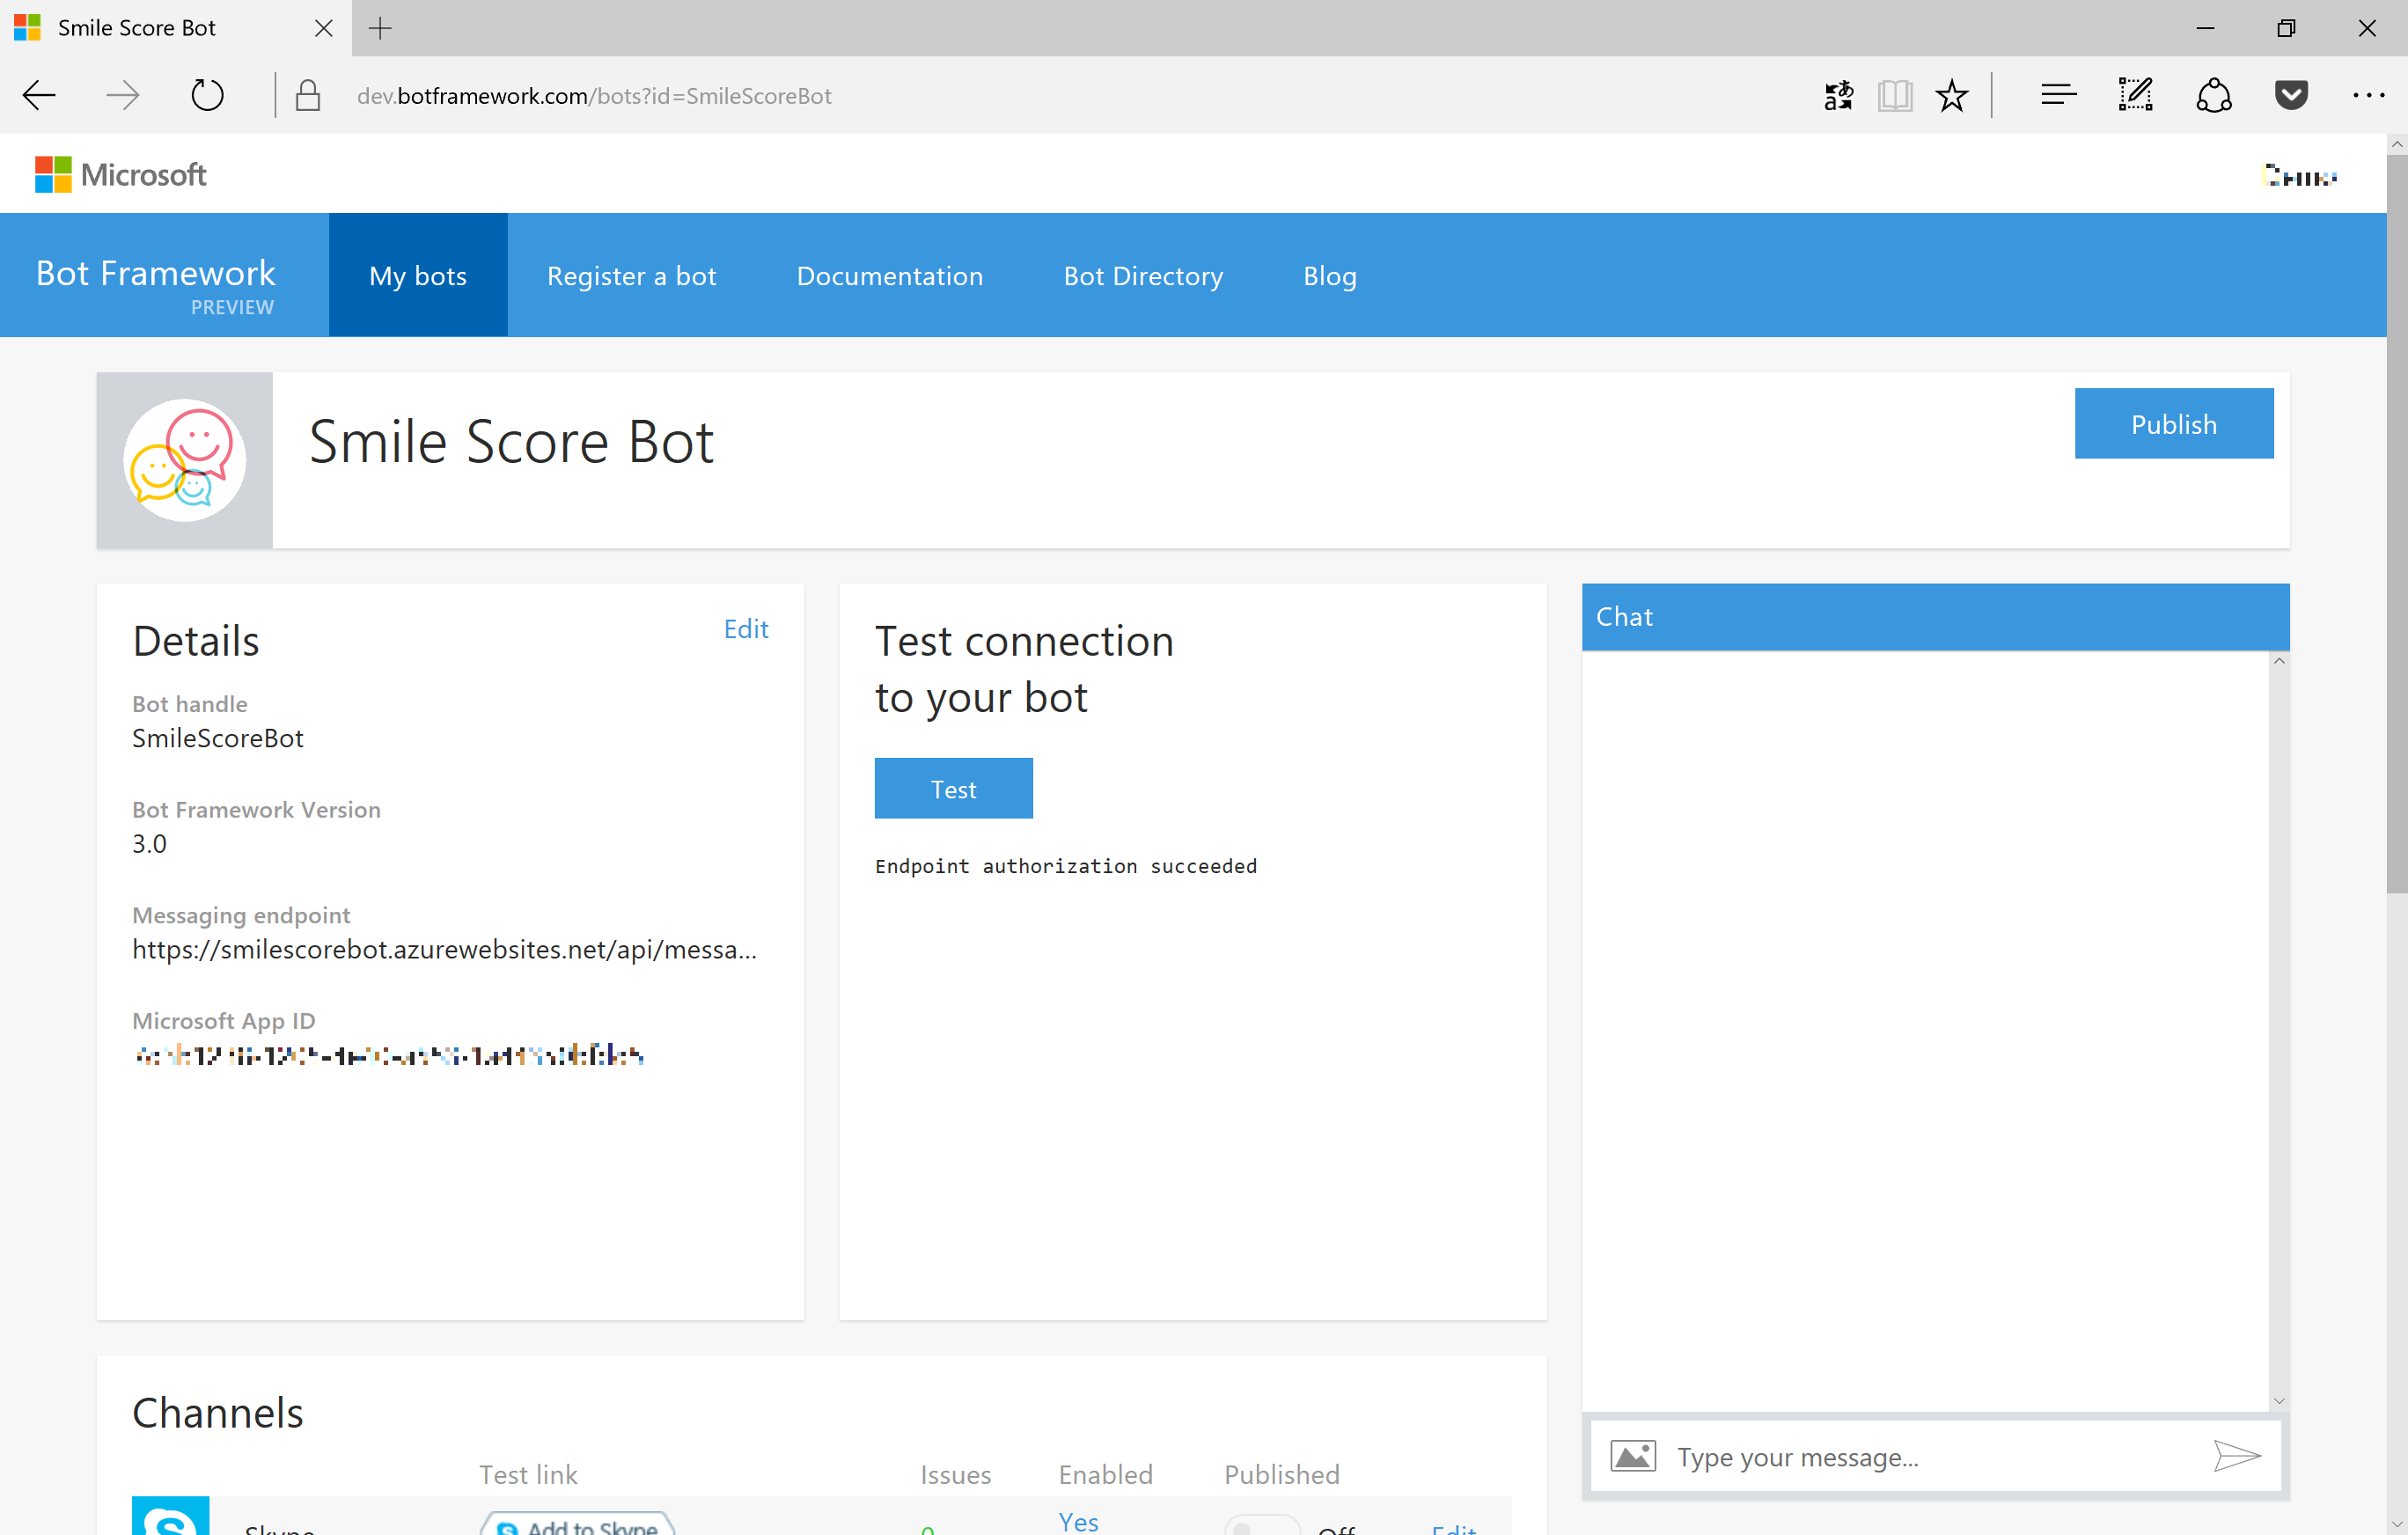
Open Bot Framework Website, click My Bots, show registered bot app.
First click [Test] at [Test connection to your bot] section, check if "succeeded" shown.
[Edit] at [Channels] > [Web Chat] row, configure Web Chat.
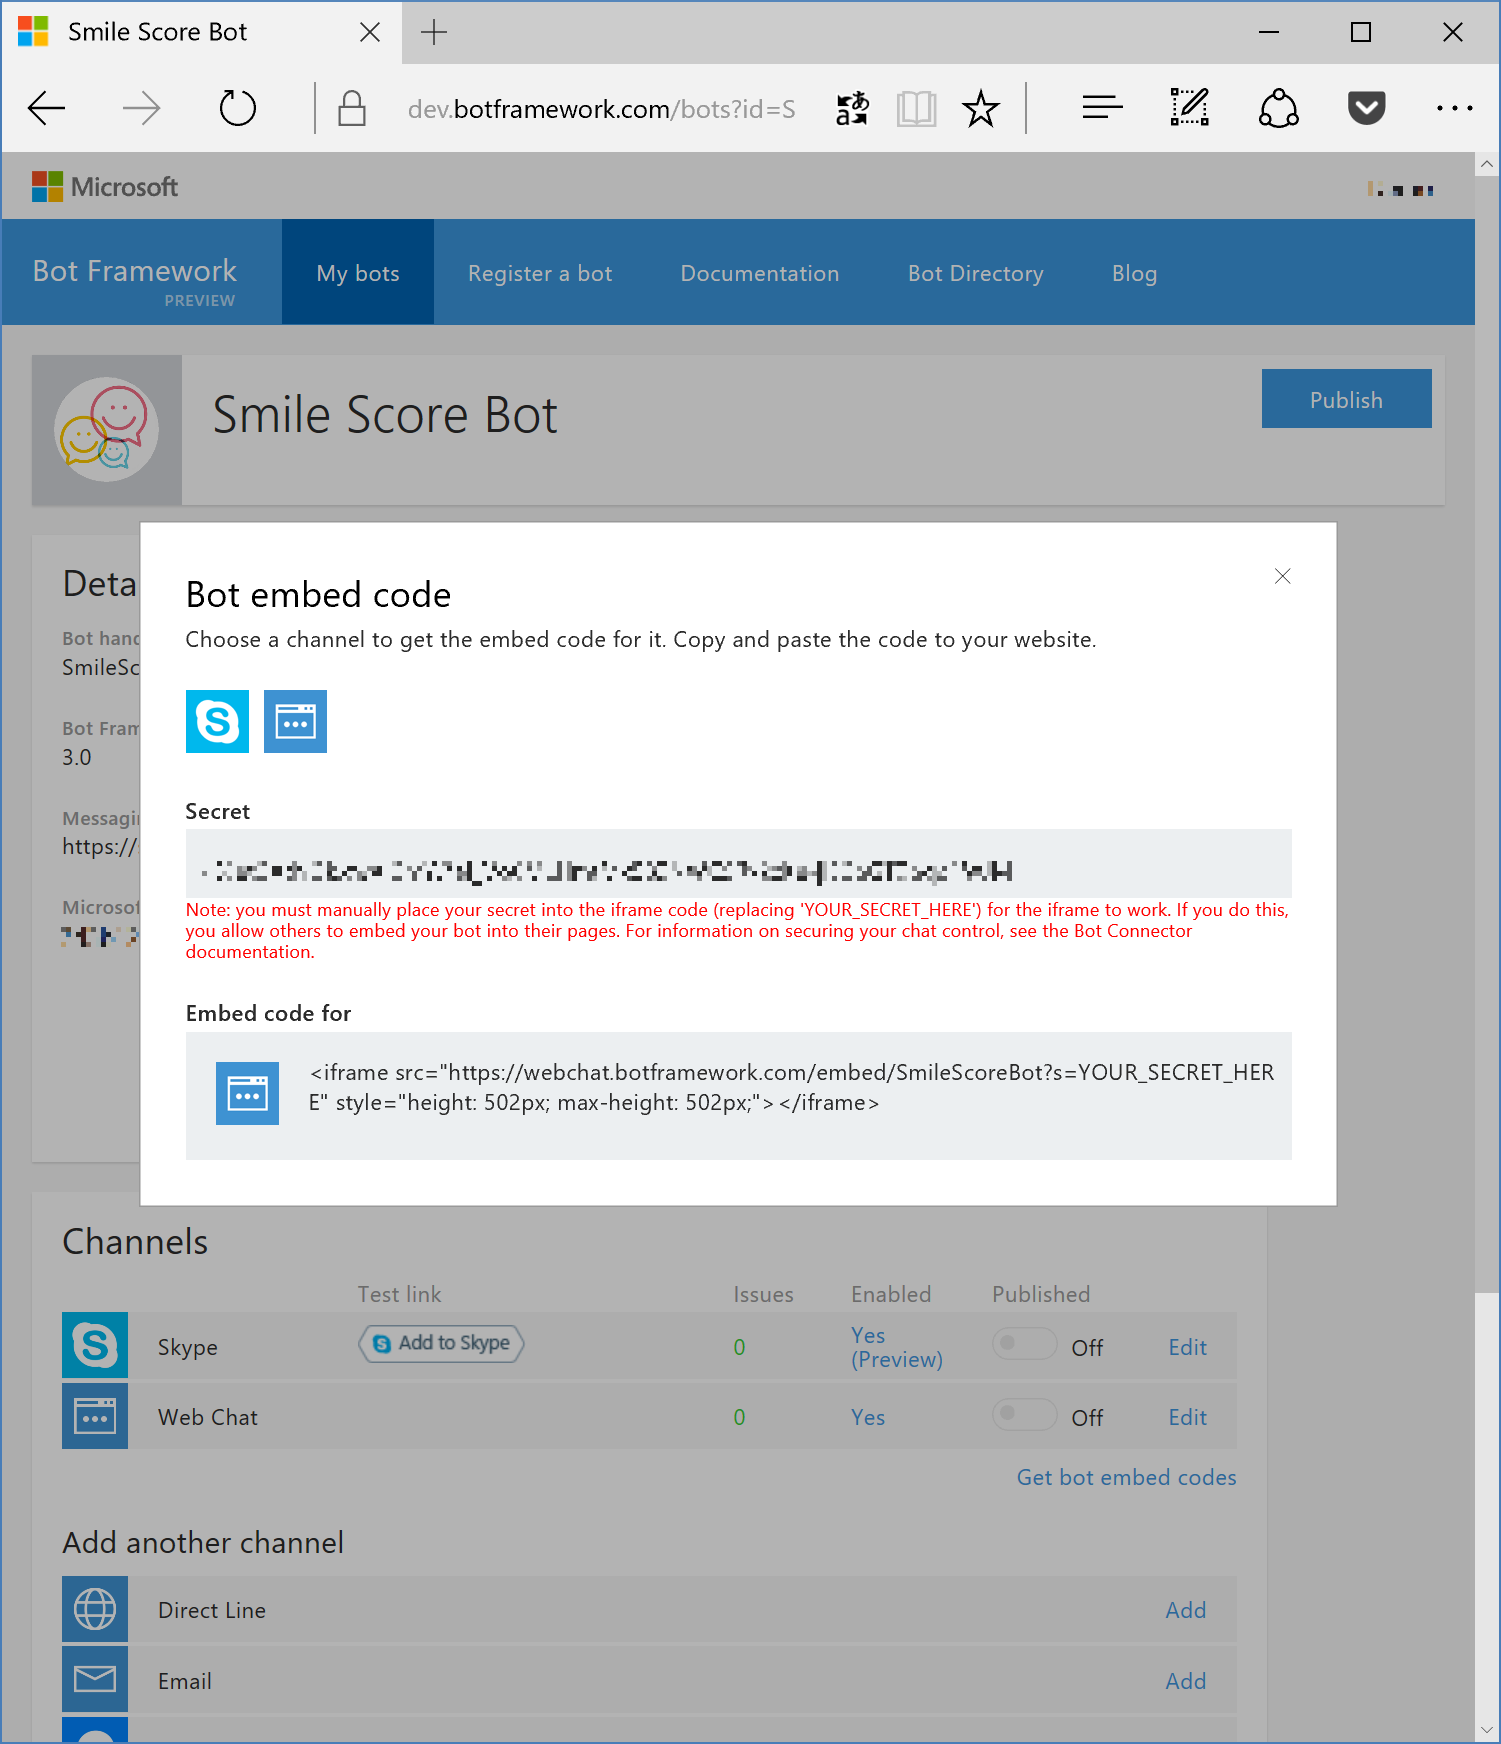
Click [Generate Web Chat Secret] generate Secret Code for Web Chat. Go back clicking [Done Confituring Web Chat].

At original page, click [Get bot embed codes] and show code to embed Web Chat. Embed code is like below;
<iframe src="https://webchat.botframework.com/embed/[BotID]?s=[SecretCode]" style="height: 502px; max-height: 502px;"></iframe>
Web Chat works with Bot ID and generated Secret Code.
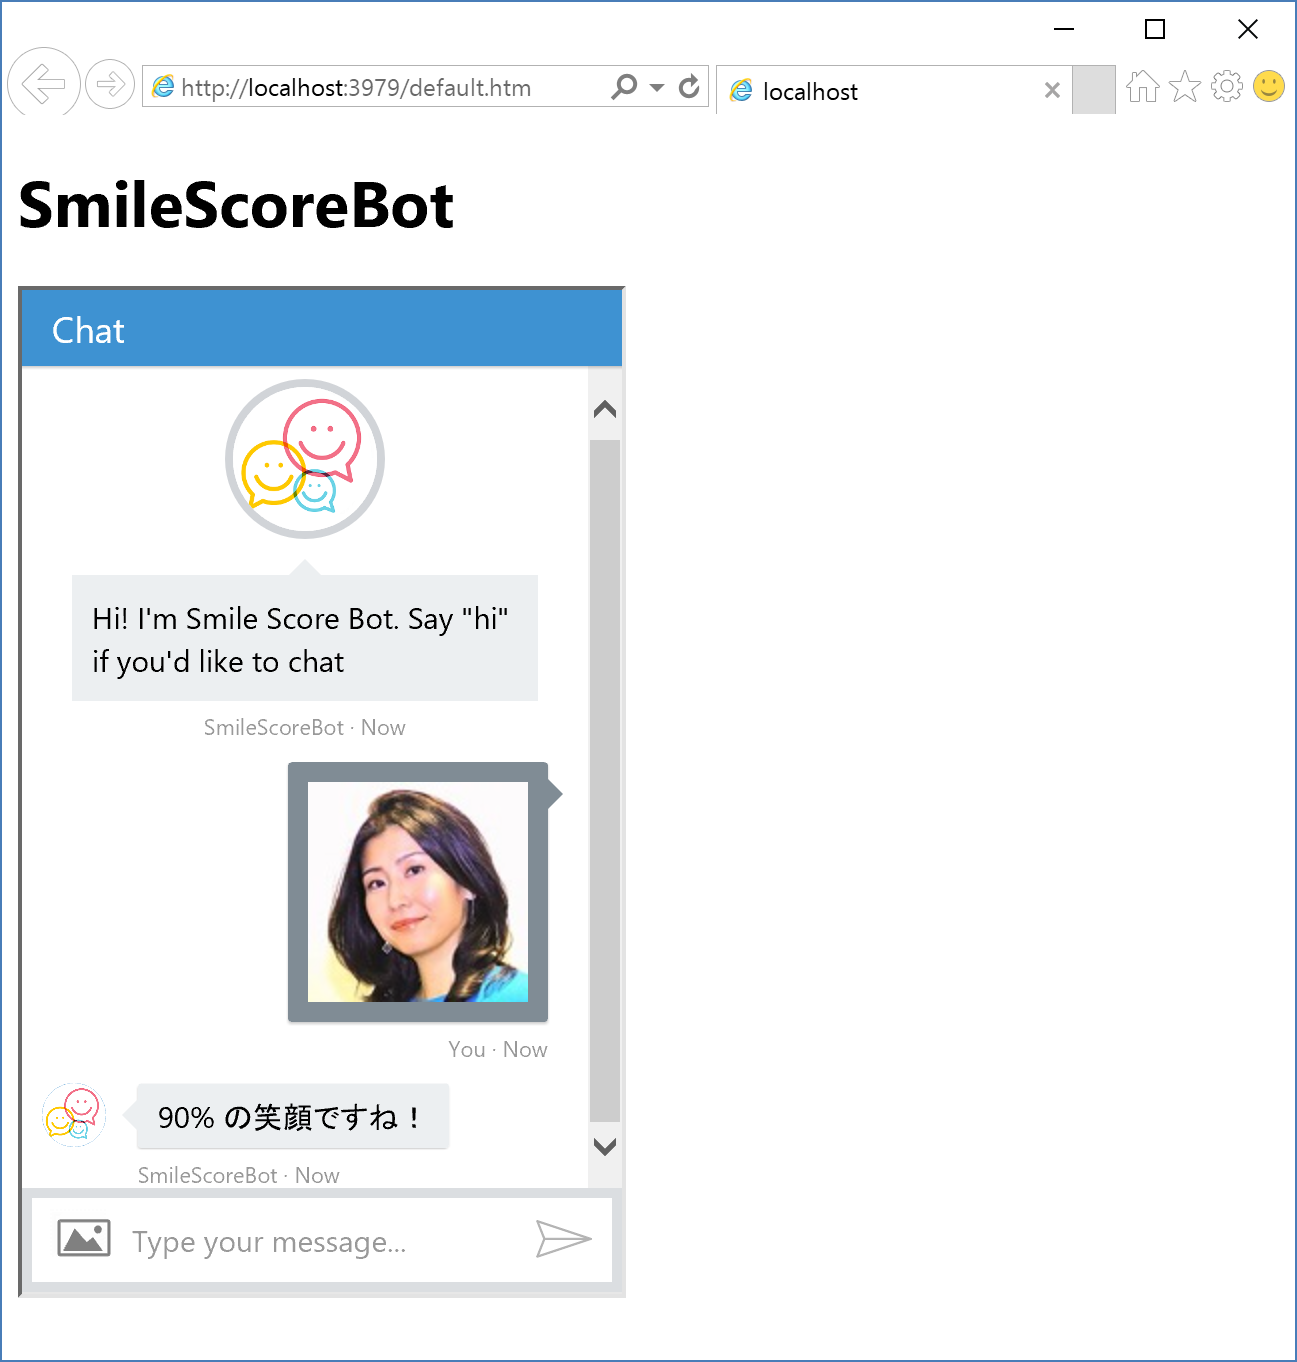
Embed Web Chat with iframe code at certain website, check it works.
Source Code on GitHub
Final source code published on GitHub below;
https://github.com/a-n-n-i-e/CognitiveEmotionAPI-SmileScoreBot