Connect to Azure IoT Hub in browser ( using AMQP over WebSockets )
Azure provides simple ways to connect to IoT Hub through azure-iot-sdk, but some developers would like to figure out what the sdk exactly did or integrate with their own services. In this situation, it is necessary to find out how to connect to Azure IoT Hub above protocol level.
AMQP is the only protocol to connect to IoT Hub ( You can find detailed spec of this protocol here, but trust me, it isn't easy to go through this ). Since using browser to do this is quite convenient for developing and debugging, so we will choose AMQP over WebSockets to connect.
First we have to create a websocket tunnel. Here is the url:
 wss://<YOUR-IOT-HUB-NAME>.azure-devices.net:443/$iothub/websocket

Sec-WebSocket-Protocol: AMQPWSB10
How to get IoT hub name?
You can find it in Azure portal.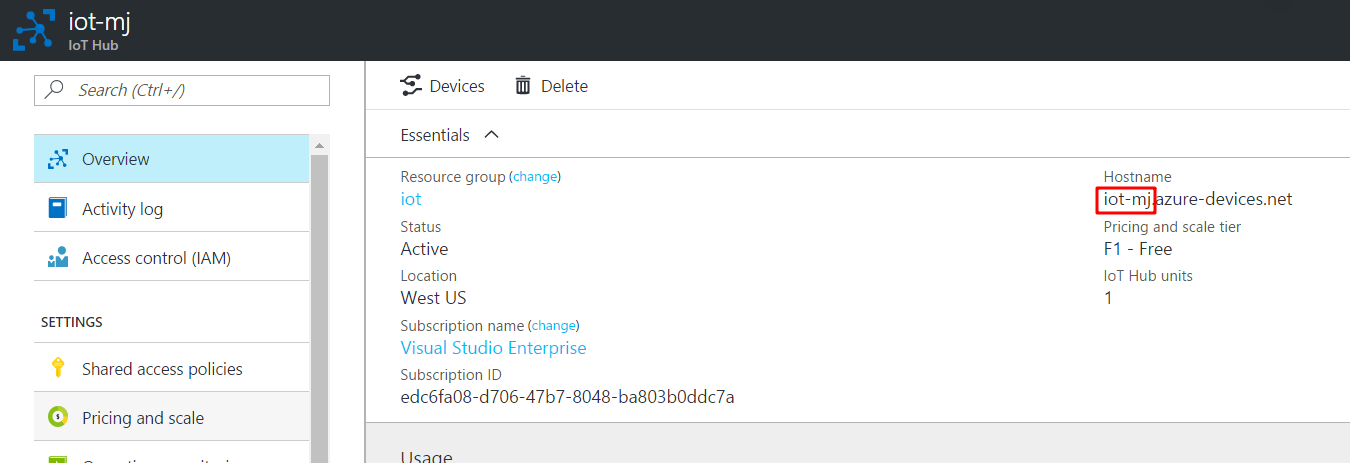
Then you will have to establish AMQP connection. Use the following parameters to connect, you need to use SASL.
| Key | Value |
|---|---|
| hostname | <YOUR-IOT-HUB-NAME>.azure-devices.net |
| container_id | "conn" + <CURRENT-TIME-STAMP> |
| max_frame_size | 4294967295 |
| channel_max | 65535 |
| idle_timeout | 120000 |
| outgoing_locales | en-US |
| incoming_locales | en-US |
| offered_capabilities | null |
| desired_capabilities | null |
| properties | {} |
| connection_details | <YOUR-WEBSOCKET-CONNECTION> |
| reconnect | false |
| username | <ROLE-IN-SHARED-ACCESS-POLICIES>@sas.root.<YOUR-IOT-HUB-NAME> |
| password | <Shared Access Signature> |
What is Shared Access Signature?
A shared access signature provides delegated access to resources in your storage account. With a SAS, you can grant clients access to resources in your storage account, without sharing your account keys. This is the key point of using shared access signatures in your applications — a SAS is a secure way to share your storage resources without compromising your account keys.
How to generate SAS?
There are two ways to generate SAS.
a.Generate by Device Explorer.
Device Explorer is a tool provided by Azure in Windows environment. You can use it to generate SAS token.
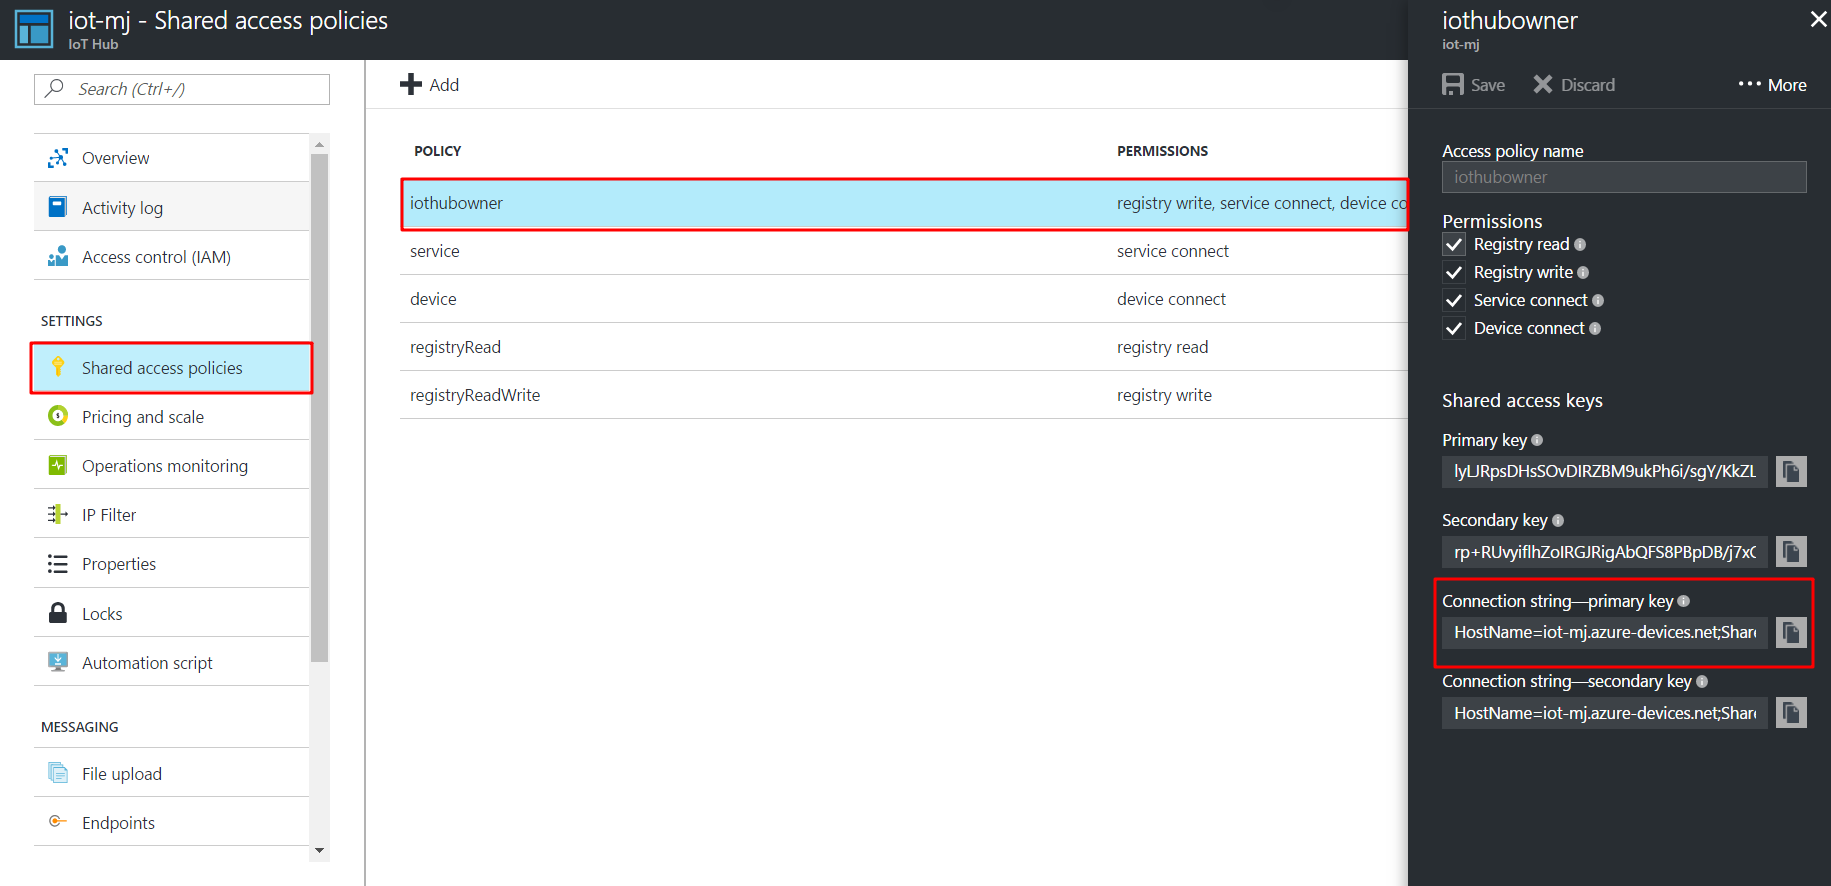
First, get IoT Hub connection string from portal
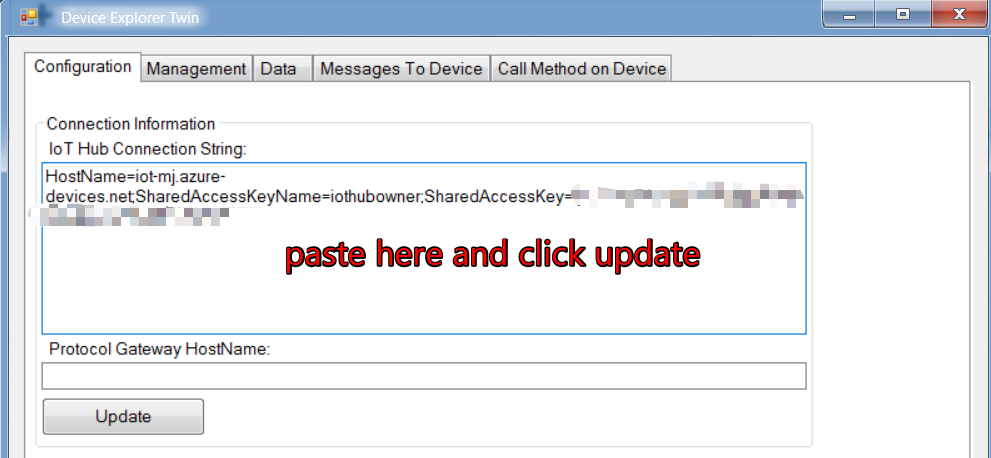
Paste connection string in Device Explorer.
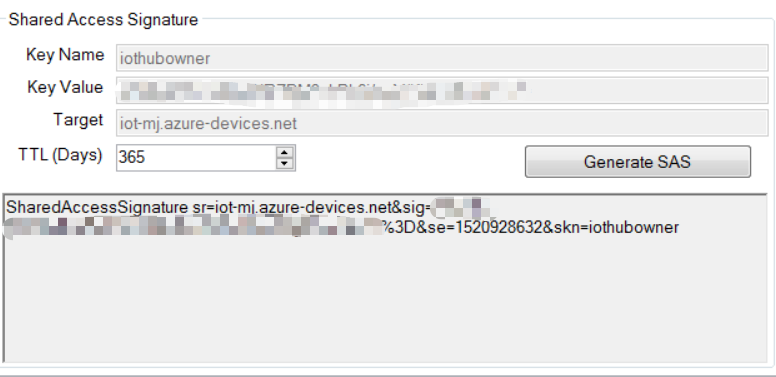
In the same tab, set TTL and click "Generate SAS", you will get SAS token.
b.Calculate SAS
To save your time and energy,
DON'T use this way if you can generate one using above method.
DON'T use this way if you don't want to investigate a bunch of things about Hash algorithm, signature,etc...
DON'T use this way if you don't have enough reason to do this.
OK. It seems you are still interested in SAS, let's do this!
 SharedAccessSignature sig=<signature-string>&se=<expiry>&skn=<keyName>&sr=<URL-encoded-resourceURI>
se: expiration time of this token
skn: role in shared access policies
sr: your iot hub url
sig: the SHA-256 hash of the scope of the token with a CRLF appended and an expiry time.
sig = hmacHash(_key, sr + '\n' + se) // _key is a base64-encoded key value
After connection is established and opened, we need to open a receiver and a sender. We use sender to send cloud-to-device message and use receiver to receive feedback message.(Unfortunately, currently we didn't find a way to fetch device-to-cloud message, we guess we can only do this by connecting EventHub or ServiceBus)
 Sender:/messages/devicebound
Receiver:/messages/serviceBound/feedback
OK, now we're finished! You can test with your device to see if it works. If you don't have a device in hand or feel troublesome to use device, you can try our Web-based Iot device simulator. It can simulator an Iot Device and communicate with IoT Hub. | Connect to Azure IoT Hub in browser ( using AMQP over WebSockets )