Custom MVC 4 Template Walkthrough
Introduction
One of the cool features of MVC 4 Tool Update for Visual Studio 2012.2 is the MVC custom template support. This was possible before as in described here, but it required to edit registry to make the custom templates appear in the MVC project wizard. This new features enables the scenarios where custom templates needs to be deployed via VSIX without additional works from the end users. Unfortunately, there is still no almost-automated tool support for this feature, and it also has a couple of limitations with this release. This walkthrough will guide you to create the first custom MVC 4 template, which uses the MVC 4 default NuGet packages and the Bootstrap package. From there, I think you should be easily able to figure out how to use this feature for your purpose. For more detailed information, see Custom MVC Template.
Prerequisites
• Users will need to have Visual Studio Professional and higher installed. Express SKUs do not support creating VSIX projects.
• Visual Studio 2012 SDK installed.
Walkthrough
Export your new Web project to a project template.
Let’s assume you already have a MVC 4 Web project. The Web project uses a custom NuGet package. In this walkthrough, let’s assume the Web project uses Bootstrap. To create new template from project and items that are currently open Visual Studio, select File -> Export Template. The Export Template Wizard appears as follow:
Note – You don’t need to actually use the Bootstrap package for this walkthrough. Simple add the Twitter Bootstrap NuGet package to your sample Web project. This walkthrough only show you how to deploy those additional package with your project templates.
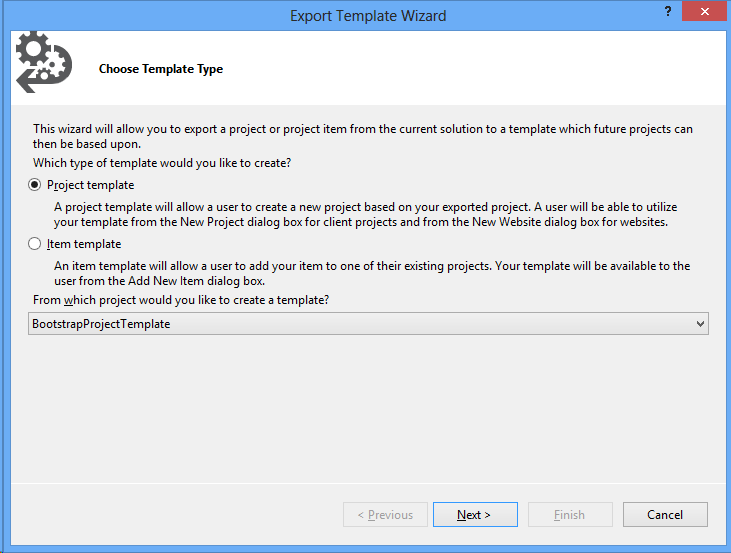
Select the Project template, select the project to export to template in the “From which project would you like to create a template” drop down list, and then click Next.
In the following dialog box, fill out the Template name, and other fields, clear the “Automatically import the template into Visual Studio” check box, select the Display an explorer window on the output files folder check box, and then click Finish. This wizard creates a zip file under the My Exported Templates folder, and open the Explorer for the folder.

Create a new VSIX project using the VSIX Project template
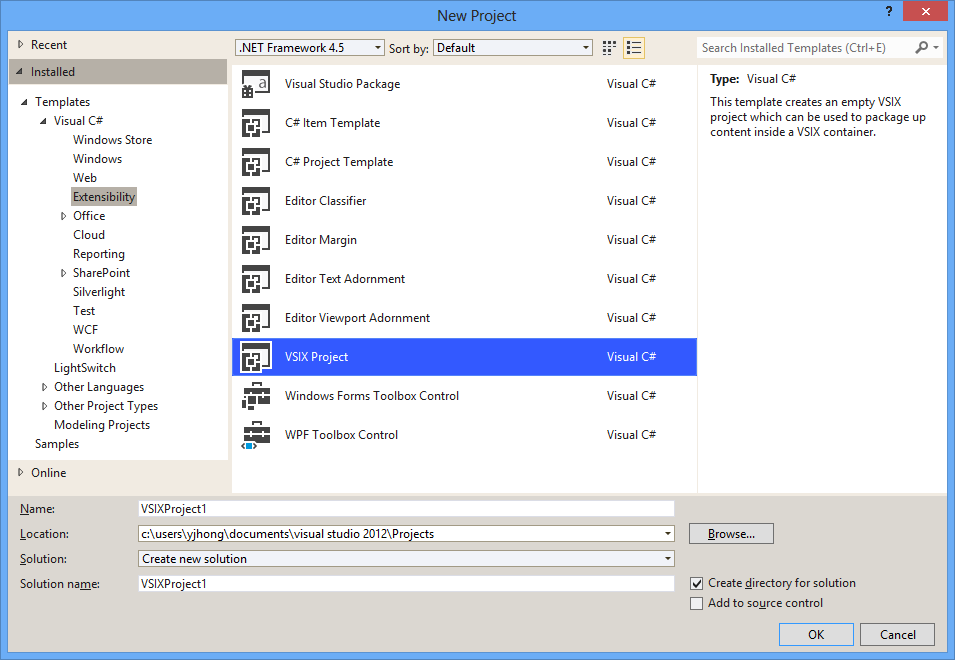
Open the New Project dialog box by selecting File->New->Project, select Templates->Visual C#->Extensibility->VSIX Project, type name and location, and click OK.
Note – If you could not find Extensibility tab, you should install Visual Studio 2012 SDK.
Add the project templates to the newly created VSIX project
In the Explorer, open the VSIX project folder, and then create a sub-folder that will contain all the files used in the project template. This walkthrough will use ‘bootstraptemplate’ for the name of the sub-folder.
Open the project zip file that you created with the Export Template Wizard, and copy all the files and sub-folders in the zip file to the bootstraptemplate folder. Your file structure should look like the following image since typical MVC 4 Web projects contain other sub-folders like App_Start, Content, Views, and so on.

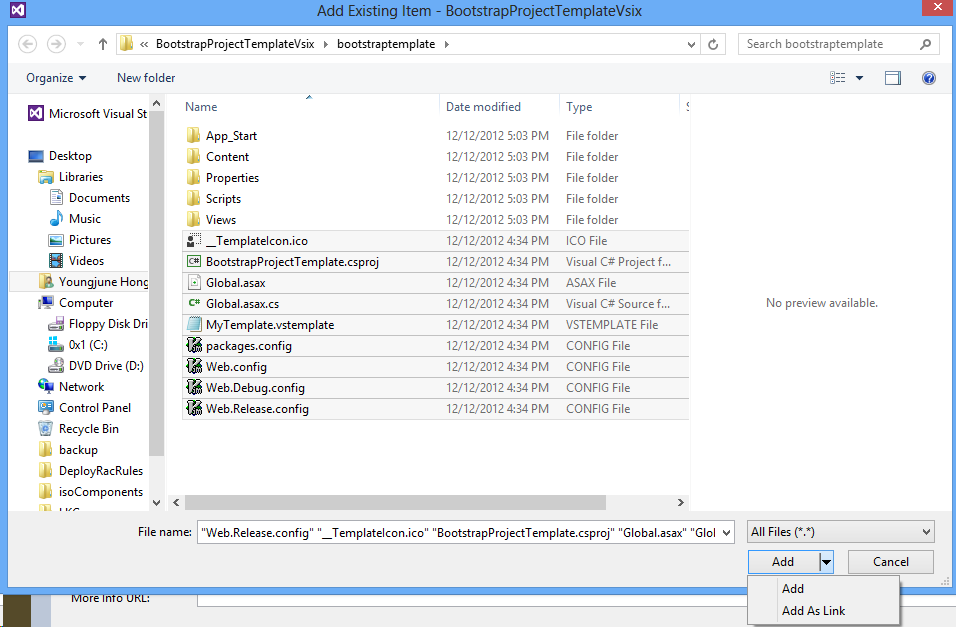
In Visual Studio, right-click the VSIX project, and then select Add->Existing Item. In the Add Existing Item dialog box, change the file filter drop down list to All Files (*.*), and then browse to the bootstraptemplate folder. From there select all the files and then select the Add As Link button instead of Add. In this example, the bootstraptemplate folder has App_Start, Content, Content/Images Properties, Scripts, and Views sub-folders. In Visual Studio, do the previous step for each folder at a time for every sub-folders,
and add-as-link all the files in the folder.
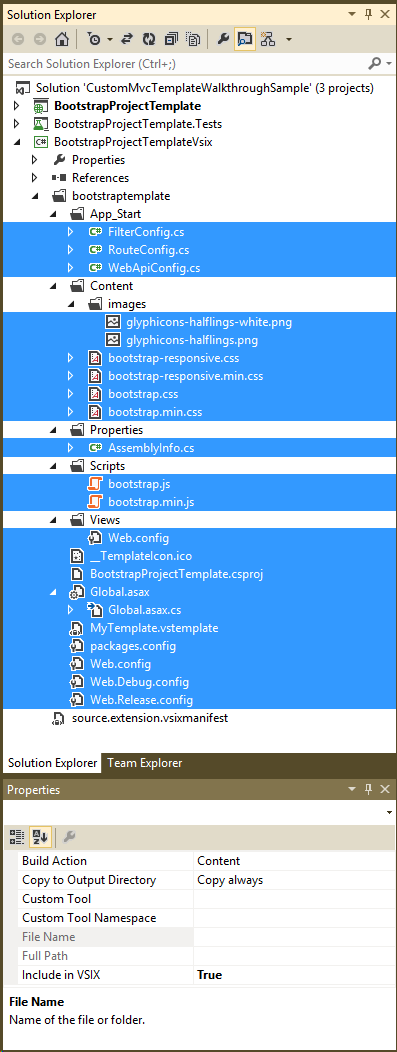
In Visual Studio, select all the files under the bootstraptemplate folder and its sub-folders, and then select Content for “Build Action”, “Copy always” for “Copy to Output Directory”, and True for “Include in
VSIX”.
In Visual Studio, open the source.extension.vsixmanifest with XML (Text) Editor, and then add an <Asset> element to the bootstraptemplate\MyTemplate.vstemplate file as follows:
 <PackageManifest ...>
  <Metadata>
    <Identity Id="BootstrapProjectTemplateVsix.Microsoft Corp..b8ef550f-5967-4e53-ac4e-68850af6ed0b" Version="1.0" Language="en-US" Publisher="Microsoft Corp." />
    <DisplayName>BootstrapProjectTemplateVsix</DisplayName>
    <Description>Empty VSIX Project.</Description>
  </Metadata>
  ...
  <Assets>
    <Asset Type="Microsoft.VisualStudio.Mvc.Templates" d:VsixSubPath="bootstraptemplate" d:Source="File" Path="bootstraptemplate\MyTemplate.vstemplate"
           ProjectType="MVC"
           Language="C#"
           ViewEngine="ASPX"
           TemplateId="bootstraptemplate.v1"
           Title="MVC 4 Bootstrap Template"
           Description="Custom MVC 4 Bootstrap Template"
           Version="4.0"/>
  </Assets>
</PackageManifest>
Add the NuGet package information to the project template file.
In Visual Studio, open the MyTemplate.vstemplate file in the bootstraptemplate folder, and then add the WizardExtenstion element, the WizardData element, and the packages element as follows:
 <VSTemplate ...>
...
  <WizardExtension>
    <Assembly>NuGet.VisualStudio.Interop, Version=1.0.0.0, Culture=neutral, PublicKeyToken=b03f5f7f11d50a3a</Assembly>
    <FullClassName>NuGet.VisualStudio.TemplateWizard</FullClassName>
  </WizardExtension>
  <WizardData>
    <packages>
    </packages>
  </WizardData>
</VSTemplate>
In the MyTemplate.vstemplate file, add the repository attribute and the isPreunzipped attribute to the packages element. If the project template uses only the NuGet packages in “%ProgramFiles%\Microsoft ASP.NET\ASP.NET MVC 4\Packages”, the value of the repository attribute should be registry, and the isPreunizipped attribute should be true.
If the project template uses any other custom NuGet packages such as Bootstrap as in this walkthrough, the value of the repository attribute should be extension, and the isPreunizipped attribute should be false. Also, you should add the repositoryId attribute to the packages, and the value should be same as the value of the ID attribute of the <PackageManifest>/<Metadata>/<Identity> element in the VSIX manifest file (source.extension.vsixmanifest). This walkthrough uses the Bootstrap package, the packages element should look like the following example:
<packages repository="extension" repositoryId="BootstrapProjectTemplateVsix.Microsoft Corp..b8ef550f-5967-4e53-ac4e-68850af6ed0b" isPreunzipped="false">
In the MyTemplate.vstemplate file, under the packages element, add a package element for each NuGet package that the project template uses as follows:
Note – You can copy most of the package elements used in this example from the existing MVC 4 Web Project template from %ProgramFiles%Microsoft Visual Studio 11.0\Common7\IDE\ProjectTemplatesCache. The following sample also has a package element for the Bootstrap package.
     <packages repository="extension" repositoryId="BootstrapProjectTemplateVsix.Microsoft Corp..b8ef550f-5967-4e53-ac4e-68850af6ed0b" isPreunzipped="false">
      <package id="DotNetOpenAuth.AspNet" version="4.0.3.12153" targetFramework="net45" />
      <package id="DotNetOpenAuth.Core" version="4.0.3.12153" targetFramework="net45" />
      <package id="DotNetOpenAuth.OAuth.Consumer" version="4.0.3.12153" targetFramework="net45" />
      <package id="DotNetOpenAuth.OAuth.Core" version="4.0.3.12153" targetFramework="net45" />
      <package id="DotNetOpenAuth.OpenId.Core" version="4.0.3.12153" targetFramework="net45" />
      <package id="DotNetOpenAuth.OpenId.RelyingParty" version="4.0.3.12153" targetFramework="net45" />
      <package id="EntityFramework" version="5.0.0" targetFramework="net45" />
      <package id="jQuery" version="1.7.1.1" targetFramework="net45" />
      <package id="jQuery.UI.Combined" version="1.8.20.1" targetFramework="net45" />
      <package id="jQuery.Validation" version="1.9.0.1" targetFramework="net45" />
      <package id="knockoutjs" version="2.1.0" targetFramework="net45" />
      <package id="Microsoft.AspNet.Mvc" version="4.0.20710.0" targetFramework="net45" />
      <package id="Microsoft.AspNet.Mvc.FixedDisplayModes" version="1.0.0" targetFramework="net45" />
      <package id="Microsoft.AspNet.Razor" version="2.0.20715.0" targetFramework="net45" />
      <package id="Microsoft.AspNet.Web.Optimization" version="1.0.0" targetFramework="net45" />
      <package id="Microsoft.AspNet.WebApi" version="4.0.20710.0" targetFramework="net45" />
      <package id="Microsoft.AspNet.WebApi.Client" version="4.0.20710.0" targetFramework="net45" />
      <package id="Microsoft.AspNet.WebApi.Core" version="4.0.20710.0" targetFramework="net45" />
      <package id="Microsoft.AspNet.WebApi.OData" version="0.2.0-alpha" targetFramework="net45" />
      <package id="Microsoft.AspNet.WebApi.WebHost" version="4.0.20710.0" targetFramework="net45" />
      <package id="Microsoft.AspNet.WebPages" version="2.0.20710.0" targetFramework="net45" />
      <package id="Microsoft.AspNet.WebPages.Data" version="2.0.20710.0" targetFramework="net45" />
      <package id="Microsoft.AspNet.WebPages.OAuth" version="2.0.20710.0" targetFramework="net45" />
      <package id="Microsoft.AspNet.WebPages.WebData" version="2.0.20710.0" targetFramework="net45" />
      <package id="Microsoft.Data.Edm" version="5.1.0-rc2" targetFramework="net45" />
      <package id="Microsoft.Data.OData" version="5.1.0-rc2" targetFramework="net45" />
      <package id="Microsoft.Data.OData.Contrib" version="5.1.0.51016-rc2" targetFramework="net45" />
      <package id="Microsoft.jQuery.Unobtrusive.Ajax" version="2.0.20710.0" targetFramework="net45" />
      <package id="Microsoft.jQuery.Unobtrusive.Validation" version="2.0.20710.0" targetFramework="net45" />
      <package id="Microsoft.Net.Http" version="2.0.20710.0" targetFramework="net45" />
      <package id="Microsoft.Web.Infrastructure" version="1.0.0.0" targetFramework="net45" />
      <package id="Modernizr" version="2.5.3" targetFramework="net45" />
      <package id="Newtonsoft.Json" version="4.5.6" targetFramework="net45" />
      <package id="System.Spatial" version="5.1.0-rc2" targetFramework="net45" />
      <package id="Twitter.Bootstrap" version="2.2.1" targetFramework="net45" />
      <package id="WebGrease" version="1.1.0" targetFramework="net45" />
    </packages>
Add the NuGet packages to the VSIX project.
If you only need the packages under %ProgramFiles%\Microsoft ASP.NET\ASP.NET MVC 4\Packages and the repository attribute of the packages element of the vstemplate file is set to registry, you should skip the rest of the steps. But, because this walkthrough uses the additional NuGet package, Bootstrap, we should add all the actual NuGet package files accessed in the project template to the VSIX project. To do that, in Visual Studio,
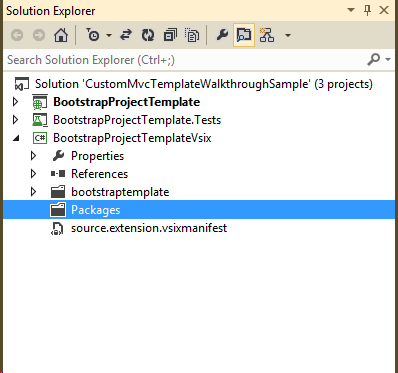
create a folder named ‘Packages’ under the VSIX project folder.
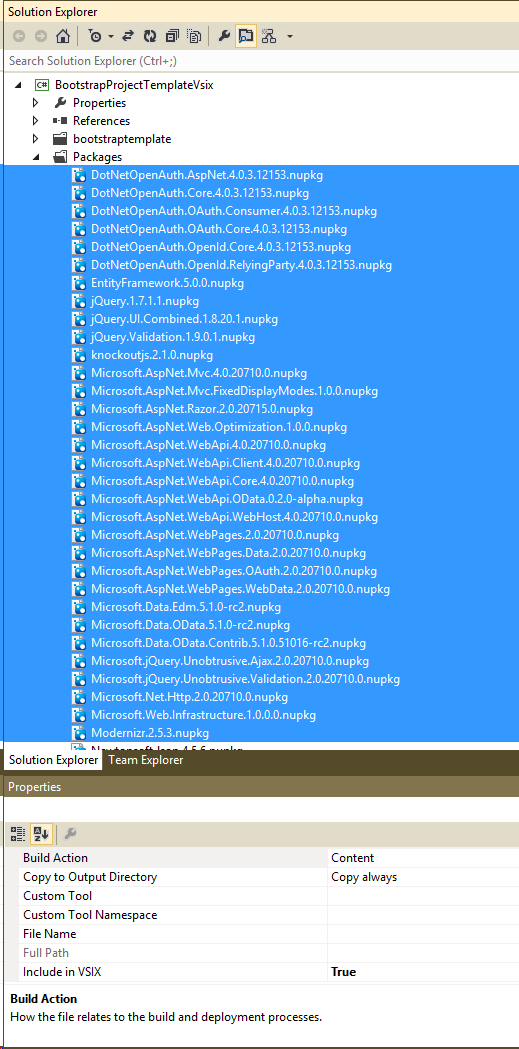
In Visual Studio, right-click the Packages folder, open the Add Existing Item dialog box, change the file filter to All Files (*.*), and then browse to the %ProgramFiles%\Microsoft ASP.NET\ASP.NET MVC 4\Packages, select all the nupkg files that you need. Repeat this step for the Bootstrap package.
In Visual Studio, select all the nupkg files that you just added under the Packages folder, and then choose Content for the Build Action property, “Copy Always” for “Copy to Output Directory”, and True for “Include in VSIX”.
Build the VSIX project, and that’s it!
The final step is build your VSIX project, and test it. After build the VSIX project, you should be able to find the .vsix file under the Debug or the Release folder. Double click the VSIX file to install, and then restart Visual Studio.
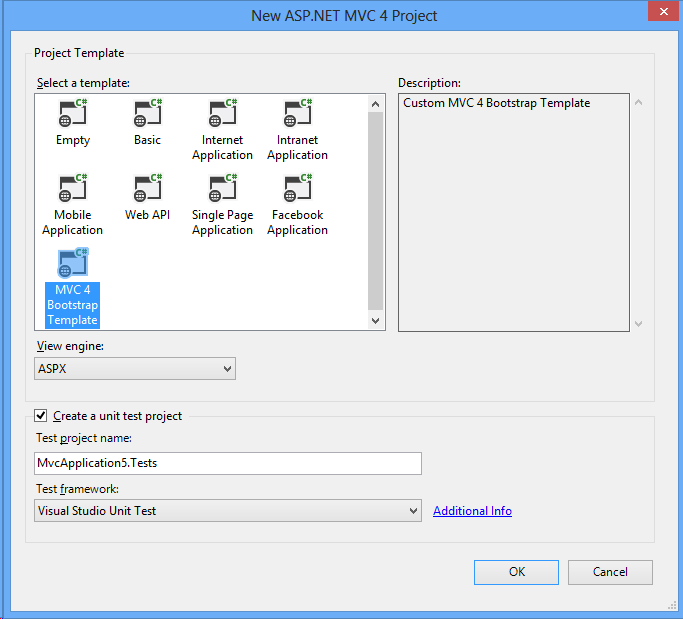
In Visual Studio, create an ASP.NET MVC 4 Web Application, and you should be able to find the new project template in the New ASP.NET MVC 4 Project wizard as follows:
That's it. If you have any comments or questions, let me know.