Seeing Through Your Transparency Problem
The question has been asked several times on the forums as to how you can take an existing bitmap image, bring it into Expression Design, and designate the areas or colors that you want to be transparent, then export as a web-safe file. So let's talk about transparencies and how you accomplish this. Annie Ford has already written up a great blog on how you can take images and merge them together. What I'll be showing you specifically is, step by step, how to render a part of a bitmap image transparent. Then, just for good measure, we'll apply a bitmap effect and I'll show you how to do that also and what the end result looks like on a web page.
So the initial question was - "Can I use Expression Design to make part of my image transparent?" The answer is - "Yes you can." The methodology will differ a bit, depending on the version of Expression you are running (either 1 or 2 at the time of this writing), and that is covered below. So without further ado, let's get started.
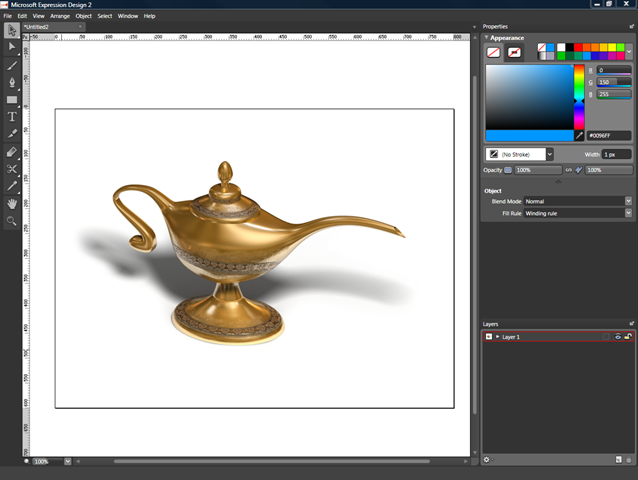
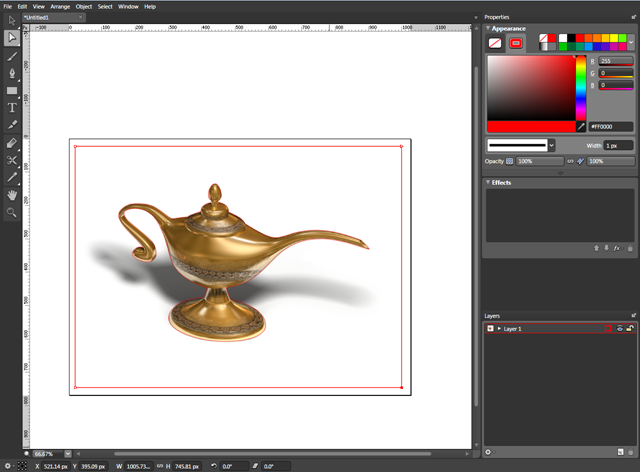
1. First, import an image to which you want to add a transparent section from the File > Import ... menu. In the photo below, the antique lamp is set against a white background with a drop shadow to the back left. Now suppose I really like the lamp but I want to add it to a different color background or I want to create a logo out of it that will sit somewhere on my web page.
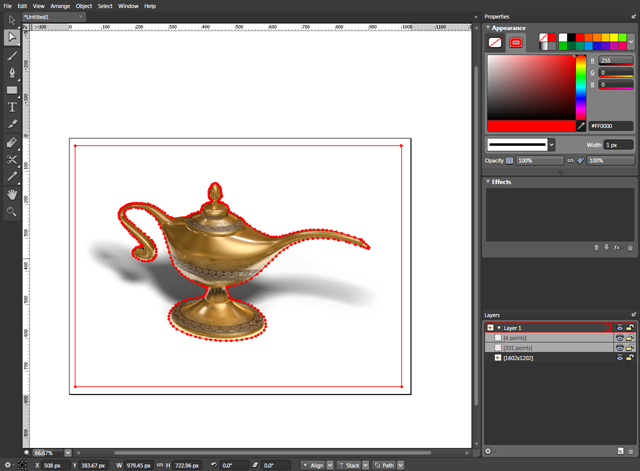
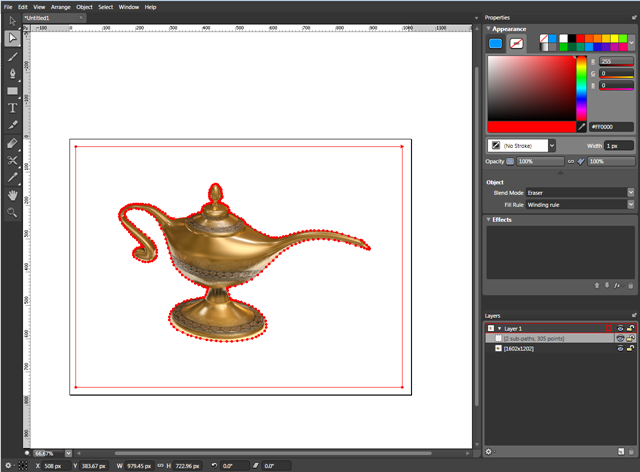
2. Next, I'm going to zoom in and then select the Pen tool  . The idea is to use the pen tool to draw a complete line around the outside of the image I want to be included in the final product. You can also use the Polyline or BSpline tool to draw your line - whichever works for you. In the image below, you can see that I have started the process of outlining the part of the image I want to be included. I just want the lamp and not the background shadow, so my outline will include just the outside of the lamp. I've also set my stroke color to red so it's easy to see where I am drawing my lines.
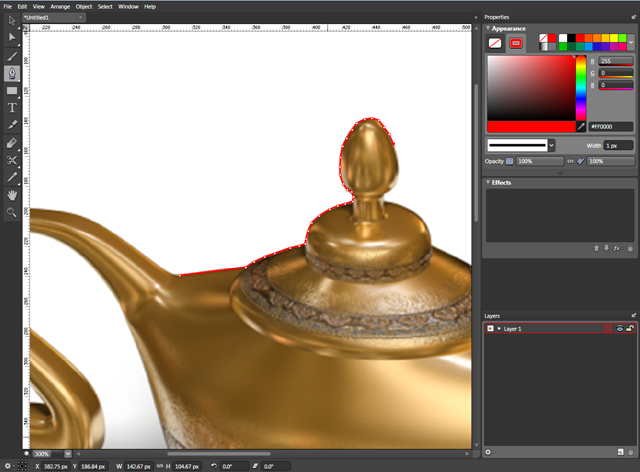
3. When I'm finished outlining the lamp, this is what my workspace looks like, below. It doesn't take that long to outline even a semi-complex object like the lamp. The tightness of the fit to the curves of course will depend on the number of points that you use to connect your lines. And of course the more you zoom in, the more points you can fit in for a finer fit.
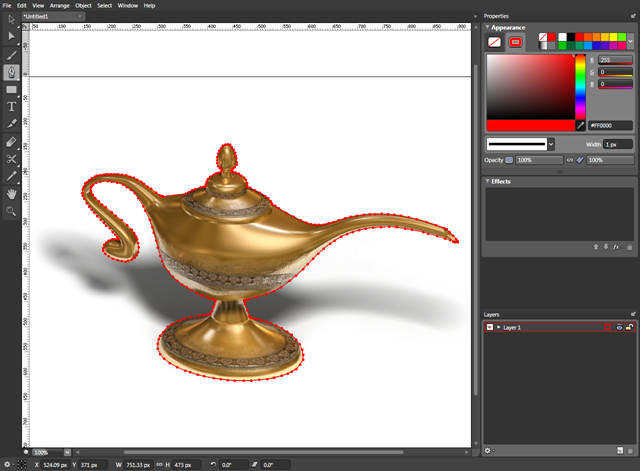
4. Next, still using the Pen tool, we need to define an outline of the outer parameter of the image. The reason we do this is because we want everything between the outline of the lamp and the outer parameter to be transparent. This is pretty easy to do and can be done with as few as four points.
You can see in the image above that we now have two line objects - the rectangle surrounding the image and the outline around the lamp. I suppose you can use the rectangle tool to create a rectangle with no fill to accomplish the second line object. Remember, it's the area between the two line objects that we will be converting to transparency. And don't worry about the rest of the image past the second line object, we will cover that a bit later.
5. Now expand the layer that these line objects exist on and use the SHIFT key to select them both. The below image is what you would see.
6. With both line objects selected, from the menu at the top click Object > Path Operations > Front Minus Back. What you have done is combined the two line objects with the front most object taking precedent.
7. Now apply a fill color, like blue to the already-selected object and set the stroke color to none. The image below is what we end up with.
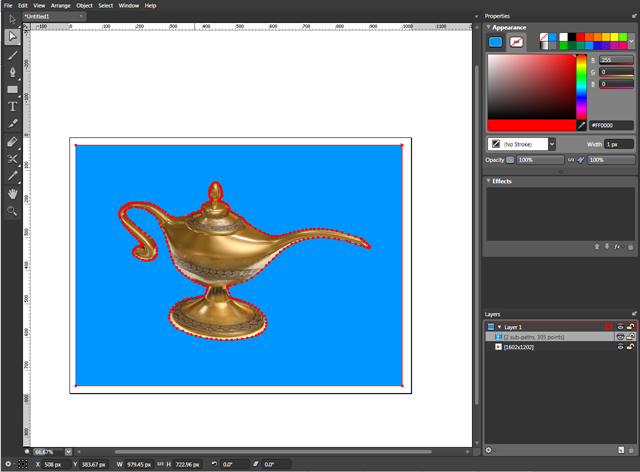
8. The blue area represents the area that will become transparent.
9. On the right side of the work area, click the down arrow under the Opacity setting. This will reveal the Object sub-dialog with Blend Mode and Fill Rule settings available.
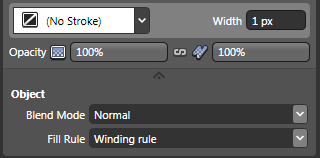
With our combined line object still selected as in the picture of the lamp above (with the blue fill), set the Blend Mode setting to Eraser. Your color fill should turn from blue (or the color you selected) to white, as in the image below.
But also notice that the drop shadow on the lamp has disappeared. This is because we have specified a transparency area and set it accordingly.
10. Now we need to export our image. If you are using Expression Design version 1 there is really only one way I would recommend doing this, and that is by using crop marks. Setting crop marks allows us to tell Expression Design precisely where we want the edges of our image to be when it is exported. Crop marks will export an image to a square or rectangular shape.
To set crop marks, click in the main menu on File > Crop Marks > Set ... The way you set crop marks is you position the mouse at the top left corner of where you want the edge of your image to be, click and hold the left mouse button, then drag down and right to the bottom right corner of where you want the edge of your image to be. When you set your crop marks, they will look like the image below.

Now all you need to do is Export. Click File > Export. On the Save As dialog that appears (Remember this is for Expression Design version 1 users) choose PNG from the file type selector and give the file a name. When you click the Save button, another dialog will appear. Click OK to accept the default values and the file will be saved.
11. Before I move on, I'm going to show another way to export the image, this time for Expression Design version 2 users. In version 2, you have the option to use crop marks, but you can also use the Slicing Tool  . To use, click the slicing tool, select it and then draw a rectangle around the image where you want the edges of your image to be. When finished, you should have a light blue slice over the image like the image below. You will also see a preview of the image in the upper right corner in the Edit Slice palette.
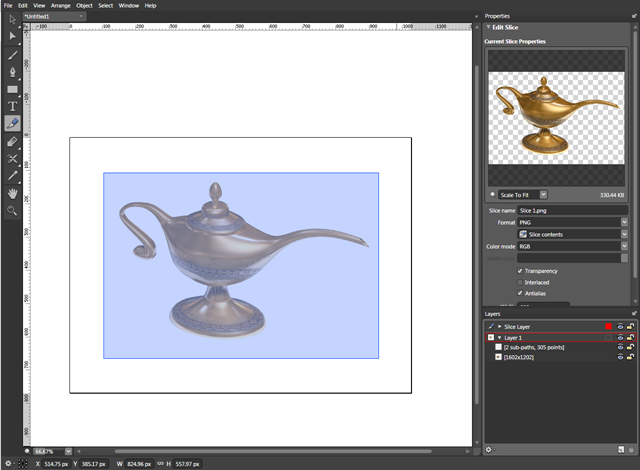
To export from a slice, right click on the slice and left click Export. In the Selected Slice Properties dialog, select PNG as the Format and make sure Slice Contents is set and Color Mode is set to RGB. Also, make sure the Transparency check box is selected. Give the image a name in the Slice Name area. Click the Export All button to export the image.
12. Okay! Now we have an exported PNG file that is transparent where we wanted it to be. At this point you can drop the image onto an HTML page that has a colored or textured background to see the transparency. But I'm going to take this a step further and show you how you can apply a bitmap effect to the exported PNG file and still maintain it's transparency!
13. Open a new Design document and from the main menu at the top, click File > Import. Navigate to where you saved the PNG file, select it and import it.
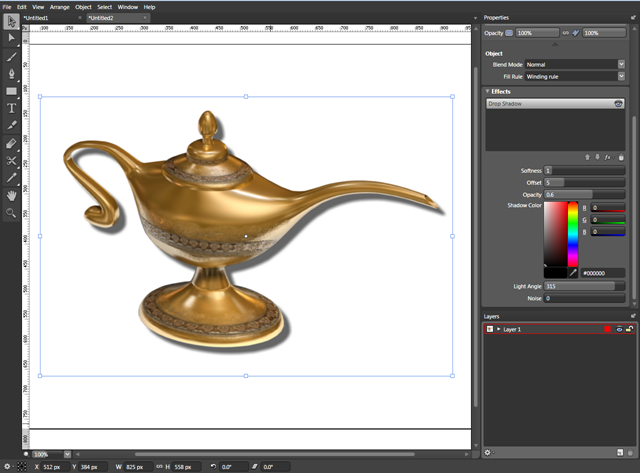
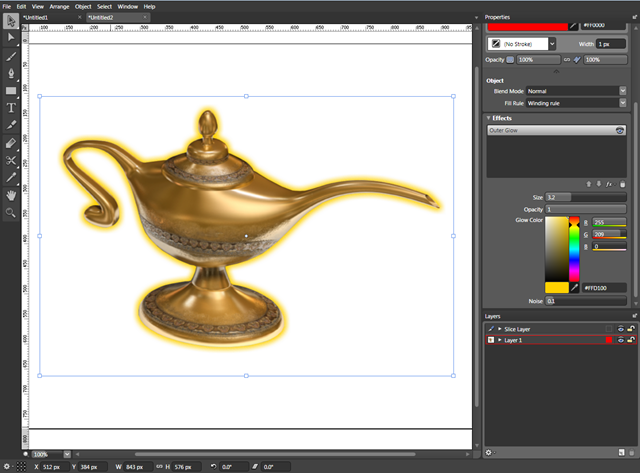
14. With the image selected, you can click in the Effects palette and add a new effect. In the image below, left you can see I added the drop shadow effect and below, right I added the outer glow effect. You might be asking what's the point of adding another drop shadow since I just got rid of another one by using transparencies. Well, the drop shadow in the picture below is different. If you look closely, you can see it's offset to the bottom right of all surfaces of the lamp. But the drop shadow is only one of several effects you can apply. Try playing around with multiple effects to see what they look like.
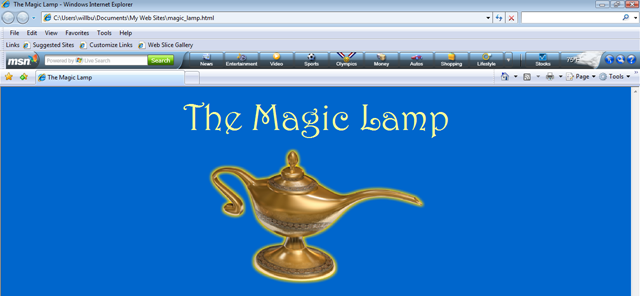
15. So to export the image after you have applied a drop shadow effect or another effect, follow the same instructions given in steps 10 and 11. Use either crop marks or the slice tool. When you export the image, the transparency is automatically maintained, as is the special effect! So now when I apply the image to an HTML page, it looks crisp and clean.