Using Azure Storage for ClickOnce Deployment Windows Desktop application
ClickOnce and Windows Application are not new and so is Microsoft Azure. What appeals to me is the sleek way to distribute the apps across. This does not want any sort of deployment mechanism which enforces a large download and no auto update capability. ClickOnce has many such good features which I am in love since its inception.
Requirement:
- Windows Desktop Application and Visual Studio
- Microsoft Azure Storage Account
- Microsoft Storage Explorer
Assume that you have an Azure account then you need to create a storage account. Once the storage account is created in that you need to create a container. Make that container a "public" container unless it contains specific to a business which you don't want others to view.
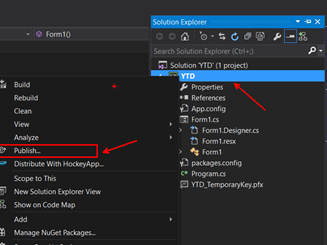
Once that is done come back to your Visual Studio solution and right click and say publish.
Then select a local folder like c:\temp to dump the executables generated by ClickOnce package creation process.
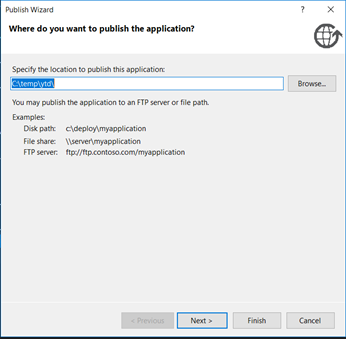
ClickOnce also allows you to select a File share and FTP server. But here we will use local folder. Once you create a container in Azure Storage the URL of that container looks like https://accountName.blobs.core.windows.net/containerName. You need to replace the highlighted ones with your storage account name and container name respectively.
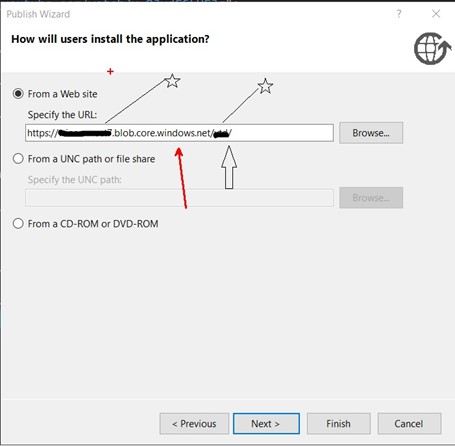
The lines with stars are the places where you will need to put your storage account name and container.
After that using the Microsoft Storage Explorer you can upload both folder and files to the container you have created earlier.
The local folder looks like below. Keep the same structure otherwise ClickOnce deployment will not work.

Publish.htm is your landing page. So you need to open or share this URL https://accountName.blobs.core.windows.net/containerName/publish.htm with people who will install the application.
That's it. Enjoy and have a great day.
Namoskar!!!