Use Transforms and Opacity Masks to Create a Reflection in WPF/E
Reflections are neat. You can use them to create the illusion of depth, transforming a plain white background into a sheet of glossy white glass. In this post, I'll walk you through the process of using a ScaleTransform and an opacity mask to create a reflection in WPF/E.
You'll create a reflection for the following image.

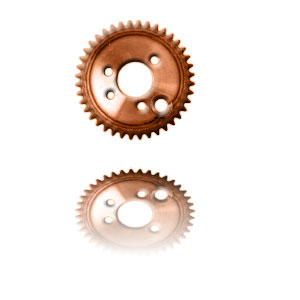
The following illustration shows the completed reflection.

Download the following zip file and extract it: reflection_examples.zip. From the directory where you extracted the file, navigate to the
reflection_examples\reflection_examplesubfolder. It contains four files:aghost.js,gear_large.png,reflection.html, andreflection.xaml.Open the file named
reflection.xaml. It contains the following markup.XAML (reflection.xaml)
<Canvas
xmlns="https://schemas.microsoft.com/client/2007"
xmlns:x="https://schemas.microsoft.com/winfx/2006/xaml"><!-- The object to reflect. -->
<Image Source="gear_large.png"
Canvas.Left="75" Canvas.Top="20">
</Image></Canvas>
To run the sample, open the file named
reflection.htmlin a browser. You should see the following output.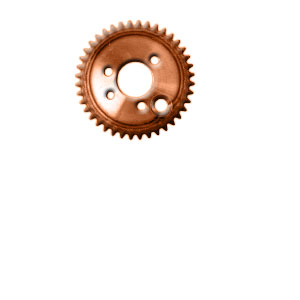
Create a duplicate image to serve as the reflection.
XAML (reflection.xaml)
<Canvas
xmlns="https://schemas.microsoft.com/client/2007"
xmlns:x="https://schemas.microsoft.com/winfx/2006/xaml"><!-- The object to reflect. -->
<Image Source="gear_large.png"
Canvas.Left="75" Canvas.Top="20">
</Image><!-- The reflection. -->
< Image Source= " gear_large.png "
Canvas.Left= " 75 " Canvas.Top= " 20 " >
</ Image></Canvas>
To flip the reflection so that it's upside down, create a ScaleTransform and set its ScaleY property to
-1.XAML (reflection.xaml)
<Canvas
xmlns="https://schemas.microsoft.com/client/2007"
xmlns:x="https://schemas.microsoft.com/winfx/2006/xaml"><!-- The object to reflect. -->
<Image Source="gear_large.png"
Canvas.Left="75" Canvas.Top="20">
</Image><!-- The reflection. -->
<Image Source="gear_large.png"
Canvas.Left="75" Canvas.Top="20">
< Image.RenderTransform >
< ScaleTransformScaleY = " -1 " />
</ Image.RenderTransform >
</Image></Canvas>
When you run the sample, notice that the second image has been flipped almost out of sight.
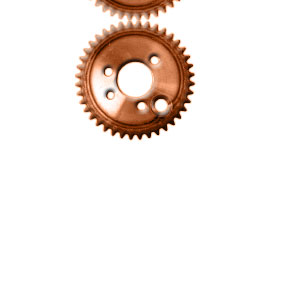
Move the flipped image so that it is below the original image. The most straightforward way to do this is to adjust the Canvas.Top property of the second image.
XAML (reflection.xaml)
<Canvas
xmlns="https://schemas.microsoft.com/client/2007"
xmlns:x="https://schemas.microsoft.com/winfx/2006/xaml"><!-- The object to reflect. -->
<Image Source="gear_large.png"
Canvas.Left="75" Canvas.Top="20">
</Image><!-- The reflection. -->
<Image Source="gear_large.png"
Canvas.Left="75" Canvas.Top= "258" >
<Image.RenderTransform>
<ScaleTransform ScaleY="-1" />
</Image.RenderTransform>
</Image></Canvas>
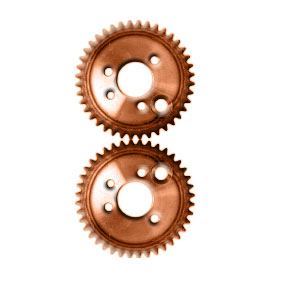
The markup now produces the following output.
Now for some finishing touches. Use an opacity mask to fade the reflected image into the background.
XAML (reflection.xaml)
<Canvas
xmlns="https://schemas.microsoft.com/client/2007"
xmlns:x="https://schemas.microsoft.com/winfx/2006/xaml"><!-- The object to reflect. -->
<Image Source="gear_large.png"
Canvas.Left="75" Canvas.Top="20">
</Image><!-- The reflection. -->
<Image Source="gear_large.png"
Canvas.Left="75" Canvas.Top="258">
<Image.RenderTransform>
<ScaleTransform ScaleY="-1" />
</Image.RenderTransform>
< Image.OpacityMask >
< LinearGradientBrushStartPoint = " 0.5,0.0 " EndPoint = " 0.5,1.0 " >
< GradientStopOffset = " 0.0 " Color = " #00000000 " />
< GradientStopOffset = " 1.0 " Color = " #FF000000 " />
</ LinearGradientBrush >
</ Image.OpacityMask >
</Image></Canvas>
As you can see in the following output, the second image now fades into the background.

Add some distortion to the reflection by changing the ScaleY value of the ScaleTransform from
-1to-0.75.XAML (reflection.xaml)
<Canvas
xmlns="https://schemas.microsoft.com/client/2007"
xmlns:x="https://schemas.microsoft.com/winfx/2006/xaml"><!-- The object to reflect. -->
<Image Source="gear_large.png"
Canvas.Left="75" Canvas.Top="20">
</Image><!-- The reflection. -->
<Image Source="gear_large.png"
Canvas.Left="75" Canvas.Top="258">
<Image.RenderTransform>
<ScaleTransform ScaleY = " -0.75" />
</Image.RenderTransform>
<Image.OpacityMask>
<LinearGradientBrush StartPoint="0.5,0.0" EndPoint="0.5,1.0">
<GradientStop Offset="0.0" Color="#00000000" />
<GradientStop Offset="1.0" Color="#FF000000" />
</LinearGradientBrush>
</Image.OpacityMask>
</Image></Canvas>
The sample now produces the following output. Notice that the reflected image appears to have changed position.
Move the reflected image so that it is just below the original image.
XAML (reflection.xaml)
<Canvas
xmlns="https://schemas.microsoft.com/client/2007"
xmlns:x="https://schemas.microsoft.com/winfx/2006/xaml"><!-- The object to reflect. -->
<Image Source="gear_large.png"
Canvas.Left="75" Canvas.Top="20">
</Image><!-- The reflection. -->
<Image Source="gear_large.png"
Canvas.Left="75" Canvas.Top= "228" >
<Image.RenderTransform>
<ScaleTransform ScaleY="-0.75" />
</Image.RenderTransform>
<Image.OpacityMask>
<LinearGradientBrush StartPoint="0.5,0.0" EndPoint="0.5,1.0">
<GradientStop Offset="0.0" Color="#00000000" />
<GradientStop Offset="1.0" Color="#FF000000" />
</LinearGradientBrush>
</Image.OpacityMask>
</Image></Canvas>
As you can see in the following output, the reflected image is now in the correct position.

For the final finishing touch, make the reflection fade into the background a little bit more by setting its opacity to
0.75.XAML (reflection.xaml)
<Canvas
xmlns="https://schemas.microsoft.com/client/2007"
xmlns:x="https://schemas.microsoft.com/winfx/2006/xaml"><!-- The object to reflect. -->
<Image Source="gear_large.png"
Canvas.Left="75" Canvas.Top="20">
</Image><!-- The reflection. -->
<Image Source="gear_large.png"
Canvas.Left="75" Canvas.Top="228"
Opacity= "0.75" >
<Image.RenderTransform>
<ScaleTransform ScaleY="-0.75" />
</Image.RenderTransform>
<Image.OpacityMask>
<LinearGradientBrush StartPoint="0.5,0.0" EndPoint="0.5,1.0">
<GradientStop Offset="0.0" Color="#00000000" />
<GradientStop Offset="1.0" Color="#FF000000" />
</LinearGradientBrush>
</Image.OpacityMask>
</Image></Canvas>
The following illustration shows the completed reflection.
-m jacobs
Related Topics
- Transforms Overview: Describes how to use WPF/E transforms to scale, skew, translate, and rotate objects.
- Brushes Overview: Describes how to paint with WPF/E brush objects, such as LinearGradientBrush and RadialGradientBrush.