Ask Learn
Preview
Ask Learn is an AI assistant that can answer questions, clarify concepts, and define terms using trusted Microsoft documentation.
Please sign in to use Ask Learn.
Sign inThis browser is no longer supported.
Upgrade to Microsoft Edge to take advantage of the latest features, security updates, and technical support.
Note
Access to this page requires authorization. You can try signing in or changing directories.
Access to this page requires authorization. You can try changing directories.
Reflections are neat. You can use them to create the illusion of depth, transforming a plain white background into a sheet of glossy white glass. In this post, I'll walk you through the process of using a ScaleTransform and an opacity mask to create a reflection in WPF/E.
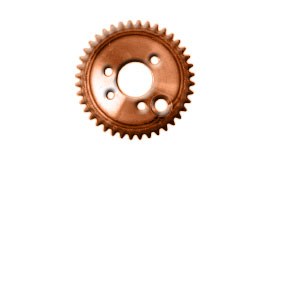
You'll create a reflection for the following image.

The following illustration shows the completed reflection.

Download the following zip file and extract it: reflection_examples.zip. From the directory where you extracted the file, navigate to the reflection_examples\reflection_example subfolder. It contains four files: aghost.js, gear_large.png, reflection.html, and reflection.xaml.
Open the file named reflection.xaml. It contains the following markup.
XAML (reflection.xaml)
<Canvas
xmlns="https://schemas.microsoft.com/client/2007"
xmlns:x="https://schemas.microsoft.com/winfx/2006/xaml">
<!-- The object to reflect. -->
<Image Source="gear_large.png"
Canvas.Left="75" Canvas.Top="20">
</Image>
</Canvas>
To run the sample, open the file named reflection.html in a browser. You should see the following output.
Create a duplicate image to serve as the reflection.
XAML (reflection.xaml)
<Canvas
xmlns="https://schemas.microsoft.com/client/2007"
xmlns:x="https://schemas.microsoft.com/winfx/2006/xaml">
<!-- The object to reflect. -->
<Image Source="gear_large.png"
Canvas.Left="75" Canvas.Top="20">
</Image>
<!-- The reflection. -->
< Image Source= " gear_large.png "
Canvas.Left= " 75 " Canvas.Top= " 20 " >
</ Image>
</Canvas>
To flip the reflection so that it's upside down, create a ScaleTransform and set its ScaleY property to -1.
XAML (reflection.xaml)
<Canvas
xmlns="https://schemas.microsoft.com/client/2007"
xmlns:x="https://schemas.microsoft.com/winfx/2006/xaml">
<!-- The object to reflect. -->
<Image Source="gear_large.png"
Canvas.Left="75" Canvas.Top="20">
</Image>
<!-- The reflection. -->
<Image Source="gear_large.png"
Canvas.Left="75" Canvas.Top="20">
< Image.RenderTransform >
< ScaleTransformScaleY = " -1 " />
</ Image.RenderTransform >
</Image>
</Canvas>
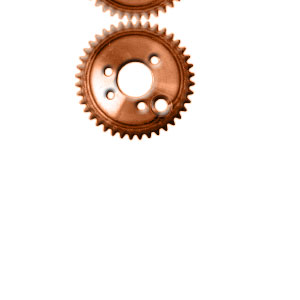
When you run the sample, notice that the second image has been flipped almost out of sight.
Move the flipped image so that it is below the original image. The most straightforward way to do this is to adjust the Canvas.Top property of the second image.
XAML (reflection.xaml)
<Canvas
xmlns="https://schemas.microsoft.com/client/2007"
xmlns:x="https://schemas.microsoft.com/winfx/2006/xaml">
<!-- The object to reflect. -->
<Image Source="gear_large.png"
Canvas.Left="75" Canvas.Top="20">
</Image>
<!-- The reflection. -->
<Image Source="gear_large.png"
Canvas.Left="75" Canvas.Top= "258" >
<Image.RenderTransform>
<ScaleTransform ScaleY="-1" />
</Image.RenderTransform>
</Image>
</Canvas>
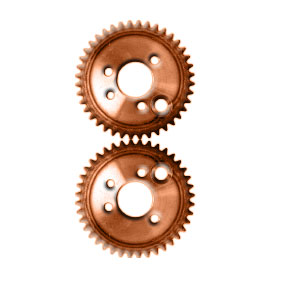
The markup now produces the following output.
Now for some finishing touches. Use an opacity mask to fade the reflected image into the background.
XAML (reflection.xaml)
<Canvas
xmlns="https://schemas.microsoft.com/client/2007"
xmlns:x="https://schemas.microsoft.com/winfx/2006/xaml">
<!-- The object to reflect. -->
<Image Source="gear_large.png"
Canvas.Left="75" Canvas.Top="20">
</Image>
<!-- The reflection. -->
<Image Source="gear_large.png"
Canvas.Left="75" Canvas.Top="258">
<Image.RenderTransform>
<ScaleTransform ScaleY="-1" />
</Image.RenderTransform>
< Image.OpacityMask >
< LinearGradientBrushStartPoint = " 0.5,0.0 " EndPoint = " 0.5,1.0 " >
< GradientStopOffset = " 0.0 " Color = " #00000000 " />
< GradientStopOffset = " 1.0 " Color = " #FF000000 " />
</ LinearGradientBrush >
</ Image.OpacityMask >
</Image>
</Canvas>
As you can see in the following output, the second image now fades into the background.

Add some distortion to the reflection by changing the ScaleY value of the ScaleTransform from -1 to -0.75.
XAML (reflection.xaml)
<Canvas
xmlns="https://schemas.microsoft.com/client/2007"
xmlns:x="https://schemas.microsoft.com/winfx/2006/xaml">
<!-- The object to reflect. -->
<Image Source="gear_large.png"
Canvas.Left="75" Canvas.Top="20">
</Image>
<!-- The reflection. -->
<Image Source="gear_large.png"
Canvas.Left="75" Canvas.Top="258">
<Image.RenderTransform>
<ScaleTransform ScaleY = " -0.75" />
</Image.RenderTransform>
<Image.OpacityMask>
<LinearGradientBrush StartPoint="0.5,0.0" EndPoint="0.5,1.0">
<GradientStop Offset="0.0" Color="#00000000" />
<GradientStop Offset="1.0" Color="#FF000000" />
</LinearGradientBrush>
</Image.OpacityMask>
</Image>
</Canvas>
The sample now produces the following output. Notice that the reflected image appears to have changed position.
Move the reflected image so that it is just below the original image.
XAML (reflection.xaml)
<Canvas
xmlns="https://schemas.microsoft.com/client/2007"
xmlns:x="https://schemas.microsoft.com/winfx/2006/xaml">
<!-- The object to reflect. -->
<Image Source="gear_large.png"
Canvas.Left="75" Canvas.Top="20">
</Image>
<!-- The reflection. -->
<Image Source="gear_large.png"
Canvas.Left="75" Canvas.Top= "228" >
<Image.RenderTransform>
<ScaleTransform ScaleY="-0.75" />
</Image.RenderTransform>
<Image.OpacityMask>
<LinearGradientBrush StartPoint="0.5,0.0" EndPoint="0.5,1.0">
<GradientStop Offset="0.0" Color="#00000000" />
<GradientStop Offset="1.0" Color="#FF000000" />
</LinearGradientBrush>
</Image.OpacityMask>
</Image>
</Canvas>
As you can see in the following output, the reflected image is now in the correct position.

For the final finishing touch, make the reflection fade into the background a little bit more by setting its opacity to 0.75.
XAML (reflection.xaml)
<Canvas
xmlns="https://schemas.microsoft.com/client/2007"
xmlns:x="https://schemas.microsoft.com/winfx/2006/xaml">
<!-- The object to reflect. -->
<Image Source="gear_large.png"
Canvas.Left="75" Canvas.Top="20">
</Image>
<!-- The reflection. -->
<Image Source="gear_large.png"
Canvas.Left="75" Canvas.Top="228"
Opacity= "0.75" >
<Image.RenderTransform>
<ScaleTransform ScaleY="-0.75" />
</Image.RenderTransform>
<Image.OpacityMask>
<LinearGradientBrush StartPoint="0.5,0.0" EndPoint="0.5,1.0">
<GradientStop Offset="0.0" Color="#00000000" />
<GradientStop Offset="1.0" Color="#FF000000" />
</LinearGradientBrush>
</Image.OpacityMask>
</Image>
</Canvas>
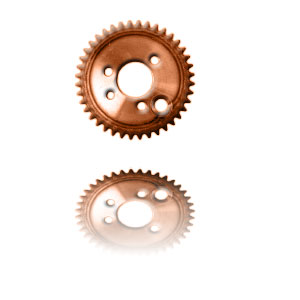
The following illustration shows the completed reflection.
-m jacobs
Anonymous
January 09, 2007
The good folks that created the WPF/E SDK and documentation have a blog and it is a great source of information
Anonymous
January 17, 2007
If you're doing WPF/E development, you should check out the WPF/E Developer Content Blog . On that blog
Anonymous
January 18, 2007
If you're doing WPF/E development, you should check out the WPF/E Developer Content Blog. On that blog...
Anonymous
January 24, 2007
I read a great artice about Use Transforms and Opacity Masks to Create a Reflection in WPF/E and tried
Anonymous
January 24, 2007
I have added a animation for the gears...
http://weblogs.asp.net/mschwarz/archive/2007/01/24/transforms-opacity-masks-and-animation-to-create-an-animated-reflection-in-wpf-e.aspx
Anonymous
January 25, 2007
Michael Schwarz , AJAX MVP and creator of the WPF/E google group has posted about extending the SDK team's
Anonymous
January 25, 2007
First the SDK team created an article about generating reflections in WPF/E . Then today I read [via
Anonymous
January 25, 2007
As you may have read on my blog I have added an animation to the gear example from Mike Harsh. Now, the
Anonymous
January 26, 2007
After reading about Bryant's CS Module , I figured I had to try something. Since I'm running a .NET 1.1
Ask Learn is an AI assistant that can answer questions, clarify concepts, and define terms using trusted Microsoft documentation.
Please sign in to use Ask Learn.
Sign in