Domain Joining Windows Azure roles
Windows Azure Connect supports domain joining Windows Azure role instances (i.e. the Virtual Machines on which your role runs) to an on-premises Active Directory. This opens up many scenarios such as logging in to Windows Azure role instances using domain accounts, connecting to an on-premises SQL server using Windows Integrated Auth, and migrating Line of Business (LOB) applications to the cloud that assume a domain-joined environment. This blog post provides a step-by-step walk through of how to domain join Windows Azure roles using Windows Azure Connect.
0. If you are new to Windows Azure Connect and haven’t used it before, please read this tutorial to learn the basics about Connect.
1. First you need to prepare your domain for Connect.
a) In the current CTP release, Connect requires a domain controller with an AD-integrated DNS server running on the same machine
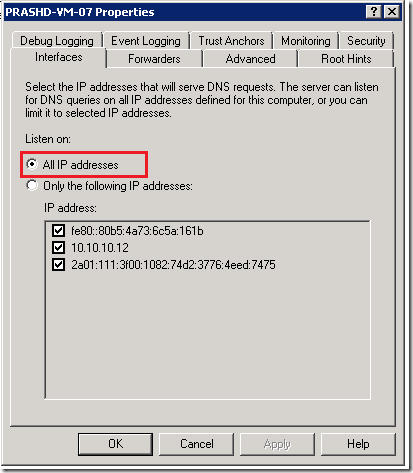
b) The DNS server should be configured to listen on all IP address. You can verify this by going to DNS Manager, right click on your server -> Properties, as shown in the below dialog.
c) We recommend you create a separate Organization Unit (OU) in Active Directory for your Windows Azure Role instances so that they can be easily managed. This step is optional, if you don’t specify an OU in the Connect plug-in settings, Azure Role instances will join the default computers container in AD.
d) In the Connect plug-in settings, you will need to specify a domain user account with permission to join machines to the domain and (optionally) the OU described above.
e) You will need to encrypt the password for this user account.
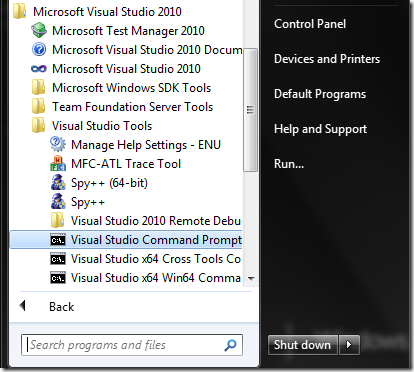
- Start the Visual Studio Command Prompt as Administrator
- Create a certificate by typing the following command, provide your own CN value and certificate file name in the highlighted area.
makecert -sky exchange -r -n "CN=MyEncryptionCert" -pe -a sha1 -len 2048 -ss My -sr localMachine "MyEncryptionCert.cer"
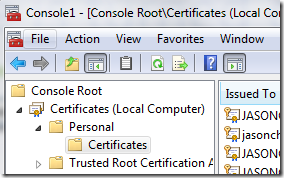
- After creating the certificate, you will need to export it. Open mmc snap-in for certificates -> Computer Account -> Personal -> Certificates. Find the certificate you just created, right click on the certificate -> All tasks -> Export -> Check Export private key -> enter a password -> follow through the wizard
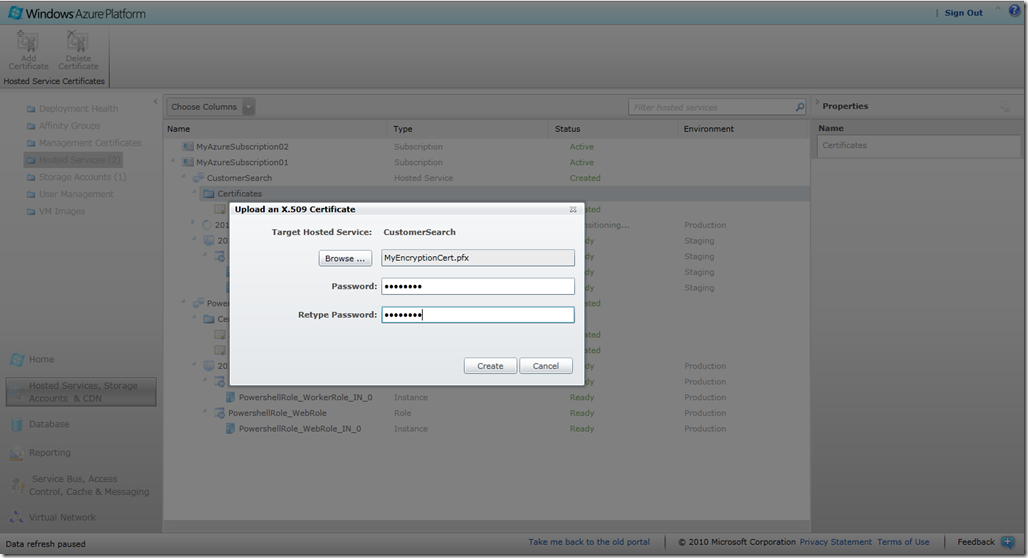
- Sign in to the Windows Azure portal, click on “Hosted Services, Storage account and CDN” on the left side, then select the “Hosted Services (n)” node. Under your Azure subscription, select the Azure service you are working on, select “Certificates”, then click “Add Certificate” on the tool bar. In the pop-up, select the certificate you just exported, provide the password for the certificate, and click on “Create”.
- In Visual Studio, go to the Property page of the Role you are domain joining. Click the “Certificate” tab, then “Add Certificate”. Select “LocalMachine” as the Store Location, and “My” as Store Name, and choose the certificate you created in the previous step.
- Now that you have prepared a certificate for encrypting your domain password, the next step is to actually encrypt it. Open notepad.exe, copy the script below into the notepad, change my_password (highlighted below) to the password you want to use.
$password = "
my_password
 "
$certs = dir cert:\LocalMachine\My
[System.Reflection.Assembly]::LoadWithPartialName("System.Security") | Out-Null
$collection = New-Object System.Security.Cryptography.X509Certificates.X509Certificate2Collection
$certs | ForEach-Object { $collection.Add($_) } | Out-Null
$cert = [System.Security.Cryptography.x509Certificates.X509Certificate2UI]::SelectFromCollection($collection, "", "Select a certifciate", 0)
$thumbprint = $cert[0].thumbprint
$pass = [Text.Encoding]::UTF8.GetBytes($password)
$content = new-object Security.Cryptography.Pkcs.ContentInfo -argumentList (,$pass)
$env = new-object Security.Cryptography.Pkcs.EnvelopedCms $content
$env.Encrypt((new-object System.Security.Cryptography.Pkcs.CmsRecipient(gi cert:\LocalMachine\My\$thumbprint)))
write-host "Writing encrypted password, cut/paste the text below the line to CSCFG file"
[Convert]::ToBase64String($env.Encode()) | Out-File .\encrypted_password.txt
Invoke-Item ".\encrypted_password.txt"
- Launch a Windows Powershell console, copy and paste the modified script to the Powershell window and run it. Choose the certificate you just created when prompted. This script will output your encrypted password, for example:
MIIBDQYJKoZIhvcNAQcDoIH/MIH8AgEAMYHBMIG+AgEAMCcwEzERMA8GA1UEAxMIUFJBU0hBTlQCEJ00PIqEIdO0TksyqpDloL4wDQYJKoZIhvcNAQEBBQAEgYCPLv216vYMWnf/y1Q2jfGxopRwwSscpYlpvfH92c8S2MQ1JRUEe+urhZ9+GLmtuinUSlCu3gfov+NyNdaTLNps+7NO+y1uHd9qqhGB4tDqoDvxN5yyQa7pfAs8QiVL3lPWZhW0fO2VAmTPNuv5Q0JiJcXUSENngDxMm8+0EMubZjAzBgkqhkiG9w0BBwEwFAYIKoZIhvcNAwcECI2FhKjyfBKBgBDh89w0B7z6zEQp/bhRGMw2
You will use the encrypted password in the next step.
2. Next you need to enable your Windows Azure role for Connect (see steps listed in this tutorial) and configure it for domain-joining, by providing the domain join settings in your ServiceConfiguration.cscfg file. These settings are listed below.
Settings |
Description |
Required |
<Setting name="Microsoft.WindowsAzure.Plugins.Connect.EnableDomainJoin" value="true" /> |
Set “EnableDomainJoin” to true if you would like domain join Windows Azure role instances to on-premise AD. |
Yes |
<Setting name="Microsoft.WindowsAzure.Plugins.Connect.DomainFQDN" value="corp.contoso.com" /> |
Set “DomainFQDN” to the fully qualified domain name of which your role instances need to join (see highlighted example). |
Yes |
<Setting name="Microsoft.WindowsAzure.Plugins.Connect.DomainControllerFQDN" value="myDC.corp.contoso.com" /> |
Optionally, you can set “DomainControllerFQDN” to the fully qualified domain name of the domain controller (see highlighted example). |
No |
<Setting name="Microsoft.WindowsAzure.Plugins.Connect.DomainAccountName" value="corp\testuser" /> |
Set “DomainAccountName” to the domain account that has permission to domain join Windows Azure role instances (see highlighted example). |
Yes |
<Setting name="Microsoft.WindowsAzure.Plugins.Connect.DomainPassword" value="MIIBFwYJKoZIhvcNAQcDoIIBCDCCAQQCAQAxgckwgcYCAQAwLzAbMRkwFwYDVQQDExBNeUVuY3J5cHRpb25DZXJ0AhCTEsiJ0zzrjktvASTLQh7qMA0GCSqGSIb3DQEBAQUABIGABGQW6efUv3fpewvgCcqxqfzJu5gmlUqXPg60aggvDeBYwyPL6xVqZ9DZYiYxbBmHSjJgzrIrLY+rP3EMtV/8G4f6hvyewasWvJgMe2vzwcMGSKqixcIRnCLuLov7zLgCsYylzZ1h4j/SIf0gUBtwC1leW4C07z+KtQb8fdDbi5wwMwYJKoZIhvcNAQcBMBQGCCqGSIb3DQMHBAiyEoiHBP8V8YAQ2PN+j2uY07qpS93N15uQkA==" /> |
Set “DomainPassword” to the encrypted password you got in previous step (see highlighted example). |
Yes |
<Setting name="Microsoft.WindowsAzure.Plugins.Connect.DNSServers" value="myDC.corp.contoso.com" /> |
Set “DNSServers” to the fully qualified domain name of the domain controller (see highlighted example). |
Yes |
<Setting name="Microsoft.WindowsAzure.Plugins.Connect.DomainOU" value="OU=AzureMachines,DC=corp,DC=contoso,DC=com" /> |
Optionally, you can specify an OU container for your Azure role instances to join (see highlighted example). |
No |
<Setting name="Microsoft.WindowsAzure.Plugins.Connect.Administrators" value="corp\user1, corp\group1" /> |
Optionally, you can specify existing on-premise AD users and groups (as a comma separated list) to add to the local Administrators group for your Azure role instances (see highlighted example). |
No |
<Setting name="Microsoft.WindowsAzure.Plugins.Connect.DomainSiteName" value="" /> |
Reserved for future use. Leave the value as an empty string. |
No |
Now that your Windows Azure roles is enabled for domain join, you can deploy it to Windows Azure. Once your Windows Azure role is successfully deployed and they are running in a “Ready” state, you should be able to see the role instances in the Connect portal (To enter the Connect portal, click the “Virtual Network” tab in the Azure portal, and then select the Windows Azure subscription that you want to use for Connect)
3. Next install the Connect endpoint software on the Domain Controller (see steps listed in this tutorial if this is new to you).
4. Using the Connect portal, create a local machine group, which is connected to the Windows Azure Roles that you wish to domain join and has the Domain Controller as a member (see steps listed in this tutorial if this is new to you).
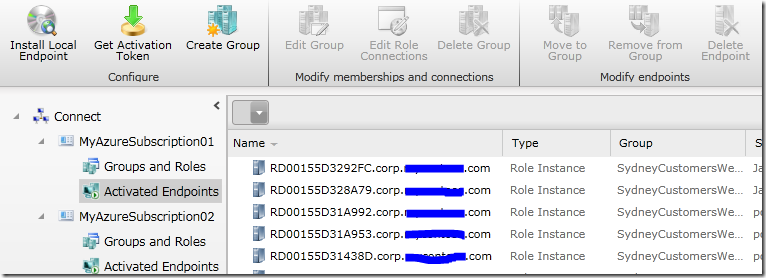
Once the “connection” is created between the Windows Azure role and the local group with the Domain Controller, within a few minutes you should see that the Windows Azure role instances are domain joined. You can tell if this has happened because the role instance names in the Connect portal will have domain suffixes (e.g. RD00155D3292FC.corp.mydomain.com).
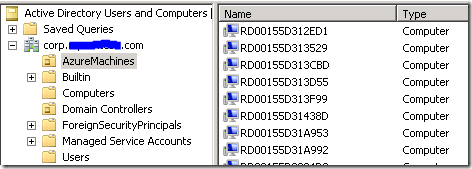
You should also see that the Windows Azure instances have been added as new computers in your Active Directory. In the screenshot below the Windows Azure instances were configured to join an OU “AzureMachines” in Active Directory.
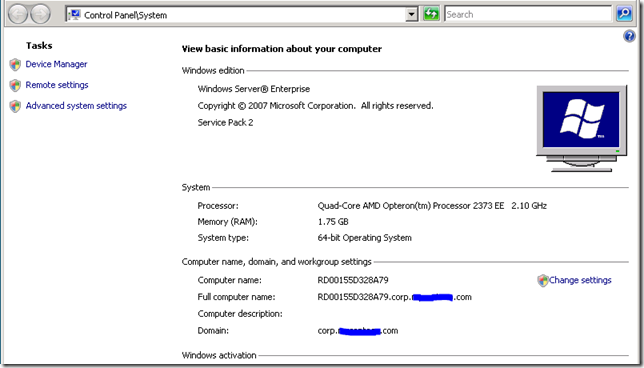
You can verify that your role instances are actually domain-joined. For example, using the Remote Access feature in the Windows Azure portal, you can log into a role instance using a domain user account that was added to the Administrators group for your role. You can then view Computer Properties to confirm that the role instance is indeed domain-joined, as shown in the screenshot below.
Note: if you configured Active Directory to apply Group Policy to your domain-joined Windows Azure instances, please make sure that the Group Policy does not configure a proxy server that is not reachable by Windows Azure. This will ensure that your domain-joined role instances continue to work with Windows Azure Connect; otherwise they may lose connectivity.
--Jason Chen
