Creating and using a Virtual CEPC
Posted By David Campbell
Program Manager
I’ve seen a number of questions in some of the forums about how to get started with Windows Embedded Compact from the perspective of running (hosting) the actual OS image created with Platform Builder (PB). PB makes it easy to design and create an embedded OS image, but you still need to be able to load and execute that image – typically on a piece of hardware.. Virtual PCs are great as a Windows Embedded Compact development tool since they don’t actually require new hardware. Virtual machine use with Windows Embedded Compact really falls into two categories: hosting an OS image and hosting PB itself. The one I’ll cover today is hosting an embedded OS image, built with PB, in a Virtual PC rather than on an actual device.
Any you know, Windows Embedded Compact supports x86 in addition to other chipsets. x86 images are convenient as hardware is readily available. In fact, most people use old PCs as “CEPCs”. CEPCs have advantages like:
- They’re easy to get (you probably have an old PC kicking around).
- They’re relatively easy to get set up.
- They’re easy to configure since the defaults in PB pretty much all align.
- They give you a full “device experience” with the tools which is more aligned with how you would interact with your custom hardware when the time comes.
However, there are times when a PC isn’t available. Using a Virtual PC in this situation is both good and bad. It’s easy to get a modern PC setup to host a virtual machine, it’s quite common in fact, but a Virtual PC was not the default target in many cases in PB, so it requires some extra work to properly configure the OS image. We’ll walk through setting up a Virtual PC to host an OS image here today. Much of this is covered in other documents, such as Getting Started with Virtual CEPC and Advanced Virtual CEPC. Part of my motive for this blog is to make you aware of information available from other diverse sources and tie them together. Thanks to people who’ve done work on this and related topics; including Jon Wallace, Mark McLemore and others.
In a future post, I’ll cover hosting PB itself in a Virtual PC, which lots of people do in order to manage versions (OS and PB), custom settings, etc. That’s a little easier to set up so I’ll cover the more complex one first. In order to do so, this post is going to be a little long and will have quite a few pictures. I’ll try to explain the “why” part of some of the requirements, but not in great detail – both to keep this relatively manageable and to get you up and running without all those extra words. J
Image Hosting on Virtual CEPC
Our goal is to be able to create an OS Image for Virtual PC that will be persistent (does not need to be pushed down from platform builder each time).
Requirements
Please ensure all of the following are installed on the PC you will use to host the Virtual PC:
- Windows 7
- Virtual PC
- Visual Studio 2008 SP1 with the Smart Device Programmability feature enabled
- Windows Embedded Compact 7
- CoreCon4CE (https://corecon4ce.codeplex.com/)
- AutoLaunch4CE (https://autolaunch4ce.codeplex.com/)
- Windows Embedded CE DiskPrep PowerToy (https://archive.msdn.microsoft.com/DiskPrep)
Creating the OS Design
Create a new OS Design
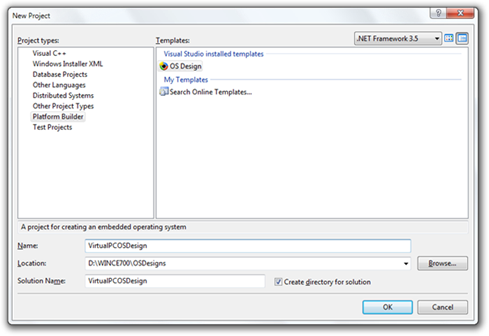
1. Create a new OS Design Project by starting Visual Studio 2008 and clicking New Project on the File Menu. The New Project dialog box will open.
2. Click Platform Builder in the Project Types pane, then click OS Design in the Templates pane and click OK. The Create an OS Design wizard will open.
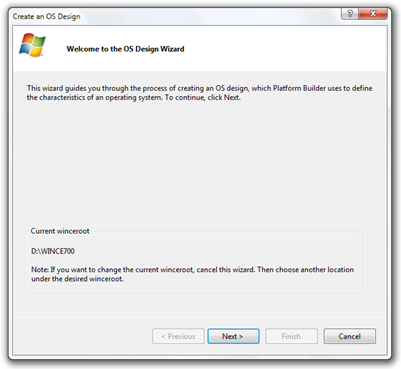
3. On the Welcome page, click Next .
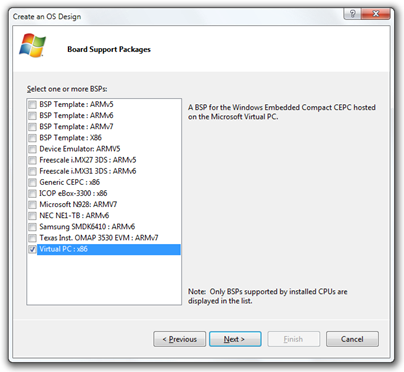
4. On the Board Support Packages page, select the Virtual PC: x86 Board Support Package check box and click Next.
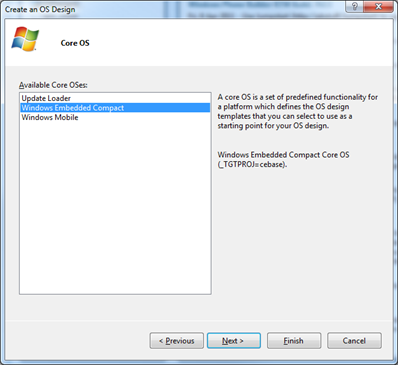
5. On the Core OS page, select Windows Embedded Compact and click Next.
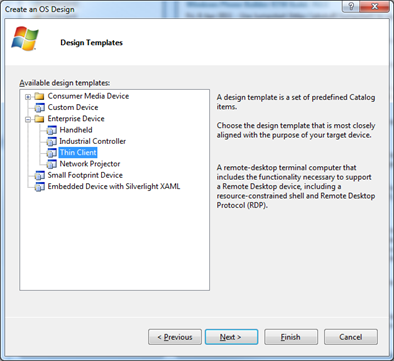
6. On the Design Templates page, select a design template. In this example we're using the Enterprise Thin Client template.
7. Either click Next to further customize the image
or
Click Finish and accept the defaults.
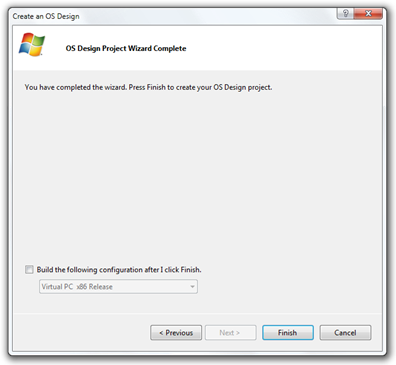
8. On the OS Design Project Wizard Complete page, click Finish. Do not select the Build the following configuration after I click Finish checkbox as there are a few more things we’ll need to configure before we build the OS.
You may be asked to acknowledge the inclusion of a component with potential security implications, depending on the options you’ve chosen. Review the information provided and Acknowledge to continue.
Customize Settings
At this point you have to customize a few settings since there are some differences in the support for different versions of the Virtual PC host.
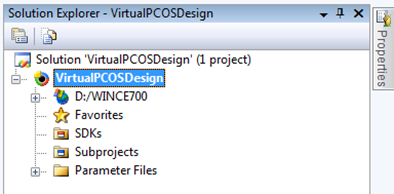
1. After Visual Studio loads the new project, in Solution Explorer, right-click the OS Design project and click Properties.
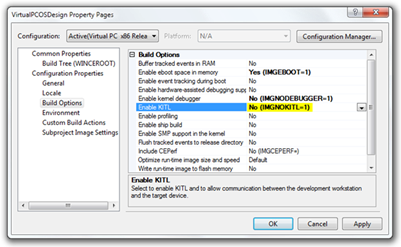
2. On the Property Pages dialog box, select Build Options in the Configuration Properties section. In the settings pane, change the value for Enable KITL to No.
3. Click OK to close the Properties dialog.
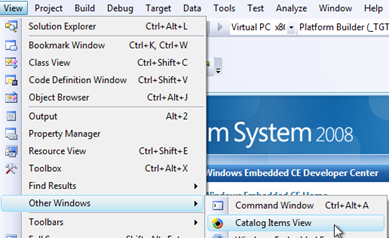
4. Now locate Visual Studio’s Catalog Items View window. This may be docked to the Solution Explorer pane. If not, you can open it by clicking Other Windows on the View menu, then clicking Catalog Items View.
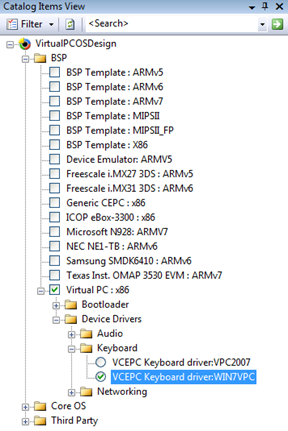
5. In the Catalog Items View window, navigate to BSP, Virtual PC : x86, Device Drivers, Keyboard and select the VCEPC Keyboard driver: WIN7VPC check box.
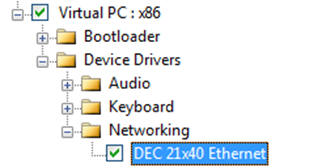
6. Navigate to BSP, Virtual PC: x86, Networking and select the DEC 21x40 Ethernet check box.
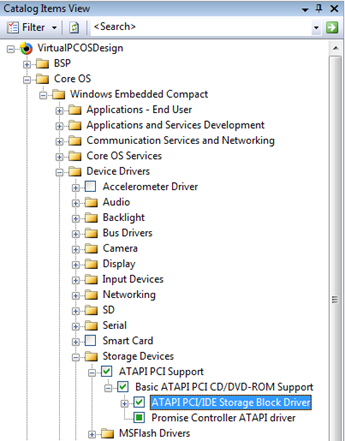
7. Navigate to BSP, Core OS, Windows Embedded Compact, Device Drivers, Storage Devices and select the ATAPI PCI Support, Basic ATAPI PCI CD/DVD-ROM Support, and ATAPI PCI/IDE Storage Block Driver check boxes.
8. Finally, build the OS Design by clicking Rebuild Solution on the Build menu.
Building the first time will take a few minutes, depending on machine speed and, especially, disk speed.
Loading the OS Image in Virtual PC
Create a VHD file
In your project output directory (e.g. [Drive]\WINCE700\OSDesigns\VirtualPCOSDesign\VirtualPCOSDesign\RelDir\VirtualPC_x86_Release), look for a file called nk.bin. This is the OS image file. The next step will be to deploy this image file to a virtual hard disk (VHD).
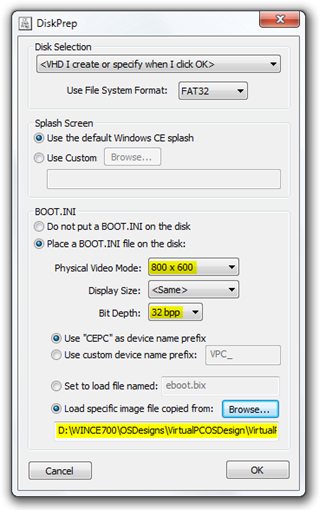
1. Launch the Windows Embedded CE DiskPrep PowerToy tool and, on the DiskPrep page, specify the options as shown below. In particular, select a display resolution and click Browse on the Load specific image file copied from field, then navigate to the location of your nk.bin file. When complete, click OK to continue.
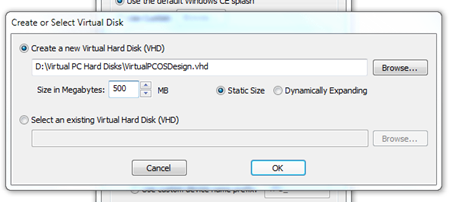
2. On the Create or Select Virtual Disk page, specify the location of the VHD file to create and the size of the VHD. Make sure the VHD is large enough for your image and storage. I choose a rather large number since this is just for testing. This will be chosen based on your nk.bin size. In my case, my nk.bin file is about 20MB, so 32MB would work.
3. Click OK to generate the VHD file.
Create a virtual machine and start the operating system
1. Click the Start button, then click Menu, All Programs, Windows Virtual PC and click Windows Virtual PC.
2. On the toolbar, click Create virtual machine.
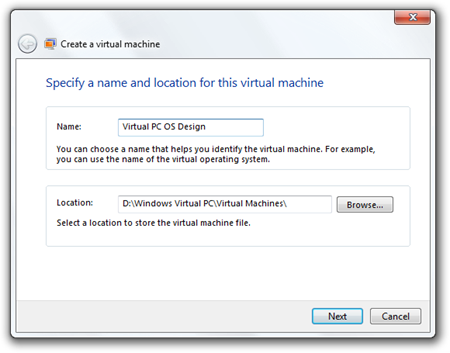
3. In the Specify a name and location fo this virtual machine page, enter your desired name and location, then click Next.
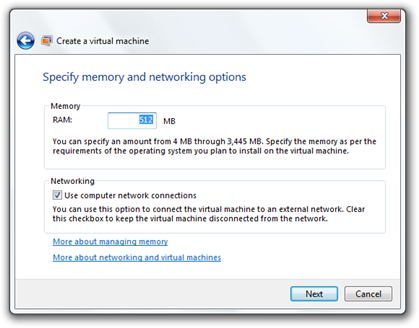
4. On the Specify memory and network options page, enter the amount of RAM to dedicate to the virtual machine and ensure that the Use computer network connections check box is selected. Then click Next.
Again, I chose to create this virtual machine larger than I need but it’s guaranteed to be enough. In my case, the image works fine with only 32MB.
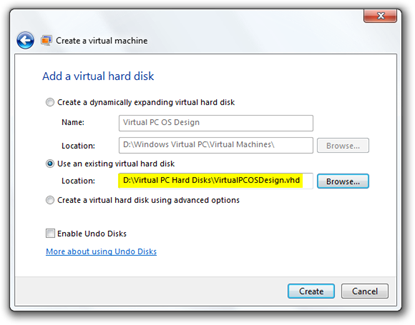
5. On the Add a virtual hard disk page, select the Use an existing virtual hard disk check box and enter or browse to the location of the vhd file that you created using the DiskPrep PowerToy tool. Then click Create to complete the creation.
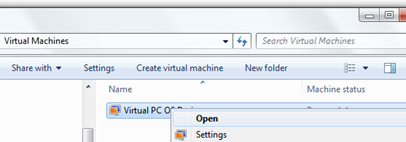
6. Right-click the new virtual machine and click Open.
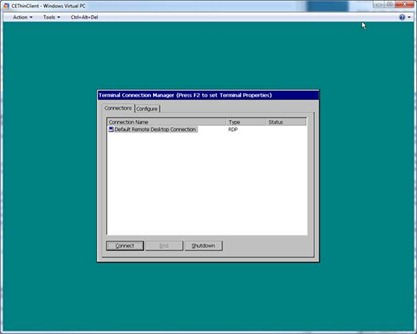
The virtual machine will start up and load the Windows Embedded Compact OS that you designed! You may need to change the networking adapter under Tools, Settings, Networking, Adapter 1 to be Shared Networking (NAT) . During the first boot, a setup wizard will be launched, but you don’t need to change anything.
Once you get to the main connect screen you can connect to another machine on your network using a Remote Desktop Connection.
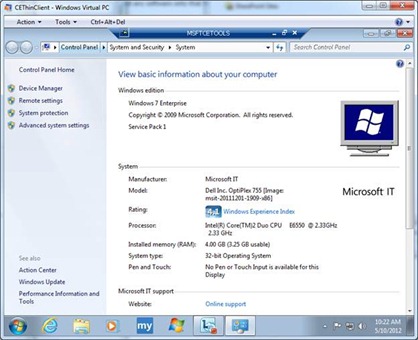
Below is an example of my Thin Client image connected to another Windows 7 machine on the network. Not particularly interesting in this case, but this would allow a very low-cost device to be used as a graphical terminal to connect to, and remotely use, other PCs on your network. (Have an old laptop or tablet lying around?)
One thing to note, I don’t recommend connecting the Thin Client back to the PC hosting your Virtual PC. It’ll work but, unless you’re running Windows Server which allows multiple concurrent sessions, the host PC console will lock. And of course when you log back in, the remote session will be automatically logged out because you can only be connected in one session.
Summary
We walked through, the steps necessary to create a Windows Embedded Compact 7 operating system targeted at Virtual PC. We imaged a virtual hard disk with the OS image and booted the device image. Hopefully you also had the opportunity to connect to a remote PC and actually use the Thin Client image. Maybe it even sparked some ideas about taking advantage of such an image.
As I mentioned there are some good sources of information available on image building with PB, some of which I listed previously. Even many of the articles targeting older versions of the tools and OS are useful.
In the future, I’ll look at customizing an image, generating an SDK for a custom image (allowing app development in Visual Studio for your device), debugging, etc. As part of these posts, I’ll continue to connect some of the related information that’s available online to allow you to further expand on the concepts.
