Preparing raw hardware to run Windows Embedded Standard
**
**Updated preface on 3/26/09
This is the first in a series of articles on a variety of topics from our guest blogger, Alexander. He is an MVP for Windows Embedded- check out the link to his bio at the bottom of this article.Our MVPs have a heavy background in Embedded systems and are a great repository of information on Windows Embedded products. We’re providing this space on our team blog as a service to our readers by allowing MVPs to share some of their knowledge with the rest of the community
It can be a challenge - especially when new to Windows Embedded Standard development - to prepare a raw target system to get the operating system booting. On a normal Windows desktop the preparation of the disk is done by Setup.exe behind the scenes, and therefore the user seldom has to cope with these preparation issues. Due to the fact that Setup.exe is, of course, not available for building Standard images, this task needs to be treated differently.
To bring up a Standard device, the best thing is to start with the disk layout. The layout should follow the normal requirements well-known from Windows XP Professional, meaning that there can be a maximum of four primary partitions per disk.
Picture 1: Standard disk layout
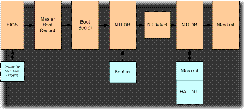
One partition (in this picture partition 1) must be the boot partition. This partition must be marked “active”, because otherwise Standard will not boot from it. It also needs to be the location of all OS boot files such as NTLDR, boot.ini, Ntdetect.com later on. Another important point to keep in mind is the master boot record (MBR). This record contains a little bit of code that helps to bootstrap the OS (calling NTLDR, whose start address can be found in the boot sector of the active partition) after the BIOS has finished its startup sequence.
Picture 2: Standard boot sequence
The content of the MBR can be the reason for boot issues because it must be different for each OS and file system you are booting from. If a DOS boot disk is used to prepare the target device with a FAT file system, FDISK /mbr will write an MBR to boot DOS from this disk, not Standard. If WinPE 1.x in combination with NTFS 2.0 is used, systems are prepared to boot XP. If the WinPE version is 2.0 or higher the system will be prepared to boot VISTA or Server 2008, which is not compatible to Standard.As one can see, this can easily create a mine field of problems.
So what would be the foolproof way to get a system prepared?
Recipe:
How to painlessly prepare a Standard device for booting:
1. Boot the target from into the "Windows Preinstallation Envirnment" of the Standard toolkit (WinPE), which can be obtained from disk 1 of any previous versions of XP Embedded. If this is not available you can use the "Windows Automated Installation Kit (WAIK)" to generate a custom WinPE image to boot from (I am going to explain how to do this in one of my upcoming blog posts).
Make sure the BootSect.exe utility from the [Install Path]\Windows AIK\Tools\PETools\x86 folder is included in this PE image.
2. At the command prompt start the Diskpart utility
3. In Diskpart mode issue the following commands (disk layout here is a single boot partition – for simplicity):
select disk 0
clean – wipes all previous disk content
create partition primary size= [as desired in MB]
select partition 1
active- set the partition active
assign letter=C
exit
4. The last command closes diskpart mode and returns to the normal command line interface
5. Format the disk with NTFS using the Format utility:
Format C: /FS:NTFS
6. Do not do a quick format, formatting a disk with NTFS Format in normal operation writes the MBR for WES automatically.
Quick format does not do this!!!
7. Now the target system is ready to boot Standard!
Just copy over the files you can find the Image folder of the development system.
Troubleshooting:
In the rare event that this should not work the Recovery Console available on Win2k or XP setup disks can be used to fix any MBR issues such as blinking cursor only, “Missing operating system” message, etc. using the fixmbr command.
There are also some 3rd party freeware utilities available on the Internet that are able to help troubleshooting and fixing MBR problems.
Alexander Wechsler
Wechsler Consulting

