Windows Dev Center – Reports FAQ
How can I see reports in the Product group summary?
How do I make sure I see data for my Product based mappings?
Where can I find information on report automation?
How do I automate generating product mappings?
How do I use PowerShell to automate product mappings?
Where can I go if I can’t find an answer to my question?
Q: How do I map files?
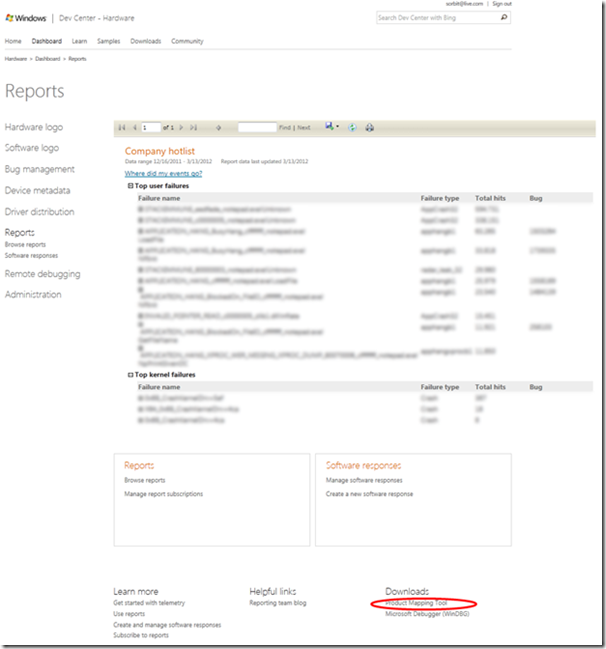
A: The Product Mapping Tool (also known as the Microsoft Ecosystem Metadata Exchange client) is the correct tool for mapping a new product, product group or driver file. A prerequisite for the Product Mapping Tool is you will need to install at least one item from the Windows Live Essentials. This is to support Windows Live ID authentication on the Developer Dashboard. The Product Mapping Tool itself is available at the bottom of the Reports main link off the dashboard. You will need to log-in to see this view
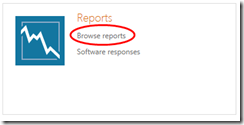
Choose the top level Reports link:
The Product Mapping tool is at the bottom of the page under Downloads (Failure data is blurred out in this view):
Once you have authenticated using your Windows Live ID and finished synchronizing with the Microsoft Metadata Exchange Server, you will see your existing drivers and products if previously
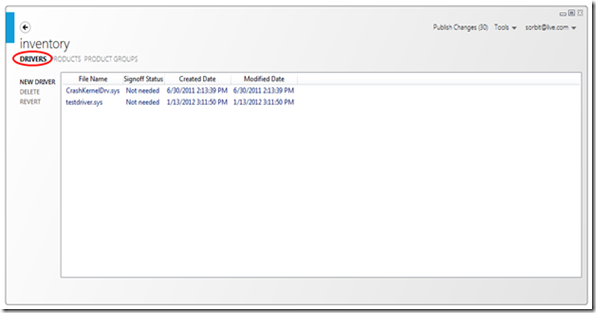
provided. The mapping inventory is divided into three areas:
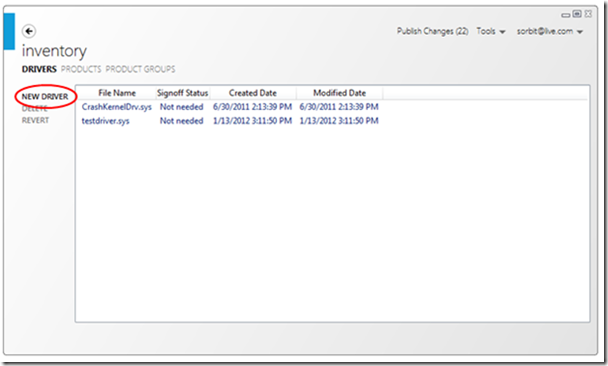
1) Drivers – Provides driver mappings on a file name basis. These are files that inform the Driver summary report, which show a version breakout. Drivers can be mapped through choosing Drivers New Driver. When a duplicate mapping already exists, the file will need to be investigated for ownership. Once signoff exists, reports can be generated. In most cases the Signoff Status will be “Not needed.”
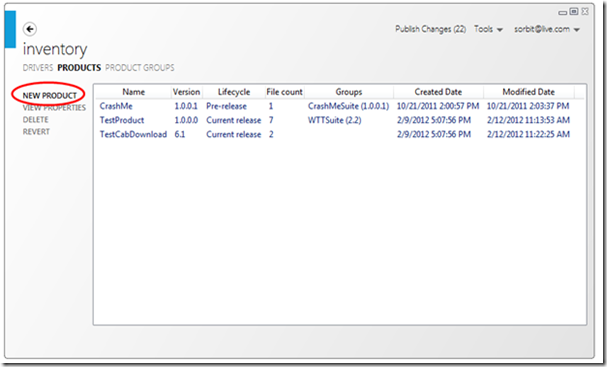
2) Products – Provides data based on specific files or file versions from specified directory. These files can be either kernel and/or user mode; however, the kernel files must be already mapped as a file in the Drivers section in order to be seen in Product based reports. The new product cycle view is a way of determining where in the development stage a product falls. This can help companies evaluate where to invest their development resources on fixes.
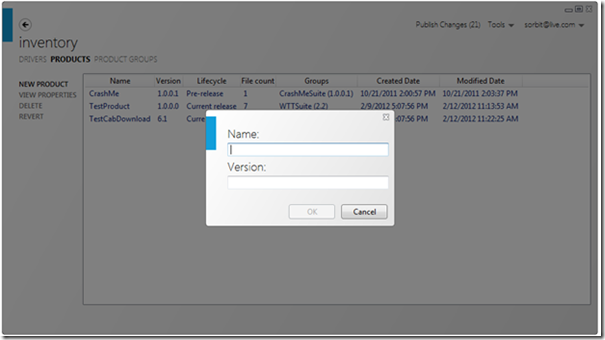
Products can be mapped through Products, New Product
Choose a Name and Version
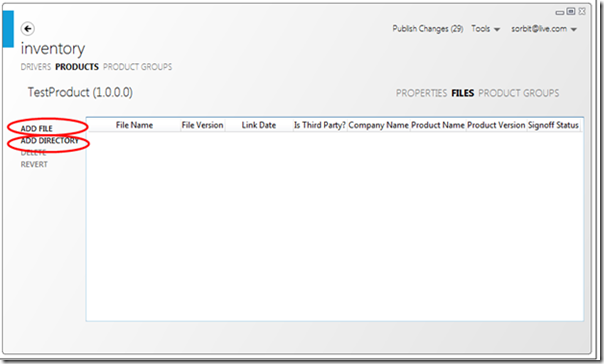
And add the appropriate file or directory of files
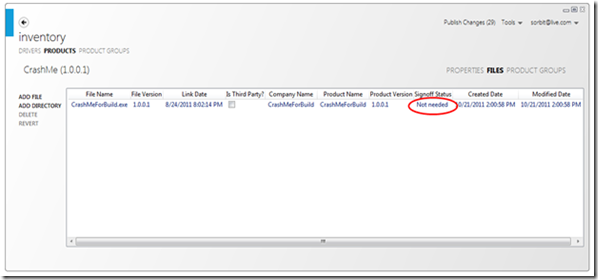
Like driver files, when a duplicate mapping already exists, the product file will need to be investigated for ownership. Once signoff exists, reports can be generated. In most cases the Signoff Status will be “Not needed”
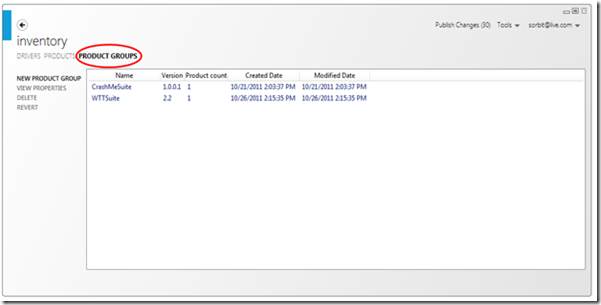
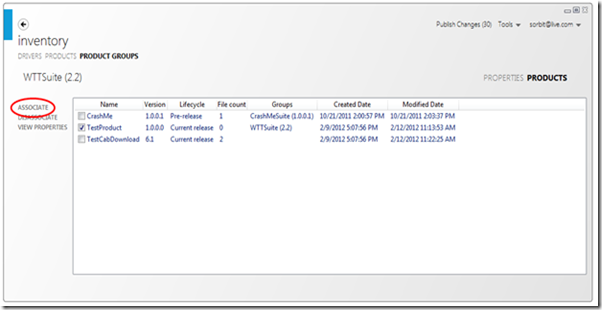
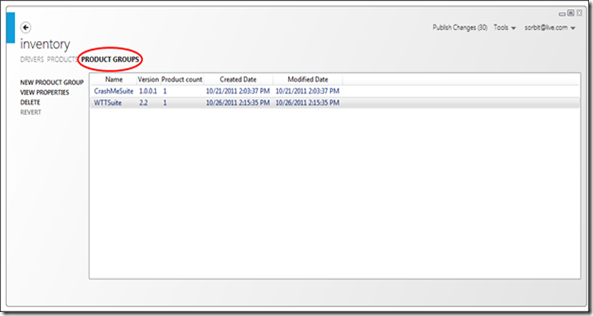
3) Product Groups – Groups products for reporting. These mappings make up the Product group summary report. Products not part of a Product group are available in the Product summary report.
Product Groups are mapped by choosing the Product Group item
and associating the Product Group with existing Products
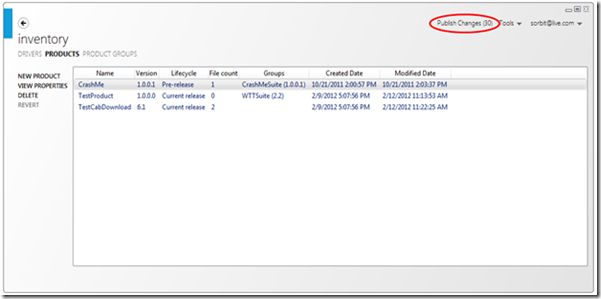
Once you’ve made your updates, you can publish your changes. Published mappings will update the report data once CABs are collected for your selected Drivers, Product and Product Groups
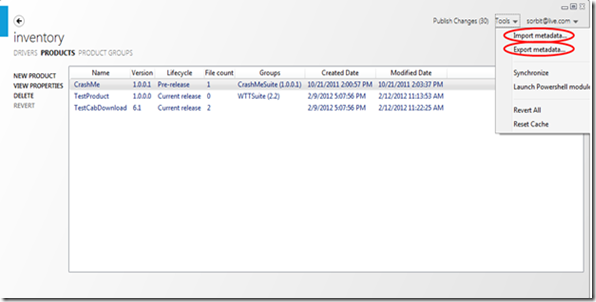
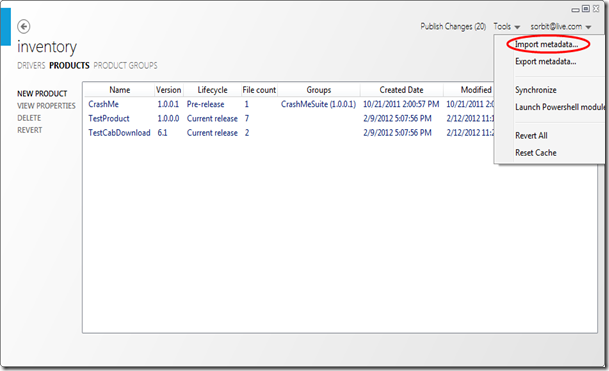
Previously provided metadata around Drivers, Products and Product Groups can be saved through Tools Import metadata and Export Metadata
Q: How can I see Driver Reports
A: Make sure the Product Mapping Tool has entries in the Drivers area. The Driver Summary report will show error reporting data across all versions
Q: How can I see reports in the Product group summary?
A: Product Group must be mapped by default in the Product Mapping Tool. Product Groups are made up of different Products. This is a new concept that allows for more flexible ways of organizing data by concepts that makes sense to your organization (e.g. by Suite, by Division.) Once these mappings are created, the next generated set of reports will show a populated Product summary report
Q: How do I make sure I see data for my Product based mappings?
A: In order for data to be provided to the reports the following conditions must be met:
1) Product data is based on the file version and link date granularity. If a file version is used across multiple link dates, make sure mappings exist for all applicable files
2) CABs are collected within the last 30 days and a Failure (see the blog “the only thing constant is change – Part 1” for more information) has at least 4 hits
3) You company has logged into the Windows Dev Center within the last 60 days
Q: Where can I find information on report automation?
A: You can download sample code and description of the feed for each core report from the Microsoft Download Center
Q: How do I automate generating product mappings?
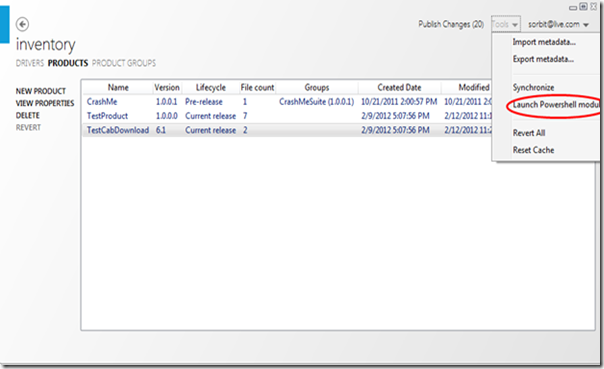
A: Automation is done through PowerShell. PowerShell uses the MicrosoftExchange module.This module can be directly initiated through the client
or directly though the PowerShell command
PS C:\Users\testuser> import-module MetaDataExchange
in both cases the Product Mapping Tool (Metadata Exchange client) must be present on the local system. You can get a list of commands through the below:
PS C:\Users\testuser> get-command -module metadataexchange
Q: How do I use PowerShell to automate product mappings?
A: Much like directly using the Product Mapping client, a product and associated files need to be provided.
Create a new product
This action uses the New-Product commandlet and pipes the output into Add-Product, which adds the product to the current Metadata Object
NAME New-Product
SYNTAX
New-Product [-Name] <string> [-Version] <string> [[-Lifecycle] <Lifecycle> {Prerelease | CurrentRelease |
Supported}] [<CommonParameters>]
NAME Add-Product
SYNTAX
Add-Product [-Product] <Product[]> [-IgnoreDuplicates] [-WhatIf] [-Confirm] [<CommonParameters>]
Add-Product [-ProductGroup] <ProductGroup> [-Product] <Product[]> [-IgnoreDuplicates] [-WhatIf] [-Confirm]
[<CommonParameters>]
Console commands:
PS C:\Users\TestUser> $p1 = New-Product -Name "CrashMe" -Version "1.0.0.0" -Lifecycle Supported | Add-Product
PS C:\Users\TestUser> $p1
Console output:
Name : CrashMe
Version : 1.0.0.0
Lifecycle : Supported
CreatedDate : 1/1/0001 12:00:00 AM
ModifiedDate : 1/1/0001 12:00:00 AM
ProductFiles : {}
ProductGroups : {}
This process can be repeated to create multiple products. In the below case a second variable is being assigned to the additional product
Console commands for second product:
PS C:\Users\TestUser> $p2 = New-Product -Name "CrashMe" -Version "1.0.0.0" -Lifecycle Supported | Add-Product
PS C:\Users\TestUser> $p2
Add files to the product
We are going to be using the New-ProductFile commandlet and pipe the output into Add-ProductFile commandlet passing in the Product variable ($p) we created in the previous command
NAME New-ProductFile
SYNTAX
New-ProductFile [-Path] <string[]> [-IgnoreErrors] [-RecursionDepth <int>] [-WhatIf] [-Confirm]
[<CommonParameters>]
New-ProductFile [-LiteralPath] <string[]> [-IgnoreErrors] [-RecursionDepth <int>] [-WhatIf] [-Confirm]
[<CommonParameters>]
NAME Add-ProductFile
SYNTAX
Add-ProductFile [-Product] <Product> [-ProductFile] <ProductFile[]> [-IgnoreDuplicates] [-WhatIf] [-Confirm]
[<CommonParameters>]
Console commands:
PS C:\Users\TestUser> New-ProductFile "C:\Program Files (x86)\App\CrashMeForBuild\Release1" | add-ProductFile $p1
Console output:
FileName : CrashMeForBuild.exe
FileVersion : 1.0.0.1
LinkDate : 8/24/2011 8:02:14 PM
IsThirdParty : False
CompanyName : SpiralOrbit
ProductName : CrashMeForBuild
ProductVersion : 1.0.0.1
ProgramId : 00000f85cc37222304c06205aa6a3b7b755600000904
FileId : 000006cea01916adcf2526f7607a9d3ee1e806d6d6b0
SignoffStatus : Requested
CreatedDate : 1/1/0001 12:00:00 AM
ModifiedDate : 1/1/0001 12:00:00 AM
this process can be repeated for additional Product Versions
Console command for second product:
PS C:\Users\TestUser> New-ProductFile "C:\Program Files (x86)\App\CrashMeForBuild\Release2" | add-ProductFile $p2
Once the mappings have been generated, the output can be consumed by the Product Mapping Client.
Export Metadata to file
We are going to use the Export-Metadata commandlet to save a file that can be consumed by the Ecosystem Metadata Exchange Client tool for upload. You need to save the file extension as .emx for it to be recognized by the EMX.exe client tool.
NAME Export-Metadata
SYNTAX
Export-Metadata [-Path] <string> [-CreateNew] [<CommonParameters>]
Console command:
PS C:\Users\TestUser> Export-MetaData "C:\CrashMeForBuild\Filemappings\EMXMetadataTest.emx"
Console output:
Mode LastWriteTime Length Name
---- ------------- ------ ----
-a--- 4/20/2012 3:35 PM 2550 EMXMetadataTest.emx
Import the .emx file to the client tool
From the Tools Menu select Import Metadata
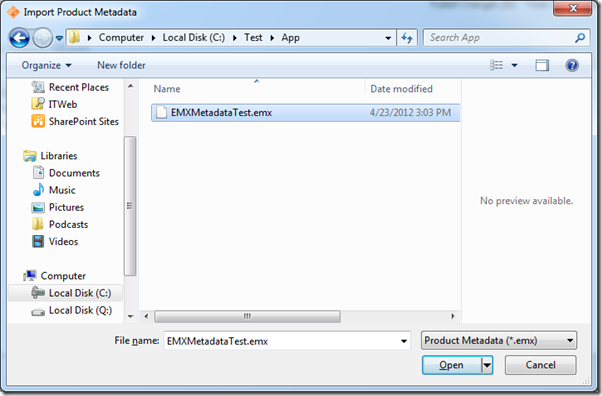
point to the directory with the saved .emx file
Select the file and open
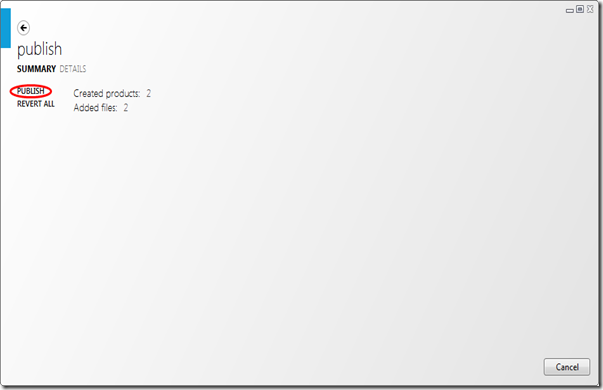
You will see the changes reflected in the Publish Changes section of the tool. Click on Publish to submit the products for processing
Q: What is the Windows 8 Reliability Mappings Product and why do I see this within my Product summary list?
A: The Windows 8 Reliability Mappings Product is to support file mappings for the Windows 8 Reliability report. This report looks at the top issues affecting the reliability of Window 8. In order to provide CAB links within the report, mappings are required at the file version and link date granularity. If these mappings are not currently available through your organization’s current Product based mappings, they will be added to the Windows 8 Reliability Mappings Product. This is to ensure your organization continues to get CABs for the Windows 8 Reliability Report
Q: Where can I go if I can’t find an answer to my question?
A: Contact the Windows Dev Center Support Team
