IIS7/WAS Installation
IIS7 has a modular design which allows you to selectively install components that are needed. This design is based on the new manifest-driven Componentization technology that was first introduced in Windows Vista. As the IIS site claimed, there are more than 40 standalone feature components of IIS7 which can be independently installed. This is good or bad. The good part is that IT professionals can easily customize the installation as needed. The bad part is that it’s hard for developers to understand which components are needed. Here I would like to write something regarding the latter.
If you are familiar with CMI (Component Management Interface) or CBS (Component Based Setup), you would know that there are many different ways to install components on Vista. You can use the GUI interface (called Software Explorer) which is available from “Control Panel” -> Programs -> “Turn Windows features on or off”. Or you can use command-line tools such as pkgmgr.exe or ocsetup.exe (which is a wrapper of pkgmgr.exe). I will talk about the simplest approach, GUI interface, below.
Minimal Installation: Installing WAS
The minimal installation of the whole IIS7 package is to install the Windows Process Activation Service (WAS). WAS is a standalone feature and it is the only feature from the IIS7 family that is available for all Windows Vista client SKUs (Basic, Home, Business, and Ultimate, etc).
From the “Turn Windows features on or off” UI of the control panel, you will see the WAS component listed in the list as in the following image:
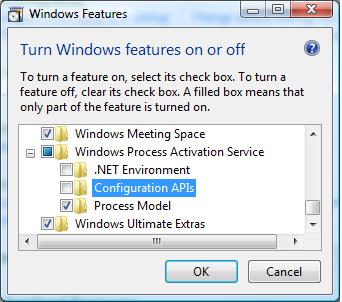
This feature has three sub-components:
- .NET Environment
- Configuration APIs
- Process Model
If you select the root node of WAS, only the “Process Model” sub-node is checked to be installed by default with the root. Please note that with this installation, you still cannot do anything interesting today. It only means that you can get WAS to work.
If you further check the “Internet Information Services” feature from the feature list, you will find out that the “Configuration APIs’ node is automatically checked.
In order to make WCF or any ASP.NET application to work, you need to further check the sub-node “.NET Environment”. This means that all of WAS components are needed in order to make WCF/ASP.NET to work well. Fortunately these are automatically checked once you install any of those components.
IIS7: Default Installation
By simply checking the “Internet Information Services” feature from the UI, you will see that quite some sub-nodes are automatically marked as following:
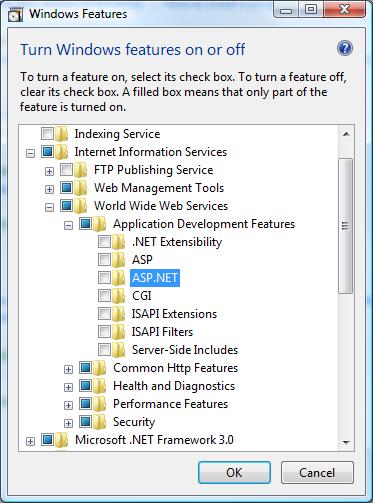
This is the default installation of IIS7. In this way, you can use IIS7 to service static content (such as HTML pages etc). However, you can’t run ASP.NET or CGI applications.
IIS7: Installlation with ASP.NET support
From the above image, it’s obvious that you need to install “ASP.NET” to make ASP.NET work on IIS7. After checking “ASP.NET”, you will find the following UI:
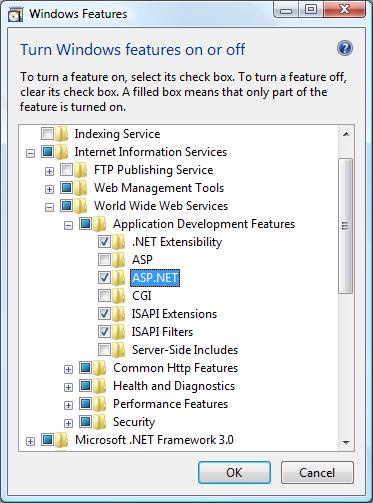
This is the minimal environment for both WCF and ASP.NET applications to work in IIS7.
Installation with IIS6 Compatibility Components
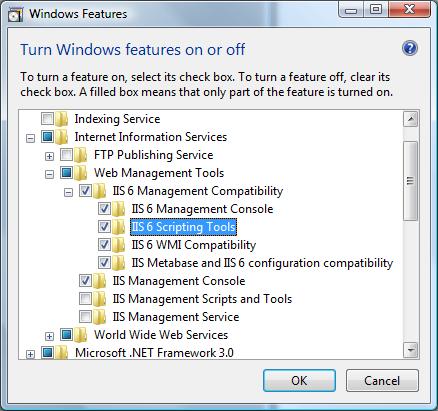
Many people still have problems with the above installation when they run Visual Studio 2005 or some automation scripts/tools (for example, adsutil.vbs) to configure virtual applications. The main reason is because those tools depend on the legacy IIS6 Metabase API support as well as the legacy IIS6 scripting tools. Here is the UI that shows what are missing from above:
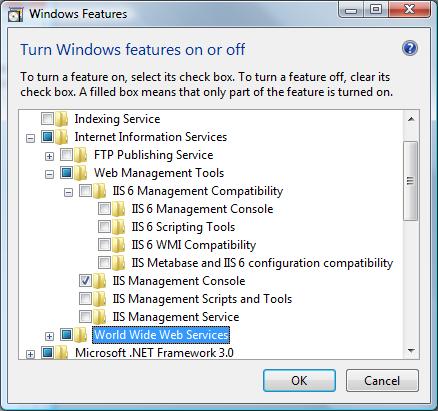
You need to check “IIS 6 Scripting Tools” (which automatically checks other three subnodes of “IIS 6 Management Compatibility”). After that, you will see the following UI:
With this installation, you are good to play with IIS7, ASP.NET, and WCF features and samples available on the web.
Maximum Installation
You may want to play with other components that are not installed by default. To install them, you can simply go through the whole tree of the IIS and check every leaf node. In this way, you will get the full IIS7 feature set installed.