Silverlight Dynamic Languages in Visual Studio
Technorati Tags: Silverlight,Dynamic Silverlight,IronRuby
del.icio.us Tags: Silverlight,Dynamic Silverlight,IronRuby
Silverlight's support of Dynamic Languages is really cool, but, as there is no template in Visual Studio or Expression Blend that supports them it might be a little difficult for you to get up and running quickly. So, I wanted to put together this blog posting to show you how you can use them within Visual Studio in a common (or garden) Web site project. It's a pretty lengthy tutorial for a Hello World applicaiton, but I'm assuming that you are as unfamiliar with Dynamic Languages as I was when I started figuring them out.
It's something I've been working on for my Silverlight 2 book, Hope you like it! Do note that all proceeds from this book will go to children's education (*), so be sure to buy lots of copies.
Silverlight 2 adds support for the use of dynamic languages, which are defined as programming languages that execute many features at runtime that other languages such as C# execute at compile time. Such behaviors include things such as extending objects and definitions, modifying the type system and more. This approach is designed to give dynamic languages a simple approach for learning through a ‘run-evaluate-print’ loop with lots of trial and error as you develop.
Silverlight 2 supports three of the more popular dynamic languages: Ruby, Python and dynamic, managed JavaScript. The SDK provides a tool called Chiron.exe that allows you to work with dynamic languages.
(*) My children's education of course! :)
Getting Started
The Chiron tool is easiest to use if you have a specific application directory structure set up for your application. In this section we’ll go through how to do this step by step.
First launch Visual Studio and create an empty Web Site by selecting New Web Site from the File menu. You’ll see Empty Web Site as an option on the New Web Site dialog.
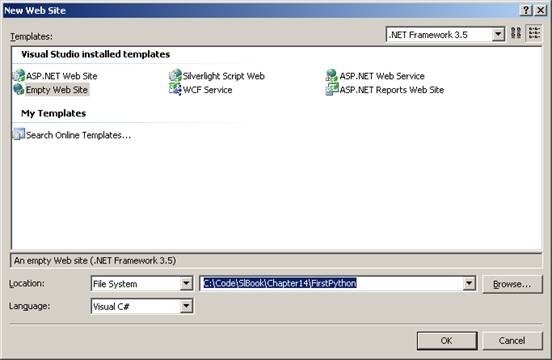
This will create an empty directory that Visual Studio can access as a Web Site. However, we will be using Chiron to run the site, but creating the pages, code etc is easier in Visual Studio.
From the Solution, right click on the project folder and select ‘Add New Item...’ – this will give you the Add New Item dialog that you can use to create a new HTML page, so select the HTML page option and give it the name Default.html.
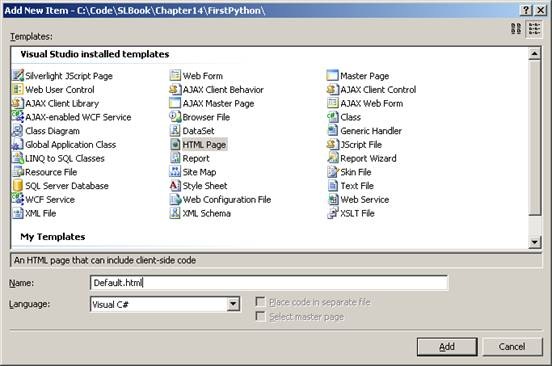
This will give you a basic HTML page, which you should edit to turn into a page that will host the Silverlight application. Here’s the code for such a page.
<html xmlns="https://www.w3.org/1999/xhtml" >
<head>
<title>Dynamic Silverlight Test Page </title>
<style type="text/css">
html, body {
height: 100%;
overflow: auto;
}
body {
padding: 0;
margin: 0;
}
#silverlightControlHost {
height: 100%;
}
</style>
</head>
<body>
<div id="silverlightControlHost">
<object data="data:application/x-silverlight,"
type="application/x-silverlight-2-b1"
width="100%" height="100%">
<param name="source" value="app.xap"/>
<param name="background" value="white" />
<param name="windowless" value="true" />
</object>
<iframe style='visibility:hidden;height:0;width:0;border:0px'></iframe>
</div>
</body>
This uses the <object> tag approach to host Silverlight in the page. It’s bare bones, so doesn’t include the code to provide an install experience if Silverlight isn’t present on the system.
Keep a note on the source parameter which is set to app.xap. Chiron will build this for you, which you’ll see in a moment. In order for it to have this name, your code file will need to be called app. First you’ll look at how do build your application with IronPython, and an app.py file, and later you’ll see how to do the same functionality with IronRuby and Dynamic JavaScript.
Next, create a directory within your web called app. Within this, select ‘Add New Item’, and select the XML File template, and call the file app.xaml.
Here’s some simple XAML that you can put into this file:
 <UserControl
    xmlns="https://schemas.microsoft.com/client/2007"
    xmlns:x="https://schemas.microsoft.com/winfx/2006/xaml"
    x:Class="System.Windows.Controls.UserControl"
    x:Name="Page"
    >
  <TextBlock
     x:Name="txtMessage" TextWrapping="Wrap"
     Foreground="Black" Text="Hello World," >
  </TextBlock>
</UserControl>
This defines a simple UserControl object that contains a TextBlock called txtMessage. This TextBlock contains the text “Hello World,” – note that it ends with a comma. You’ll see why in a moment!
Now let’s add the IronPython code file. Again right click on the app folder within your Web site, and select ‘Add New Item…’. From the dialog, select Text File and call it app.py (‘py’ is the extension for python).
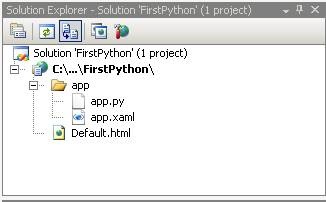
As a quick sanity check your solution should look like this:
Now let’s edit your python code file to make it do something a little interesting.
Here’s the code:
from System.Windows import Application
from System.Windows.Controls import UserControl
 def handleClick(sender, eventArgs):
    sender.Text = sender.Text + " from Python!"
class App:
def __init__(self):
self.scene =
Application.Current.LoadRootVisual(UserControl(),
"app.xaml")
def start(self):
self.scene.txtMessage.MouseLeftButtonUp += handleClick
App().start()
If you’ve been writing Silverlight applications in C# or VB, the syntax will be roughly familiar to you, so for example the line
from System.Windows import Application
is equivalent to the C#
using System.Windows;
and then referring to the Application class in code.
The code then defines a python class, called App and sets the ‘scene’ object for this app by loading the xaml file that you defined earlier. As part of this class definition it defines the startup event hander with def start(self): and specifies the code to execute within this handler. This code defines the event handler for the MouseLeftButtonUp event on the TextBlock control called txtMessage that you defined earlier. The event hander is called handleClick.
The event handler code itself is here:
def handleClick(sender, eventArgs):
sender.Text = sender.Text + " from Python!"
This adds the text “ from Python!” to the end of the Text property of its sender (which in this case is the TextBlock) upon being called.
Configuring Visual Studio to use Chiron
To run this application you’ll use Chiron. You can configure Visual Studio to launch Chiron by right clicking on the project file in Solution explorer (note, use the Project file and not the Solution file – the Project is usually the first child of the Solution) and selecting Property Pages from the pop up menu.
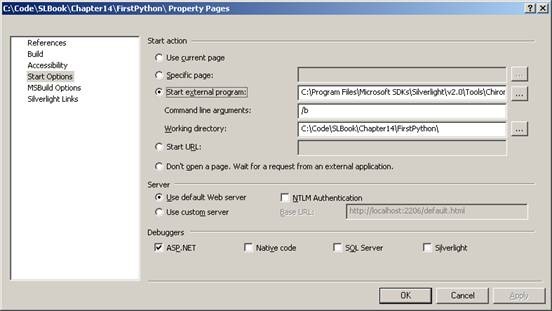
From the property pages, select Start Options, and then select Start external program. Use the ellipses button to brose to the location of Chiron.exe which should be in C:\Program Files\Microsoft SDKs\Silverlight\v2.0\Tools\Chiron.exe.
Enter ‘/b’ in the Command line arguments setting, and then enter the location of the web site in the Working Directory setting.
You can see it here
Now you can execute your dynamic Silverlight application by pressing F5 in Visual Studio.
Chiron will launch and you’ll see this in a command prompt window:
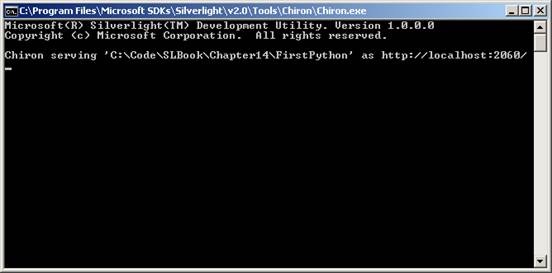
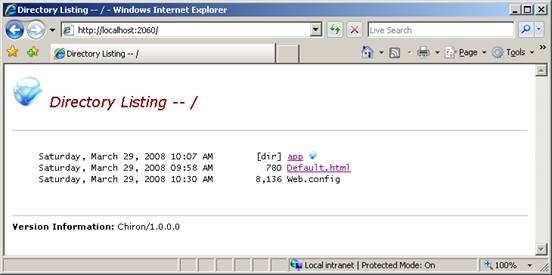
This shows you that the application is accessed via https://localhost:2060 . Visual Studio will also launch a browser at this address, which gives you a listing of the files within the web directory.
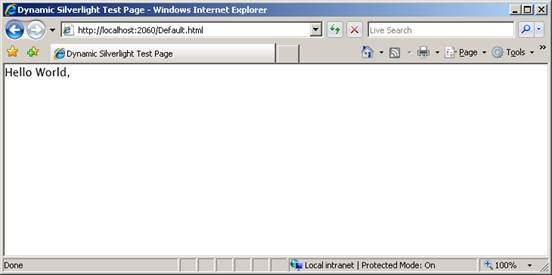
Select Default.html to see your dynamic Silverlight application. You’ll see your ‘Hello World’ message.
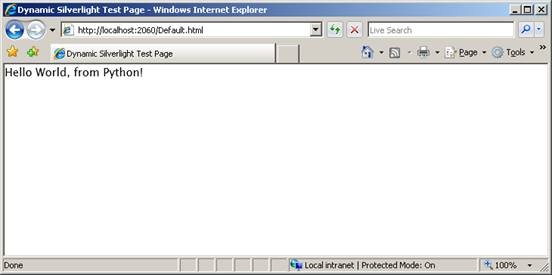
Clicking the ‘Hello World,’ text will then add ‘ from Python’ to the block as shown here
While this is, of course, an extremely simple application, it demonstrates how the Dynamic Language Runtime works in Silverlight, and how to configure Visual Studio to use Dynamic Languages!