Tip #61: Did you know… How to create an ASP.Net Dynamic Data Web Site?
If your web site is heavily data driven then here is a quick and easy way for you to create one without writing much code. All you need is Visual Studio 2008 SP1 or Visual Web Developer 2008 Express SP1 installed on your box.
Dynamic Data Web Sites makes use of a mechanism called Scaffolding. When Scaffolding is enabled it lets ASP.Net go through your data model and generate web pages for your tables. These generated pages have Insert, Delete and Update capabilities for each table.
Here are the steps:
Step 1: Create a Dynamic Data Web Site.
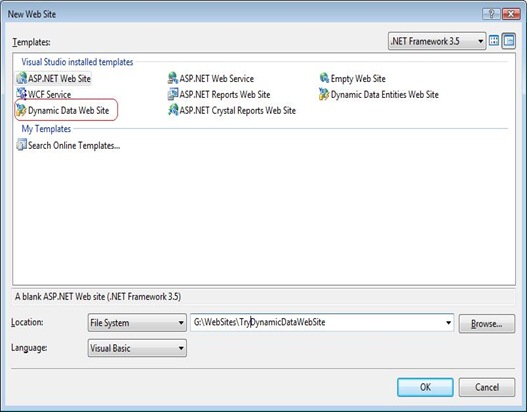
Go to File ->New Web Site and select Dynamic Data Web Site template. Give it a name and select the location and language to be used. Click Ok button.
Step 2: Add data to your Web Site.
Copy paste pubs.mdf file that you want to use in your App_Data folder.
Step 3: Create a Data model using LINQ to SQL.
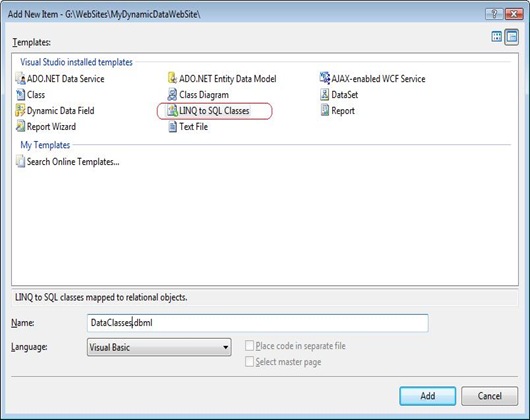
Right click on App_code and Add New LINQ to SQL Classes. On selecting the LINQ to SQL Classes the DataClasses.dbml opens up in your O/R Designer.
Step 4: Drag drop tables to Object Relational Designer.
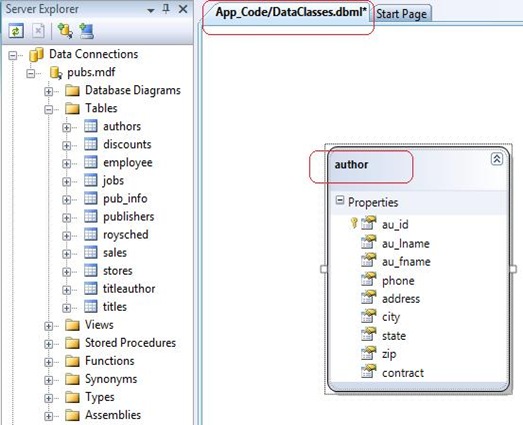
Now drag drop Authors table on to the O/R Designer from server explorer and save DataClassses.dbml.
Step 5: Look what VS has created for you.
Note that there are two files DataClasses.dbml.layout and DataCalsses.designer.vb present under the .dbml file node.
Open DataCalsses.designer.vb, and you can see that there is a Partial Public Class DataClassesDataContext. This file also contains an entity class for Author table (Partial Public Class author).
Step 6: Register the data context in Global.asax file.
Open global.asax page and add the following lines of code in RegisterRoutes method.
VB code:
model.RegisterContext(GetType(AdventureWorksDataContext), _ New ContextConfiguration() With {.ScaffoldAllTables = True})
C# code:
model.RegisterContext(typeof(AdventureWorksDataContext), new ContextConfiguration() { ScaffoldAllTables = true });
Save the file.
Step 7: View the page in Browser
Now you can view default.aspx page using View in Browser. This will show you a link for Authors table.
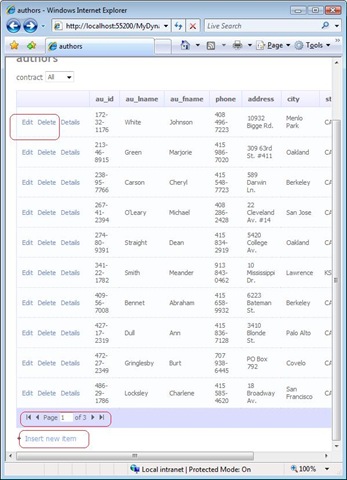
Click on the table name and you will see a page with data from Authors Table. There is also readymade option for you to Edit, Delete and Insert new data.
Try this today and have fun!
Reshmi Mangalore
SDET, Web Development Tools


