
Part 3 of 3: Creating sub-projects using the Visual Studio Development Server and Web Application Projects
This is the Part 3 of a 3 part series on using sub-projects with the Web Application Projects add-in for Visual Studio 2005.
Part 1 of the series can be found here. Part 2 of the series can be found here.
This post covers the final concept I wanted to share when using sub-projects with the Web Application Projects add-in, that is using a sub-project structure without using IIS, but instead with the built-in Visual Studio Development Server.
Prerequisite
- Visual Studio 2005 with Web Application Projects add-in installed
- This article assumes the user has already walked through Part 1 and Part 2 of this series. NOTE: It is very important to have done these prerequisite steps as the example below will not make sense without the context of those two articles.
Setting up the Root Project
To create the root project follow the instructions as they are described in Part 1 of this series. The primary difference when using the Visual Studio Development Server is to set the project properties of the root project to not use IIS and to use a specific port with the Visual Studio Development Server as shown in the diagram below:

Setting up the Sub-Project
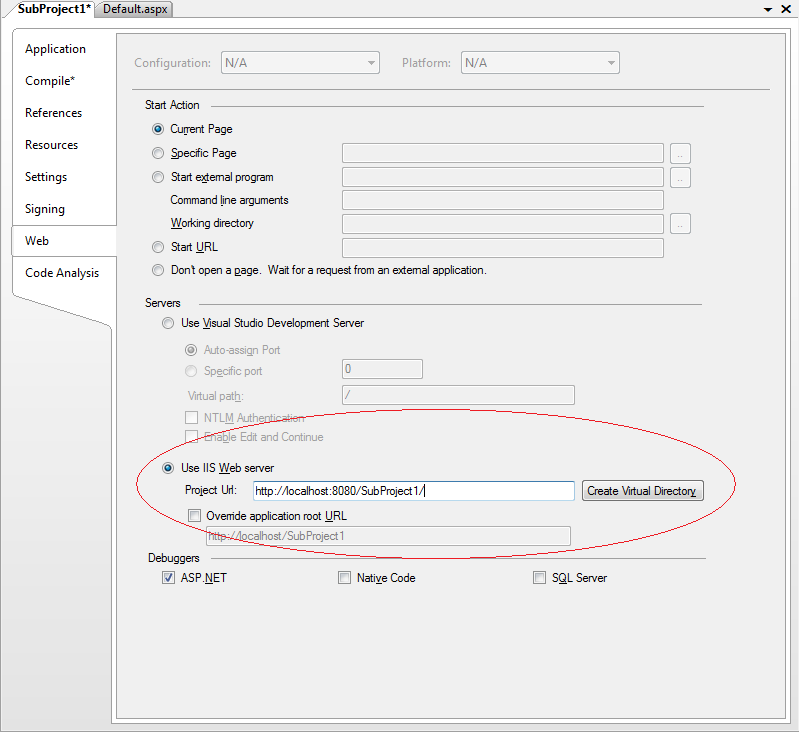
Once again, creating and setting up the sub-project is done the same as described in Part 1 of this series, the primary difference being the settings in the “Web” tab of the project properties for the sub-project. For the sub-project, on the “Web” tab of its project properties, leave the setting to “Use IIS Web Server” (somewhat ironic as in this case it will actually use the Visual Studio Development Server). Also, set the Project URL value to: http://localhost:[port]/[subprojectfolder], where [port] is the Specific Port you selected for the Visual Studio Development server on the Root project, in this case “8080”, and [subprojectfolder] is the name of the sub-folder where the sub-project is located inside the root project, in this case “SubProject1”.
NOTE: This post only describes the differences in setting up a sub-project’s settings when using the Visual Studio Development Server. You will still needs to perform all the the other steps described in Part 1 of this series to configure the sub-project property (e.g. – deleting the web.config in sub-project, setting correct output path in sub-project, setting a project reference to root project in sub-project).
Running pages in the Sub-Project
The final aspect that is different about this configuration from using IIS is how pages in the sub-project are run. The difference is that the Visual Studio Development Server from the root project must be running in order to serve up pages from the sub-project. Thus the first thing one should do is select the page in the root project and run it to make sure the Visual Studio development server is loaded. Once a page in the root project is run, you should be able to run pages from the sub-project with success.
Summary
This post finalizes my series on using Web Application projects to partition a single ASP.NET application into several Visual Studio projects. If you cannot use IIS in your development environment, the technique described here will still enable you to take advantage of using a sub-project structure at development time.
As always, looking forward to hearing feedback from users trying this out!
–Omar
 Light
Light Dark
Dark
0 comments