Hosting WordPress in a Subfolder of Your Windows Azure Web Site
This post applies to Windows Azure Web Sites. These steps do not apply if you are using a Web Role.
Windows Azure Web Sites makes it quick and easy to create a WordPress blog hosted in Azure. However, if you create a WordPress blog using the Gallery in Windows Azure Web Sites, the blog becomes the root of your website. Many of our customers have asked about creating a WordPress blog in a sub-folder of a site so that it can be accessed with a URL such as www.mysite.com/blog. In this post, I’ll show you how you can host a WordPress blog in a subfolder of your site.
Here are the steps that we’ll use to add WordPress to a subfolder of an existing site. (I’ve used Roman numerals for these steps so that I can easily refer to them elsewhere in the post without your confusing them with one of the sub-steps.)
I. Create a temporary WordPress site.
II. Download the WordPress site using FTP.
III. Add the WordPress content to an existing site.
IV. Delete the temporary WordPress site.
V. Link the MySQL database to the existing site now hosting the WordPress blog.
VI. Make a couple of changes to the MySQL database.
I. Create a Temporary WordPress Site
The first step in the process is to create a temporary WordPress site in Windows Azure Web Sites that you can then move to your existing site.
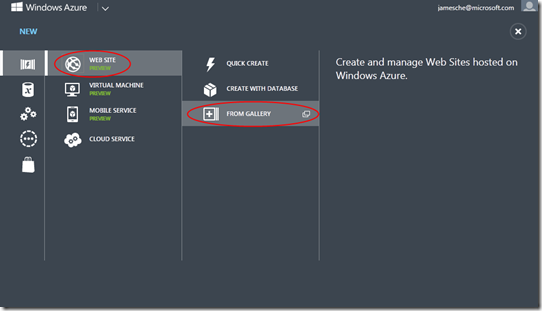
1. In the Azure Portal, click the New button to create a new website.
2. Choose to create a new website from the Gallery.
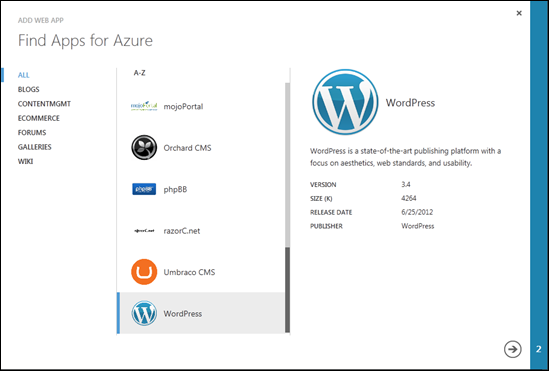
3. Select WordPress from the list of apps in the Gallery.
4. Proceed through the wizard to create the WordPress site.
II. Download the WordPress Site Using FTP
The next step is to download all of the files for the WordPress site to your local machine so that you can transfer them to the existing site. I use FileZilla, a free FTP client, to do this.
To open the site using FTP, you’ll use the information contained in the publish profile for the site. The publish profile is an XML file that defines the different methods that can be used to publish to the website using Visual Studio, Web Matrix, or Web Deploy. Each publish method is defined in the publish profile using a <publishProfile> section. One of these sections defines the URL, username, and password that you can use to access the site with an FTP client.
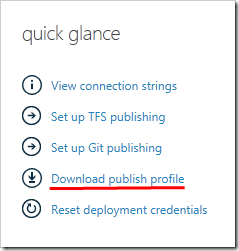 From the WordPress site’s dashboard in the Azure Portal, click the Download Publish Profile link in the Quick Glance section.
- Save the publish profile to your local machine.
- Open the publish profile in Notepad or in another text editor.
- Locate the FTP publish profile for your site and use the URL, username, and password to log into the site with your FTP client. (See Bertrand’s blog post for details on FTP credentials and where they are located in the publish profile.)
- Log into the WordPress site you created in step I and copy the entire contents of the site/wwwroot folder to your local machine. (You can copy these files to any folder you choose.)
Bonus Information on Credentials
The credentials that you obtained from the publish profile are site-level credentials. They are specific to the website and if you share them with a co-administrator of your website, he or she can use them to access the site as well. In addition to the site-level credentials, you can also access the site using user-level credentials.
User-level credentials are tied to your Microsoft account (the account you use to sign into Azure.) Windows Azure Web Sites calls user-level credentials deployment credentials, and you can set them using the Reset Deployment Credentials link in the Quick Glance section.
Since deployment credentials are user-level credentials, you can use them with any of your websites. However, you will need to precede your username with the site name and a backslash. In other words, if my deployment credentials username is Jim, to use it to open a site named WordPressTest, I would use the username WordPressTest\Jim.
You can read more about user-level and site-level credentials in David Ebbo’s entry in GitHub.
III. Add the WordPress Content to an Existing Site
The third step involves adding a new folder to your existing site and then copying the WordPress files into that folder.
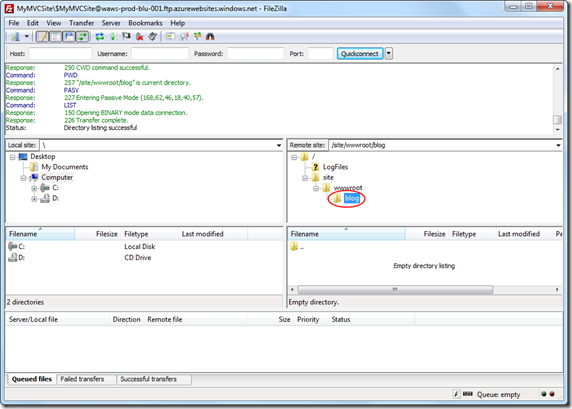
1. Open your existing site in your FTP client. (You’ll need to use the proper FTP credentials for the site. You can obtain those using the same steps you used in step II.)
2. Create a new directory to hold the WordPress blog. In this example, I’ve named that directory blog.
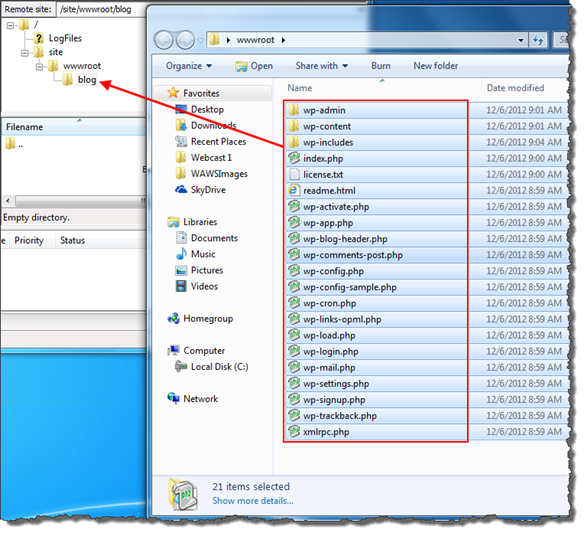
3. Copy the WordPress files you downloaded in step II into the new folder you created in your existing website.
IV. Delete the Temporary WordPress Site
You no longer need the temporary WordPress site you created in step I, so the next step is to delete that site. Be careful not to delete the linked MySQL database when you do this or you will break the new WordPress blog!
1. Select the temporary WordPress site in the Azure Portal.
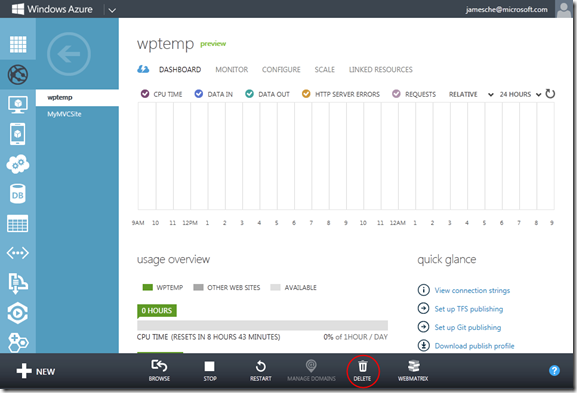
2. Click the Delete button to delete the website.
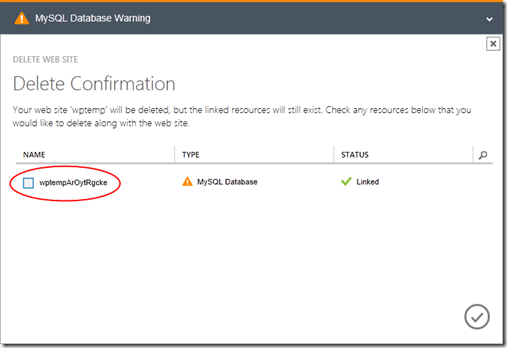
3. Make sure that the checkbox for your linked MySQL database instance is unchecked. You do NOT want to delete the linked MySQL database because the WordPress blog you copied in the previous step is still using the database.
4. Click the Yes button in the lower-right corner of the Delete Confirmation dialog show above to delete the site and keep the MySQL database.
V. Link the MySQL Database to the Existing Website
The final step is to link the MySQL database to the existing website that now hosts your WordPress blog.
1. From the Azure Portal, select the existing website that is hosting your WordPress blog.
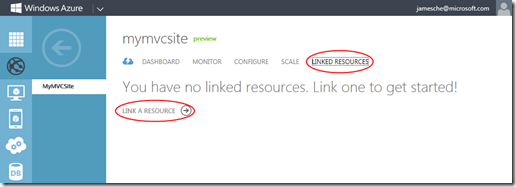
2. Click the Linked Resources tab.
3. Click the Link a Resource link.
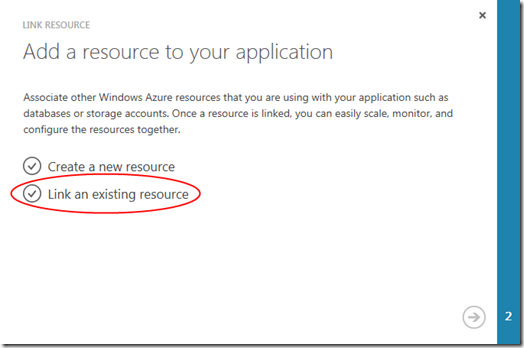
4. Click the Link an Existing Resource link.
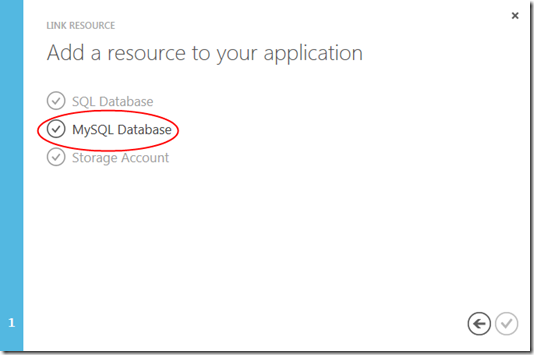
5. Click the MySQL Database link.
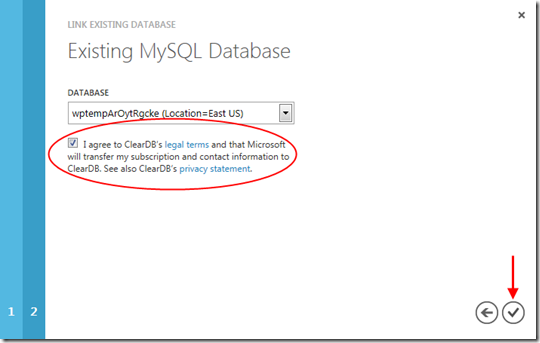
6. Check the checkbox to agree to ClearDB’s legal terms and then click the Yes button to link the MySQL database to your website.
VI. Making a Couple of Changes to the MySQL Database
The final step in making your WordPress blog available in a subfolder of the new site is to make a couple of changes to the MySQL database. When you install WordPress, the URL of the WordPress site is added to the MySQL database. In order for your WordPress blog to work correctly in the new folder, you’ll need to change the URL in the database.
Note: Before you can make changes to the database, you’ll need to install MySQL Workbench and connect to the MySQL database. If you’re not sure how to do this, you can find out in this screencast.
1. Open the MySQL database in MySQL Workbench.
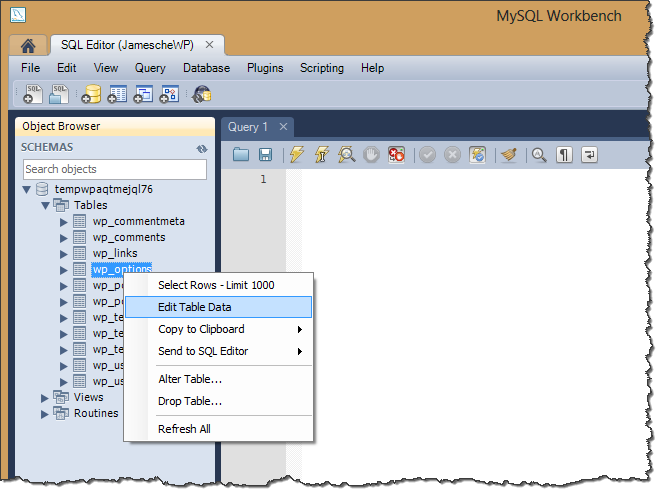
2. Expand the Tables node in the Object Browser, right-click on the wp_options table and click Edit Table Data as shown below.
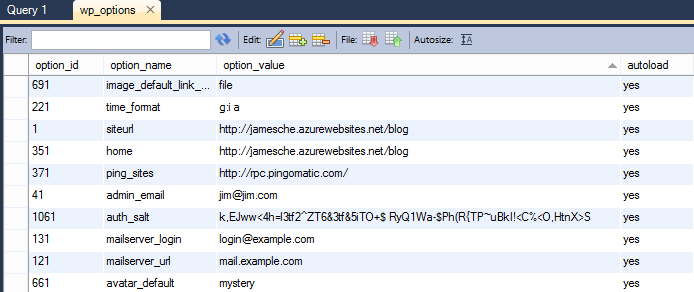
3. Change the siteurl and home fields so that they reflect the correct URL to the new WordPress site as shown below. (Note that I clicked the option_value column header in order to sort by that field.)
4. Click the Apply button at the bottom of the window to apply your changes.
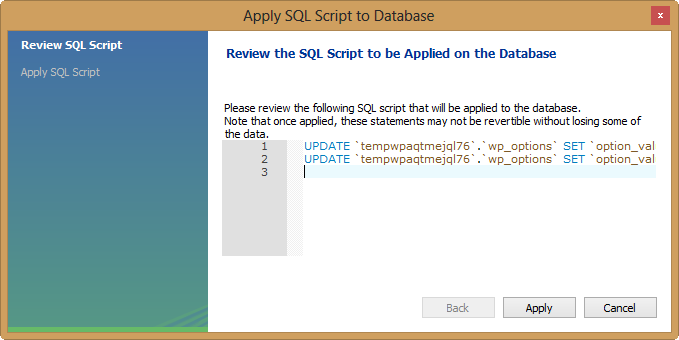
5. Click Apply in the Apply SQL Script to Database dialog as shown below.
6. Once your changes have been applied, click the Finish button to complete the process.
You can now browse to your WordPress blog by browsing to the URL for the folder you created in step III.

