Add an SSL certificate to an Azure Web App (CRT and P7B)
This article has been moved to its new location here: https://benperk.github.io/waws/2015/2015-12-add-an-ssl-certificate-to-an-azure-web-app-crt-and-p7b.html
I was following these instructions here using CERTREQ to create my certificate request, and everything worked fine up to step 6. In step 6 is states that I should have a CER file. I wrote some articles about creating a certificate here and here, where there is a CER file created, however, when I downloaded my SSL certificate request from Go Daddy, I received a .CRT and a .P7B file. For example, when I download the ZIP file from Go Daddy, as shown in Figure 1.
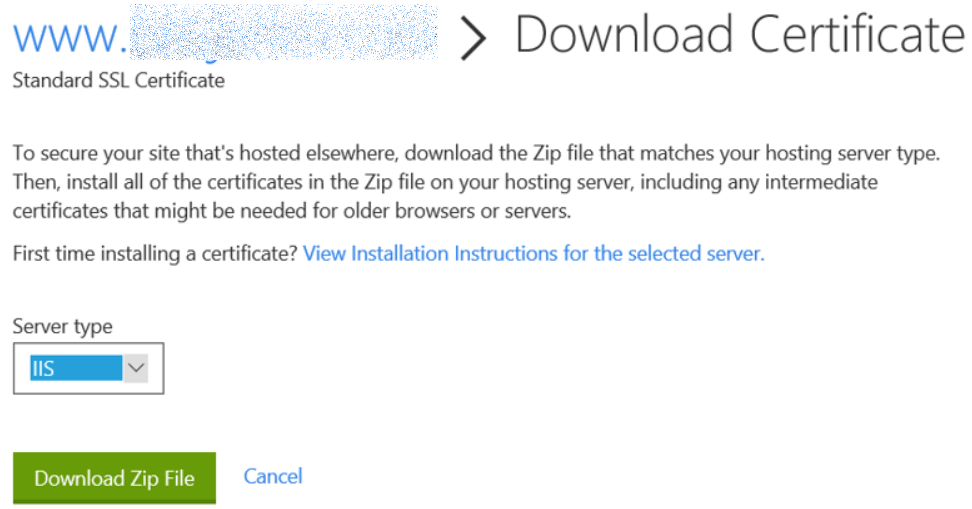
Figure 1, download IIS SSL certificate from Go Daddy
The ZIP file contains the P7B file which contain the intermediate certificates and the CRT which is the SSL certificate for my custom domain.
The question is, how do I convert the CRT file into a PFX file so that I can upload it to my Azure Web App? Here are the steps I followed to convert a CRT into a PFX file:
- Open Certificate Manager for the Local Computer
- Import the Intermediate Certificate (.P7B file)
- Import the SSL certificate (.CRT file)
- Export the SSL certificate and its dependencies as a .PFX file
Open Certificate Manager
Open a Command Prompt and enter CERTLM.MSC into the console and press enter. This opens the Certificate Manager console for the Local Computer, as shown in Figure 2. NOTE: I opened certificate manager on the same PC where I created the request using CERTREQ.
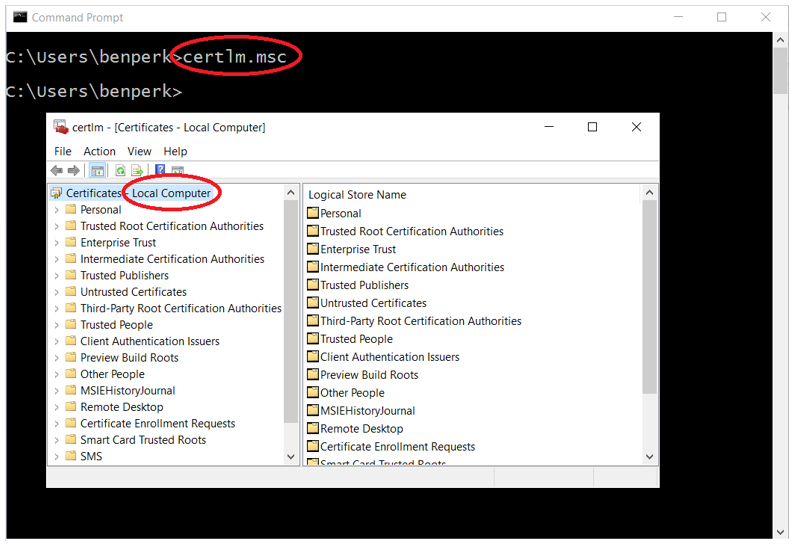
Figure 2, open CERTLM.MSC, certificate management console to convert a CRT into a PFX
Import the Intermediate Certificate (.P7B file)
Next, expand the Intermediate Certification Authorities folder and right-click Certificates, as shown in Figure 3. Select All Tasks and then Import.
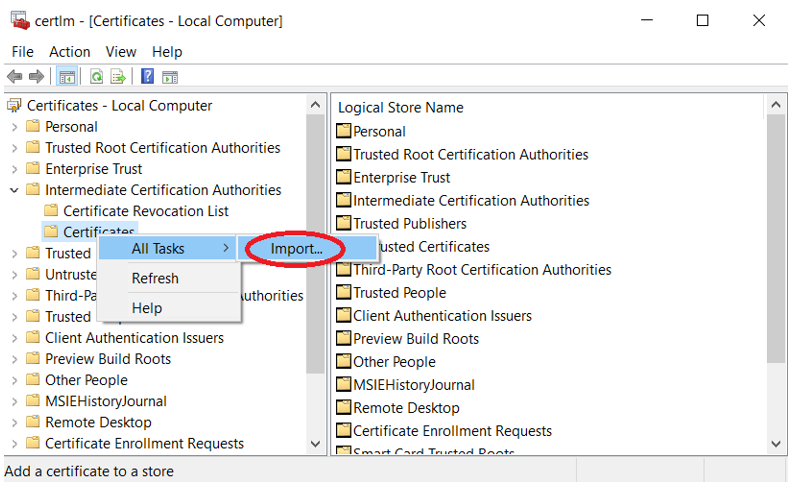
Figure 3, import the P7B file to convert CRT into PFX
Follow the Import Wizard, using all the defaults and select your P7B file which came with the CRT file. Once the import is complete and successful, you will get notification that the import was successful. Similar to that shown in Figure 4.
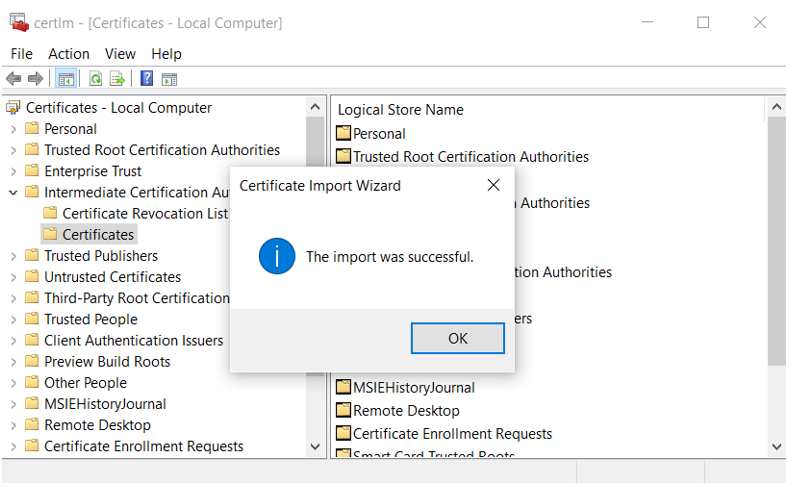
Figure 4, import P7B into certificate manager, convert CRT to PFX
Import the SSL certificate (.CRT file)
Now, do the same with the CRT but instead of the Intermediate Certification Authority folder, select Personal -> Certificates folder as shown in Figure 5.
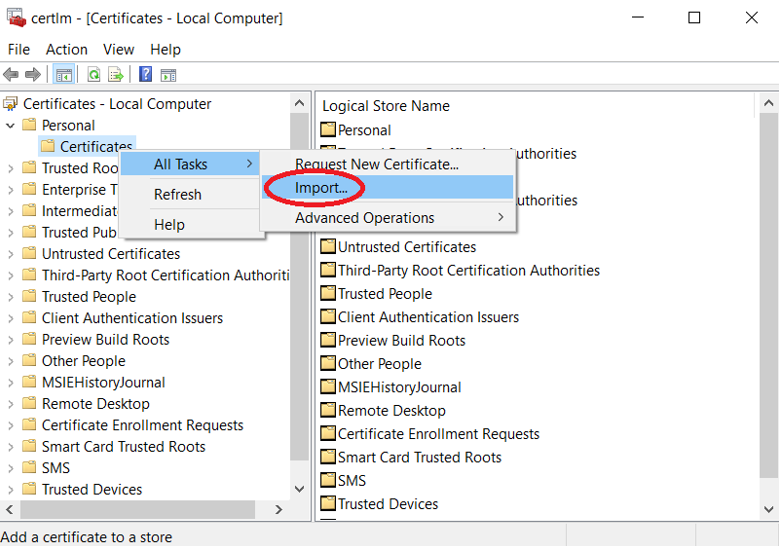
Figure 5, import CRT into certificate manager to convert to PFX
Follow the import wizard, accept the defaults and this time import the CRT file. When completed successfully, you will again receive notification, as seen in Figure 4 previously.
Export the SSL certificate and its dependencies as a .PFX file
Once both the intermediate certificate and the certificate are imported, you can export the certificate by scrolling down to the certificate you just imported into the Personal\Certificates store, right-click it, select All Tasks and Export, as shown in Figure 6.
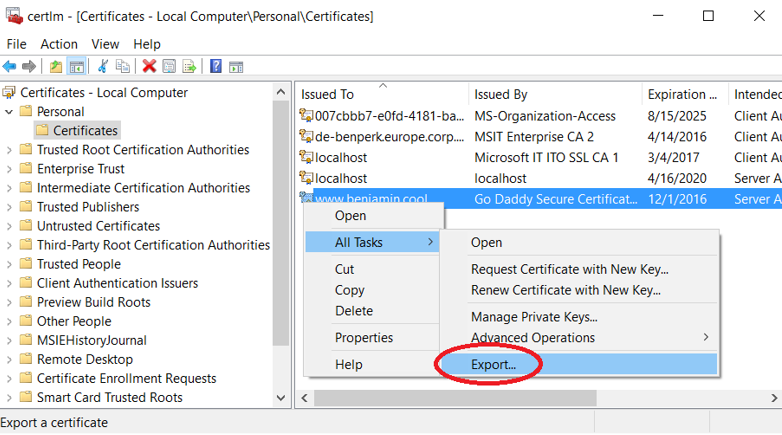
Figure 6, export the CRT as a PFX, convert
Follow the wizard and select the following. As shown in Figure 7, select to export the private key.

Figure 7, export private key, convert CRT to PFX
Make sure you export all extended properties, this will include the intermediate certificates which are needed to validate the certificate chain. Illustrated in Figure 8.
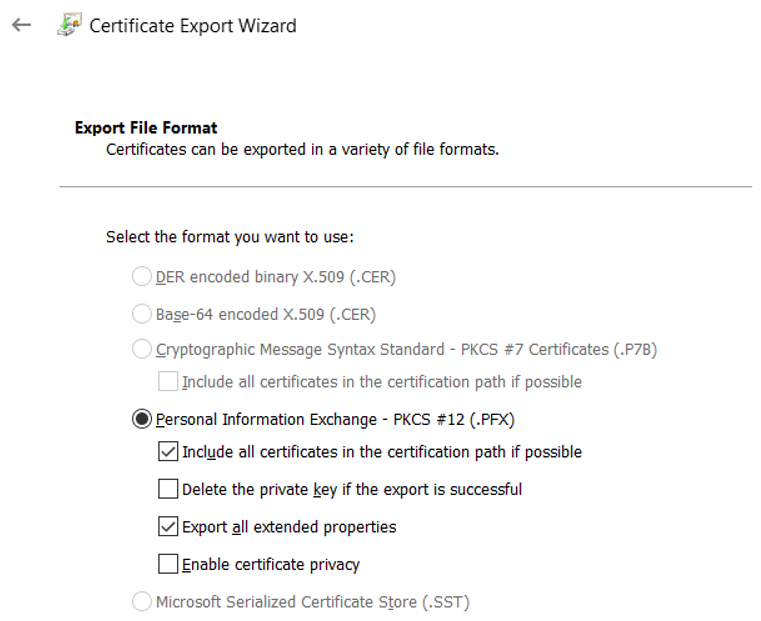
Figure 8, export all extended properties, convert CRT to PFX
Lastly, set a password and save the PFX file to a safe location. When you configure SSL for your Web App, this is the file and password you need to install it. So keep track of both.
NOTE: As of writing this post, it is recommended that your request for an SSL certificate is generated under SHA2 so that you do not run into compliance issues.