Creating Load Balanced Virtual Machines in a Virtual Network
I have seen in a couple of places where it has been mistakenly implied that you can’t create load balanced virtual machines in a virtual network. Actually, you can. The trick is that load balancing is not specific to the virtual network, but can be incidental to it. In order to load balance virtual machines, they must be in the same cloud service. So if you create load balanced machines inside a cloud service, targeting the first of the load balanced machines to a virtual network, then both load balanced machines will participate in the virtual network. I will walk through the process to show how it’s done for two load balanced virtual machines. Of course, you can add more.
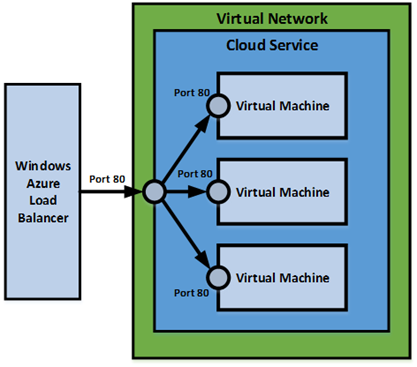
Our walkthrough scenario will look something like the below diagram when we are done. Note that this is slightly modified from the Windows Azure Load Balancing Virtual Machines documentation page, adding Virtual Network to the diagram.
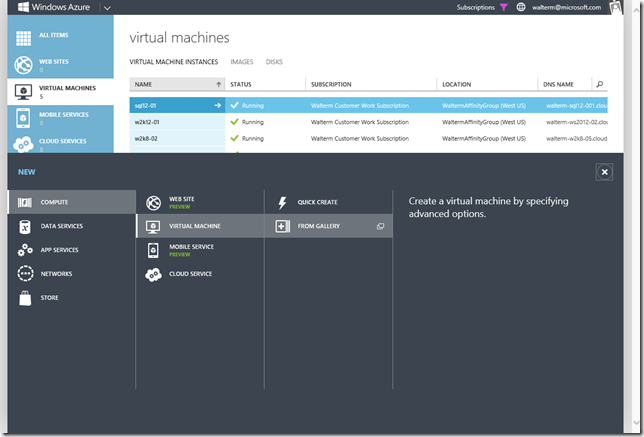
So let’s now begin. From the Windows Azure management portal, select the enormous “+ NEW” button in the lower left hand corner of the portal, and navigate to the creation of a virtual machine as seen below.
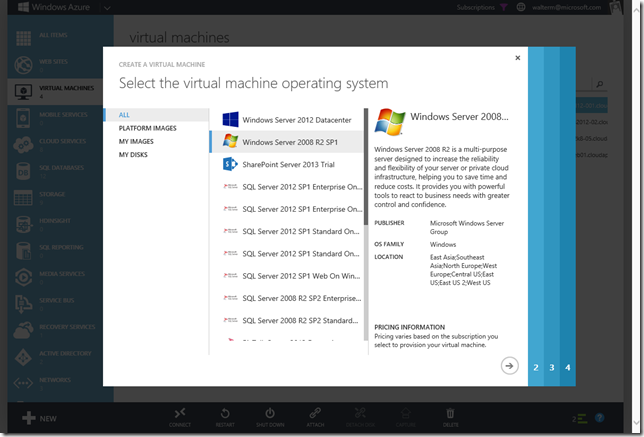
From the create a virtual machine wizard, select the image you would like.
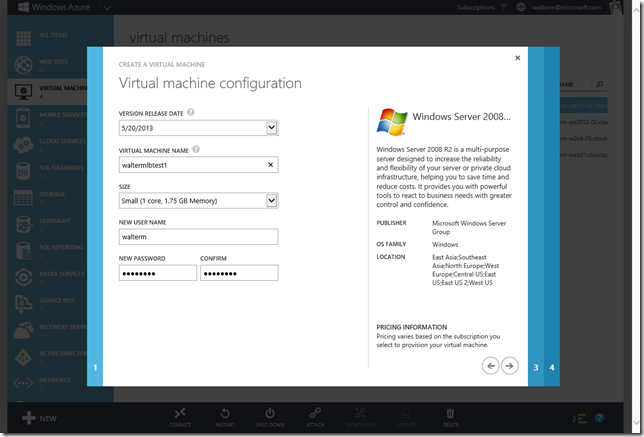
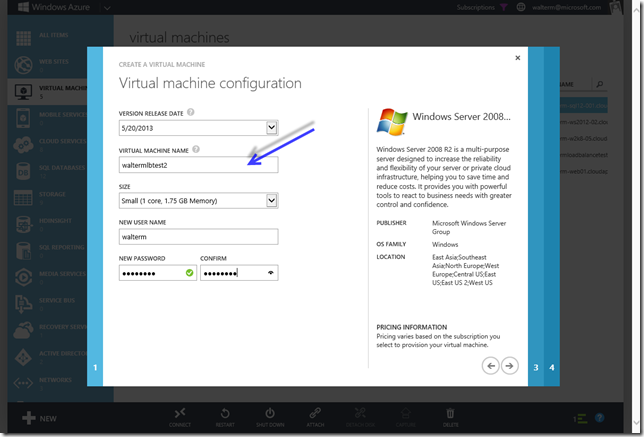
Provide a virtual machine name and fill in the remaining values, as seen below.
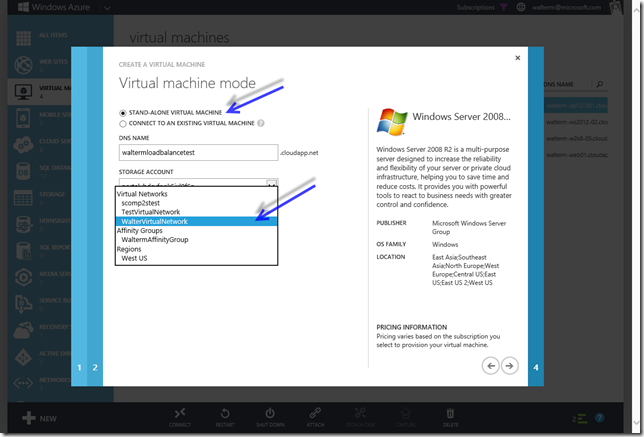
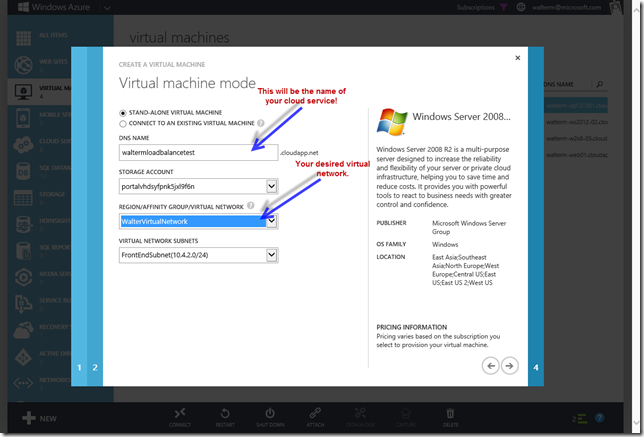
Now, on the Virtual machine mode page, leave the Stand-alone Virtual Machine radio button checked. Enter a DNS name for your load balanced machines, select the storage account to contain your virtual machine, and then select the virtual network you would like this virtual machine to participate in.
Your portal should look as seen below when you’re done.
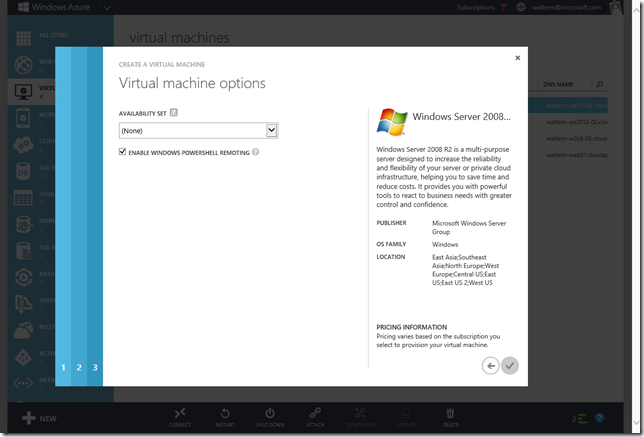
Finally, choose an availability set if desired.
Now walk through the steps above again for a new virtual machine, providing a virtual machine name on the Virtual machine configuration page that complements the one created previously.
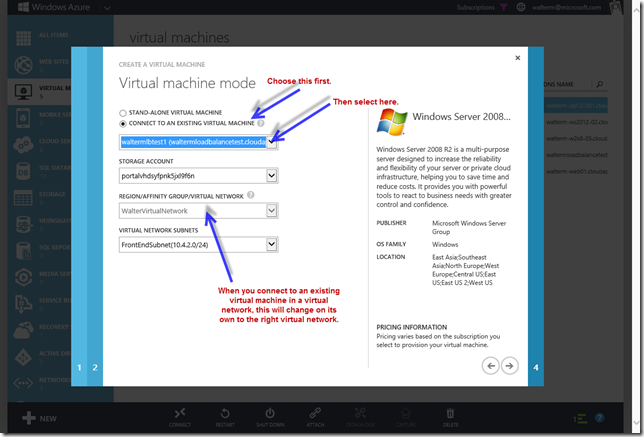
On the Virtual machine mode page, select the Connect to an Existing Virtual Machine radio button. Select the virtual machine you created previously in the dropdown immediately below. The virtual network dropdown, even though it is grayed, will change on its own to the virtual network associated with the virtual machine you created previously. Go ahead and complete the wizard as before.
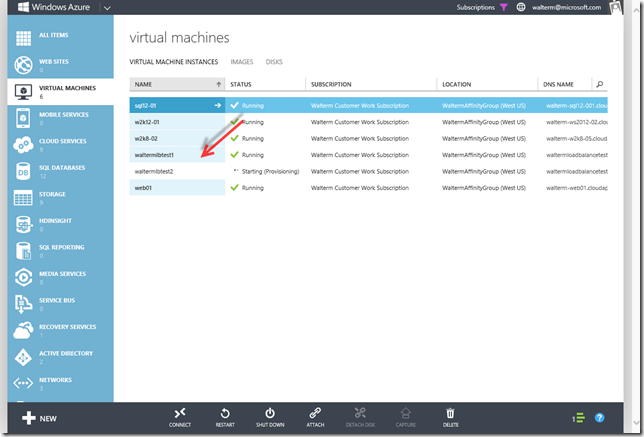
Now that you have created the virtual machines, let’s setup the load balanced endpoints for each. Select your first virtual machine in the first column as seen below so that it will take you to its details page.
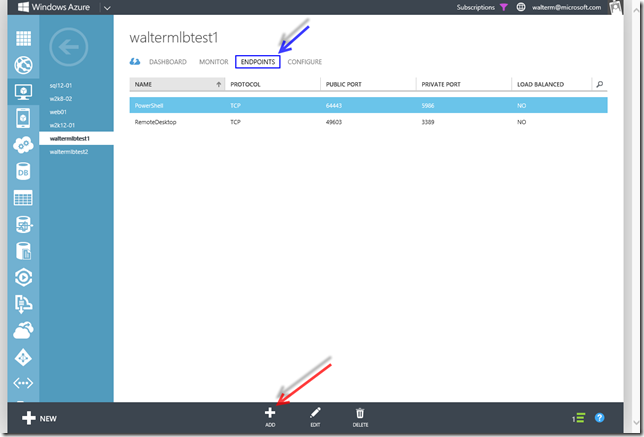
Select the Endpoints tab, as seen below, and then select the Add button, which will start the endpoint wizard.
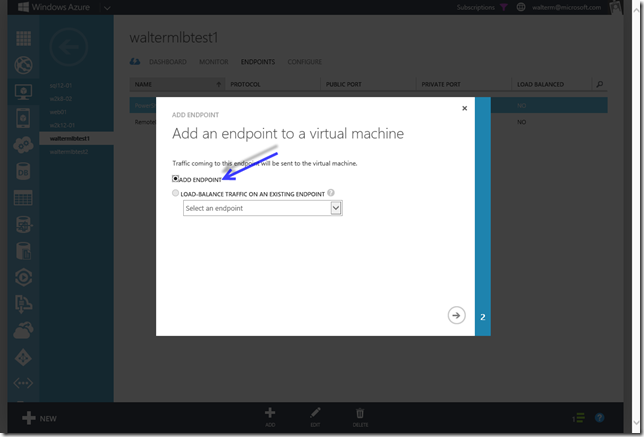
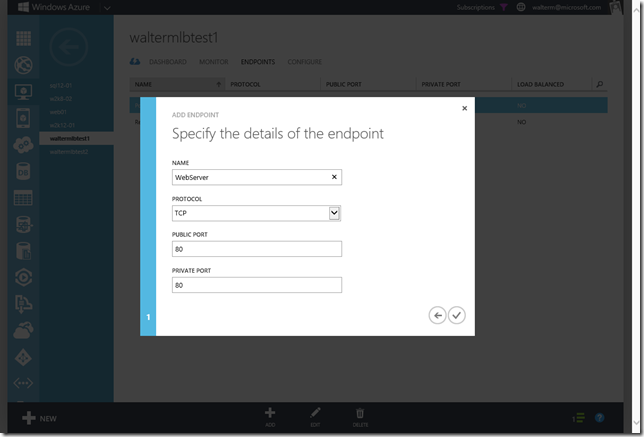
Leave the default Add Endpoint radio button selected on the first wizard page, as seen below.
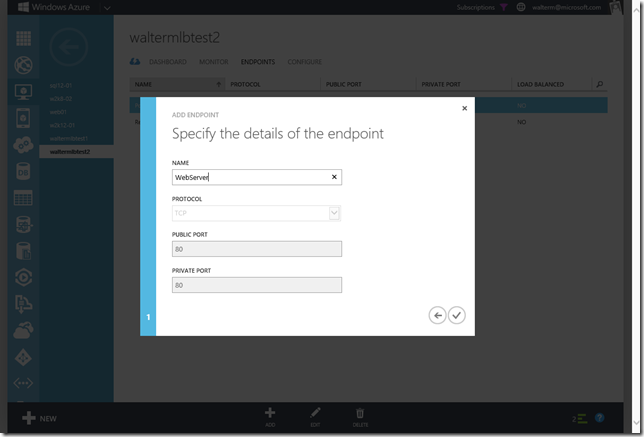
On the next page, provide a name for the endpoint and input your public as well as private ports. As an example, since I’m setting up web servers, both of my ports will be port 80.
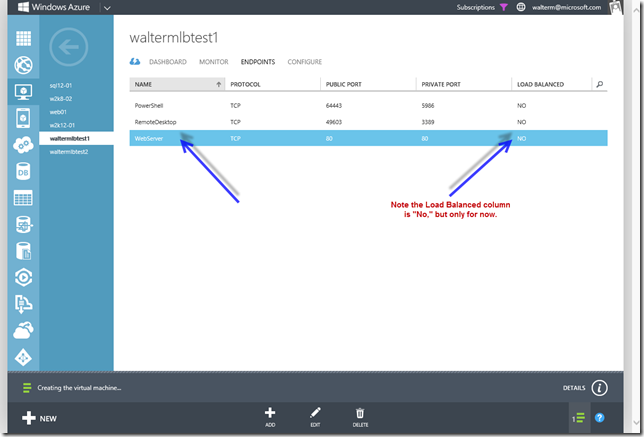
When you’re done, you will shortly see a newly configured endpoint.
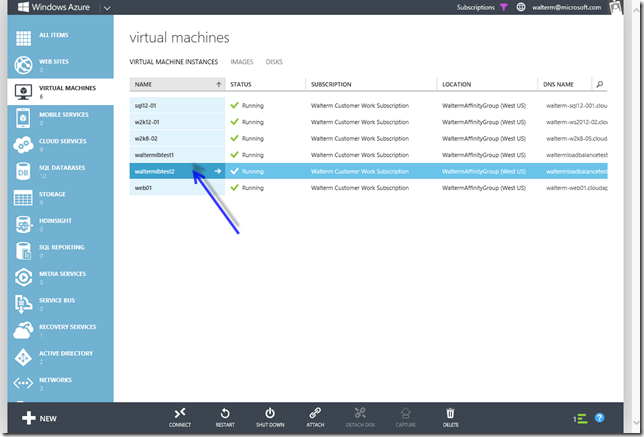
Now head back to the virtual machines page, and select the first column of the second virtual machine, which will take you to the details page.
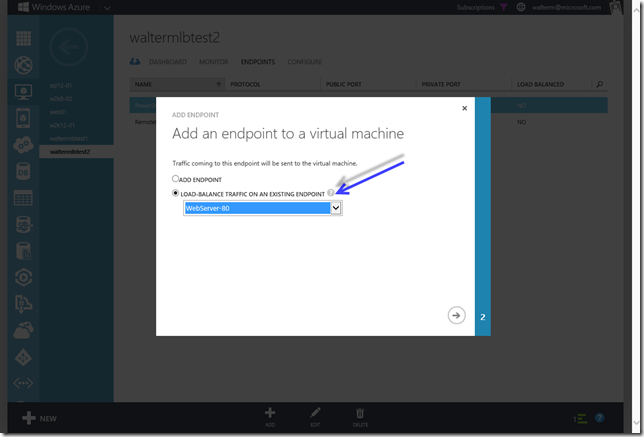
As before, select the Endpoints tab, and add an endpoint. On the Add Endpoint page, as seen below, select the Load-balance Traffic on an Existing Endpoint. From the dropdown, select the endpoint name you previously created (which will be appended with the port number).
On the next page, provide a name for the endpoint, and select the checkmark to finish the wizard.
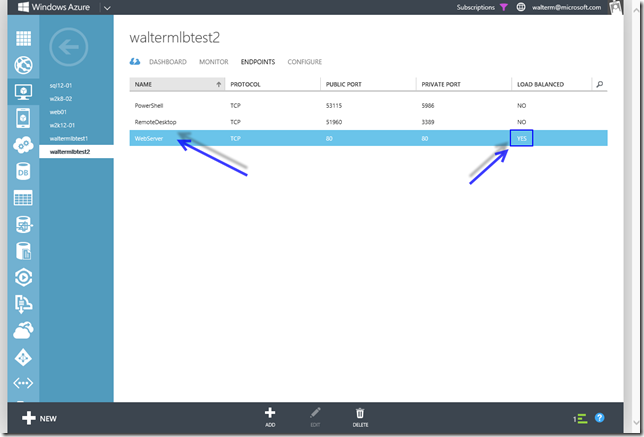
After a short while, your endpoint will be created. Verify that under the Load Balanced column, the value is “Yes.” If you go to the first virtual machine we created and inspect its endpoints page, you will see that its Load Balanced column has changed to “Yes.”
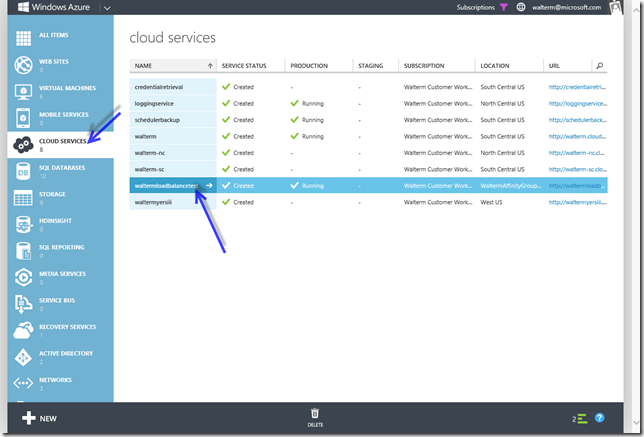
Let’s verify that everything is setup properly now. Navigate to the Cloud Services pane from the left-hand navigation. You should see a cloud service with the DNS name you specified when you created the first load balanced virtual machine. Select the first column of the cloud service to go to the details page.
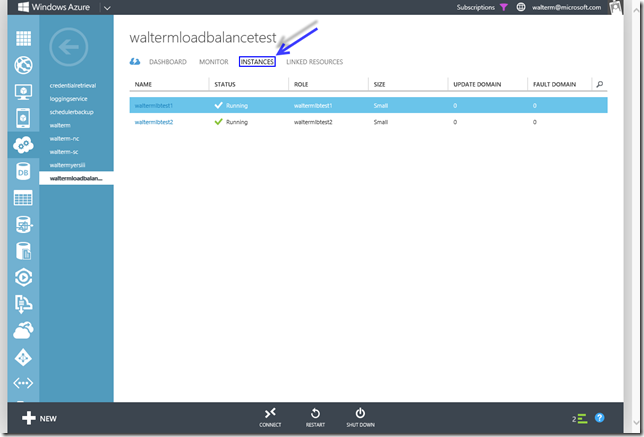
Select the Instances tab for your cloud service, as seen below. You should see your two virtual machines you just created.
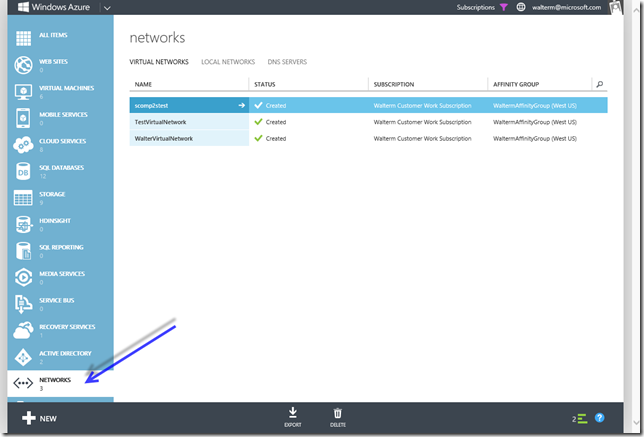
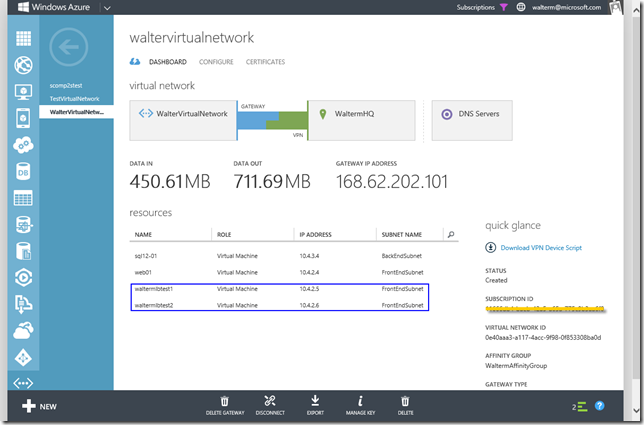
Now let’s verify that the virtual machines are contained within the selected virtual network. Select the Networks pane from the left-hand navigation.
You should see your virtual machines under the Dashboard tab.
You’re now done. You can go ahead and add additional load balanced endpoints if needed.
