Resolving Windows Azure Diagnostics Connection String Issues with SCOM 2007 R2
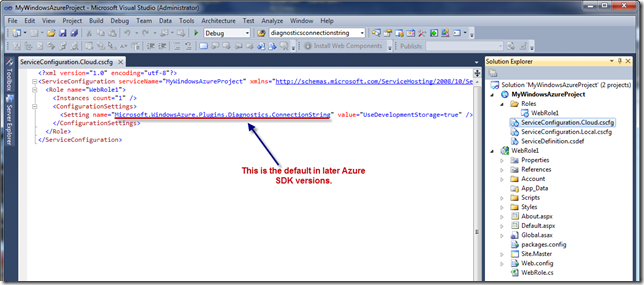
In earlier versions of the Windows Azure SDK, the default Windows Azure Diagnostics string provided by the Visual Studio template in the service configuration file was named DiagnosticsConnectionString. Later Windows Azure SDKs have changed this name to Microsoft.WindowsAzure.Plugins.Diagnostics.ConnectionString. By default, however, the SCOM 2007 R2 Windows Azure Management Pack continues to reference the DiagnosticsConnectionString setting in order to find the storage account from which to collect diagnostics. This has obviously caused some chagrin for those who have deployed new applications and setup SCOM to monitor them only to see no results in SCOM, particularly with performance counters. The Azure Management Pack documentation does document the fact that if a different name is used in the service configuration file, you must override the Diagnostics Storage Account Setting Name parameter for Windows Azure Hosted Service Total Discovery, but is not immediately obvious how to do so. This blog post will walk you through the process of resolving the problem. A special shout out goes out to my Microsoft colleague Bruno Saille who first alerted me to the solution for this issue.
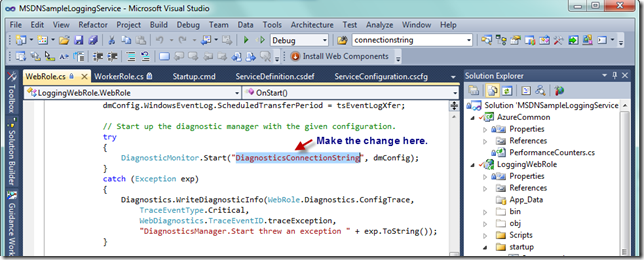
Below is our starting point in Visual Studio 2010, where I’m using the 1.5 version of the Windows Azure Tools for Visual Studio. You can always just change the value in Visual Studio to the default setting name in SCOM before you deploy your application (this change to the connection name would be applied in the service configuration file and also the DiagnosticMonitor.Start call that references the connection name in your role OnStart method). If the application has already been deployed, you can modify the value in the configuration file from the management portal. If that’s too much trouble (as you are probably the SCOM admin), it’s easy to change the setting in SCOM to point to the correct diagnostics connection string, which is what we will show you in this post.
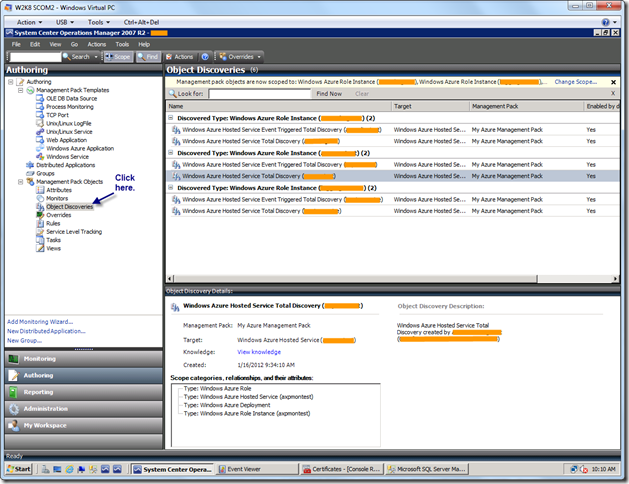
Presuming you want to make the change in SCOM, we will start in the Authoring view of the Management Console. Select the Object Discoveries node under Management Pack Objects, as seen below . I have scoped the Object Discoveries pane down to Windows Azure Role Instances to make my deployment easy to find.
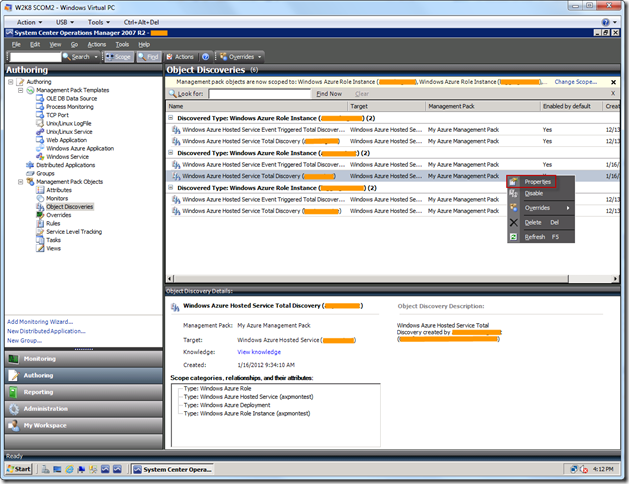
Find your desired target whose name should look something like Windows Azure Hosted Service Total Discovery (<your hosted service name>) as seen below. Right-click on the item and select Properties from the popup menu.
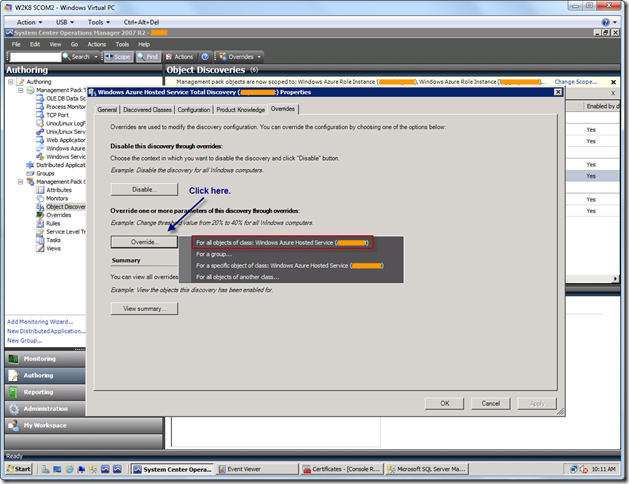
You will now see the Properties dialog, as seen below. Select the Override… button, which will present a fly out menu. In the fly out menu, select the For all objects of class:… menu selection.
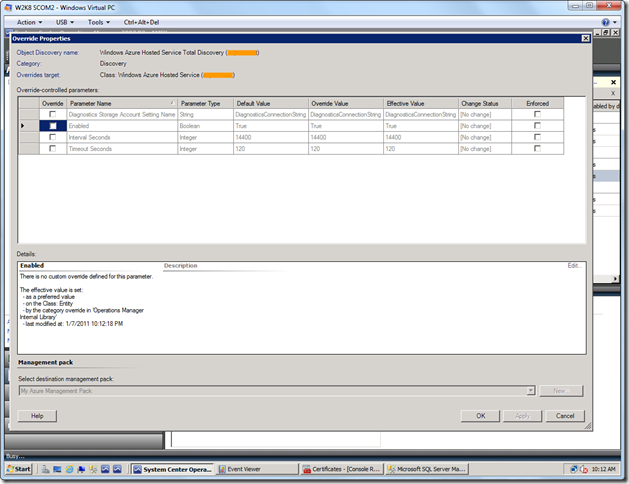
You will now see the Override Properties dialog, as seen below. Click on the Override check box for the Diagnostics Storage Account Setting Name parameter.
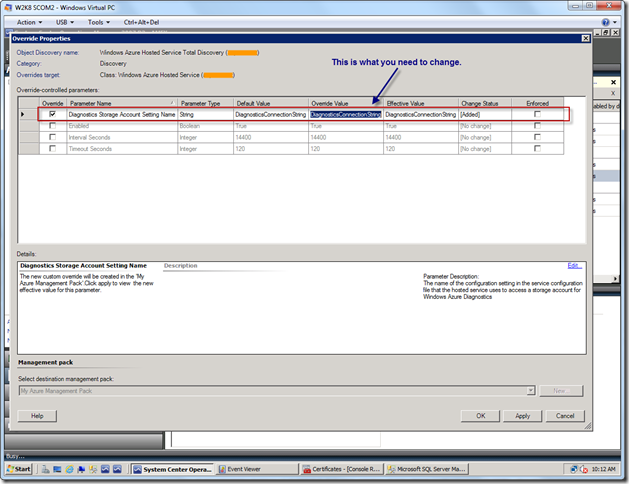
That row you selected now becomes enabled. Your dialog should now look as seen below, where we will override the existing DiagnosticsConnectionString value.
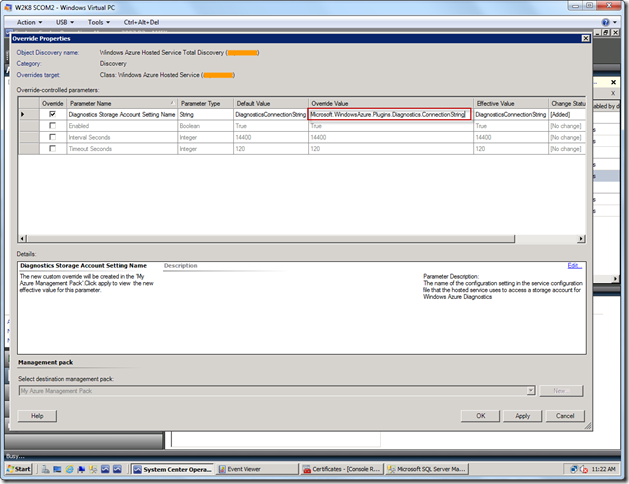
Change the value to look like below, by entering Microsoft.WindowsAzure.Plugins.Diagnostics.ConnectionString into the Override Value field (or whatever other name you may have specified in the service configuration file).
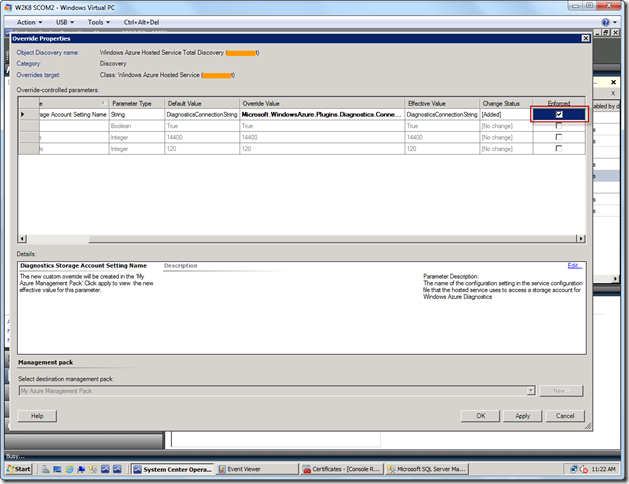
Now, use the scroll bar to display the columns not currently in view to the right, if you can’t see all of them. Your next step is to select the Enforced check button for this parameter, as seen below. Choose the Apply button.
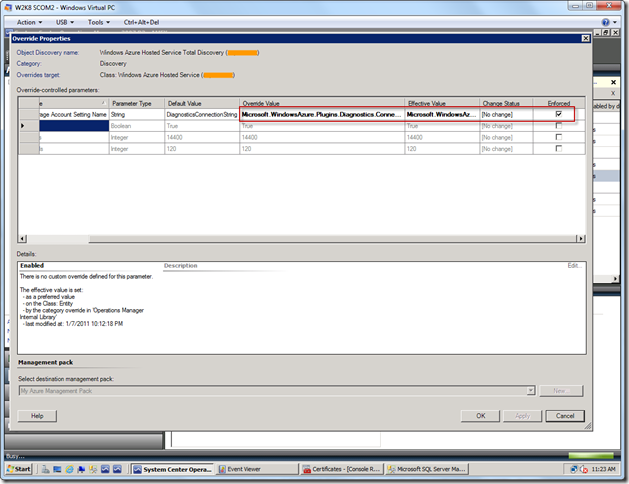
Your view should now look similar to the screen below. Verify that the Effective Value field has your new value, and that the Enforced box is checked. Next click the OK button. This will take you back to the original Properties dialog.
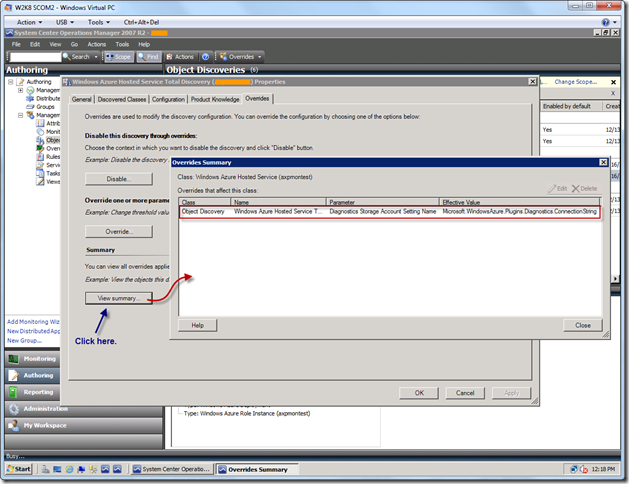
From the Properties dialog, you can select the View Summary button in order to verify your override, as seen below. When you’re done, close the summary dialog and then select the OK button on the Properties dialog to dismiss it.
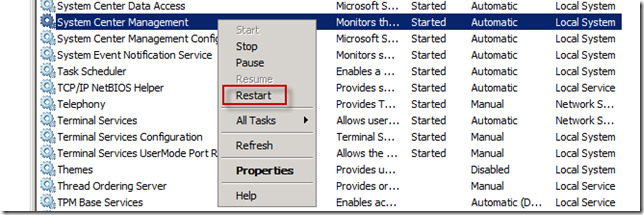
It may take some time for the updated discovery to take, so you can hurry it along a bit by going to the Services administrative tool and restarting the System Center Management service, as seen below. Please be careful not to bother any other System Center services.
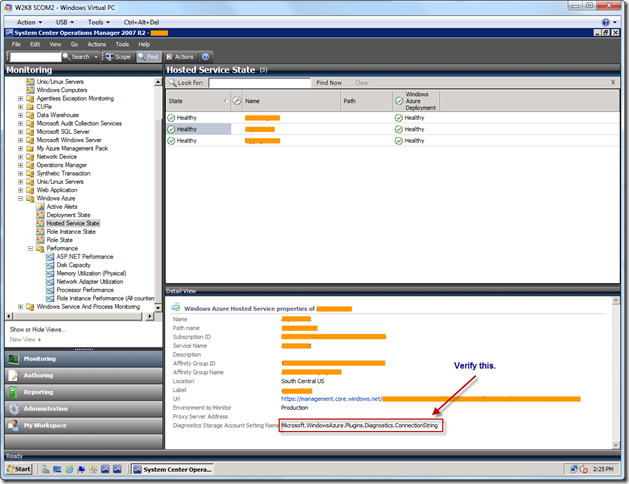
Return now to the Management Console, select the Monitoring view, and then select the Hosted Service State node. Select the desired hosted service. After some time you will eventually see the Diagnostics Storage Account Setting Name update to your overridden value. You may have to refresh this in order to see the updated value, but please be patient as this can take a while. In my case it took about 10 minutes after recycling the service.
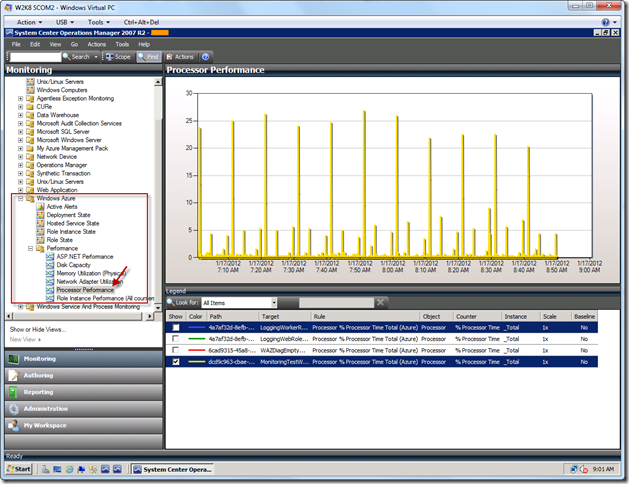
You should be all set now, and I would suggest that you next go to a performance view and wait for your counters to show up. Of course, be sure that you are looking at a performance view with counters you are actually writing out with Azure diagnostics in your role (two common counters are % Processor Time Total and Memory Available Megabytes). Please be patient as it may take up to 10-15 minutes before you begin to see results flowing into your performance views.
That’s all for now, and I hope this helps.
