Grooming Collected Diagnostics Data from Windows Azure Storage in SCOM 2007 R2
Recently, I had a colleague ask me how to groom diagnostic data collected in Windows Azure storage from Windows Azure applications. Since he is using SCOM, there is a ready answer for configuring regular grooming of Windows Azure diagnostic data, thus saving on storage consumption costs and preventing massive quantities of data from accumulating over time. Below I will provide a quick walkthrough to configure SCOM 2007 R2 for Azure diagnostics storage data grooming. Please note that this article assumes you have a working installation of SCOM, and that you have the Windows Azure Management Pack installed. If you need instructions on doing so, please see my previous blogs.
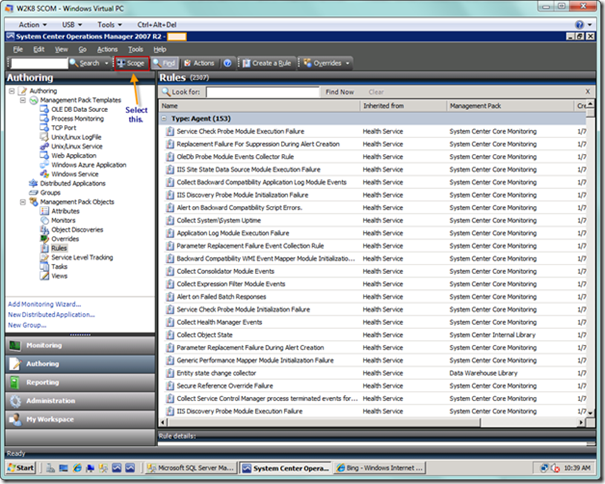
From the Operations Console, select the Authoring view. From here, select the Rules node under the Management Pack Objects tree. Regardless of how your view in the right-hand pane might look, the first thing we want to do is to “scope” the view down to make it more manageable for our purposes. If it is un-scoped, which is the default, your view will look similar to below. There are many, many object targets with thousands of rules included in SCOM. Go ahead and select the Scope button on the toolbar.
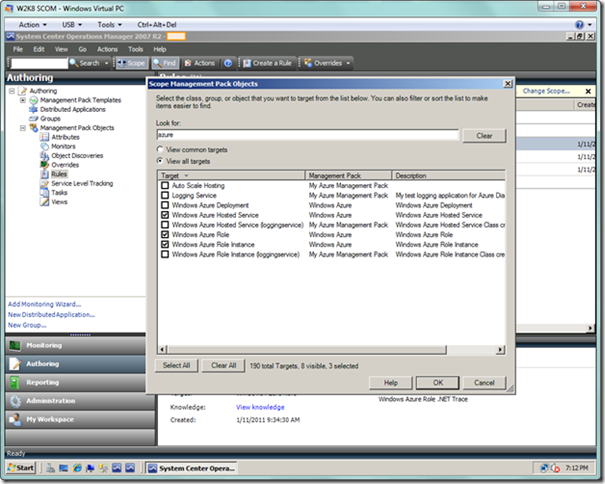
Upon selecting the Scope button, you will be presented with a dialog box. Type “azure” in the Look for: textbox, and select the View all targets radio button, as seen below. From here, select the following targets:
- Windows Azure Hosted Service
- Windows Azure Role
- Windows Azure Role Instance
Your dialog should look similar to below. Select the OK button.
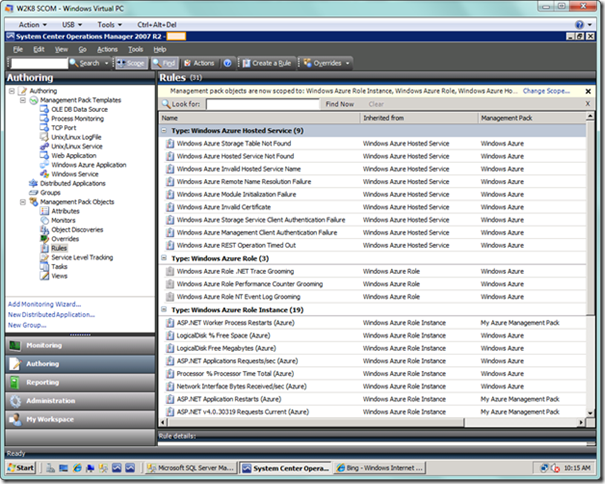
You will now see the three targets you selected with their out of box rules listed beneath the target heading. Notice that for Windows Azure hosted services, there are several rules enabled by default, each of which generates alerts if the conditions of the rule are met. For each Windows Azure role instance, there are default performance counters (which I covered in a previous blog). Now with respect to a Windows Azure role, we have three grooming rules, as follows:
- .NET Trace Grooming
- Performance Counter Grooming
- Event Log Grooming
Note that these are the only diagnostics data sources groomed because these are the only sources the SCOM Azure Management Pack will collect diagnostics data from currently.
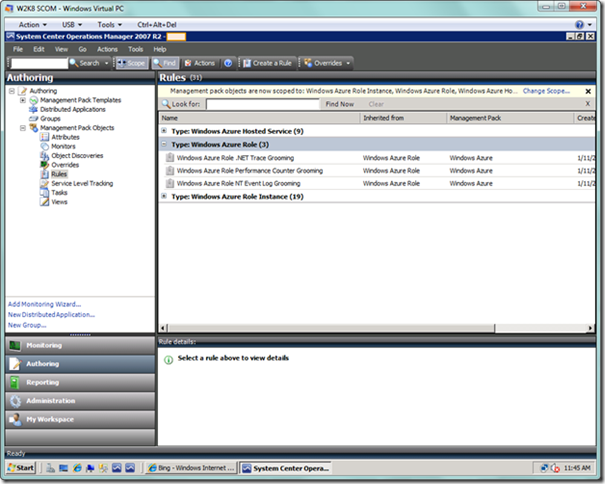
Go ahead and collapse both the Windows Azure Hosted Service and Windows Azure Role Instance targets, so your view will look as below.
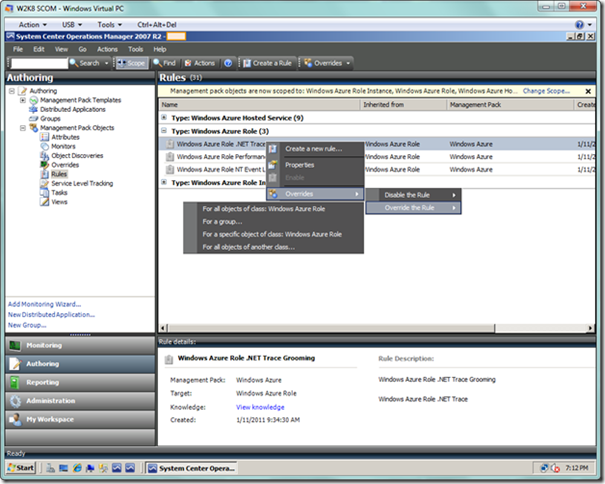
Now right-click on the Windows Azure Role .NET Trace Grooming item under the Windows Azure Role target. In the flyout menu, s elect Overrides | Override the Rule | For all objects of class: Windows Azure Role.
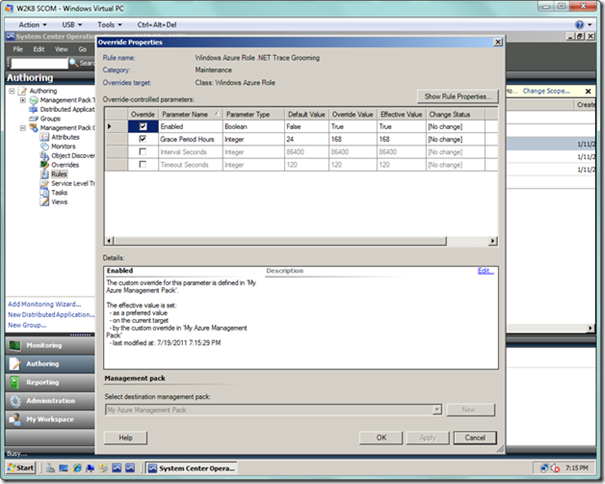
You should now see the Override Properties dialog, as seen below. Select the Override checkbox for the Enabled parameter, and change the Override Value field to True. Next, select the Override checkbox for the Grace Period Hours parameter, and change Override Value field to the desired number in hours. I chose 168 hours, which means SCOM will delete collected trace logs that are over one week old. Finally, select your management pack as the destination management pack at the bottom of the dialog. You can then select the Apply button, and then eventually the OK button to dismiss the dialog.
Do likewise for Performance Counter grooming and Event Log grooming.
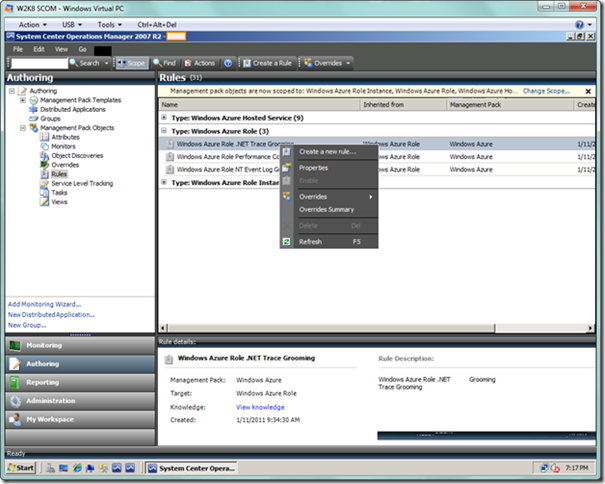
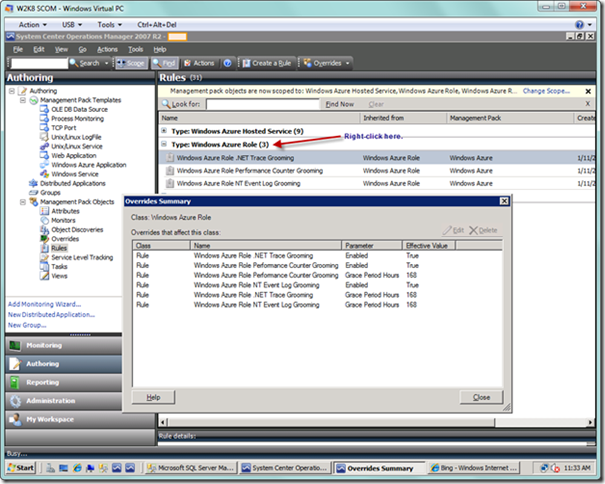
Next, let’s verify the work we have done. Right-click on the .NET Trace Grooming item, and select Overrides Summary from the popup menu.
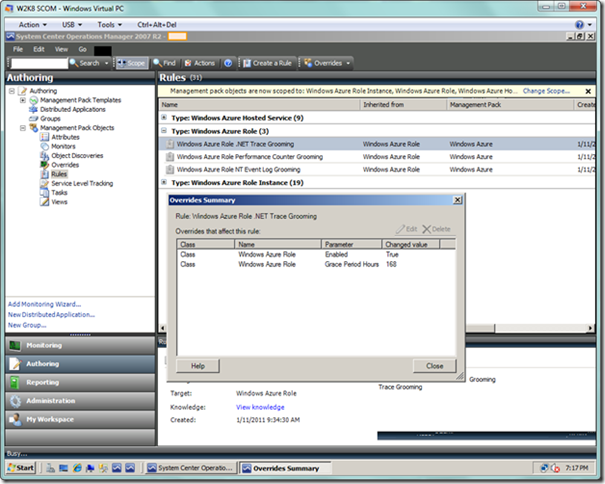
You should now see the summary, as below. Verify that grooming is enabled and that you have the desired grooming period in hours.
You can also right click on the Windows Azure Role target and select the Overrides Summary popup menu item to see all of the overrides for that target, as seen below.
That is all for now. Please feel free to let me know if any questions.
