What's new in November 2007 CTP: Automation for Navigation
Manual Test Runner (MTR) is one of the key portions of Rosario with which we are hoping to capture the imagination of the manual tester. Read more...
AfN-Automation for Navigation is a feature that we are adding to MTR to enrich the testing experience, to facilitate the tedious manual testing! It helps the tester to automate the repetitive and time consuming parts of a manual testcase so that more focus can be laid on testing the functionality of the application, thus increasing efficiency.
What happens exactly is that when the tester does manual testing for the first time, we start a background recorder that captures all the manual actions and creates a recording strip which is essentially an XML file containing all the actions performed and is exposed to the tester. The strip has markers inserted at all those points where a step was marked in the middle of the recording. Here is a snippet of the XML file that’s generated:
<?xml version="1.0" encoding="utf-8"?><UITest xmlns:xsi="https://www.w3.org/2001/XMLSchema-instance" xmlns:xsd="https://www.w3.org/2001/XMLSchema" Name="" Id="83a5f887-245b-4a71-9d5e-20def6ebfd6d" Version="1.0">
<InitializeActions />
<ExecuteActions>
<TestStepMarker MarkerInformation="">
<StepId>0</StepId>
</TestStepMarker>
<MouseAction UIObjectName="CurrentUIMap.ItemWindow.RunningApplicationsToolBar.VshostexeButton">
<ModifierKeys>None</ModifierKeys>
<Location X="53" Y="13" />
<WheelDirection>0</WheelDirection>
<ActionType>Click</ActionType>
<MouseButton>Left</MouseButton>
</MouseAction>
<MouseAction UIObjectName="CurrentUIMap.ApplicationCustom.Run1202PM24MicrosoftMenuItem">
<ModifierKeys>None</ModifierKeys>
<Location X="68" Y="15" />
<WheelDirection>0</WheelDirection>
<ActionType>Click</ActionType>
<MouseButton>Left</MouseButton>
</MouseAction>
<TestStepMarker MarkerInformation="">
<StepId>2147483647</StepId>
</TestStepMarker>
</ExecuteActions>
Whenever a step is marked, a visual indiactor immediately appears in the same row as the step. Random marking of steps is allowed but markers are not inserted in all cases. If a step is marked in the forward direction without doing any AUT actions, the last inserted marker moves to this step. If a step is marked in backward direction, no marker movement occurs, only tooltips advising to mark steps in order, appear. An implicit start marker is inserted when a testcase is started and an implicit end marker is inserted on ending the testcase.
The tester will have a choice of switching on/off the background recorder, the video recorder and the action log and also to exclude applications to be recorded. Throughout the testcase execution, this information is displayed to her.
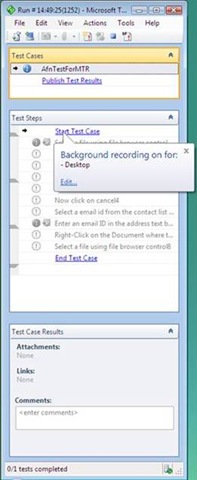
Fig 1: The tooltip shows the default recording settings. On clicking on the ‘Edit’ link, the Recording Settings dialog pops up

Fig 2: The Recording Settings showing available choices of loggers and AUTs
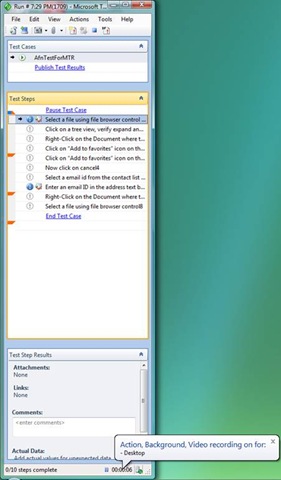
Fig 3: After the TC is started, hovering the mouse over the status bar shows which loggers are on and what all AUTs are being recorded
So when the same testcase is opened again, the UI shows a visual indication at the points where a marker was inserted. The tester has a choice of skipping some sections by playing back between a chosen set of markers to speed up her navigation through the testcase or overwrite the existing markers and recordings. In the end, the original and the new strips are merged and a choice is given to the tester to either keep the original recording or save the new merged recording.
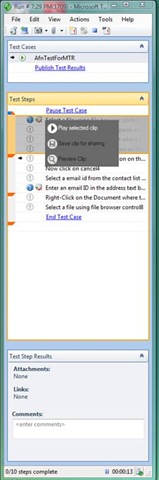
Fig 4: On opening the TC again, the available markers are displayed which can be played back or re-recorded

Fig 5: After re-recording, when TC is ended, tester is given options to save/discard new markers
With so much functionality, MTR is sure to be a boon for all manual testers!