Importing fields using the Import SharePoint Solution Package project
A SharePoint Content Type project allows the user to create a content type based on the built-in SharePoint content types. But what about situations where one would want to re-use a built-in field(s) in SharePoint? One way to do this is to use the "Import SharePoint Solution Package" project. This article provides the simple step-by-step procedures on how to achieve this.
To begin, let's first create a subsite. Imagine this as the site you want to copy the field from. This may or may not be on the same development machine that you're using.
To create a subsite in SharePoint:
Using Internet Explorer, browse to https://<machinename>
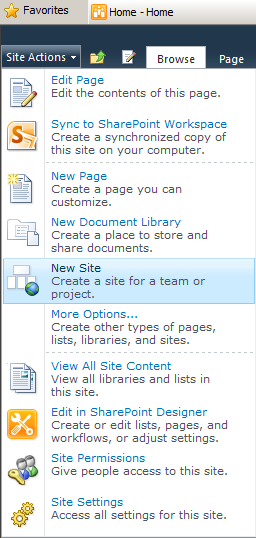
Click on Site Actions | New Site.
Fill-in the following values for the form:
- Title: SourceSite
- URL name: SourceSite
Click the Create button.
The “SourceSite” subsite is now created. Let's now use SharePoint's "Save site as template" feature to export the entire subsite to a .wsp file.
To export a subsite to a .wsp file:
- Using Internet Explorer, browse to https://<machinename>/SourceSite
- Click on Site Actions | Site Settings.
- Click on Save site as template.
- Fill-in the following values for the form:
- File name: SourceSite
- Template name: SourceSite
- Click the Ok button.
- After the operation completes successfully, click the Solution Gallery link.
- Click SourceSite and save the wsp file to your disk.
We're now ready to import the field into Visual Studio.
To import a field into Visual Studio:
Start Visual Studio in admin mode.
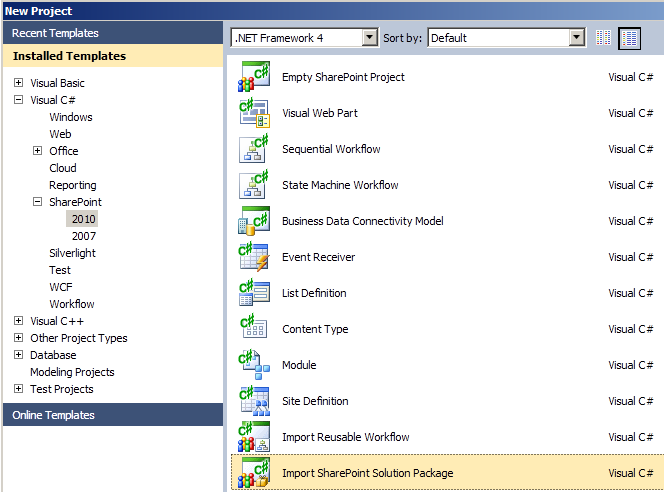
Create a new C# Import SharePoint Solution Package project.
In Page 1 of the wizard, leave all default values as-is. Click the Next button.
In Page 2 of the wizard, click the Browse button and browse to the directory where you previously saved the SourceSite.wsp file. Click the Next button.
In Page 3 of the wizard, unselect all SharePoint items (Tip: This can easily be done by typing "Ctrl+A" and then hitting the space bar).
Look for the following fields and check them (Tip: This can easily be done by typing the fields you're looking for).
- Address
- City
- State/Province
- \Zip/Postal code
Click the Finish button.
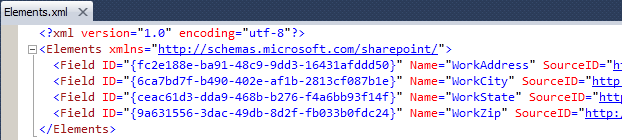
A project will be created that contains the Fields project item. Double-clicking on this project item will show the contents of its Elements.xml:
Let's now create a content type that will use these fields that we just imported.
To add a Content Type project item:
- From the main menu of Visual Studio, select Project | Add New Item.
- In the Add New Item dialog, select Content Type and click Add.
- In Page 1 of the wizard, select "Issue" as the base content type. Click the Finish button.
We now modify the content type to reference the imported fields.
To reference the fields in the content type:
In Solution Explorer, double-click the Fields project item.
Copy the Fields:
In Solution Explorer, double-click the Content Type.
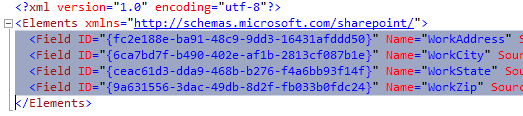
Paste the Fields into the Content Type so that it would look like this:
Note:
o Make sure you change the Field tags to FieldRef.
o Only the ID, Name, and DisplayName attributes are needed.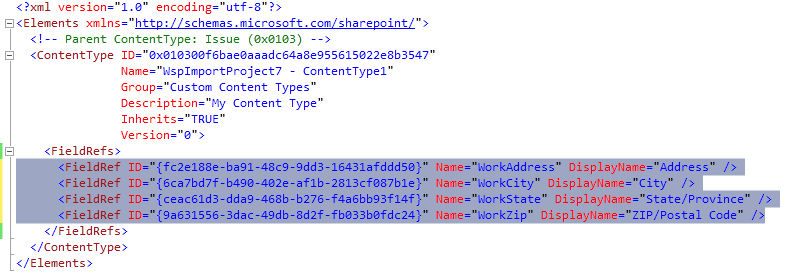
We are now ready to debug and deploy the content type and fields.
To debug the content type and fields:
- Set the content type as the default startup item:
- Right-click the content type in Solution Explorer.
- Select "Set as Startup Item" in the context menu.
- Press F5 to start debugging.
- Click the content type under the "Custom Content Types" group.
You'll see the Address, City, State/Province and Zip/Postal Code fields in the columns section.The next step is to create a List Definition and List Instance based on the Content Type.
To create a List Definition and List Instance based on the Content Type:
From the main menu of Visual Studio, select Project | Add New Item.
In the Add New Item dialog, select the List Definition from Content Type and click the Add button.
Use the defaults in the List Definition wizard. Visual Studio automatically detects the Content Type in your project and uses this.
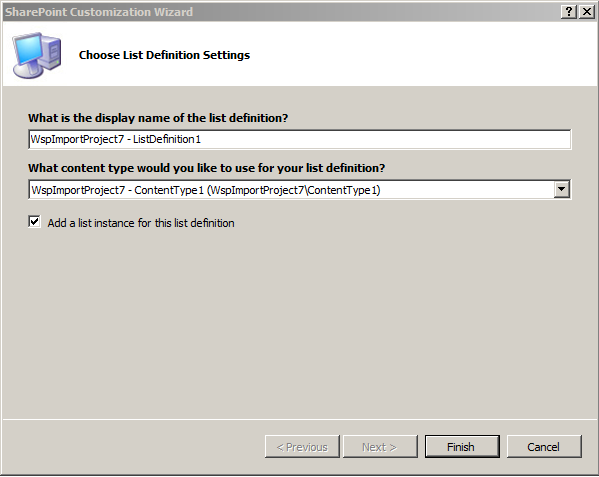
Click the Finish button.
A List Definition and List Instance project item are added to the project.

To debug the List Definition and List Instance:
Set the List Instance as the default startup item:
- Right-click the List Instance in Solution Explorer.
- Select "Set as Startup Item" in the context menu.
Press F5 to debug. The List Instance will be loaded in IE.
Click the Add new item link.
You'll find the fields at the bottom of the New Item form:
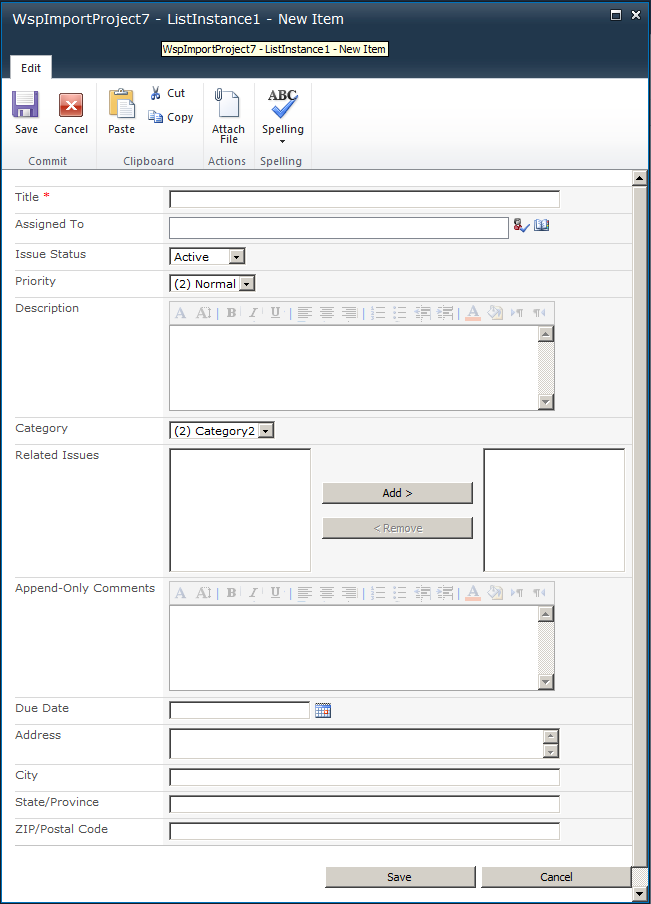
Fill-up the form and click Save.
You'll notice the Address, City, State, and Zip fields are not displayed in the list. To display them, follow these steps:
To display certain fields in the list:
Click the List tab under the List Tools tab.
Click Modify View in the ribbon:
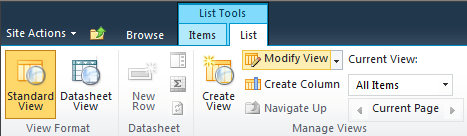
Check the fields you want to be displayed in the list view.
That's it! You've now inherited fields, referenced them in a content type, created a list definition based on the content type, and displayed the fields in the list instance. Hope this helps! :)
Ian Ching