Getting Started with the SharePoint Packaging Designers
Visual Studio 2010 SharePoint Tooling supports packaging of WSP files with visual designers, tool-windows and MSBuild. Here we start by introducing the designers.
The feature and package designers expose deployment concepts which are familiar to SharePoint developers. These include features, packages and SharePoint items as well as their attributes and contents. Some of them include feature scope, feature dependencies, packaged assemblies, safe-controls, class resources, and more. Additionally, the designers abstract away the more difficult concepts and provide pre-deployment validation rules to avoid common issues when deploying your solutions. The designers allow advanced users partial or full control of the feature and solution manifest files to merge or add data and view the final product. Whatever your skill level you’ll find the new designers an exciting addition to your SharePoint development arsenal.
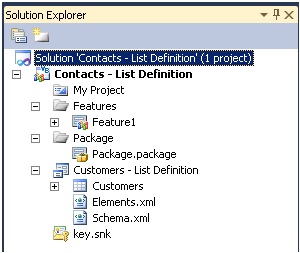
The best way to get started with packaging is to create a SharePoint project. SharePoint projects come standard with a Features and Package folder in your project. There are 0..n features in a SharePoint project and always 1 package. Here is a sample List Definition project as viewed in the solution explorer.
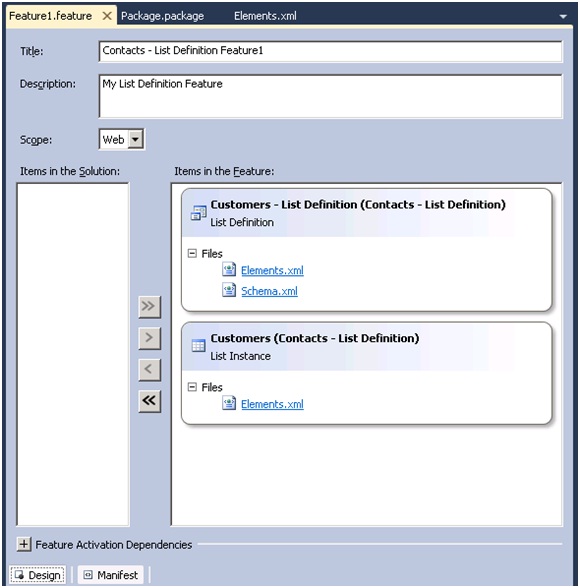
Opening the Feature1 designer shows that the List Definition and List Instance SP project items are included by default in the feature. The SharePoint items which are included in the feature are visible in the list on the right. Other available SharePoint items in the solution will be shown in the list on the left if they match the feature’s scope. Remember that you must have a compatible feature scope for SharePoint items to be packaged in this feature. Configuring the feature properties can be done via the property grid and some of these properties are visible on the designer UI.
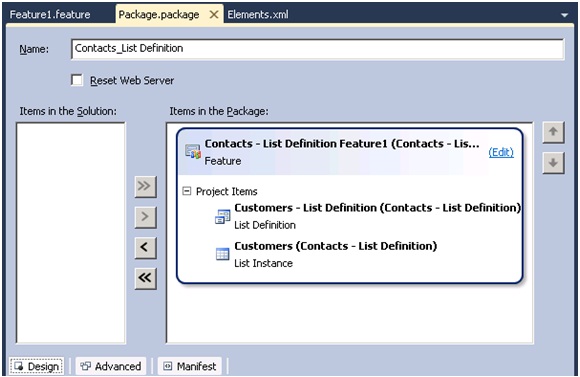
In turn, the package designer can be opened to show that the feature is included in the package. Package related properties are exposed on the designer and in the property grid. At this point your solution is ready for packaging. Right click the project node and select Package to generate a WSP in the output directory. Packaging includes validation of the SharePoint package for potential problems, generating the feature.xml and manifest.xml files and packaging all the files for your SharePoint items.
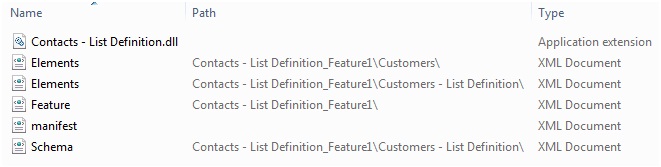
Here is a look at the contents of the WSP once it is packaged for deployment.
Further information on Packaging and Deploying SharePoint Solutions can be found on MSDN here. Stay tuned for further updates from the team on SharePoint Tools and packaging in VS 2010. If there are specific topics you’d like us to address please feel free to post them to the comments.
Erik Cutts