SharePoint WSS3.0 on Home Server
Of course we all know it is currently not supported . Be it as is may, there's plenty of good guidance on installing WSS3.0 on Windows Home Server. For my installation I used this guide. This post is not meant to be another guide to do the same! I want to highlight how I made sure the WSS content database is created in a different location (read: separate disk, unmanaged by Home Server).
If you have already installed WSS on your Home Server and used above document, you end up with your content and search database on the C: drive. The C: drive has only 20GB capacity by default and you are not supposed to change that to avoid Home Server getting confused.
Making heavy use of WSS, storing a lot of documents and images or using it as a blogging engine, will help filling up the 20GB disk relatively quickly. The only way to avoid this is moving the database to a separate drive or another partition. In my configuration I added a third USB drive and left it unmanaged by Home Server. Before installing WSS I did some research on the web about moving SQL databases and the SQL engine used by WSS. WSS uses the embedded version of SQL Server.
Q: How do you make SQL Server Embedded Edition use a different destination for its database files when running WSS3.0 on Home Server?
A: You change the default path of the database engine during the installation of WSS3.0. Here's how.
The stuff you need:
- .Net 3.0
- WSS3.0
- Microsoft Core XML Services (MSXML) 6.0
- Microsoft SQL Server Management Studio Express
Prerequisites
Install XML6 and SQL Management Studio.
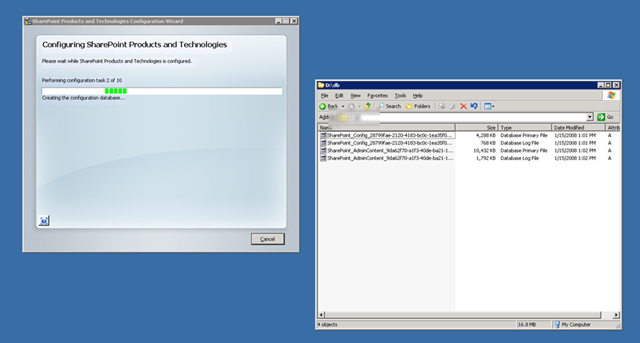
If you follow the guide I mention above, all of the steps described in this post happen before you click "Close" in step 7. After running the basic install of WSS you will be presented with this dialog
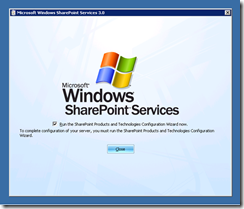
Make sure you do not click Close before you have done the following:
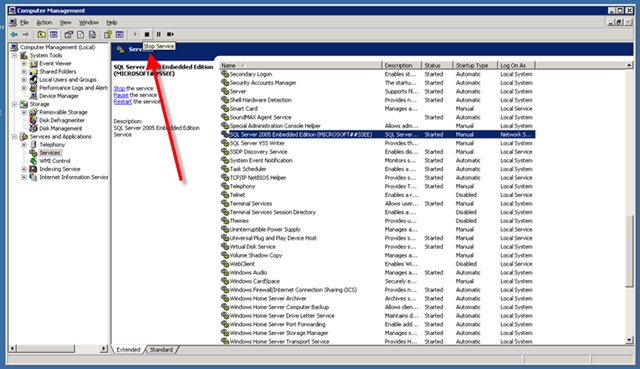
Go to Start/All Programs/Administrative/Tools/Computer Management.
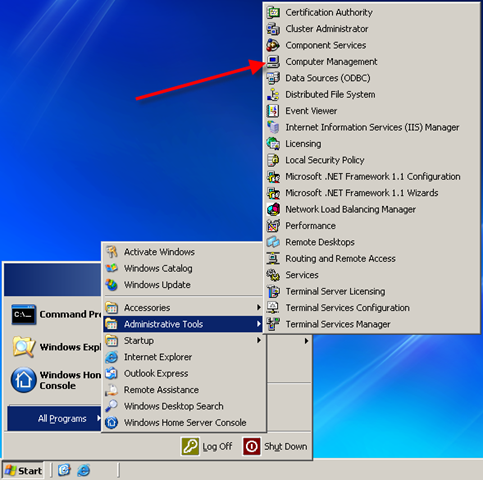
Open the Services branch
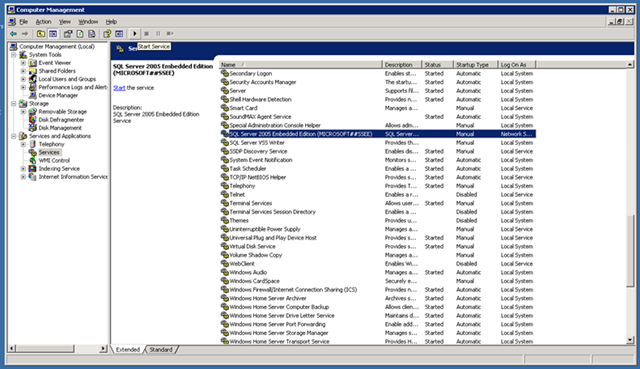
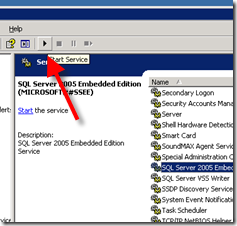
In the list of services on the right locate "SQL Server 2005 Embedded Edition". If this is a fresh installation of Home Server and WSS, the service should have not been started yet. If it has been started already, another app might have installed the database server already and you should not continue with this guide. There's more details about moving existing databases to different locations on the web and you should not follow this guide!!
Start the service
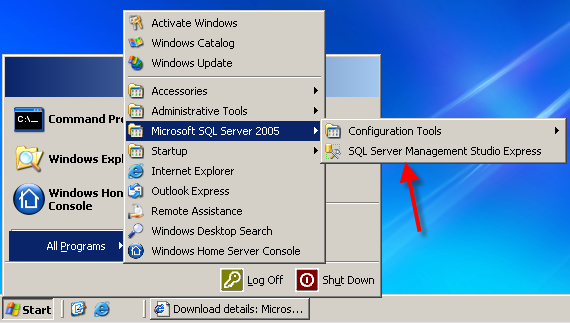
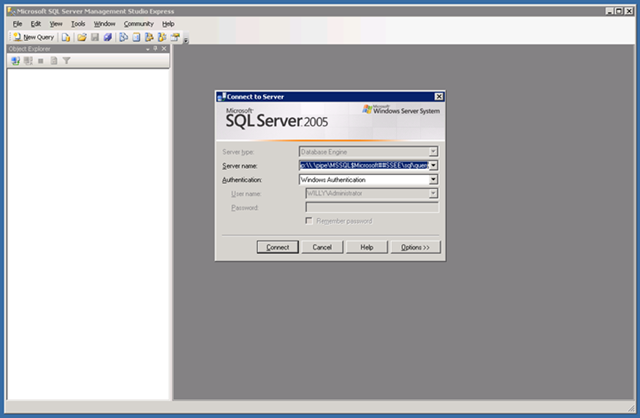
After a short while the service status will change to Started. Now you start the SQL Server Management Studio via Start/All Programs/SQL Server/SQL Server Management Studio Express.
In the Server name field enter np:\\.\pipe\MSSQL$Microsoft##SSEE\sql\query and click Connect.
After connecting to the database server, go ahead and change the database server's default database locations by right click on the navigation tree's root and selecting Properties.
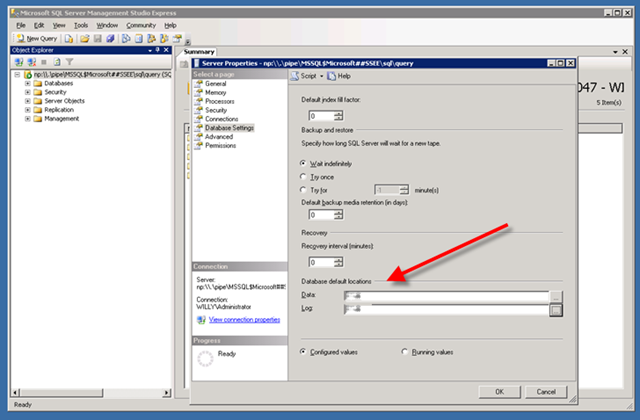
Both, the C: drive and the D: drive are maintained by Home Server. To avoid conflicts with Home Server pick any other drive. In my case I used an additional USB drive connected to Home Server but not maintained as a storage device my the server. After clicking Ok you can close the management studio.
In the next step we go back to the Services in our management console. To clean up after us we are going to stop the SQL server engine.
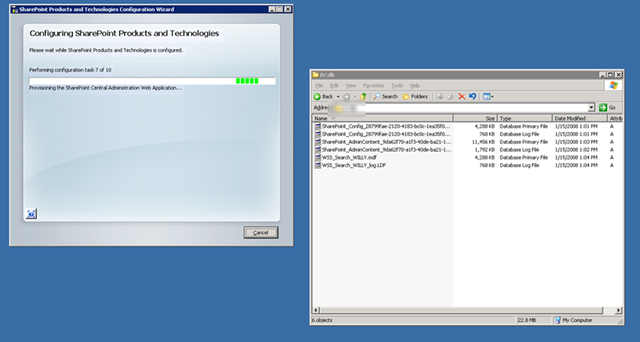
Then close the management console. That was basically it. These few steps allowed us to move the default path the database server stores its files to a different location. All new databases created by WSS or any other application using the embedded SQL engine will end up in the new directory.
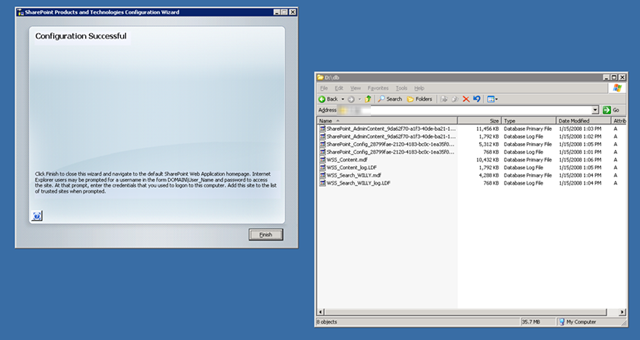
Now go back to the SharePoint Products and Technologies Configuration Wizard, make sure the "Run the SharePoint Products and Technologies Wizard now" checkbox is checked and click Close. You can now continue with step 8 of the before mentioned installation guide. Watch the databases created during the install by opening an Explorer window to the new database directory. Have fun.