Visual Studio 2012 Exploratory Testing A Windows 8 App On A Remote Device
The new Exploratory testing capability in Visual Studio 2012 is great, and I’ve been using it with Web based applications and thick clients such as WPF. If you haven’t seen it then it allows you to start a test without any test scripts, and to then create bugs and/or reverse engineer a test case while you explore the application under test, capturing screenshots, the steps you’ve performed, system information and more.
I was at the World Record setting Game Jam at the weekend, during which 50 teams were developing Windows Store game Apps, and (over a pizza with Aj Grand-Scrutton of Dlala Studios) it seemed like a good idea to look into using exploratory testing with Windows Store Apps deployed onto a separate touch device. I was delighted that it worked very well, and this is my summary of the process. My thanks to the infinite patience of Simon Michael while I used his device as the test bed.
It’s actually quite simple, but this is a relatively long post because I wanted to highlight the steps required.
Scenario
My scenario is perhaps what will be a fairly common one: I develop a Windows Store App on my developer machine, in my case a Lenovo W510 running Windows 8, but without touch input. I can create the App, test and deploy it locally, and use the Visual Studio Emulator to test it in an emulated touch device. At some point however I would like to test the App on a dedicated touch device, perhaps even getting someone else to actually test it. In this case the device was a Windows 8 Samsung 700T.
Pre-requisites
Developer machine: Windows 8 (not as a requirement for Visual Studio but in order to develop the App), Visual Studio 2012 and Test Manager 2012 (either as part of Visual Studio 2012 Premium or separately). Note that Test Manager requires Team Foundation Server (Express upwards).
Target machine: A device running Windows 8, with the Visual Studio 2012 remote debugging tools installed.
Setting up the remote debugging tools
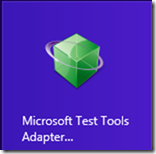
Download the Visual Studio 2012 remote debugging tools from here, and install them on the target machine. On the Start menu you’ll find 2 new tiles (on the extreme right hand side):
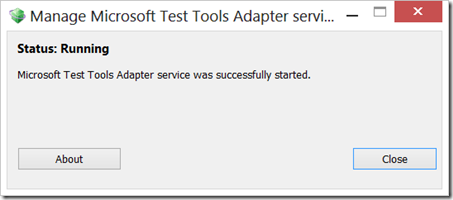
Open both of these, and start the Test Tools Adapter service:
Note: If you are going to be connecting to the target machine as a different user on the developer machine, add that user into the Remote Debugger permissions, and give the user Debug permission.
Connecting to the remote device from Test Manager
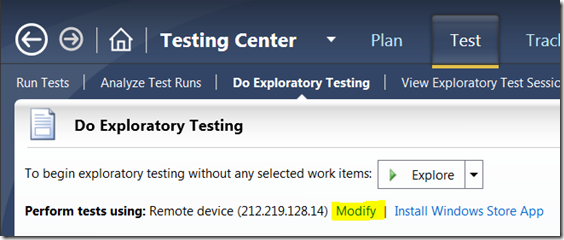
In Test Manager, select the Test section and within that Do Exploratory Testing. Then select the Modify option highlighted below:
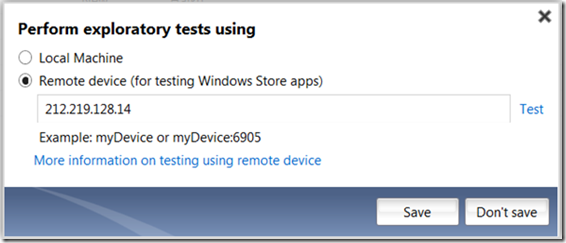
On the dialog displayed change the default setting from Local to Remote, and enter the target device hostname or IP address:
Then select Test this to make sure the target device can be found, entering the user credentials as prompted, and then Save. I didn’t need to change the default port (6905) and therefore didn’t include the port. You’re now ready to deploy your app from your developer machine to the target device.
Deploying the App to the target device
Obviously you need a Windows Store App to deploy. As an example I just created a new Grid App using the Project Templates in Visual Studio 2012. You also need to create the Store package. I won’t step through this but it’s straightforward, to get started select Store | Create App Packages. Note in Ultimate this is in the Solution context menu:
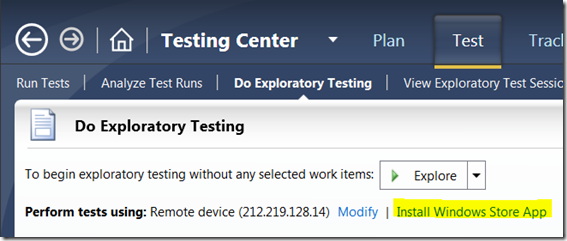
Make a note of the location for the App package output, you’ll need that during the installation step. Back in Test Manager, this time select the Install Windows Store App option:
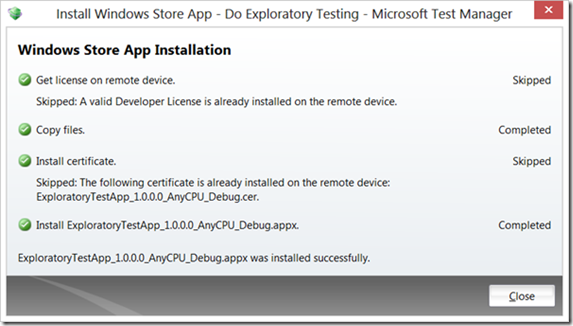
Select the created App Package, and go through the deployment steps. Note that this will require some input on the target device as well to accept the developer licence and certificates first time:
Once this is complete you’re ready to run the Exploratory test.
Running the Exploratory Test
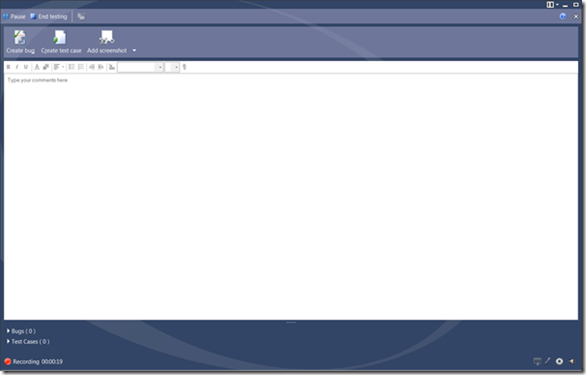
All the hard work has now been done – the rest is easy ![]() . Start the Exploratory test using the Explore button (or Explore with options if you want to specify the build, configuration, test plans or Lab Management test environment). This will start the Exploratory Test:
. Start the Exploratory test using the Explore button (or Explore with options if you want to specify the build, configuration, test plans or Lab Management test environment). This will start the Exploratory Test:
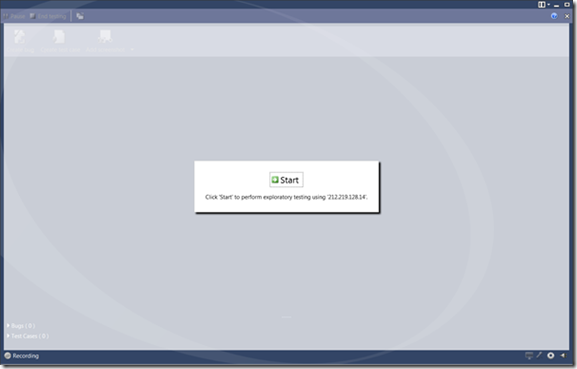
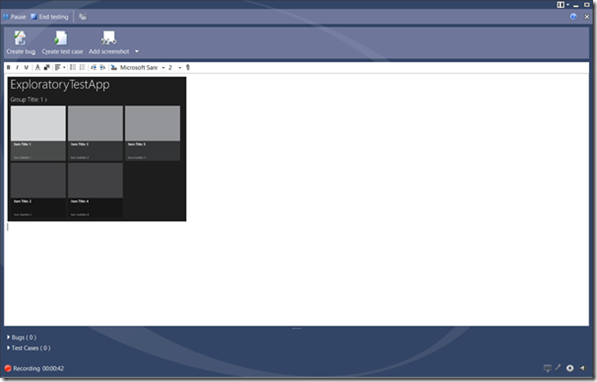
Click Start, and then on the target device, start using the Windows Store App. Until you do something, the screen on the development machine will look like this:
You’ve got 3 main options to choose from during the test:
Taking a Screenshot of the App in action
Select Add screenshot and you’ll be able to select the screenshot (rectangular or full) on the target device within test:
You can also add comments directly into the test screen as well.
Recording a Bug
Whilst you (or someone else) is testing the App on the target device, you can decide that you’ve found a bug. Select Create bug and this will create a TFS bug work item, with the steps performed up to that point recorded as an Action Recording, together with other information such as System Information. You can edit these as you wish, so for example the bug may only be relevant to the last 5 steps, not all of the steps recorded.
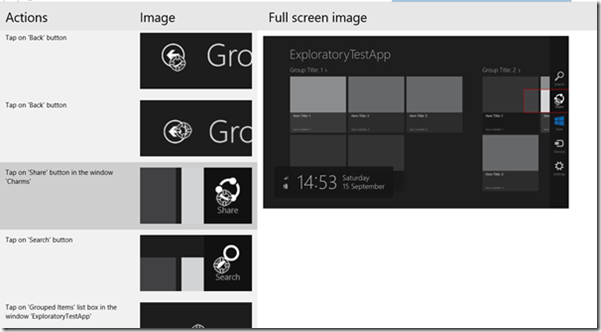
The Action Recording looks like this, with this action showing the Search Charm being invoked on the target machine:
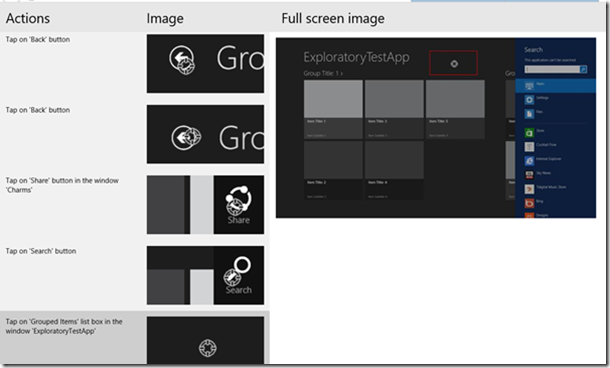
And this step showing the Search screen appearing in use:
The action recording can also be exported at any point as a standalone HTML file, so you could for example email this to someone.
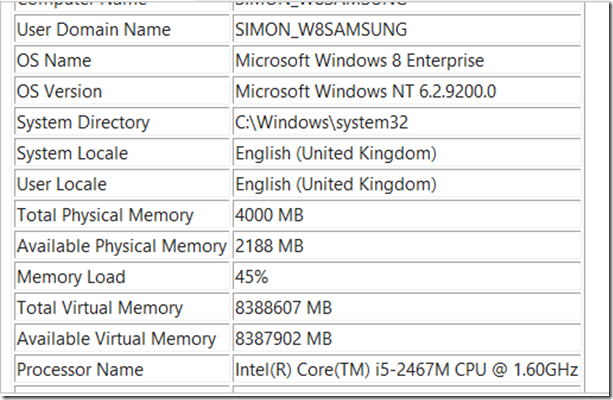
The system information includes a snapshot of memory, logged in user, resolution and much other useful information (not all shown here):
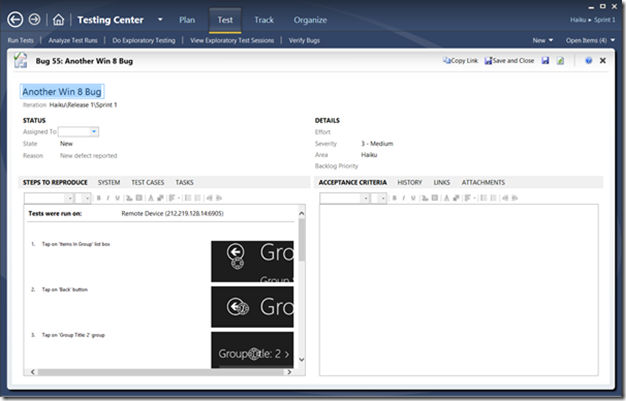
This is what the bug looks like in Test Manager:
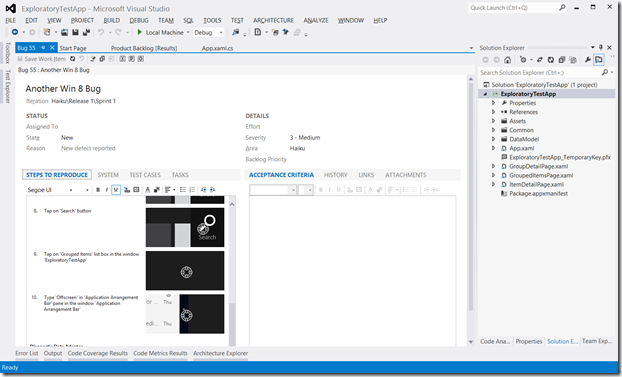
And in Visual Studio:
You can just Save and Close the bug, and then carry on testing, or you could also create a test case.
Reverse Engineering a Test Case
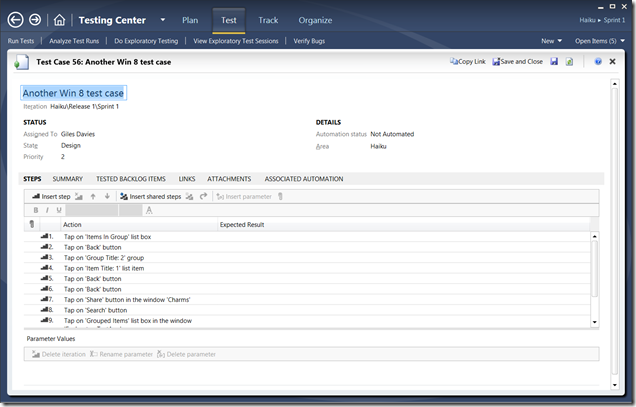
It may be that the steps you’ve just carried out, and the bug you’ve just found, warrant creating a test case, so that you can retest the steps you took in some form of regression test. This is catered for and you can just select Save and Create Test Case at the same time that you save the bug, or just create a test case independently. This takes the same information but reverse engineers this for you into a test case. Again you can edit the test case to either clarify steps or remove unwanted steps:
Summary
I found this easy and incredibly powerful. You, or someone else, can just use the App on the target device, and you can easily create bugs and test cases that relate to the steps they’ve taken in the App, helping with bug identification.
Links
MSDN: Overview of Exploratory Testing
MSDN: Testing Windows Store apps Running on a Device Using Microsoft Test Runner
MSDN: Installing the Remote Debugging Tools
Downloads: Visual Studio 2012 Remote Debugging Tools
Cheers,
Giles

