How to create or upgrade your VSTS extension in 4 steps
My contribution to the Yeoman generator for the VSTS extension project helped me improve the way we create extensions. Starting from the way we structure the extension files, the JavaScript minification, how we generate and publish the extension package and down to monitoring the extension usage.
The goal of this post is to walk you through the main modifications steps you may want to follow in order to improve your new/existing extension.
Step 1 : Update the folder structure
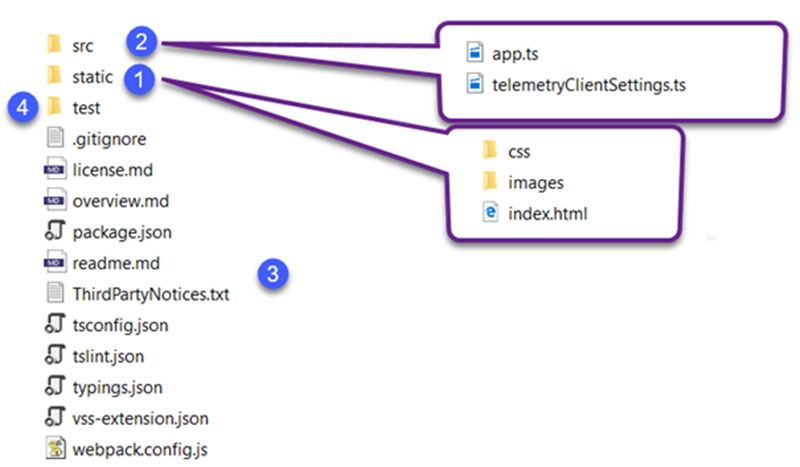
The structure of an extension should be simple and consists of four main parts:
[1] The static folder contains elements that do not change frequently, for example images, css and html pages.
[2] The src or scripts directory contains your extension TypeScript scripts.
[3] The manifest file (vss-extension.json), package.json, as well as other external files like overview.md, license file, are at the root of the extension.
[4] The test folder contains unit tests.
Step 2: TypeScript check, transpilation and Minification
Let’s walk through Step 2 in detail:
- Check the syntax of the TypeScript code
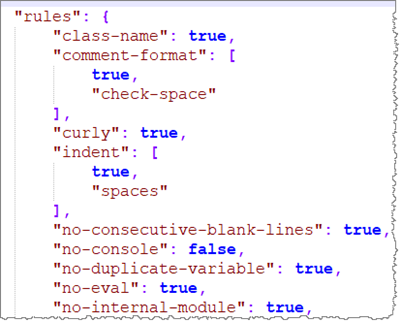
Before transpiling and minifying the TypeScript code we need to check the syntax with the tslint. The tslint package is referenced in package.json and configured in the tslint.json file, at the root of the extension folder.
- Transpile the TypeScript code
The npm TypeScript package is referenced in the extension package.json and configured in the tsconfig.json file. It specifies the files to be transpiled and the destination directory of the generated JavaScript (js) files.
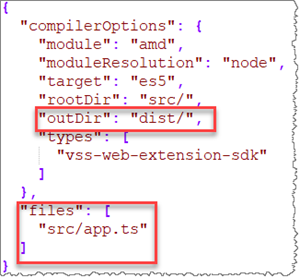
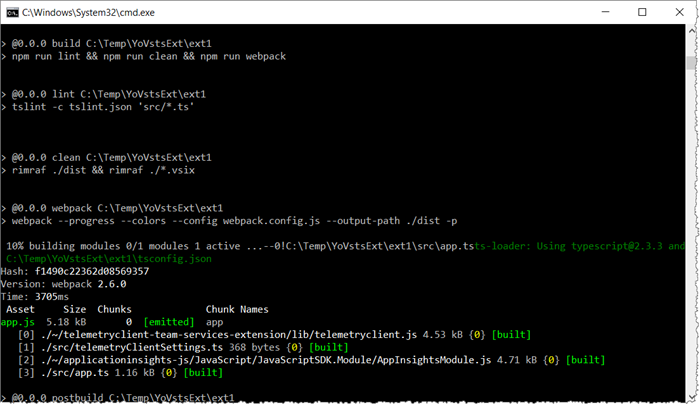
JavaScript files are generated in a separate dist folder so that the vsix package will contain only the essential files. TypeScript files are not needed. - Minify the generated JavaScript code
- The minification consists of:
- Remove whitespaces, comments and line breaks.
- Import the external libraries, for example node modules, into the JavaScript files of the extension. - To minify, we use the webpack component, configured in the webpack.config.js file.
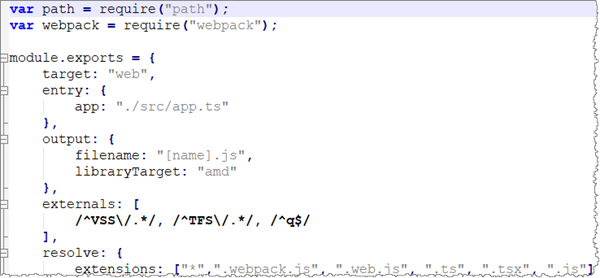
- The webpack component uses the tsconfig.json configuration file to locate the code files.
- The minification consists of:
- Automation scripts
The scripts for these modules are configured in scripts section of the package.json file.

Step 3: Automatic import for external Libraries
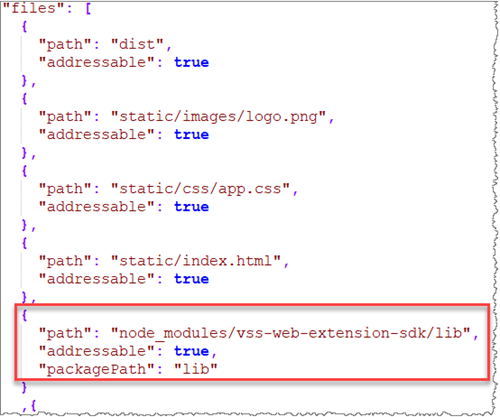
When we generate the vsix extension package, we import external libraries, for example vss-web-extension-sdk, into a lib folder and add an entry in the files section of the vss-extension.json file
The packagePath property specify the destination folder. When the package is created by tfx-cli, all the files that in node_modules/ vss-web-extension-sdk /libwill be copied to the lib folder.
Remember to refer these libraries using the final path in your code.

We will see another example of importing external libraries in next article.
Step 4: Integrate the automation scripts into package.json
For simplicity, we no longer use grunt or gulp for the automation tasks. Instead we integrate the create and publish scripts directly into the package.json file.
That’s it. To create your package, simply run:
npm run package
- To create a package after TypeScripts modifications, run the command line: npm run build to transpile and minify the code. After the build, the postbuild script will automatically execute the npm run package
- To publish the package to VSTS Marketplace using your publisher, update the gallery-publish scripts with your vsts token and run npm run gallery-publish
- To create and publish your extension in one step during the build, update the postbuild scripts as follow: "Postbuild" : "npm run gallery-publish"
In the next article we’ll show you how to integrate Application Insights monitoring into your extensions.
References
- Roll-Up board extension as an example of this new structure
- Visual Studio Services Web Extension SDK
