
Use Azure portal to setup Continuous Delivery for Web App On Linux
Continuous Delivery in Visual Studio Team Services simplifies setting up a robust deployment pipeline for your Web App on Linux. By default, the pipeline builds a container image, pushes the image to a container registry and deploys the new image to the Web App. You can easily add another Azure Web App on Linux to the pipeline to validate your changes before they ever get to production.
You can extend this deployment automation to handle any other operations your application needs to do during deployment. For example, provision additional Azure resources, run scripts, upgrade database or run additional validation tests.
Code
You can store your app’s source code in a Team Services Git, GitHub to use Azure Continuous Delivery.
- Download/fork our Node.js Hello World sample app or Install Node.js Tools for Visual Studio and create a new Node.js application.
- Upload your code to Team Services Git or GitHub
- You also need a Dockerfile in the repository which has the instructions required to build the image. Our sample repository has a Dockerfile for your reference.
Configure
- In the Azure portal, select your web app. If you haven’t yet created a web app, do this now by choosing the “+” icon, selecting Web App on Linux from the Web + Mobile category, and providing a name and a resource group.
- In your app’s menu blade, choose Continuous Delivery (Preview) and then choose Configure.
- Select Choose container registry. The setup wizard will read and show the container registry settings for the selected Web App on Linux.
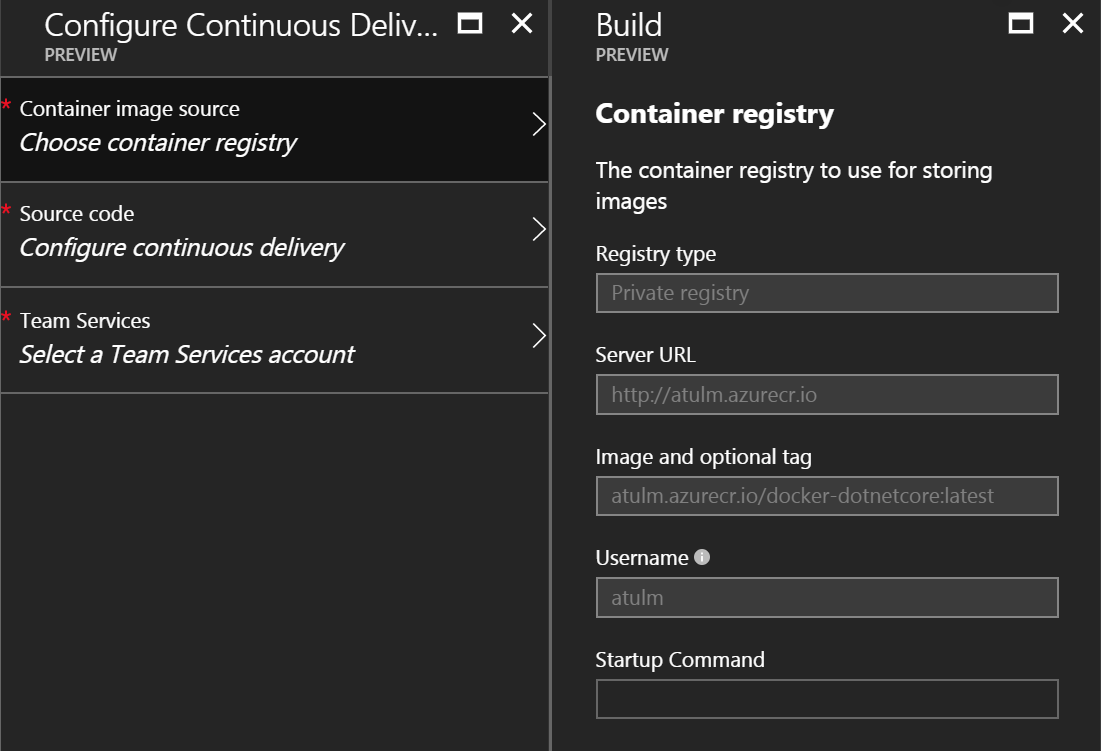
- In case you want to change your container registry setting you can do that by going to the Docker Container setting of the Web App. The Startup command is set automatically based on what is defined in the Docker image file, but you can set your own commands.
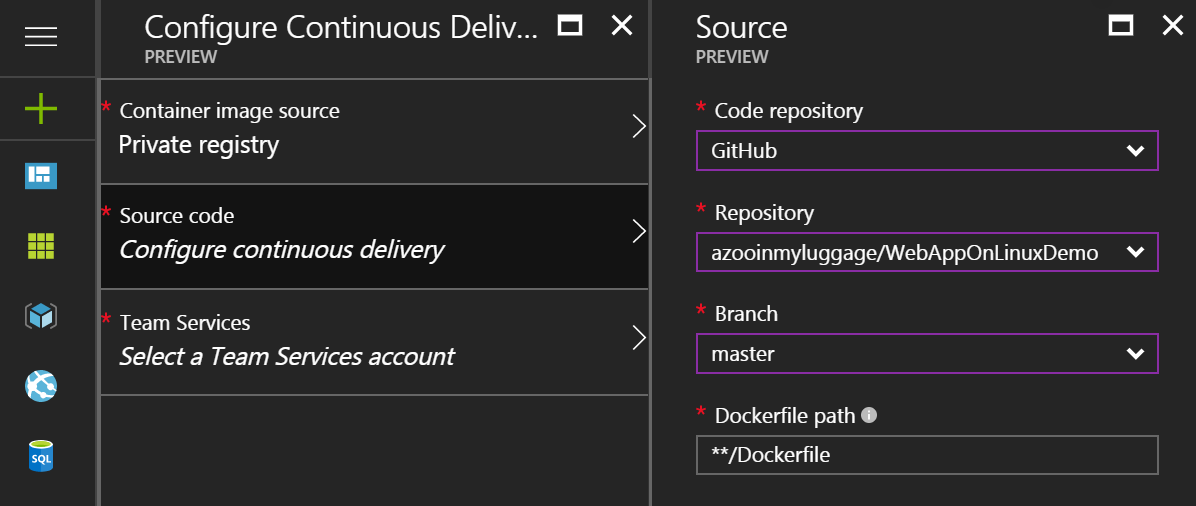
- Select Configure continuous delivery and select the type of repository where you stored your app’s source code. You have a choice of Visual Studio Team Services Git, GitHub (support for other repository types will be enabled soon). Select the repository, and branch to deploy from. When you’re done, choose OK. You can choose to give the Dockerfile path. By default we will try to find a Dockerfile and use it for building images.
- Select“Team Service Account” and choose the Team Services account where you want to setup the Continuous Delivery. In case you don’t have a team service account, you can choose to create a new account. When you’re done, choose OK to create and execute the Continuous Delivery workflow.
The following sequence of events occurs:
- After the build has completed successfully, a new release is created and the deployment triggered. The Web App pulls the new container image from registry and updates itself.
- After setup has completed successfully, a build is triggered that creates a container image and pushes it to the container registry associated with the Web App.
- Azure Continuous Delivery creates a build and a release definition in the Team Services account you specified, together with a service endpoint each to connect to Azure and Container registry.
- After all these actions have completed, the Azure portal shows the results in the Activity Log.
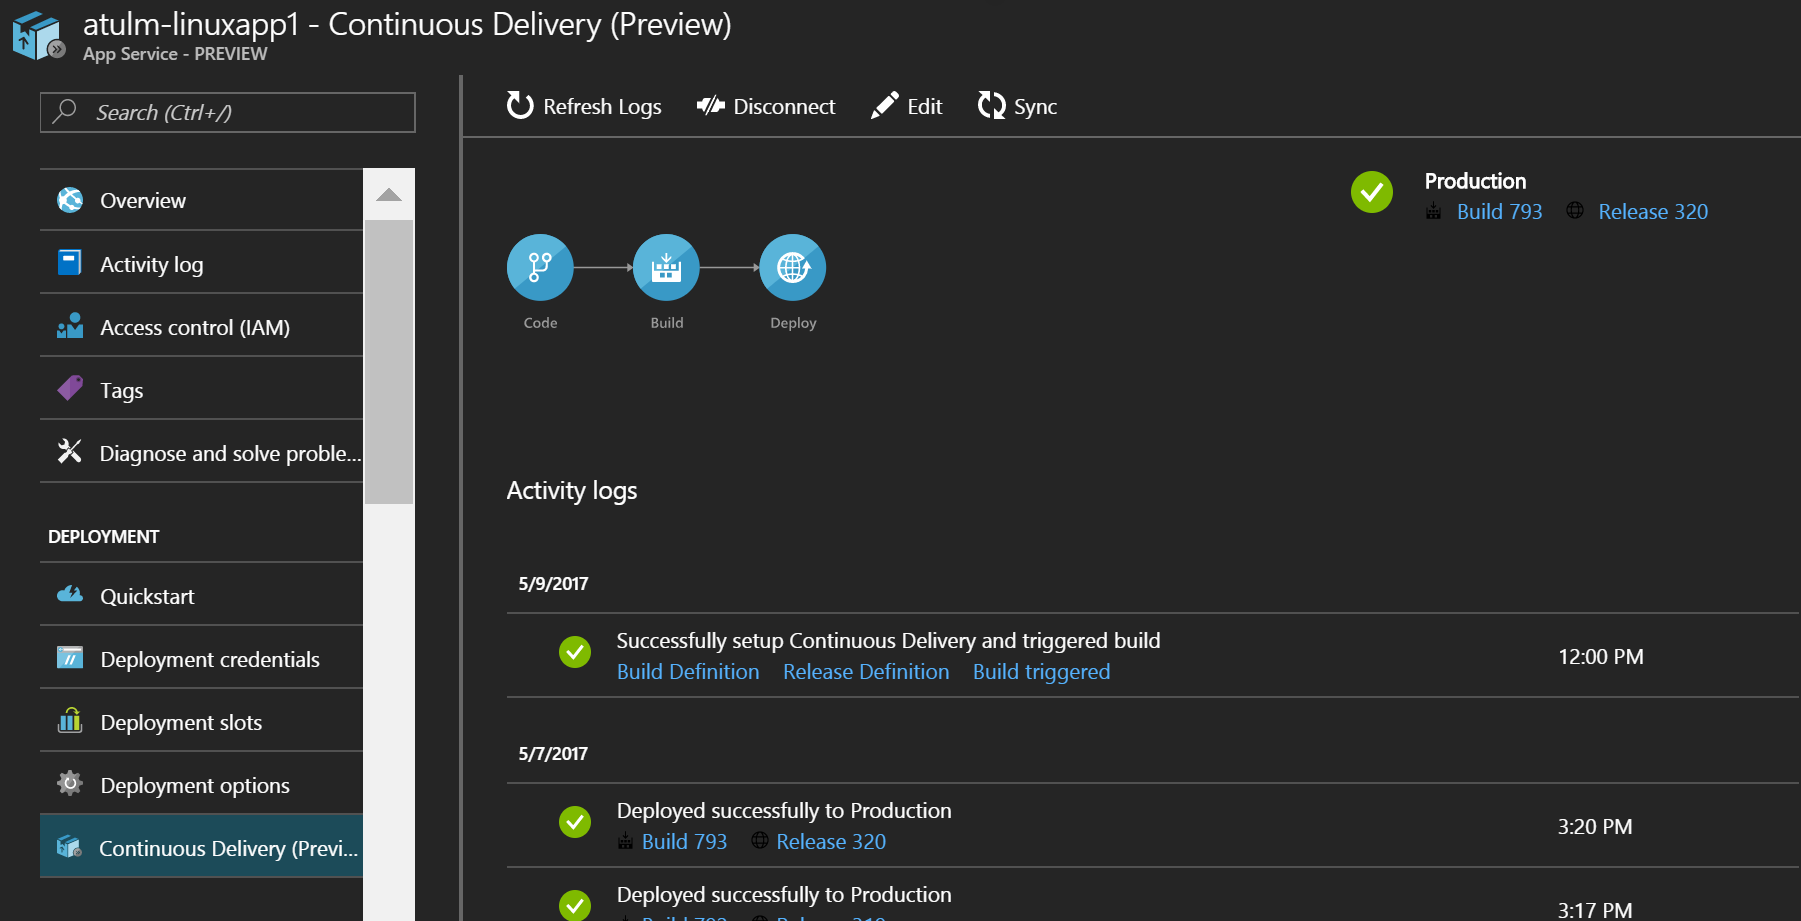
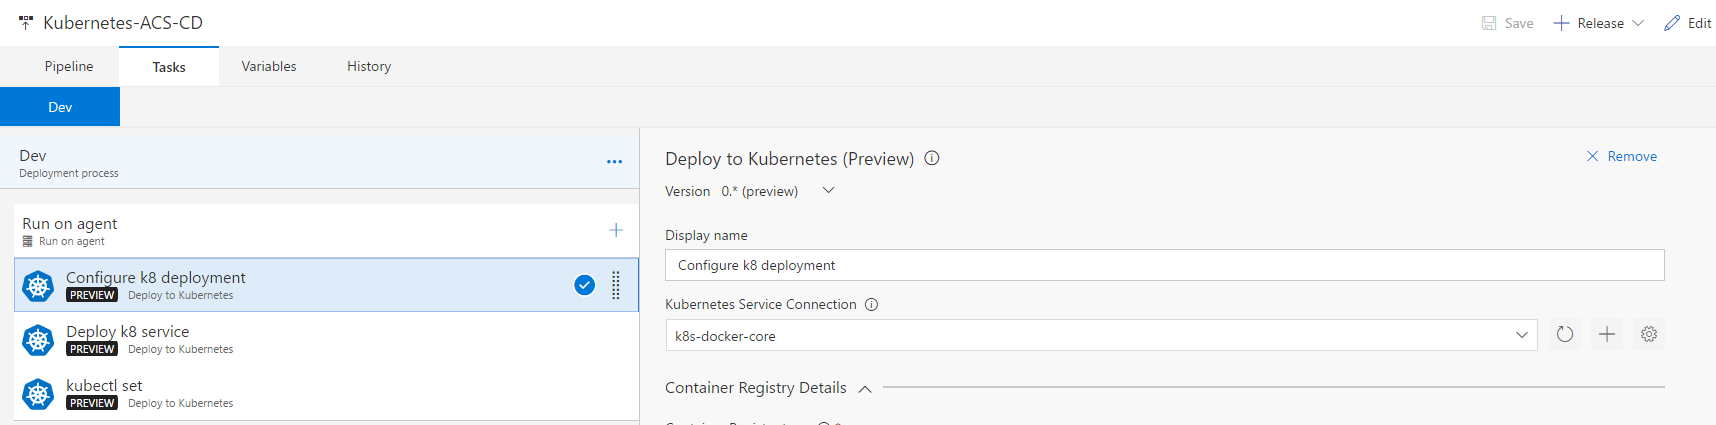
- In the “Successfully set up Continuous Delivery…” item, choose the Release Definition link to open the project containing your app in Team Services, and see the list of releases for this definition. Choose Edit to see the tasks that have been added and configured. There are also links in other items in the Activity Log that open commits, builds, build reports, releases, deployment slots, and the deployed app itself, in relevant windows or apps.

- In the “Successfully set up Continuous Delivery…” item, choose the Build Definition link to open the project containing your app in Team Services, and see the summary for the build definition. Choose Edit to see the Docker tasks that have been added and configured.
- Verify that continuous deployment is occurring from the repository containing your app by pushing a change to the repository. Your app should update to reflect the changes shortly after the push to the repository completes. You can stop a deployment to your Azure Web App on Linux by choosing Disconnect at the top of the Continuous Delivery blade. This deletes the Azure Continuous Delivery configuration in the Azure portal and turns off the build triggers in your Team Services account for this configuration.
Next steps You can easily add another Azure Web App on Linux to the pipeline to validate your changes before they reach production. These validation can be done by running load or functional tests at each step. You can even choose to deploy automatically, or set up manual approval for any deployment to production.
The Azure Continuous Delivery feature is a preview version. You may encounter the following known issues:
- If you do not have relevant permission to create build and release definitions in the Team Services account, the Continuous Delivery configuration will fail with an appropriate error message. See Manage users and access in Visual Studio Team Services.
- If you encounter the error “Failed to create an Azure service connection” while deploying to Azure Web App on Linux, see Troubleshoot Azure Resource Manager service endpoints.
- Support for other repository types like TFVC, External Git and BitBucket is coming soon
 Light
Light Dark
Dark
0 comments