
Continuous deployment/delivery with Jenkins and VS Team Services
Release Management (VS Team Services) lets you automate your deployments so that you could deliver your apps/services easily and deliver them often. You can setup the CI and CD process all on VS Team Services. However, if you have the CI pipeline already set with Jenkins, VS Team Services has good integration points through its APIs that can let you interact with its release service from any other third-party – Jenkins in this case.
The post assumes you have already set up Continuous Integration to build your project with every code checkin/commit. After going through this post, you should be able to automatically trigger release in Release Management (VS Team Services) with the help of the Jenkins plugin: Visual Studio Team Services Continuous Deployment
Follow the following steps to set up setup continuous deployment for your app with Jenkins and Release Management:
- Set up Jenkins project that archives artifacts
- Set up Release definition in VS Team Services
- Create Service Endpoint for Jenkins
- Link Jenkins build project as artifact source
- Set up the deployment steps
- Auto trigger releases from Jenkins
Step 0: Pre-requisites
We assume that you already have the following available with you:
- A working Jenkins installation
- A Jenkins project that builds your application
- A VS Team Services account
Step 1: Set up Jenkins project that archives artifacts
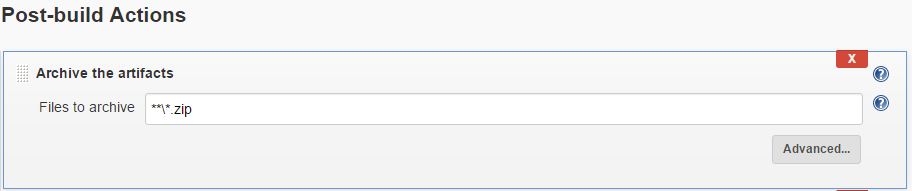
You need to have a Jenkins project setup with all the actions/steps that are required to build your project. Once you are able to build the app, you need to publish artifacts (all the files that constitutes your app/service) that can be released/deployed. This can be done by simply using the step: Archive the artifacts in Post Build Actions section. E.g.
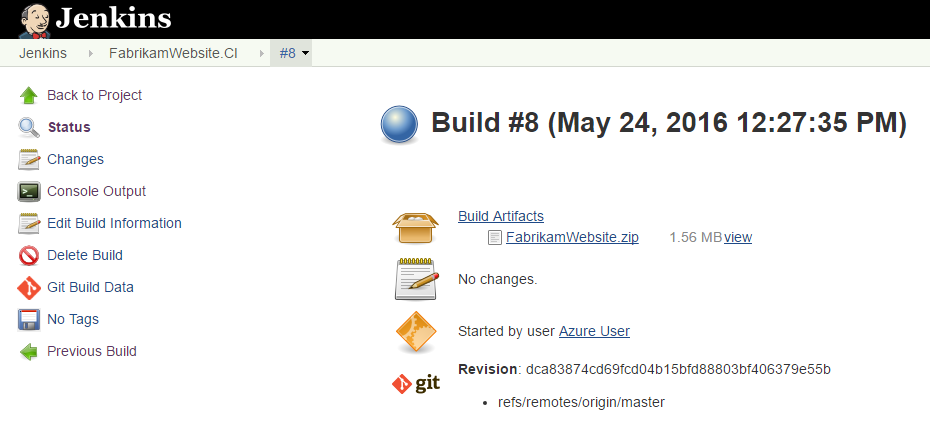
Once you are able to archive the artifacts, you can create a new build and check if the archived artifacts do show up in your build details as Build Artifacts:
Additionally you would need to set up CI with Jenkins that enables auto trigger with each code checkin/commit. This CI setup is dependent on the Code repository system that you use.
Step 2: Set up Release definition in VS Team Services
Now that you are able to create new builds with Jenkins that produces and archives artifacts, the next step is to be able to deploy these artifacts using VS Team Services – Release Management. You can refer to the YouTube video below that lets you set up a Release Definition that can deploy Jenkins artifact OR follow the steps mentioned after the video.
1. Create Service Endpoint for Jenkins
In order to access the build artifacts produced by Jenkins, Release Management (VS Team Services) needs to be able to connect to it. So you need to create a service endpoint connection to your Jenkins service.
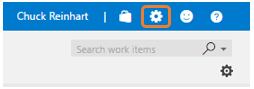
Go to project settings in VS Team Services:
Now under the services tab, select new Jenkins endpoint…
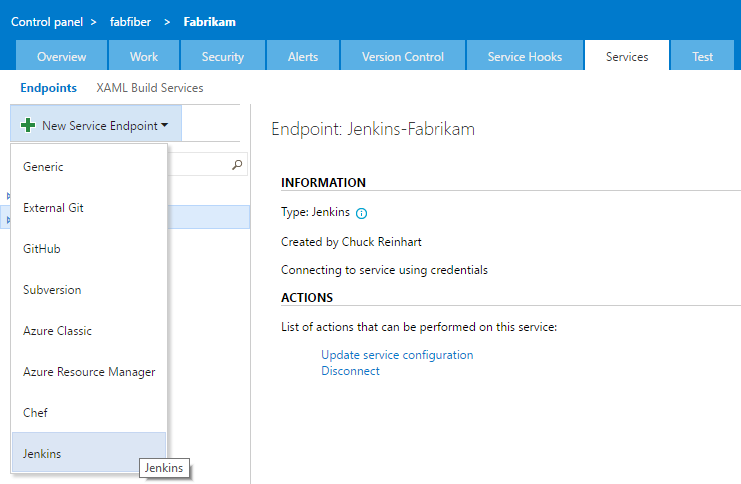
… and enter the required fields to create the endpoint as shown in the example below:

If your Jenkins service is on-premise and not accessible from VS Team Services, you don’t need to worry. Just create the endpoint with the right URL and credentials and make sure that release agents have a line of sight to the Jenkins service when release is run. Refer to this doc, for info on agents and line of sight to artifacts.
2. Link Jenkins build project as artifact source
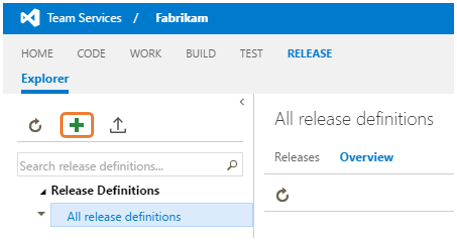
Create a new Release definition. If your are using the guided experience on clicking the “+” sign…
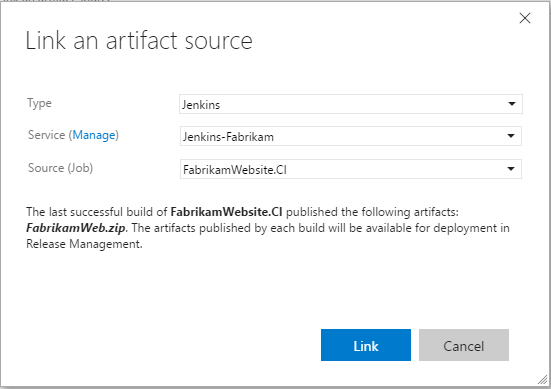
… on the artifacts selection page, choose Jenkins as artifact source and provide the Jenkins endpoint (created in #1) in the service drop-down and select the right Jenkins project whose build artifacts you wish to deploy.

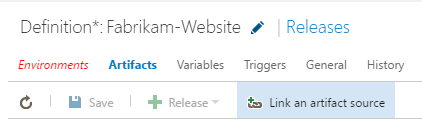
In case you chose a wrong option here or chose nothing, you can always link the artifact from the artifacts tab of the Release Definition’s edit flow:
3. Set up the deployment steps
This step is dependent on the type of app you wish to deploy and where you wish to deploy. Depending upon the app type and deployment methodology, you could choose the steps/tasks in your release definition. You can also define multiple environments in the release definition, again depending on your need. The video referred above has some of these details. Go here to understand more about creating release definitions.
Try to trigger a new release and the Jenkins artifact can now be deployed using the deploy steps you provided. Refer to the next section to set up continuous deployment so that the releases are auto triggered on new build creation on your Jenkins service.
Step 3: Auto trigger releases from Jenkins
To set up continuous deployment, we will enable auto trigger of release from Jenkins through the plugin: Visual Studio Team Services Continuous Deployment
This plugin makes use VS Team Services REST APIs that lets you trigger a release in VS Team Services or TFS, upon completion of a build in Jenkins. The plugin has a post build step – “VS Team Services Continuous Deployment”. Follow the below steps:
0. Install the “VS Team Services Continuous Deployment” plugin
Just like any other plugin installation, go to Manage Jenkins -> Manage plugins. Search for the plugin named “VS Team Services Continuous Deployment” and install it.
Using the plugin
Assuming that you have already created the Release Definition and linked the Jenkins as artifact source in Vs Team Service – Release Manaegment, you need to follow the following steps at the Jenkins side to trigger releases automatically, upon build creation.
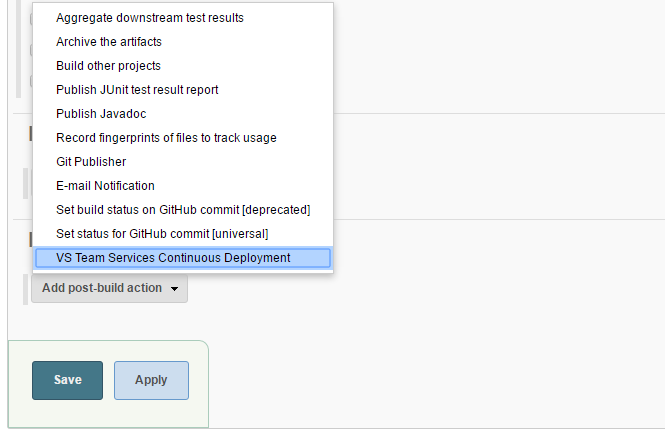
1. Add the post build action
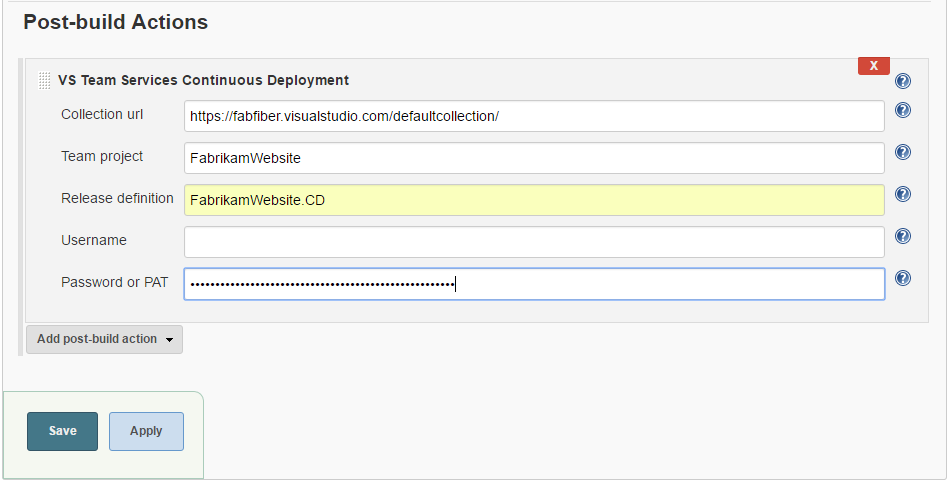
Go to the Job configuration and add the post build action – VS Team Services Continuous Deployment
2. Fill in the required fields
Fill in the details required for this post build action. You need the following details:
Collection URL: e.g. https://fabfiber.visualstudio.com/DefaultCollection <- Note that you need the url till the collection. Team project: The VS Team Services Project in which you have defined the release definition. Release definition: The Release definition name that links this Jenkins job as an artifact source. You need to now enter the credentials that lets Jenkins trigger a release with the latest completed build, on your behalf. If you are using VS Team Services, you just need to enter PAT. (Refer to this link to understand how to create PAT). In case you are using TFS, you need to enter the username and password.
3. All set! See CD in action
You have now automated your deployment trigger thereby enabling continuous deployment i.e. a checkin/commit would trigger a build and that will trigger a release. Go ahead and test your setup by manually triggering a build in Jenkins or by a code checkin/commit that kicks off Jenkins build which in turn will trigger the release in VS Team Services.
FAQs
- If I have multiple artifacts linked in my Release Definition, will this plugin trigger a release? A: Yes. With version 1.3 onward it is supported. For other linked artifacts’ sources, the latest version would automatically be picked for release
 Light
Light Dark
Dark
0 comments