
This is the third and final post in a series covering strategies for versioning a NuGet package. If you missed part 1 or part 2, you should read those first. Today’s post walks through a specific workflow that Git users could adopt, using a really powerful tool called GitVersion. GitVersion comes with some expectations about the layout of your branches, so it may not be for everyone.
Let’s walk through using Package Management, Team Build, and GitVersion to manage version numbers. Because it’s more complicated than previous walkthroughs, I’ve chosen to be more verbose and detailed in my explanation.
I’ve decided that I’ll follow the GitFlow branching model for this project. There’s a great tool called GitVersion which lets me translate GitFlow branches and tags directly into semantic versions. For brevity, I’m omitting a lot of experimentation and dead-ends I went down before finally settling on this flow. I encourage you to play around with GitFlow and GitVersion yourself.
Start by creating a new class library called MyComponent in Visual Studio. Let Visual Studio create a new Git repo for you.
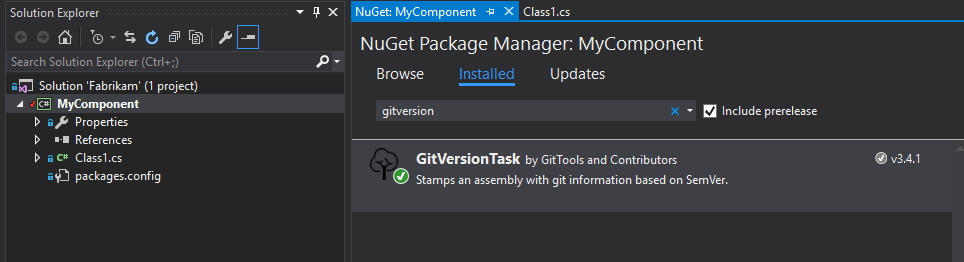
Right-click the project and choose Manage NuGet Packages. From NuGet.org, add GitVersionTask.
Next, edit AssemblyInfo.cs to comment out the explicit assembly versioning. GitVersionTask will take care of versioning the assembly.

The last thing to do on the client side before building is to set up GitVersion’s config file. While the defaults are great for most people, I personally prefer the continuous deployment style of versioning. In the solution folder, add a file GitVersionConfig.yaml with the following contents:
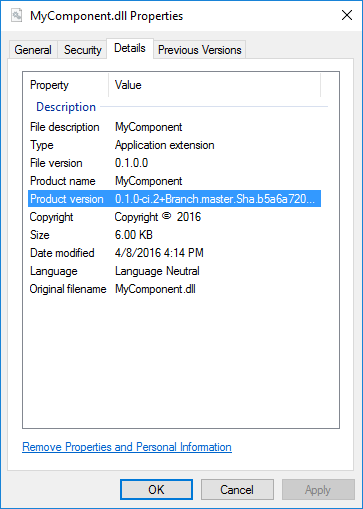
mode: ContinuousDeployment branches: {} Commit the changes and build the solution. Look at the properties of the built DLL and notice all the GitVersion magic represented in the Product version field.
Next, push your code to a Git repo on Visual Studio Team Services. Everything we do from here on out will support creating and versioning a NuGet package using the tools VSTS provides plus the GitVersion extension. Go ahead and install GitVersion from the Marketplace into your VSTS account. This will introduce a new build step that we’ll need later. Also, if you haven’t installed Package Management in your account, do that as well.
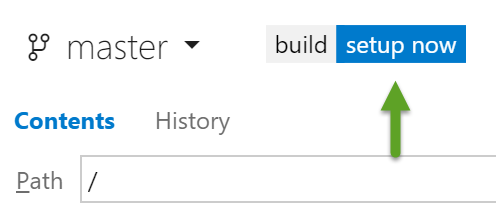
In the Code hub, click the “build: setup now” badge.
Leave the defaults to create a new Visual Studio build. Then, make the following changes to your newly-created build:
- Add four new steps: GitVersion Task (available in the Build category), PowerShell (Utility category), NuGet Packager, and NuGet Publisher (latter two available in the Package category).
- Move GitVersion Task up so that it’s right after NuGet Installer. Check the box which says “Update AssemblyInfo files”.
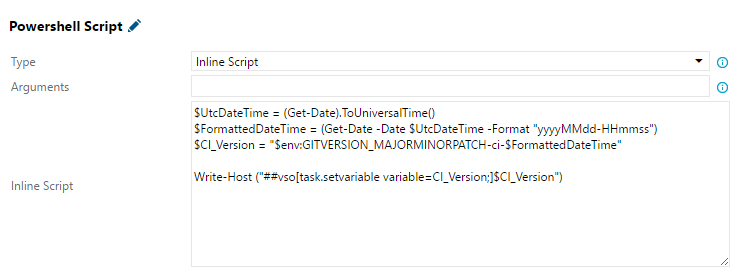
- Move PowerShell up so that it’s right after GitVersion. Change its type to “Inline Script”. In the Inline Script box, add the following code:
$UtcDateTime = (Get-Date).ToUniversalTime() $FormattedDateTime = (Get-Date -Date $UtcDateTime -Format "yyyyMMdd-HHmmss") $CI_Version = "$env:GITVERSION_MAJORMINORPATCH-ci-$FormattedDateTime" Write-Host ("##vso[task.setvariable variable=CI_Version;]$CI_Version")We’ll cover what this script does a bit later.
- Move NuGet Packager up so that it’s right after Visual Studio Test. For Path to CSProj or NuSpec, make sure it’s targeting
***.csproj(that’s the current default, but if you’re re-using an existing build definition, you might have something different there). In the Versioning section, change Automatic Package Versioning to “Use an environment variable”. For Environment Variable, put “CI_Version”.
- Finally, leave the NuGet Publisher step at the end. Change its Feed Type to “Internal NuGet Feed” and set the URL to the URL of a feed in your account.


Save this build definition. The steps should appear in this order: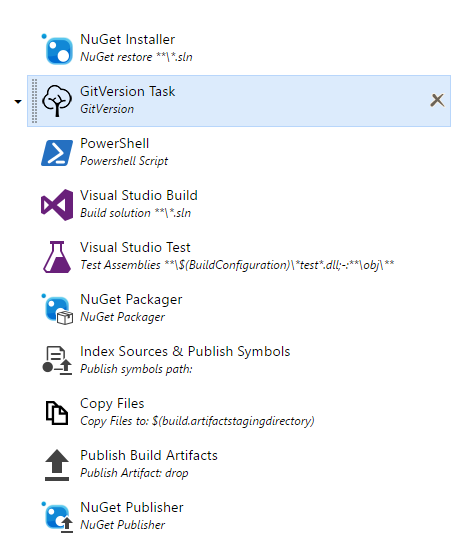
Let’s queue a build to see what you’ve set up, then we’ll walk through it step by step. The first thing you’ll likely notice is that your build numbering has changed: GitVersion has automatically called it something like “Build 0.1.0-ci.2”. That means you’re building a pre-release build (-ci.2) of version 0.1.0. So far so good.
Next, swing over to the Package hub and find the feed where you published your package. You should see the very first version of your shiny new NuGet package, properly semantically versioned as a prerelease of 0.1.0. If you were to queue another build right now, you’d get a new prerelease package of the same version of the code.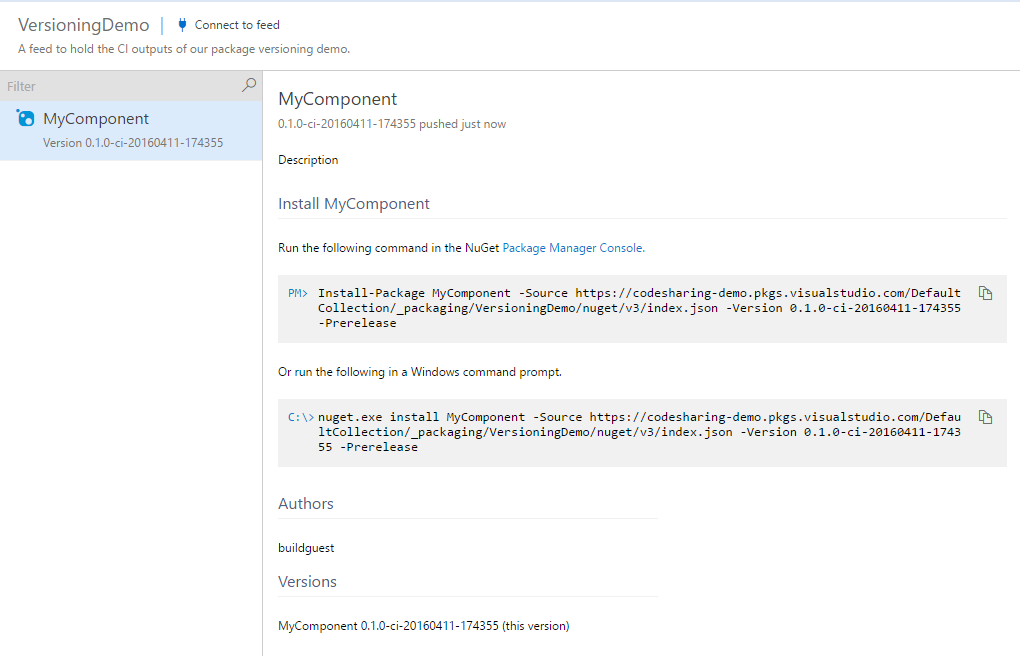
So what happened here? The magic is in three build tasks: GitVersion (which selected our semantic version), the PowerShell script (which added a timestamp to make the package version unique), and the NuGet Packager task (which reads the computed version number from an environment variable). Even if you don’t speak PowerShell, you can probably understand the first 3 lines of code. We get the UTC date and time, format it into a string, then append it to the environment variable that GitVersion had already set ($env:GITVERSION_MAJORMINORPATCH). The last line is the Team Build way to add/alter an environment variable for later build steps to read.
Now that we’ve exercised the whole workflow, let’s see what happens when we bump the version. Say we’ve done some development on our component and are preparing for a 1.0 release. Under GitFlow, we’re likely to do some final cleanup in a release branch, so let’s go back to Git and do that. In your solution, create a new branch called “release-1.0”.
Make and check in a small code change on the branch. Publish the branch to VSTS (git push --set-upstream origin release-1.0 if you’re command-line oriented) and queue a build of your release-1.0 branch.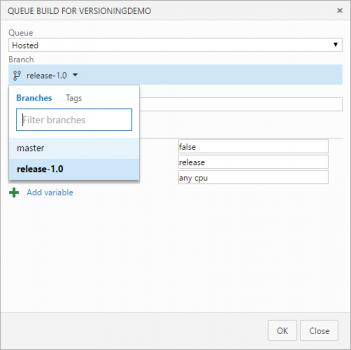
Once the build finishes, check your feed again – you’ll find a CI package of a 1.0.0 build of your component! GitVersion automatically determined that this component should be versioned 1.0.0 because of the branch name.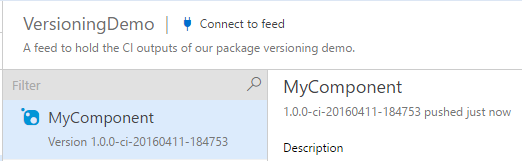
Releasing a package
Great, now you can produce prerelease packages of your components. So once you’ve decided that a particular package is the one you want to release, how do you do it? Well, as Xavier explains, you need to “strip off the pre-release tag”.
In the simple scenario that I walked through here, you have two easy options:
- Like part 1, don’t worry about stripping the prerelease tag. Whatever “release” means to you (perhaps uploading your package to NuGet.org), simply promote the CI package straight to release. Your consumers will know it’s a “released” version because of where they got it rather than metadata on the package itself.
- Repack (but don’t rebuild!) your package with the new version number. A NuGet package is a zip file with a particular set of files in particular places. If you pull out the .nuspec from the root of the zip file, rewrite its <version> property, and re-insert it into the package, you’ve changed the version of that package without rebuilding its contents.
Note that option 2 only works if none of the packages output by your build depend on each other. If you produce only a single package, you’re probably safe; if you produce multiple packages, you’re probably not safe. As discussed in part 2, we’re considering how to take a build as input, find all the packages produced by that build, find all their inter-dependencies, and then rewrite versions/dependency specifiers with updated version numbers.
A recap
In part 1, we covered semantic versioning and how to automatically create prerelease packages in a continuous delivery model. Part 2 discussed some additional tools we want to develop to make these flows easier. Part 3, this post, covered version numbers managed with GitFlow and GitVersion. Feedback is always welcomed, here in the comments or via Send-a-Smile. We read every Send-a-Smile we get.
0 comments