
Using Release Management VSO service to manage releases
With Release Management for Visual Studio 2013 Update 4 RTM, you can use Visual Studio Online(VSO) service to set up and manage your releases to Azure. This means you can configure Release Management client to connect to Visual Studio Online service instead of Release Management server used for on-premises setup.
Getting started with Release Management VSO service from Visual Studio IDE
If you need to get started quickly with Release Management service in Visual Studio Online, just download the Release Management Extension from Visual Studio gallery. You can create release artefacts directly from within the Visual Studio IDE using Release Management as a service with a Visual Studio Online account. You must use an Azure subscription to deploy to your Azure VMs with this release definition.
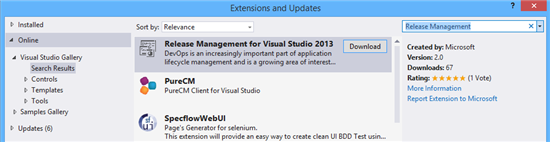
Step 1: Download the Release Management Tool for Visual Studio 2013 from Visual Studio gallery
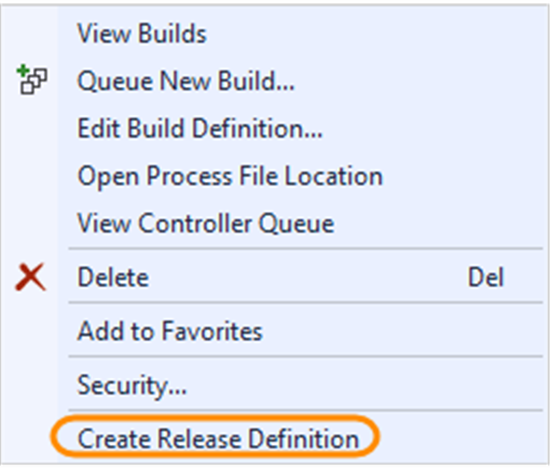
Step 2: Create release artefacts in Visual Studio Online using Build Definition menu
Learn more about Release to Azure from Visual Studio IDE
This blog describes how you can connect Release Management client to VSO service to set up and manage releases.
Before you start, you’ll need:
- A Visual Studio Online account. If you don’t have one, sign up now.
- A team project. If you haven’t created it, find out how.
- Azure VMs. If you need to create them, here’s how.
- An Azure storage account. Create one here.
- Release Management Update 4 client. Get it here
- A deployment script. Find out how to set up and check-in this script here.
Here are the steps to set up and manage releases to Azure using Release Management service on Visual Studio Online:
Configure Release Management client to use Visual Studio Online service
In order to use Release Management service on Visual Studio Online, you need to connect Release Management client to Visual Studio Online service. Once you download the Release Management client, enter the Visual Studio account URL for which you are admin, in the Configure Services window:

This will pop up an authentication browser window where you should enter your Microsoft account credentials corresponding to an admin account for the Visual Studio account URL.
Once authentication is successful, Release Management client window will appear and you can now set up and manage your releases.
Note: The account owner and project collection administrators (at the time of first-connection to Release management features in VSO) will automatically become “Release Managers”. So if you would like to enable more people having access to Release Management, one of these users has to sign in using the WPF client, and then add the rest of the users as release managers.
Set up Stages
Decide on the number of stages you would like to have in your deployment pipeline. Now go to Administration tab — Manage Pick Lists and add the stages:

More details on adding Stages can be found here.
Set up Microsoft Azure environments
In order to release to Azure environments,
1. You should have Azure VMs ready. If you need to create them, here’s how.
2. Import the Azure Environments to Release Management. If you need to import them, here’s how.
a. Download the settings file from the Azure portal and open it with a text editor, such as Notepad, to get your subscription ID and Management Certificate key. (After using the settings file, consider deleting or securing it as it contains information that can be used by others to access your Azure account.) Go here to get the name of an existing storage account or add a new storage account using the Azure portal.
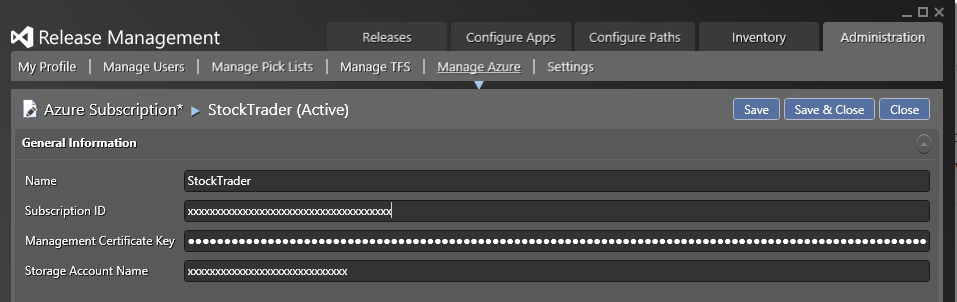
b. Now go to Administration tab — Manage Azure. Click on New vNext: Azure

c. Add the subscription by putting in the following details of your Azure subscription as obtained in Step (a)
i. Subscription Id
ii. Management Certificate key
iii. Storage Account Name
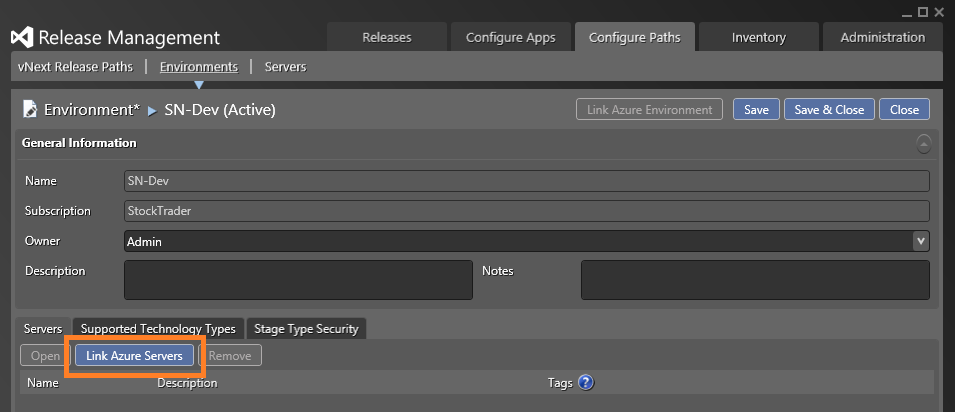
d. Now go to Configure Paths — Environments tab and click New vNext: Azure. Add the Environments one by one here.
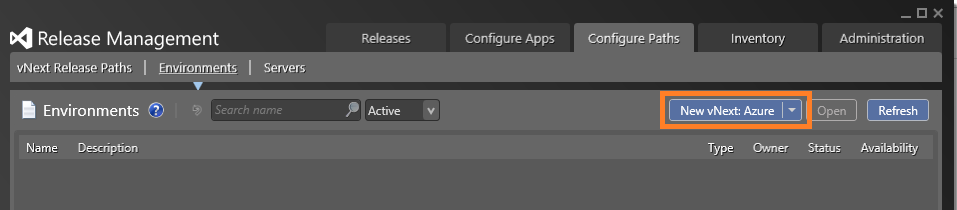
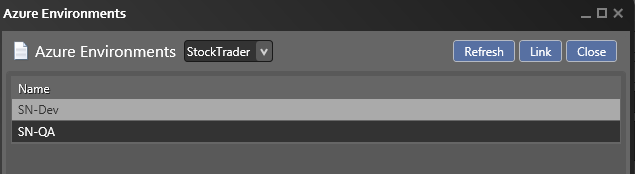
e. For each Environment, you need to add the Servers (Azure VMs that you would have created).
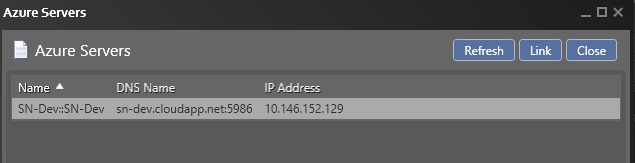
You are done now importing the Azure environments to Release Management.
Create release template and start your release
To create a Release template and start your release, you need to follow the following steps. Detailed steps are also covered here.
1. Create a release path to represent the stages that your release must go through

Choose the environment and approvers to use for each stage of your release. You can add multiple final approvers for each stage if you want to.

2. Create required components of your app that you need to deploy separately
Go to Configure Apps — Components, click **New vNext **
Select Builds with application and put component path w.r.t. Build drop folder as **Path to package. **Here we are putting the whole build as single component, for simplicity.

3. Create a release template and use the release path that you just added
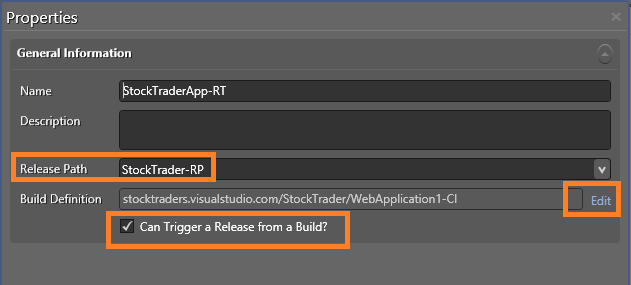
a. Go to Configure Apps — vNext Release Template. Click New. Provide the Release Path you created earlier. Select the Build definition by clicking on the Edit button. If you would like to trigger a new release every time a new build is available, check the box for “Can Trigger a Release from Build?”
b. Add the component you created by right click on Component on the left pane and Add. Add the component you created earlier.
c. Drag and drop the Action “Deploy Using PS/DSC” to the deployment sequence canvas
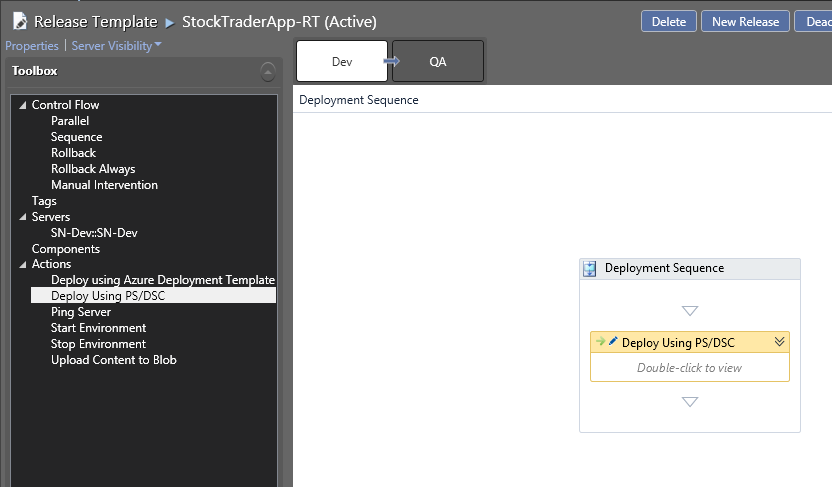
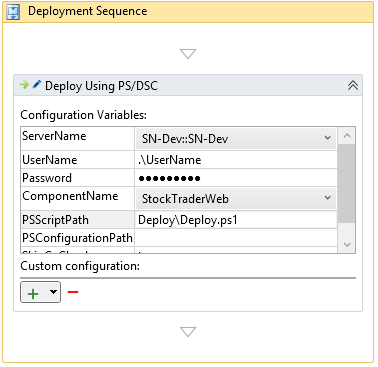
d. Add the following details to the action.
- ServerName
- UserName
- Password
- Component Name
- Deployment script path (relative to build drop)
- Configuration script path, if any.
- Put SkipCaCheck as true
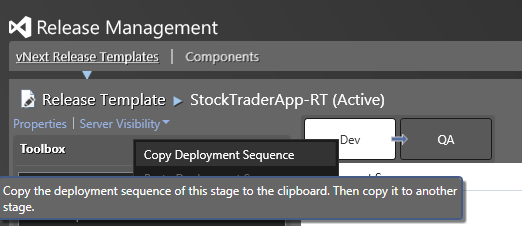
e. Copy this deployment sequence and paste it to QA stage. Click Save & Close.
The Release Template is now ready. You can trigger a new Release from here (select Release Template and click “New Release”) or if you have selected “Can Trigger a Release from Build?” option while creating this Release Template, a new release will be triggered as soon as a new build is available. To test this, go to Visual Studio IDE, Team Explorer — Build. Right click on your build definition and select “Queue New Build”. On completion of a successful build, go to Release Management client à Releases tab and you will see a new Release has been triggered.
Note that with Release Management service on Visual Studio online:
- You can only use Agent less release pipeline.
- You can set up deployments only to Azure environments.
Other Release Management Resources
- Try Release Management using ALM virtual machine
- Get started with Release Management
- Learn to deploy and test a web application using Release Management
- Customer case studies
- What’s new in Release Management for VS 2013 Update 4?
 Light
Light Dark
Dark
0 comments