Registering an Incompatible VM with PowerShell
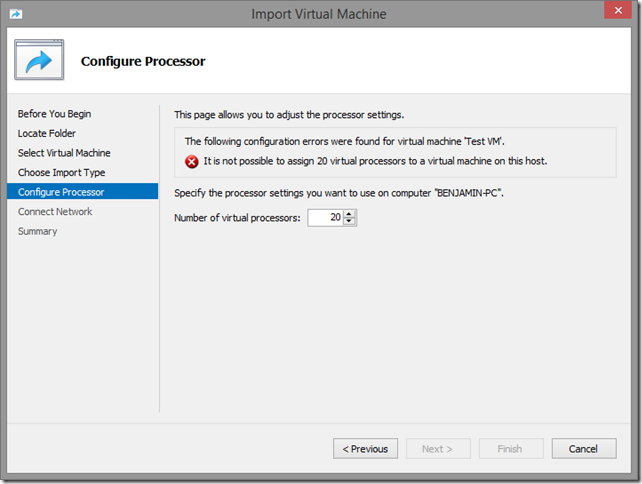
If you have ever tried to register a virtual machine in Hyper-V Manager, and the virtual machine was not compatible with your current computer, you would have seen something like this:
This is a GUI experience that allows you to make changes to the incoming virtual machine in order to make it work on the physical computer in question. We use this same GUI in a couple of places – and internally we refer to it as “the fix-up wizard”, as it allows you to fix a virtual machine and make it compatible with your computer.
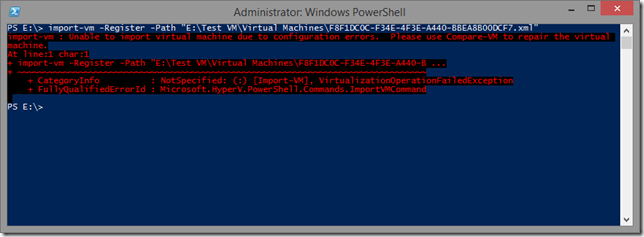
But what about when you want to use PowerShell? There is no concept of a wizard in PowerShell – and sure enough when I try and register the same virtual machine in PowerShell I just get an error message:
So how do you make this work? Well the answer is in the error message: use Compare-VM. Compare-VM is the PowerShell equivalent of the fix-up wizard.
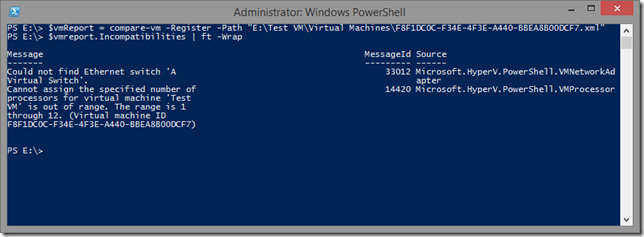
In this case I need to call Compare-VM and provide it with exactly the same parameters that I was using for Import-VM. This returns a virtual machine compatibility report – which I will store in the variable $vmReport.
As you can see, the virtual machine compatibility report has a property called “Incompatibilities”. This property is a collection of everything that is wrong with the virtual machine. Here I have a virtual network adapter that is connected to a missing virtual network, and too many virtual CPUs.
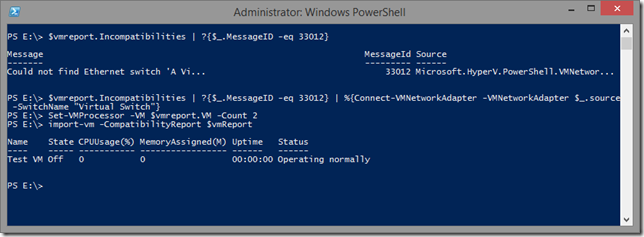
There are two ways that you can fix up these problems. The first way is to change the configuration on the object that is stored in the “source” property of the incompatibility in question. The second way is to reconfigure the virtual machine object that is attached to the virtual machine compatibility report itself. Below I show you how to do both:
Once you have fixed all the incompatibilities you can successfully register the virtual machine by using Import-VM and passing it the corrected compatibility report.
Cheers,
Ben


