
Visual Basic Windows Phone 7 Series #9. How to create a keyboard input scope application for Windows Phone 7
In our last post, I explained how to create a settings page for Windows Phone 7. In this blog post, I want to share a sample that will help you to create a keyboard input scope application for Windows Phone 7. This application will have the feature that allows you to change the input scope of the on-screen keyboard to one of the many built-in options. This sample contains code for three different ways of changing the on-screen keyboard.
I will now demonstrate how easy it is to create a keyboard input scope application for Windows Phone 7, using Visual Basic for Windows Phone Developer Tools. The keyboard input scope application can be created in 4 simple steps as follows:
- Create a sample application and add controls
- Add an event handler
- Build and debug the application
- Rebuild in the release mode before publishing
Prerequisites:
- Visual Studio 2010 Professional, Premium, or Ultimate. If you do not have any of the releases, you can download any of the following trial versions as per your preference: Professional, Premium, or Ultimate.
- Windows Phone Developer Tools RTW
- Visual Basic
for Windows Phone Developer Tools – RTW
Note: You can install the newer version- Windows Phone Developer Tools 7.1 Beta instead of the above mentioned two tools as it will take comparatively less time. However, this sample was created using the previous version.
To create a keyboard input scope application for Windows Phone 7 application, let’s follow the 4 simple steps mentioned earlier:
Step 1 – Create a sample application and add controls
Create a sample application
- Create a new project and browse to the “Silverlight for Windows Phone” node.
- Select the “Windows Phone Application” template.
- Enter a name for the application.
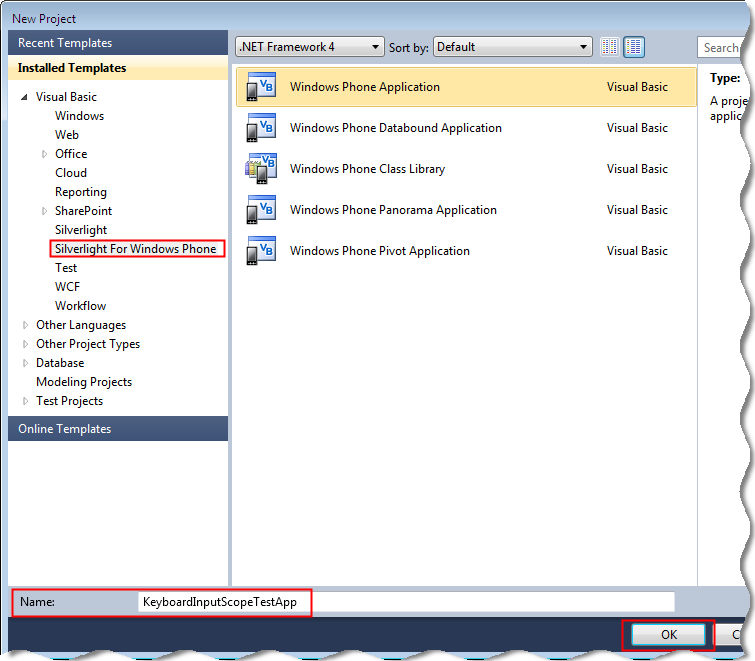
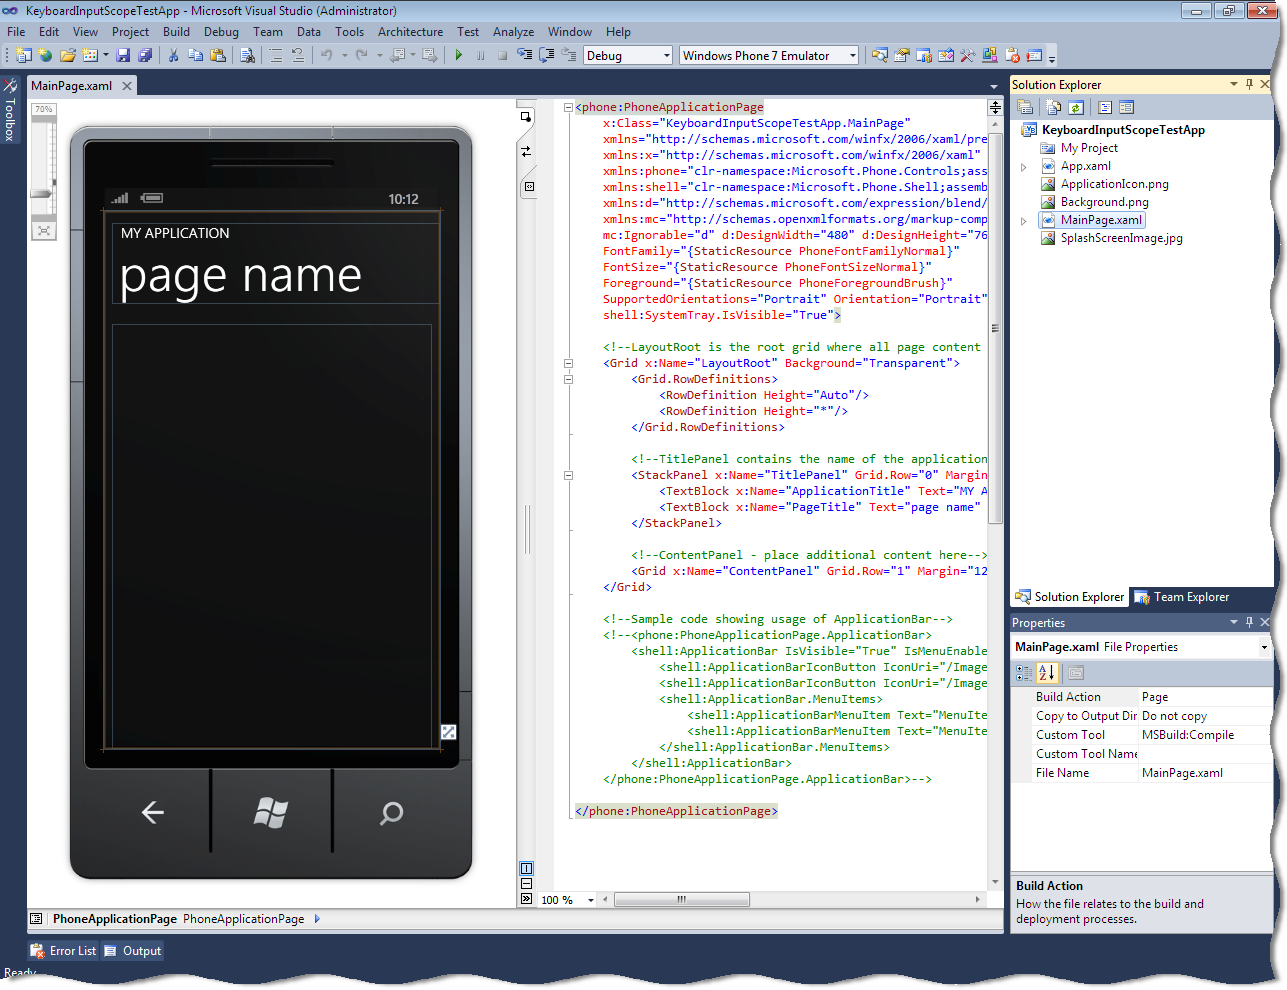
- Click OK. The MainPage.xaml page is displayed.
Add controls
- Click the MY APPLICATION text. In the Properties window, change the text property to “Keyboard Test App”.
- Click the page name text. In the Properties window, change the text property to “all about you”.
- To create the Pivot control, add the following XAML code:
<Grid x:Name=”LayoutRoot” Background=”Transparent”>
<!–Pivot Control–>
<controls:Pivot Title=”Keyboard Test App” >
<!–Pivot item one–>
<controls:PivotItem Header=”all”>
<StackPanel Height=”Auto” Width=”Auto” HorizontalAlignment=”Stretch” VerticalAlignment=”Stretch” >
<!– – – – – – – – – – – – – – – – – – – – – – – – – – – – – – – – – – – – – – – – – –>
<!– These text boxes use the short form to set the InputScope –>
<!– You must know the name of the InputScope that you want to use –>
<!– – – – – – – – – – – – – – – – – – – – – – – – – – – – – – – – – – – – – – – – – –>
<TextBlock Text=”your name” Foreground=”{StaticResource PhoneAccentBrush}” Style=”{StaticResource PhoneTextLargeStyle}” />
<TextBox InputScope=”PersonalFullName” Name=”txtName” Height=”71″ Width=”460″ />
<TextBlock Text=”what country are you from?” Foreground=”{StaticResource PhoneAccentBrush}” Style=”{StaticResource PhoneTextLargeStyle}” />
<TextBox InputScope=”AddressCountryName” Name=”txtCountry” Height=”71″ Width=”460″ />
<TextBlock Text=”your number” Foreground=”{StaticResource PhoneAccentBrush}” Style=”{StaticResource PhoneTextLargeStyle}” />
<TextBox InputScope=”Number” Name=”txtNumber” Height=”71″ Width=”460″ />
<!– – – – – – – – – – – – – – – – – – – – – – – – – – – – – – – – – – – – – – – – – –>
<!– This text box uses the long form to set the InputScope –>
<!– You can use intellisense to get the name of the InputScope that you want to use –>
<!– Put the cursor between the quotation marks after NameValue=”” –>
<!– Press the space key and intellisense will list the options –>
<!– – – – – – – – – – – – – – – – – – – – – – – – – – – – – – – – – – – – – – – – – –>
<!– USE THIS TEXT BOX TO TEST THE DIFFERENT KEYBOARDS –>
<!– – – – – – – – – – – – – – – – – – – – – – – – – – – – – – – – – – – – – – – – – –>
<TextBlock Text=”(set scope in the XAML)” Foreground=”{StaticResource PhoneSubtleBrush}” Style=”{StaticResource PhoneTextLargeStyle}” />
<TextBox Name=”txtChoose” Height=”71″ Width=”460″ >
<TextBox.InputScope>
<InputScope>
<InputScopeName NameValue=”Default” />
</InputScope>
</TextBox.InputScope>
</TextBox>
<Button Content=”view” Click=”button_Click” Height=”71″ Width=”160″ />
</StackPanel>
</controls:PivotItem>
<!–Pivot item two–>
<controls:PivotItem Header=”about”>
<StackPanel Height=”Auto” Width=”Auto” HorizontalAlignment=”Stretch” VerticalAlignment=”Stretch” >
<TextBlock Text=”your email” Foreground=”{StaticResource PhoneAccentBrush}” Style=”{StaticResource PhoneTextLargeStyle}” />
<TextBox InputScope=”EmailNameOrAddress” Name=”txtEmail” Height=”71″ Width=”460″ />
<TextBlock Text=”your favorite website” Foreground=”{StaticResource PhoneAccentBrush}” Style=”{StaticResource PhoneTextLargeStyle}” />
<TextBox InputScope=”Url” Name=”txtWebsite” Height=”71″ Width=”460″ />
<TextBlock Text=”call your best friend” Foreground=”{StaticResource PhoneAccentBrush}” Style=”{StaticResource PhoneTextLargeStyle}” />
<TextBox InputScope=”TelephoneNumber” Name=”txtFriend” Height=”71″ Width=”460″ />
<!– – – – – – – – – – – – – – – – – – – – – – – – – – – – – – – – – – – – – – – – – –>
<!– The input scope for this text box is set by code –>
<!– The code is in the MainPage_Loaded event –>
<!– – – – – – – – – – – – – – – – – – – – – – – – – – – – – – – – – – – – – – – – – –>
<TextBlock Text=”(set scope in the code)” Foreground=”{StaticResource PhoneSubtleBrush}” Style=”{StaticResource PhoneTextLargeStyle}” />
<TextBox Name=”txtSetByCode” Height=”71″ Width=”460″ />
<Button Content=”view” Click=”button_Click” Height=”71″ Width=”160″ />
</StackPanel>
</controls:PivotItem>
<!–Pivot item three–>
<controls:PivotItem Header=”you”>
<StackPanel Height=”Auto” Width=”Auto” HorizontalAlignment=”Stretch” VerticalAlignment=”Stretch” >
<TextBlock Text=”how are you feeling today?” Foreground=”{StaticResource PhoneAccentBrush}” Style=”{StaticResource PhoneTextLargeStyle}” />
<TextBlock Text=”use the smiley button!” Foreground=”{StaticResource PhoneAccentBrush}” Style=”{StaticResource PhoneTextLargeStyle}” />
<TextBox InputScope=”Chat” Name=”txtFeeling” Height=”194″ Width=”460″ />
<Button Content=”view” Click=”button_Click” Height=”71″ Width=”160″ />
</StackPanel>
</controls:PivotItem>
</controls:Pivot>
</Grid>
Note: This method changes the keyboard input scope for each control. To change the input scope manually, you can add or change the value of the InputScope attribute for the required control.
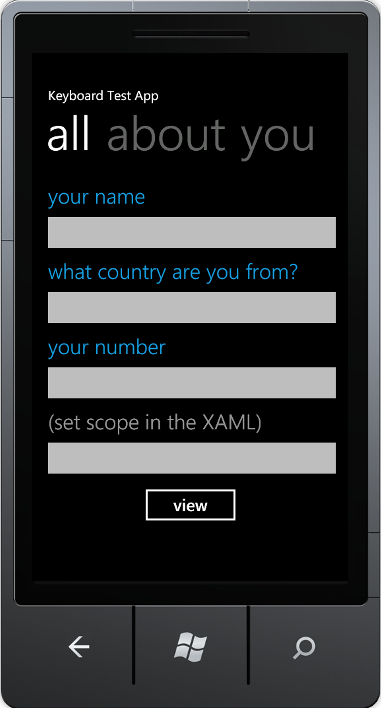
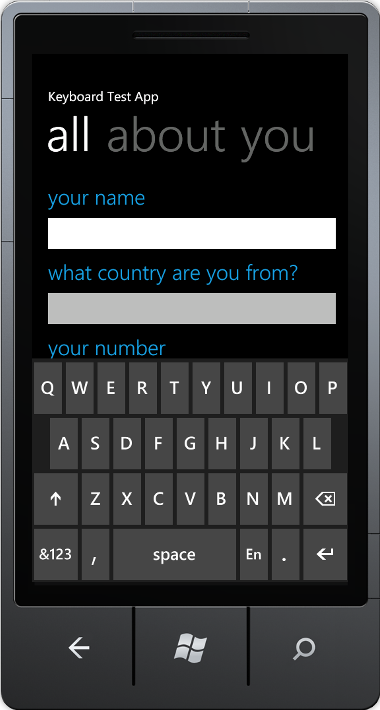
Your application now looks like this: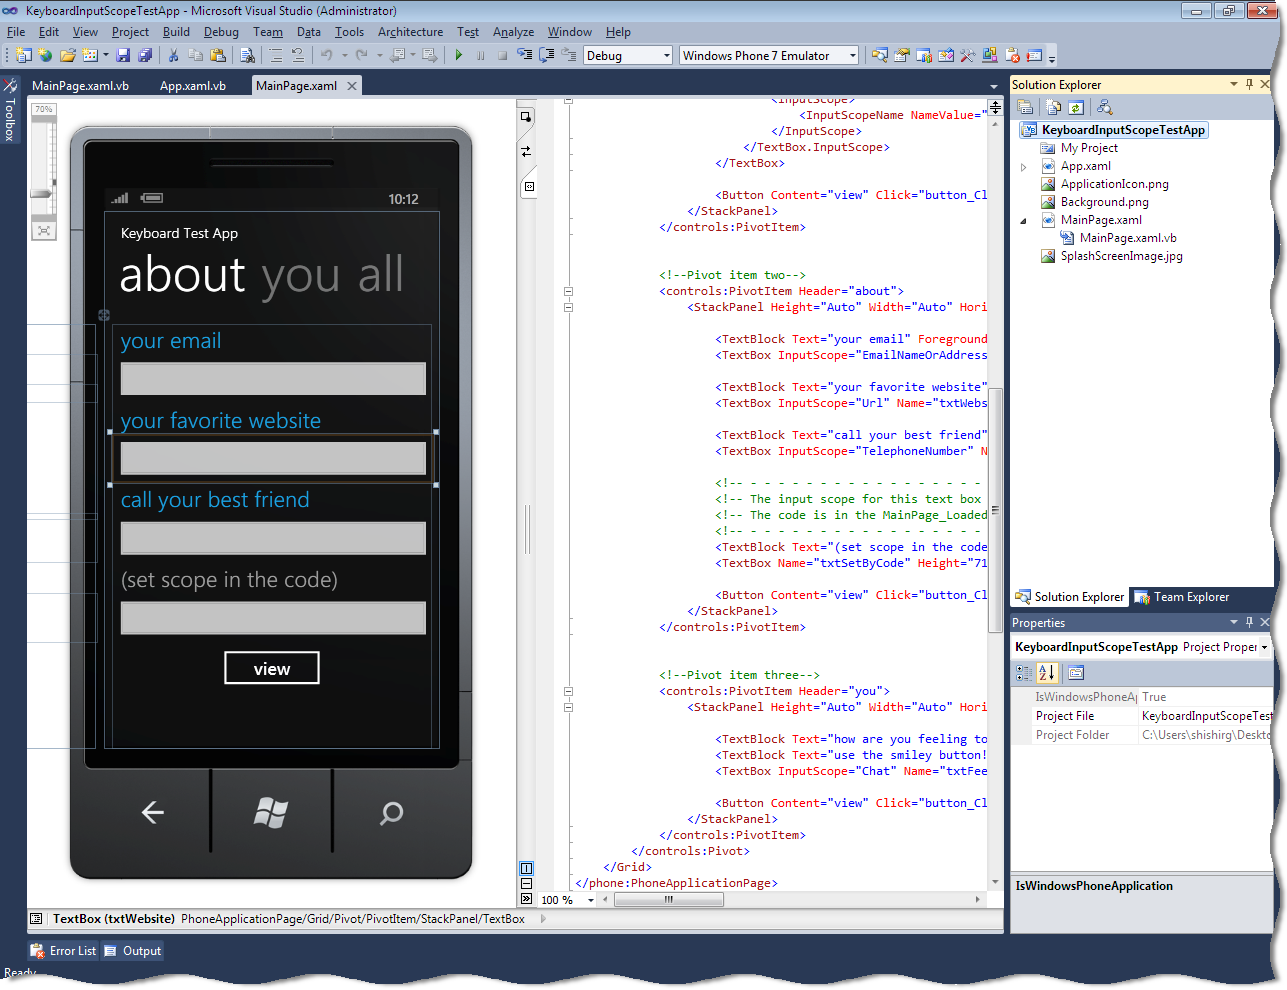
Step 2 – Add an event handler
- Open the MainPage.xaml.vb page. The page is displayed with the following code:
Partial Public Class MainPage
Inherits PhoneApplicationPage
‘ Constructor
Public Sub New()
InitializeComponent()
End Sub
End Class
- To set the keyboard input scope, add the following code:
Private Sub MainPage_Loaded(ByVal sender As Object, ByVal e As RoutedEventArgs) Handles Me.Loaded
Dim scope As New InputScope
Dim name As New InputScopeName
name.NameValue = InputScopeNameValue.Number
scope.Names.Add(name)
txtSetByCode.InputScope = scope
End Sub
- To create an event handler for the button click event, add the following code:
Note: This method creates an event handler that stores all the information and navigates to a new screen and displays the content in a message box
Private Sub button_Click(ByVal sender As Object, ByVal e As RoutedEventArgs)
Dim sb As New System.Text.StringBuilder
sb.AppendLine(“What I know about you:”)
sb.AppendLine(txtName.Text)
sb.AppendLine(txtCountry.Text)
sb.AppendLine(txtNumber.Text)
sb.AppendLine(txtEmail.Text)
sb.AppendLine(txtWebsite.Text)
sb.AppendLine(txtFriend.Text)
sb.AppendLine(txtFeeling.Text)
MessageBox.Show(sb.ToString())
End Sub
There you are! Now your keyboard input scope application for Windows Phone 7 is ready! You just need to build and debug the application.
Step 3 – Build and debug the application
- To build the application, select Build > Build Solution. The project should build without any errors. If there are errors, check the earlier steps, correct the errors, and then build the application again.
- To debug the application, set the deployment target of the application to “Windows Phone 7 Emulator”.
- Select Debug > Start Debugging. The emulator window is displayed.

- To test the alphabet keyboard click “your name” text box. The keyboard to enter the alphabets is displayed.

- To test the number keyboard click “your number” text box. The keyboard to enter the numbers is displayed.


Note: To stop debugging the application, select Debug > Stop Debugging.
Step 4 – Rebuild in the release mode before publishing
- On the standard toolbar, change the configuration manager to Release.
- To rebuild the application, select Build > Rebuild. The XAP file of the application is generated, which is the package that you will have to submit in the marketplace to publish the application. You can also locate this XAP file in the BinRelease folder.
Finally, to submit your application to the market place, you can refer to upload your application walkthrough.
Summary
Congrats! Buenos! You have successfully created a keyboard input scope application for Windows Phone 7, that too in just 4 simple steps! You can find the full source code for the settings page application here.
 Light
Light Dark
Dark
0 comments