
Visual Basic Windows Phone 7 Series #8. How to create a settings page for Windows Phone 7
I have experienced lot of fun creating Windows Phone 7 applications in Visual Basic and writing about them here. In our last post, I explained how to create a Bing Maps application for Windows Phone 7. In this blog, I want to share a sample that will help you to create a settings page for Windows Phone 7. This application will display two setting pages – one where the setting changes will be updated immediately, and the other where the user will have to confirm the changes.
I will now demonstrate how easy it is to create a settings page for Windows Phone 7, using Visual Basic for Windows Phone Developer Tools. The settings page can be created in 6 simple steps as follows:
- Create a sample application and add controls
- Create a settings class
- Create a settings page that does not require a confirmation button
- Create a settings page that requires a confirmation button
- Build and debug the application
- Rebuild in the release mode before publishing
Prerequisites:
- Visual Studio 2010 Professional, Premium, or Ultimate. If you do not have any of the releases, you can download any of the following trial versions as per your preference: Professional, Premium, or Ultimate.
- Windows Phone Developer Tools RTW
- Visual Basic
for Windows Phone Developer Tools – RTW
Note: You can install the newer version- Windows Phone Developer Tools 7.1 Beta instead of the above mentioned two tools as it will take comparatively less time. However, this sample was created using the previous version.
To create a settings page for Windows Phone 7, let’s follow the 6 simple steps mentioned earlier:
Step 1 – Create a sample application and add controls
Create a sample application
- Create a new project and browse to the “Silverlight for Windows Phone” node.
- Select the “Windows Phone Application” template.
- Enter a name for the application.
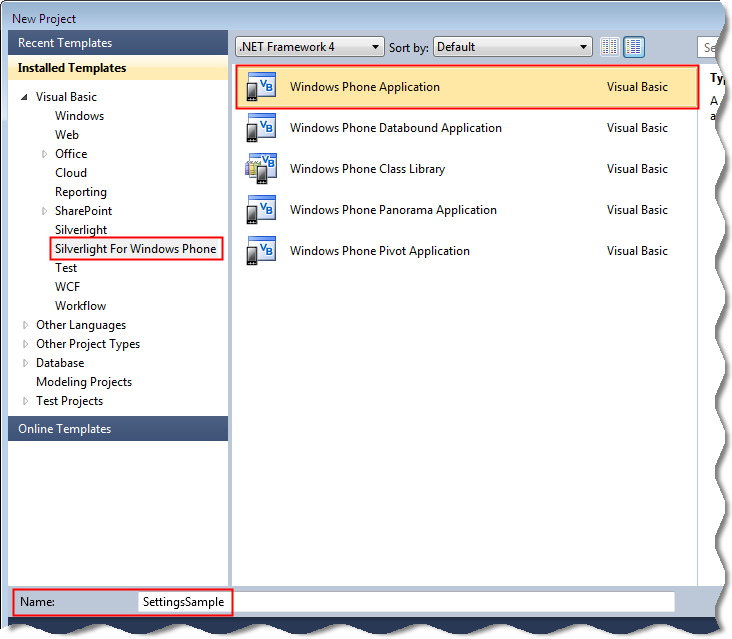
- Click Ok. The MainPage.xaml page is displayed.
Add controls
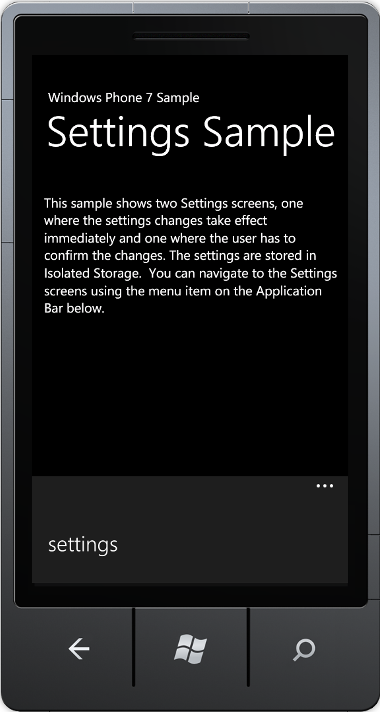
- Click the MY APPLICATION text. In the Properties window, change the text property to “Windows Phone 7 Sample”.
- Click the page name text. In the Properties window, change the text property to “Settings Sample”.
- From the toolbox, drag and drop the TextBlock control to the design surface.
- Click the TextBlock control. In the Properties window, change the text property to “This sample shows two Settings screens, one where the settings changes take effect immediately and one where the user has to confirm the changes. The settings are stored in Isolated Storage. You can navigate to the Settings screens using the menu item on the Application Bar below.”.
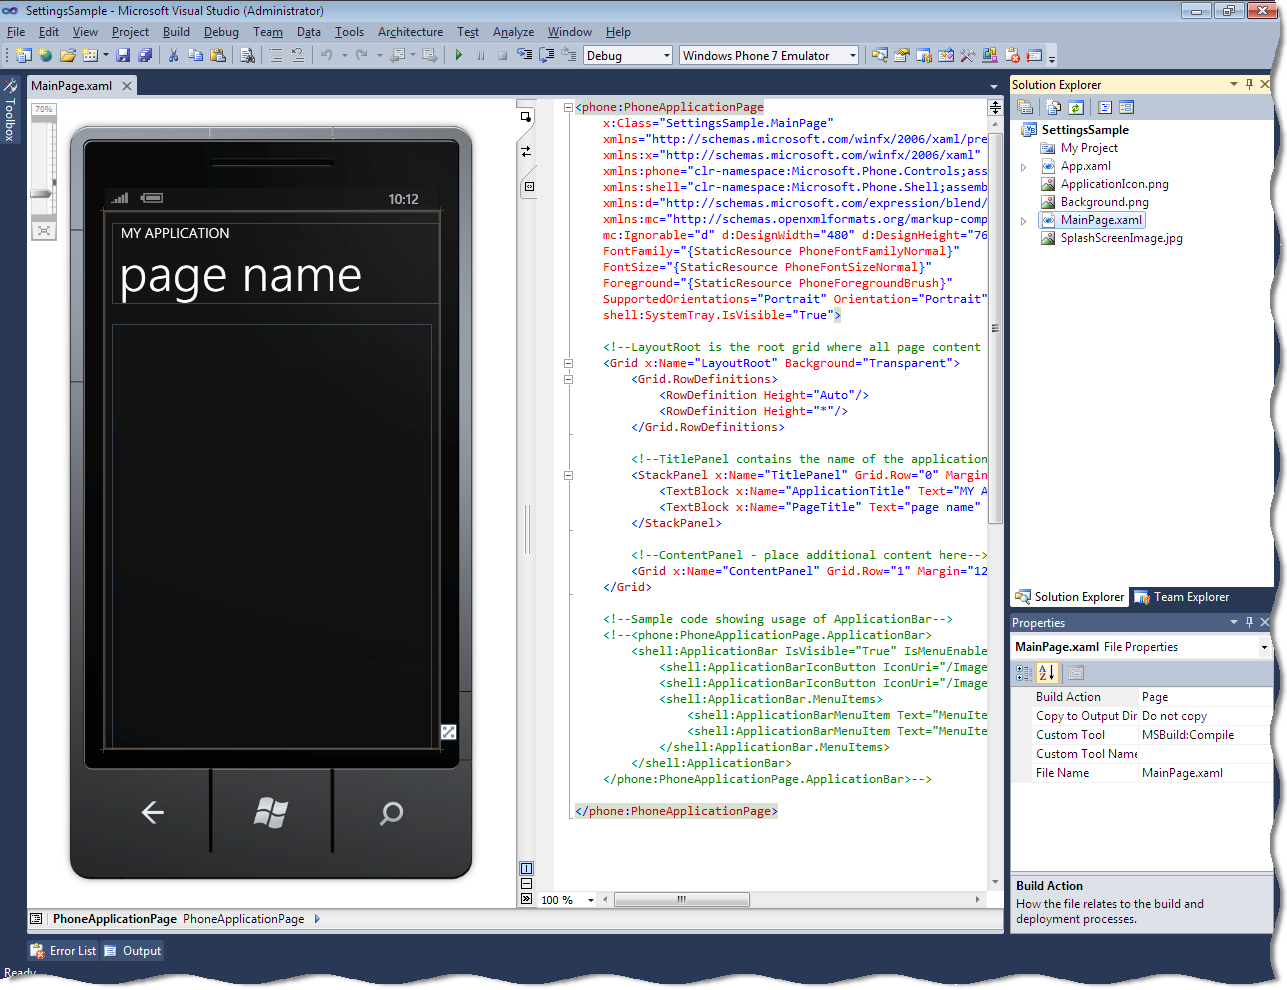
- Open the MainPage.xaml.vb page. The page is displayed with the following code:
Partial Public Class MainPage
Inherits PhoneApplicationPage
‘ Constructor
Public Sub New()
InitializeComponent()
End Sub
End Class
- Replace the code in Step 5 with the following code:
Partial Public Class MainPage
Inherits PhoneApplicationPage
‘ Constructor
Public Sub New()
InitializeComponent()
SupportedOrientations = SupportedPageOrientation.Portrait
‘ Add an Application Bar with a ‘setting menu item.
ApplicationBar = New ApplicationBar()
ApplicationBar.IsMenuEnabled = True
ApplicationBar.IsVisible = True
ApplicationBar.Opacity = 1.0
Dim settingsItem As New ApplicationBarMenuItem(“settings”)
AddHandler settingsItem.Click, AddressOf settings_Click
ApplicationBar.MenuItems.Add(settingsItem)
End Sub
Private Sub settings_Click(ByVal sender As Object, ByVal e As EventArgs)
Me.NavigationService.Navigate(New Uri(“/SettingsWithoutConfirmation.xaml”, UriKind.Relative))
End Sub
End Class
Note: This method creates an application bar containing a settings menu item. This menu item is required by the user to navigate to the settings page that does not require the confirmation button.
Step 2 – Create a settings class
Creating a settings class is one of the important tasks. This class is required to hold, save, and then load the settings from isolated storage. This class will contain a method to add or update a value to isolated storage. This method will also assign a default value if the setting has never been set earlier.
- In Solution Explorer, right-click the application name and add a class. The Add New Item dialog box is displayed.
- Enter the name as “AppSettings.vb”, and then click Add. The AppSettings.vb page is displayed.
- Replace the code with the following code:
Imports System.IO.IsolatedStorage
Imports System.Diagnostics
Public Class AppSettings
‘ Our isolated storage settings
Private isolatedStore As IsolatedStorageSettings
‘ The isolated storage key names of our settings
Private Const CheckBoxSettingKeyName As String = “CheckBoxSetting”
Private Const ListBoxSettingKeyName As String = “ListBoxSetting”
Private Const RadioButton1SettingKeyName As String = “RadioButton1Setting”
Private Const RadioButton2SettingKeyName As String = “RadioButton2Setting”
Private Const RadioButton3SettingKeyName As String = “RadioButton3Setting”
Private Const UsernameSettingKeyName As String = “UsernameSetting”
Private Const PasswordSettingKeyName As String = “PasswordSetting”
‘ The default value of our settings
Private Const CheckBoxSettingDefault As Boolean = True
Private Const ListBoxSettingDefault As Integer = 0
Private Const RadioButton1SettingDefault As Boolean = True
Private Const RadioButton2SettingDefault As Boolean = False
Private Const RadioButton3SettingDefault As Boolean = False
Private Const UsernameSettingDefault As String = “”
Private Const PasswordSettingDefault As String = “”
”’ Constructor that gets the application settings.
Public Sub New()
Try
‘ Get the settings for this application.
isolatedStore = IsolatedStorageSettings.ApplicationSettings
Catch e As Exception
Debug.WriteLine(“Exception while using IsolatedStorageSettings: “ & e.ToString())
End Try
End Sub
”’ Update a setting value for our application. If the setting does not
”’ exist, then add the setting.
Public Function AddOrUpdateValue(ByVal Key As String, ByVal value As Object) As Boolean
Dim valueChanged As Boolean = False
Try
‘ if new value is different, set the new value.
If isolatedStore(Key) IsNot value Then
isolatedStore(Key) = value
valueChanged = True
End If
Catch e1 As KeyNotFoundException
isolatedStore.Add(Key, value)
valueChanged = True
Catch e2 As ArgumentException
isolatedStore.Add(Key, value)
valueChanged = True
Catch e As Exception
Debug.WriteLine(“Exception while using IsolatedStorageSettings: “ & e.ToString())
End Try
Return valueChanged
End Function
”’ Get the current value of the setting, or if it is not found, set the
”’ setting to the default setting.
Public Function GetValueOrDefault(Of valueType)(ByVal Key As String, ByVal defaultValue As valueType) As valueType
Dim value As valueType
Try
value = CType(isolatedStore(Key), valueType)
Catch e1 As KeyNotFoundException
value = defaultValue
Catch e2 As ArgumentException
value = defaultValue
End Try
Return value
End Function
”’ Save the settings.
Public Sub Save()
isolatedStore.Save()
End Sub
”’ Property to get and set a CheckBox Setting Key.
Public Property CheckBoxSetting() As Boolean
Get
Return GetValueOrDefault(Of Boolean)(CheckBoxSettingKeyName, CheckBoxSettingDefault)
End Get
Set(ByVal value As Boolean)
AddOrUpdateValue(CheckBoxSettingKeyName, value)
Save()
End Set
End Property
”’ Property to get and set a ListBox Setting Key.
Public Property ListBoxSetting() As Integer
Get
Return GetValueOrDefault(Of Integer)(ListBoxSettingKeyName, ListBoxSettingDefault)
End Get
Set(ByVal value As Integer)
AddOrUpdateValue(ListBoxSettingKeyName, value)
Save()
End Set
End Property
”’ Property to get and set a RadioButton Setting Key.
Public Property RadioButton1Setting() As Boolean
Get
Return GetValueOrDefault(Of Boolean)(RadioButton1SettingKeyName, RadioButton1SettingDefault)
End Get
Set(ByVal value As Boolean)
AddOrUpdateValue(RadioButton1SettingKeyName, value)
Save()
End Set
End Property
”’ Property to get and set a RadioButton Setting Key.
Public Property RadioButton2Setting() As Boolean
Get
Return GetValueOrDefault(Of Boolean)(RadioButton2SettingKeyName, RadioButton2SettingDefault)
End Get
Set(ByVal value As Boolean)
AddOrUpdateValue(RadioButton2SettingKeyName, value)
Save()
End Set
End Property
”’ Property to get and set a RadioButton Setting Key.
Public Property RadioButton3Setting() As Boolean
Get
Return GetValueOrDefault(Of Boolean)(RadioButton3SettingKeyName, RadioButton3SettingDefault)
End Get
Set(ByVal value As Boolean)
AddOrUpdateValue(RadioButton3SettingKeyName, value)
Save()
End Set
End Property
”’ Property to get and set a Username Setting Key.
Public Property UsernameSetting() As String
Get
Return GetValueOrDefault(Of String)(UsernameSettingKeyName, UsernameSettingDefault)
End Get
Set(ByVal value As String)
AddOrUpdateValue(UsernameSettingKeyName, value)
Save()
End Set
End Property
”’ Property to get and set a Password Setting Key.
Public Property PasswordSetting() As String
Get
Return GetValueOrDefault(Of String)(PasswordSettingKeyName, PasswordSettingDefault)
End Get
Set(ByVal value As String)
AddOrUpdateValue(PasswordSettingKeyName, value)
Save()
End Set
End Property
End Class
Step 3 – Create a settings page that does not require a confirmation button
- In Solution Explorer, right-click the application name, and then add a new item. The Add New Item dialog box is displayed.
- Select the “Silverlight for Windows Phone” node, and then select the “Windows Phone User Control” template.
- Enter the name as “SettingsWithoutConfirmation.xaml”, and then click Add. The SettingsWithoutConfirmation.xaml page is displayed.
- Add the following XAML code in the namespace declaration:
xmlns:phone=”clr-namespace:Microsoft.Phone.Controls;assembly=Microsoft.Phone”
xmlns:shell=”clr-namespace:Microsoft.Phone.Shell;assembly=Microsoft.Phone”
xmlns:local=”clr-namespace:SettingsSample”
- To add a local resource, add the following XAML code before the <Grid> tag:
<phone:PhoneApplicationPage.Resources>
<local:AppSettings x:Key=”appSettings”></local:AppSettings>
</phone:PhoneApplicationPage.Resources>
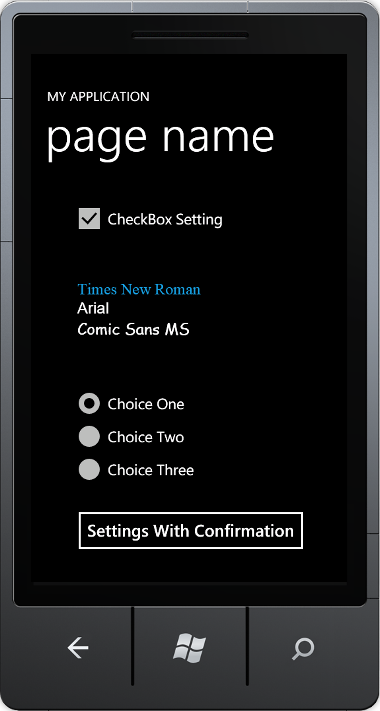
- To create buttons, add the following XAML code in the <Grid> tag:
<CheckBox Content=”CheckBox Setting” Height=”Auto” HorizontalAlignment=”Left” Margin=”60,20,0,0″ Name=”checkBoxSetting” VerticalAlignment=”Top” IsChecked=”{Binding Source={StaticResource appSettings}, Path=CheckBoxSetting, Mode=TwoWay}” />
<ListBox Height=”140″ HorizontalAlignment=”Left” Margin=”70,150,0,0″ Name=”listBoxSetting” VerticalAlignment=”Top” Width=”360″ SelectedIndex=”{Binding Source={StaticResource appSettings}, Path=ListBoxSetting, Mode=TwoWay}”>
<ListBoxItem Content=”Times New Roman” FontSize=”24″ FontFamily=”Times New Roman” />
<ListBoxItem Content=”Arial” FontSize=”24″ FontFamily=”Arial” />
<ListBoxItem Content=”Comic Sans MS” FontSize=”24″ FontFamily=”Comic Sans MS” />
</ListBox>
<RadioButton Content=”Choice One” Height=”Auto” HorizontalAlignment=”Left” Margin=”60,0,0,235″ Name=”radioButton1″ VerticalAlignment=”Bottom” GroupName=”GroupOne” IsChecked=”{Binding Source={StaticResource appSettings}, Path=RadioButton1Setting, Mode=TwoWay}” />
<RadioButton Content=”Choice Two” Height=”Auto” HorizontalAlignment=”Left” Margin=”60,350,0,0″ Name=”radioButton2″ VerticalAlignment=”Top” GroupName=”GroupOne” IsChecked=”{Binding Source={StaticResource appSettings}, Path=RadioButton2Setting, Mode=TwoWay}”/>
<RadioButton Content=”Choice Three” Height=”Auto” HorizontalAlignment=”Left” Margin=”60,400,0,0″ Name=”radioButton3″ VerticalAlignment=”Top” GroupName=”GroupOne” IsChecked=”{Binding Source={StaticResource appSettings}, Path=RadioButton3Setting, Mode=TwoWay}”/>
<Button Content=”Settings With Confirmation” Height=”80″ HorizontalAlignment=”Left” Margin=”60,450,0,0″ Name=”buttonAdditional” Click=”buttonAdditional_Click” />
Note: This page uses data binding for the settings to be updated immediately and then saves the values to isolated storage. Selecting the binding mode as “TwoWay” updates the changes immediately.
Step 4 – Create a settings page that requires a confirmation button
- In Solution Explorer, right-click the application name, and then add a new item. The Add New Item dialog box is displayed.
- Select the “Silverlight for Windows Phone” node, and then select the “Windows Phone User Control” template.
- Enter the name as “SettingsWithConfirmation.xaml”, and then click Add. The SettingsWithConfirmation.xaml page is displayed.
- Add the following XAML code in the namespace declaration:
xmlns:phone=”clr-namespace:Microsoft.Phone.Controls;assembly=Microsoft.Phone”
xmlns:shell=”clr-namespace:Microsoft.Phone.Shell;assembly=Microsoft.Phone”
- To create buttons, add the following XAML code in the <Grid> tag:
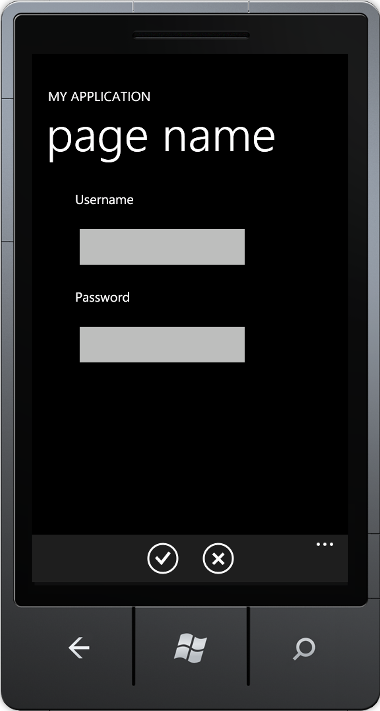
<TextBlock Height=”60″ HorizontalAlignment=”Left” Margin=”65,12,0,0″ Name=”textBlock1″ Text=”Username” VerticalAlignment=”Top” Width=”169″ />
<TextBox Height=”78″ HorizontalAlignment=”Left” Margin=”60,60,0,0″ Name=”textBoxUsername” VerticalAlignment=”Top” Width=”274″ />
<TextBlock Height=”60″ HorizontalAlignment=”Left” Margin=”65,160,0,0″ Name=”textBlock2″ Text=”Password” VerticalAlignment=”Top” Width=”169″ />
<PasswordBox Height=”78″ HorizontalAlignment=”Left” Margin=”60,208,0,0″ Name=”passwordBoxPassword” VerticalAlignment=”Top” Width=”274″ />
- Open the SettingsWithConfirmation.xaml.vb page. The page is displayed with the following code:
Partial Public Class SettingsWithConfirmation
Inherits PhoneApplicationPage
Public Sub New()
InitializeComponent()
End Sub
End Class
- Replace the code in Step 6 with the following code:
Partial Public Class SettingsWithConfirmation
Inherits PhoneApplicationPage
Private settings As New AppSettings()
Public Sub New()
InitializeComponent()
‘ Add an Application Bar that has a ‘done’ confirmation button and
‘ a ‘cancel’ button
ApplicationBar = New ApplicationBar()
ApplicationBar.IsMenuEnabled = True
ApplicationBar.IsVisible = True
ApplicationBar.Opacity = 1.0
Dim doneButton As New ApplicationBarIconButton(New Uri(“/Images/appbar.check.rest.png”, UriKind.Relative))
doneButton.Text = “done”
AddHandler doneButton.Click, AddressOf doneButton_Click
Dim cancelButton As New ApplicationBarIconButton(New Uri(“/Images/appbar.cancel.rest.png”, UriKind.Relative))
cancelButton.Text = “cancel”
AddHandler cancelButton.Click, AddressOf cancelButton_Click
ApplicationBar.Buttons.Add(doneButton)
ApplicationBar.Buttons.Add(cancelButton)
‘ Copy the current settings into the text boxes as the new values
‘ entered in will not be saved until the user clicks the ‘done’ button.
textBoxUsername.Text = settings.UsernameSetting
passwordBoxPassword.Password = settings.PasswordSetting
End Sub
Private Sub doneButton_Click(ByVal sender As Object, ByVal e As EventArgs)
settings.UsernameSetting = textBoxUsername.Text
settings.PasswordSetting = passwordBoxPassword.Password
NavigationService.GoBack()
End Sub
Private Sub cancelButton_Click(ByVal sender As Object, ByVal e As EventArgs)
NavigationService.GoBack()
End Sub
End Class
Note: This method creates an application bar with the done and the cancel buttons. These buttons are required by the user to confirm or cancel the changes. This method also creates event handlers for the button click events.
There you are! Now your settings page application for Windows Phone 7 is ready! You just need to build and debug the application.
Step 5 – Build and debug the application
- To build the application, select Build > Build Solution. The project should build without any errors. If there are errors, check the earlier steps, correct the errors, and then build the application again.
- To debug the application, set the deployment target of the application to “Windows Phone 7 Emulator”.
- Select Debug > Start Debugging. The emulator window is displayed.

- To test the settings page that does not require a confirmation button, click “settings” on the application bar. The settings screen is displayed without the confirmation button.
- To test the screen, click any of the options. The settings will be changed immediately and saved to isolated storage.
- To test the settings page that requires a confirmation button, click “Settings With Confirmation”. The settings screen is displayed with the confirmation button.
- Enter the username and the password details and click the Right arrow icon to confirm the changes. The settings will be changed and stored in isolated storage.


Note: To stop debugging the application, select Debug > Stop Debugging.
Step 6 – Rebuild in the release mode before publishing
- On the standard toolbar, change the configuration manager to Release.
- To rebuild the application, select Build > Rebuild. The XAP file of the application is generated, which is the package that you will have to submit in the marketplace to publish the application. You can also locate this XAP file in the BinRelease folder.


Finally, to submit your application to the market place, you can refer to upload your application walkthrough.
Summary
Bravo! Buenos! You have successfully created a settings page for Windows Phone 7, that too in just 6 simple steps! You can find the full source code for the settings page application here. This application uses general Silverlight and Visual Basic features that are applicable for different application types including Windows Phone application.
 Light
Light Dark
Dark
0 comments