
Visual Basic Windows Phone 7 Series #4. How to implement a model-view-viewmodel pattern in a Windows Phone application
In our last post, I explained how to create a custom indeterminate progress bar application for Windows Phone 7. In this blog, I want to share a sample that will help you to implement a model-view-viewmodel pattern in a Windows Phone application. A model-view-viewmodel pattern is used to separate data from the user interface. This pattern allows the developers to code data models and the designers to create user interfaces. In this sample, I will demonstrate how to create a game tracker application by implementing the model-view-viewmodel pattern.
I will now demonstrate how easy it is to implement the model-view-viewmodel pattern in a Windows Phone application, using Visual Basic for Windows Phone Developer Tools. The model-view-viewmodel pattern can be implemented in 8 simple steps as follows:
- Create a sample application
- Create a data model, a viewmodel, and two views
- Create the main application page
- Maintain the page state
- Save the data to isolated storage
- Add the application bar
- Build and debug the application
- Rebuild in the release mode before publishing
Prerequisites:
- Visual Studio 2010 Professional, Premium, or Ultimate. If you do not have any of the releases, you can download any of the following trial versions as per your preference: Professional, Premium, or Ultimate.
- Windows Phone Developer Tools RTW
- Visual Basic
for Windows Phone Developer Tools – RTW
Note: You can install the newer version- Windows Phone Developer Tools 7.1 Beta instead of the above mentioned two tools as it will take comparatively less time. However, this sample was created using the previous version.
To implement the model-view-viewmodel pattern in a Windows Phone application, let’s follow the 8 simple steps mentioned earlier:
Step 1 – Create a sample application
- Create a new project and browse to the “Silverlight for Windows Phone” node.
- Select the “Windows Phone Application” template.
- Enter a name for the application.

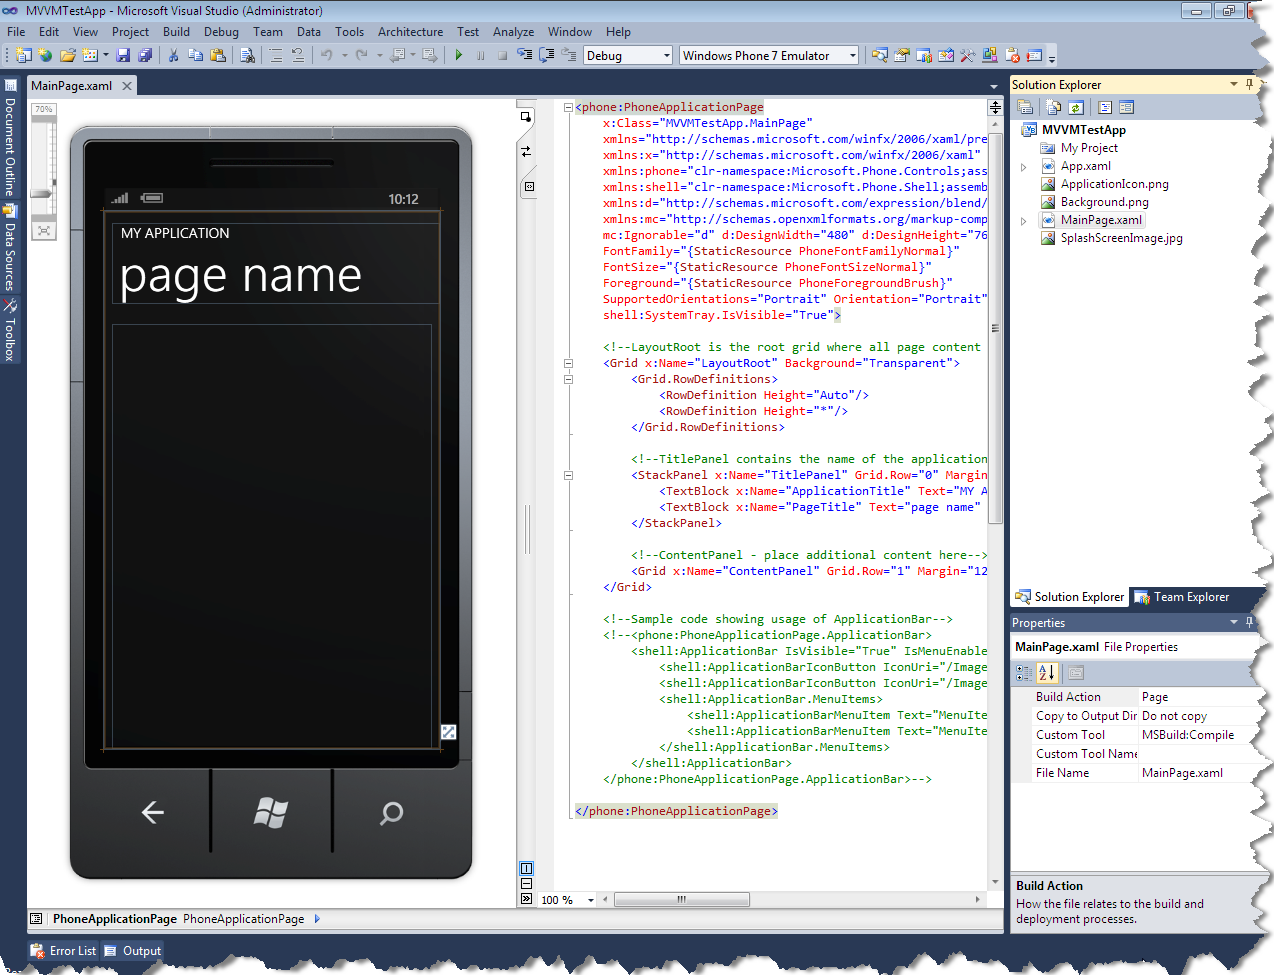
- Click OK. The MainPage.xaml page is displayed.
Step 2 – Create a data model, a viewmodel, and two views
Create a data model
- In Solution Explorer, right-click the application name and add a new folder.
- Rename the new folder as “Model”.
- Right-click the Model folder, and then add a class. The Add New Item dialog box is displayed.
- Enter the name for the class as “Accomplishment.vb”, and then click Add. The Accomplishment.vb page is displayed.
- Replace the code with the following code:
Imports System.ComponentModel
Public Class Accomplishment
Implements INotifyPropertyChanged
' The name of the accomplishment.
Public Property Name As String
' The type of the accomplishment, Item or Level.
Public Property Type As String
' The number of each item that has been collected.
Private _count As Integer
Public Property Count As Integer
Get
Return _count
End Get
Set(ByVal value As Integer)
_count = value
RaisePropertyChanged("Count")
End Set
End Property
' Whether a level has been completed or not
Private _completed As Boolean
Public Property Completed As Boolean
Get
Return _completed
End Get
Set(ByVal value As Boolean)
_completed = value
RaisePropertyChanged("Completed")
End Set
End Property
Public Event PropertyChanged As PropertyChangedEventHandler Implements INotifyPropertyChanged.PropertyChanged
Private Sub RaisePropertyChanged(ByVal propertyName As String)
RaiseEvent PropertyChanged(Me, New PropertyChangedEventArgs(propertyName))
End Sub
' Create a copy of an accomplishment to save.
' If your object is databound, this copy is not databound.
Public Function GetCopy() As Accomplishment
Dim copy = CType(Me.MemberwiseClone(), Accomplishment)
Return copy
End Function
End Class
Create a viewmodel
In Solution Explorer, right-click the application name, and then add a new folder.
- Rename the new folder as “ViewModel”.
- Right-click the ViewModel folder, and then add a class. The Add New Item dialog box is displayed.
- Enter the name for the class as “ViewModel.vb”, and then click Add. The ViewModel.vb page is displayed.
- Replace the code with the following code:
Imports System.Collections.ObjectModel
Imports System.IO.IsolatedStorage
Public Class ViewModel
Public Property Accomplishments As ObservableCollection(Of Accomplishment)
Public Sub GetAccomplishments()
If IsolatedStorageSettings.ApplicationSettings.Count > 0 Then
GetSavedAccomplishments()
Else
GetDefaultAccomplishments()
End If
End Sub
Public Sub GetDefaultAccomplishments()
Dim a As New ObservableCollection(Of Accomplishment)
' Items to collect
a.Add(New Accomplishment With {.Name = "Potions", .Type = "Item"})
a.Add(New Accomplishment With {.Name = "Coins", .Type = "Item"})
a.Add(New Accomplishment With {.Name = "Hearts", .Type = "Item"})
a.Add(New Accomplishment With {.Name = "Swords", .Type = "Item"})
a.Add(New Accomplishment With {.Name = "Shields", .Type = "Item"})
' Levels to complete
a.Add(New Accomplishment With {.Name = "Level 1", .Type = "Level"})
a.Add(New Accomplishment With {.Name = "Level 2", .Type = "Level"})
a.Add(New Accomplishment With {.Name = "Level 3", .Type = "Level"})
Accomplishments = a
'MessageBox.Show("Got accomplishments from default")
End Sub
Public Sub GetSavedAccomplishments()
Dim a As New ObservableCollection(Of Accomplishment)
For Each o In IsolatedStorageSettings.ApplicationSettings.Values
a.Add(CType(o, Accomplishment))
Next o
Accomplishments = a
'MessageBox.Show("Got accomplishments from storage")
End Sub
End Class
Create the first view
- In Solution Explorer, right-click the application name, and then add a new folder.
- Rename the new folder as “View”.
- Right-click the View folder, and then add a new item. The Add New Item dialog box is displayed.
- Select the “Silverlight for Windows Phone” node, and then select the “Windows Phone User Control” template.
- Enter the name for the view as “ItemView.xaml”, and then click Add. The ItemView.xaml page is displayed.
- In the <Grid> tag, add the following XAML code:
<ListBox ItemsSource="{Binding}">
<ListBox.ItemTemplate>
<DataTemplate>
<Grid>
<Grid.ColumnDefinitions>
<ColumnDefinition Width="200"/>
<ColumnDefinition Width="80"/>
<ColumnDefinition Width="100"/>
</Grid.ColumnDefinitions>
<TextBlock x:Name="Item" Text="{Binding Path=Name, Mode=OneWay}" Grid.Column="0" HorizontalAlignment="Left" VerticalAlignment="Center" />
<TextBox x:Name="Count" Text="{Binding Path=Count, Mode=TwoWay}" Grid.Column="1" TextAlignment="Center" InputScope="Number"/>
<TextBlock x:Name="Check" Text="{Binding Path=Count, Mode=OneWay}" Grid.Column="2" HorizontalAlignment="Center" VerticalAlignment="Center" />
</Grid>
</DataTemplate>
</ListBox.ItemTemplate>
</ListBox>
Create the second view
- In Solution Explorer, right-click the View folder, and then add a new item. The Add New Item dialog box is displayed.
- Select the “Silverlight for Windows Phone” node, and then select the “Windows Phone User Control” template.
- Enter the name for the view as “LevelView.xaml”, and then click Add. The LevelView.xaml page is displayed.
Create the custom data binding converter
Open the LevelView.xaml.vb page, and replace the code with the following code:
Imports System.Globalization
Partial Public Class LevelView
Inherits UserControl
Public Sub New()
InitializeComponent()
End Sub
End Class
Public Class BoolOpposite
Implements System.Windows.Data.IValueConverter
Public Function Convert(ByVal value As Object, ByVal targetType As Type, ByVal parameter As Object, ByVal culture As CultureInfo) As Object Implements System.Windows.Data.IValueConverter.Convert
Dim b = CBool(value)
Return Not b
End Function
Public Function ConvertBack(ByVal value As Object, ByVal targetType As Type, ByVal parameter As Object, ByVal culture As CultureInfo) As Object Implements System.Windows.Data.IValueConverter.ConvertBack
Dim s = TryCast(value, String)
Dim b As Boolean
If Boolean.TryParse(s, b) Then
Return Not b
End If
Return False
End Function
End Class
Create the user interface for the second view
- Open the LevelView.xaml page.
- In the <UserControl> tag, add the following XAML code:
xmlns:src="clr-namespace:MVVMTestApp"
- After the <UserControl> tag, add the following XAML code:
<UserControl.Resources>
<src:BoolOpposite x:Key="BoolOpposite"/>
</UserControl.Resources>
- In the <Grid> tag, add the following XAML code:
<ListBox ItemsSource=”{Binding}”>
<ListBox.ItemTemplate>
<DataTemplate>
<Grid>
<Grid.ColumnDefinitions>
<ColumnDefinition Width=”200″/>
<ColumnDefinition Width=”80″/>
<ColumnDefinition Width=”100″/>
</Grid.ColumnDefinitions>
<TextBlock x:Name=”Level” Text=”{Binding Path=Name, Mode=OneWay}” Grid.Column=”0″ HorizontalAlignment=”Left” VerticalAlignment=”Center”/>
<CheckBox x:Name=”Completed” IsChecked=”{Binding Path=Completed, Mode=TwoWay}” Grid.Column=”1″ HorizontalAlignment=”Center” IsEnabled=”{Binding Path=Completed, Converter={StaticResource BoolOpposite}}”/>
<TextBlock x:Name=”Check” Text=”{Binding Path=Completed, Mode=OneWay}” Grid.Column=”2″ HorizontalAlignment=”Center” VerticalAlignment=”Center”/>
</Grid>
</DataTemplate>
</ListBox.ItemTemplate>
</ListBox>
Step 3 – Create the main application page
Create the user interface for the main application page
- Open the MainPage.xaml page.
- Click the MY APPLICATION text. In the Properties window, change the text property to “MVVM Test App”.
- Click the page name text. In the Properties window, change the text property to “game tracker”.
- In the <phone> tag, add the following XAML code:
xmlns:views=”clr-namespace:MVVMTestApp”
- Replace the <Grid> tag for the content panel with the following XAML code:
<!–ContentPanel – place additional content here–>
<Grid x:Name=”ContentPanel” Grid.Row=”1″ Margin=”12,0,12,0″>
<StackPanel>
<TextBlock Text=”Items Collected” Foreground=”{StaticResource PhoneAccentBrush}” Style=”{StaticResource PhoneTextLargeStyle}” />
<views:ItemView x:Name=”ItemViewOnPage” Height=”200″/>
<TextBlock Text=”Levels Completed” Foreground=”{StaticResource PhoneAccentBrush}” Style=”{StaticResource PhoneTextLargeStyle}” />
<views:LevelView x:Name=”LevelViewOnPage” Height=”200″/>
</StackPanel>
</Grid>
Add the code for the main application page
Open the MainPage.xaml.vb page, and replace the code with the following code:
Partial Public Class MainPage
Inherits PhoneApplicationPage
Private vm As ViewModel
‘ Constructor
Public Sub New()
InitializeComponent()
vm = New ViewModel
End Sub
Protected Overrides Sub OnNavigatedTo(ByVal e As System.Windows.Navigation.NavigationEventArgs)
MyBase.OnNavigatedTo(e)
‘ Later, you will replace this line with something better
vm.GetAccomplishments()
‘ There are two different views, but only one view model.
‘ So, use LINQ queries to populate the views.
‘ Set the data context for the Item view.
ItemViewOnPage.DataContext = From Accomplishment In vm.Accomplishments
Where Accomplishment.Type = “Item”
Select Accomplishment
‘ Set the data context for the Level view.
LevelViewOnPage.DataContext = From Accomplishment In vm.Accomplishments
Where Accomplishment.Type = “Level”
Select Accomplishment
‘ If there is only one view, you could use the following code
‘ to populate the view.
‘ AccomplishmentViewOnPage.DataContext = vm.Accomplishments
End Sub
Step 4 – Maintain the page state
- In Solution Explorer, right-click the application name, and then add a class. The Add New Item dialog box is displayed.
- Enter the name for the class as “StateUtilities.vb”, and then click Add. The StateUtilities.vb page is displayed.
- Replace the code with the following code:
Public NotInheritable Class StateUtilities
Private Shared _isLaunching As Boolean
Private Sub New()
End Sub
Public Shared Property IsLaunching As Boolean
Get
Return _isLaunching
End Get
Set(ByVal value As Boolean)
_isLaunching = value
End Set
End Property
End Class
- Open the App.xaml.vb page.
- Replace the Application_Launching method with the following code:
Private Sub Application_Launching(ByVal sender As Object, ByVal e As LaunchingEventArgs)
StateUtilities.IsLaunching = True
End Sub
- Replace the Application_Activated method with the following code:
Private Sub Application_Activated(ByVal sender As Object, ByVal e As ActivatedEventArgs)
StateUtilities.IsLaunching = False
End Sub
- Open the MainPage.xaml.vb, and locate the following code:
‘ Later, you will replace this line with something better
vm.GetAccomplishments()
- Replace the code given in step 7 with the following code:
‘ Old instance of the application
‘ The user started the application from the Back button.
If (Not StateUtilities.IsLaunching) AndAlso Me.State.ContainsKey(“Accomplishments”) Then
vm = CType(Me.State(“Accomplishments”), ViewModel)
‘MessageBox.Show(“Got data from state”)
‘ New instance of the application
‘ The user started the application from the application list,
‘ or there is no saved state available.
Else
vm.GetAccomplishments()
‘MessageBox.Show(“Did not get data from state”)
End If
- After the OnNavigatedTo method, add the following code:
Protected Overrides Sub OnNavigatedFrom(ByVal e As System.Windows.Navigation.NavigationEventArgs)
MyBase.OnNavigatedFrom(e)
If Me.State.ContainsKey(“Accomplishments”) Then
Me.State(“Accomplishments”) = vm
Else
Me.State.Add(“Accomplishments”, vm)
End If
StateUtilities.IsLaunching = False
End Sub
Step 5 – Save data to isolated storage
Open the ViewModel.vb page, and add the following code:
Public Sub SaveAccomplishments()
Dim settings As IsolatedStorageSettings = IsolatedStorageSettings.ApplicationSettings
For Each a In Accomplishments
If settings.Contains(a.Name) Then
settings(a.Name) = a
Else
settings.Add(a.Name, a.GetCopy())
End If
Next a
settings.Save()
MessageBox.Show(“Finished saving accomplishments”)
End Sub
Step 6 – Add the application bar
Add the icon file
- In Solution Explorer, right-click the application name, and then add an existing item. The Add Existing Item dialog box is displayed.
- Browse to one of the following folders to locate the standard icons:
- C:Program FilesMicrosoft SDKsWindows Phonev7.0Iconsdark
- C:Program Files (x86)Microsoft SDKsWindows Phonev7.0Iconsdark
- Select the appbar.save.rest.png icon, and then click Add.
- In Solution Explorer, select the appbar.save.rest.png file.
- In the Properties window, change the Build Action property to “Content”.
- Change the Copy to Output Directory property to “Copy if newer”.
- Change the File Name property to “AppBarSave.png”.
Add the application bar
- Open the MainPage.xaml.vb page.
- After the OnNavigatedFrom method, add the following code:
Private Sub AppBarSave_Click(ByVal sender As Object, ByVal e As EventArgs)
vm.SaveAccomplishments()
End Sub
- Open the MainPage.xaml page.
- Replace the <phone:PhoneApplicationPage.ApplicationBar> tag with the following XAML code:
<phone:PhoneApplicationPage.ApplicationBar>
<shell:ApplicationBar IsVisible=”True” IsMenuEnabled=”True” >
<shell:ApplicationBarIconButton IconUri=”AppBarSave.png” Text=”Save” Click=”AppBarSave_Click” />
</shell:ApplicationBar>
</phone:PhoneApplicationPage.ApplicationBar>
Voila! Now your model-view-viewmodel pattern for Windows Phone application is ready! You just need to build and debug the application.
Step 7 – Build and debug the application
- To build the application, select Build > Build Solution. The project should build without any errors. If there are errors, check the earlier steps, correct the errors, and then build the application again.
- To debug the application, set the deployment target of the application to “Windows Phone 7 Emulator”.
- Select Debug > Start Debugging. The emulator window is displayed.

- To test whether the view is bound to the model, enter appropriate values in the Items Collected boxes.
- To test the data converter, select the Level 1 check box.
- To test the page state, click the Start button, and then click the Back button. The application resumes, and the page state is maintained.
- To test the data in isolated storage, click the Save button. The message “Finished saving accomplishments” is displayed. Click the Start button, and then select “MVVMTestApp”. A new instance of the application is launched, containing the data that you had saved in isolated storage.

Step 8 – Rebuild in the release mode before publishing
- On the standard toolbar, change the configuration manager to Release.
- To rebuild the application, select Build > Rebuild. The XAP file of the application is generated.
Finally, to submit your application to the market place, you can refer to upload your application walkthrough.
Summary
That’s it! You have now successfully implemented the model-view-viewmodel pattern for the Windows Phone application, that too in just 8 simple steps!
You can find the full source code for the Model-View-ViewModel Pattern application here.
 Light
Light Dark
Dark
0 comments