Using AAL to Secure Calls to a Classic WCF Service
[you do remember that this is my personal blog and those are my own opinions, right? ;-)]
After the releases we’ve been publishing in the last few months, I am sure you have little doubt that REST is something we are really interested in supporting. The directory uses OAuth for all sorts of workloads, the Graph API is fully REST based, all the AAL samples use Web API as protected resources, we released a token handler for a format that has REST as one of its main raison d’etre… even if (as usual) here I speak for myself rather than in official capacity, the signs are pretty clear.
With that premise: I know that many of you bet on WCF in its classic stance, and even if you agree with the REST direction long term many of you still have lots of properties based on WCF that can’t be migrated overnight. Ever since I published the post about javascriptnotify, I got many requests for help on how to apply the same principle to classic WCF services. I was always reluctant to go there, on account that 1) I knew it was not aligned to the direction we were going and 2) it would have required a *very* significant effort in terms of custom bindings/behaviors sorcery.
Well, now both concerns are addressed: in the last few months you have clearly seen the commitment to REST, and the combination of AAL and new WIF features in 4.5 now make the task if not drop-dead simple at least approachable.
With that in mind, I decided to write a short post about how to use AAL to add authentication capabilities to your rich client apps (WPF, WinForm, etc) and to secure calls to classic WCF services. That might come in handy for the ones among you who has existing WCF services and want to move them to Windows Azure and/or invoke them by taking advantage of identity providers that would not normally be available outside of browser-based applications.
The advantage is that you’ll be able to maintain the existing service in its current for, svc file and everything, and just change the binding used to secure calls to it: however I want to go on record saying that this is pure syntactic sugar. You’ll pay the complexity price associated with channels and behaviors without reaping its benefits (more sophisticated message securing mechanisms) given that you’ll be using a bearer token (which cannot give more guarantees in this mode than when used in REST style (shove it in the Authorize HTTP header over an SSL connection and you’re good to go)). If you are OK with the security levels offered by a bearer token over an SSL channel, you’d be likely better off by adopting a REST based solution; but as I mentioned above, if you have a really good reason for wanting to use classic WCF then this post might come in handy.
I am going to describe a simple solution composed by two projects:
- A WPF client, which uses AAL to obtain a token and WCF+WIF to invoke a simple service
- A WCF service, which uses WCF+WIF to authenticate incoming calls and work with claims
…aaaand there we go.
The Service
Even if it might be slightly counter-intuitive for some of you, let’s start with the service side. You’ll see that by going this way we’ll be better off later.
The game plan is: create a simple WCF service, then configure it so that will accept calls secured with a bearer token. That’s it.
We plan to use AAL and its interactive flow. Tokens obtained by going through browser flows do not (for now?) contain keys that could be actually be used to secure the message (e.g. by signing it); in absence of such keys, the only way for a service to authenticate a caller is to require that it simply attaches the token to the message (as opposed to using it on the message), hence the term “bearer” (“pay to the bearer on demand”…). That’s about as much as I am going to say about it here, if you are passionate about the topic and you like intricate diagrams go have fun here.
Let’s create a WCF service with the associated VS template. I am using VS2012 here, given that there are some new WIF features that are really handy here. The service must listen on HTTPS, hence make sure to enable SSL in the project properties (IIS Express finally made it trivial).
Let’s modify the interface to make it look like the following:
 using System.ServiceModel;

namespace WCFServiceIIS
{

    [ServiceContract]
    public interface IEngager
    {
        [OperationContract]
        string Engage();
    }
}
Given that I am just back from the movies, where I saw the trailer for “Into Darkness”, I am just going to do the entire sample Star Trek-themed (the more I read Kahneman, the less I fight priming and the like :-)).
The implementation will be about as impressive:
 using System.Security.Claims;
using System.ServiceModel;

namespace WCFServiceIIS
{
  public class Engager : IEngager
  {
    public string Engage()
    {
      return string.Format("Aye, Captain {0}!",
        ((ClaimsIdentity)
        OperationContext.Current.ClaimsPrincipal.Identity)
           .FindFirst(ClaimTypes.Name).Value);
    }
  }
}
The code is formatted for this narrow column theme, obviously you would not put a newline before .FindFirst, but you get the idea.
The service just sends back a string which includes the value of a claim, to demonstrate that a token did make it through WCF’s pipeline. In this case I picked Name, which is not issued by every ACS IdP; we should remember that when we’ll test this (e.g. no Live ID).
Well, now we come to the fun part: crafting the config so that the service will be secured in the way we want. Luckily the VS project template contains most of the code and the right structure, we’ll be just appending and modifying here and there. Let’s go through those changes. First part:
 <?xml version="1.0"?>
<configuration>
  <!-- Add the WIF IdentityModel config section-->
  <configSections>
    <section name="system.identityModel"
      type="System.IdentityModel.Configuration.SystemIdentityModelSection,
        System.IdentityModel,
        Version=4.0.0.0, Culture=neutral, PublicKeyToken=B77A5C561934E089"/>
  </configSections>
Once again, it’s formatted funny; I won’t mention this again and assume you’ll keep an eye on it moving forward.
Here we are just adding the type for the WIF config section.
   <system.serviceModel>
    <behaviors>
      <serviceBehaviors>
        <behavior>
          <serviceMetadata httpGetEnabled="true" httpsGetEnabled="true"/>
          <serviceDebug includeExceptionDetailInFaults="false"/>
          <!-- opt in for the use of WIF in the WCF pipeline-->
          <serviceCredentials
            useIdentityConfiguration="true" />
        </behavior>
      </serviceBehaviors>
    </behaviors>
The fragment above defines the behavior for the service, and it mostly comes straight form the boilerplate code found in the project template. The only thing I added is the useIdentityConfiguration switch, which is all that is required in .NET 4.5 for a WCF service to opt in to the use of WIF in its pipeline. That’s one of the advantage s of being in the box: in WIF 1.0 getting WIF in the WCF pipeline was a pretty laborious tasks (and one of hardest parts to work on while writing the WIF book).
     <!-- we want to use ws2007FederationHttpBinding over HTTPS -->
    <protocolMapping>
        <add binding="ws2007FederationHttpBinding"
          scheme="https" />
    </protocolMapping>
    <bindings>
      <ws2007FederationHttpBinding>
        <binding name="">
          <!-- we expect a bearer token sent thru an HTTPS channel -->
          <security mode="TransportWithMessageCredential">
            <message issuedKeyType="BearerKey"></message>
          </security>
        </binding>
      </ws2007FederationHttpBinding>
    </bindings>
    <serviceHostingEnvironment aspNetCompatibilityEnabled="true" multipleSiteBindingsEnabled="true" />
  </system.serviceModel>
We are going to overwrite the default binding with our own ws2007FederationHttpBinding, and ensure it will be on https.
The <ws2007FederationHttpBinding> element allows us to provide more details about how we want things to work. Namely, we want TransportWithMessageCredentials (== the transport must be secure, and we expect the identity of the caller to be expressed as an incoming token) and we’ll expect tokens without a key.
Finally:
   <system.identityModel>
    <identityConfiguration>
      <audienceUris>
        <!-- this is the realm configured in ACS for our service -->
        <add value="urn:engageservice"/>
      </audienceUris>
      <issuerNameRegistry>
        <trustedIssuers>
          <!-- we trust ACS -->
          <add name="https://lefederateur.accesscontrol.windows.net/"
             thumbprint="C1677FBE7BDD6B131745E900E3B6764B4895A226"/>
        </trustedIssuers>
      </issuerNameRegistry>
    </identityConfiguration>
  </system.identityModel>
Many of you will recognize that fragment as a WIF configuration element. The useIdentityConfiguration switch told WCF to use WIF, now we need to provide some details so that WIF’s pipeline (and specifically its validation process) will know what a valid token looks like.
The <audienceUri> specifies how to ensure that a token is actually for our service; we’ll need to make sure we use the same value when describing our service as an RP in ACS.
The issuerNameRegistry entry specifies that we’ll only accept tokens from ACS, and specifically tokens signed with a certificate corresponding to the stored thumbprint (spoiler alert: the ACS namespace certificate). How did I dream up that value? I stole it from the ws-federation sample in this post, where I obtained it by using the Identity and Access tools for VS2012.
That’s it, code-wise your service is ready to rock & roll; however we are not 100 done yet. The certificate used by the ACS namespace is not trusted, hence if we want to use it for checking signatures (and we do) we have only 2 alternatives: turn off validation (can be done in the WIF & WCF settings) or install it in the local certificate store. Here I am doing the latter, again following the process described here.
The ACS Namespace
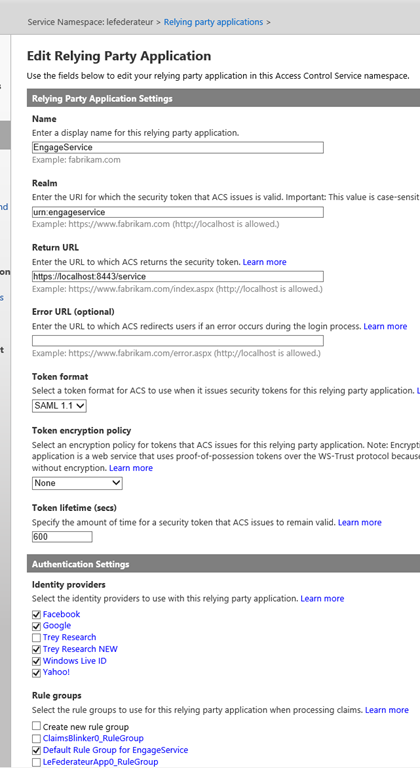
For the ACS namespace I got lucky: I have the usual development namespace I keep for these experiment already pre-provisioned, all I had to do was creating a suitable relying party and generating the default claims transformation rules. Let’s take a look at it:
Nothing strange, really. The only notable thing is that I am using urn:engageservice as realm, matching nicely the expected audience on the service side.
Also, note that I didn’t even bother changing the defaults for things like the token format. Finally, remember: even if I am not showing it here, I did visit the rules page and generate the default rules for the “Default Rule Group for EngageService”.
The Client
Finally, the client. Let’s go ahead and create a simple WPF application. Let’s add a button (for invoking the service) and a label (to display the result), nothing fancy.
Double-click on that button, you’ll generate the stub for the click even handler. As it is now tradition, let’s break down the code of the handler that will determine what happens when the user clicks the button. First part:
 private void btnCall_Click(object sender, RoutedEventArgs e)
{
      // Use AAL to prompt the user and obtain a token
    Microsoft.WindowsAzure.ActiveDirectory.Authentication.AuthenticationContext
        aCtx =
        new Microsoft.WindowsAzure.ActiveDirectory.Authentication.AuthenticationContext(
          "https://lefederateur.accesscontrol.windows.net");
     AssertionCredential aCr =
         aCtx.AcquireToken("urn:engageservice");
If you already played with AAL, you know what’s going on here: we are creating a new instance of AuthenticationContext, initializing it with our namespace of choice, and using it for obtaining a token for the target service. Literally 2 lines of code. Does it show that I am really proud? :-)
However, do you see something odd with that code? Thought so. Yes, I am fully qualifying AuthenticationContext with its complete namespace path. The reason is that there is another AuthenticationContext class in the .NET Framework, which happens to live in System.IdentityModel.Tokens, which we happen to need in this method, hence the need to specify whihc one we are referring to. If we would not be using the WCF OM, we would not be in this situation. Just sayin’.. ;-) on to the next:
 // Deserialize the token in a SecurityToken
IdentityConfiguration cfg = new IdentityConfiguration();
SecurityToken st = null;
using (XmlReader reader =
          XmlReader.Create(
            new StringReader(
                 HttpUtility.HtmlDecode(aCr.Assertion))))
{
    st = cfg.SecurityTokenHandlers.ReadToken(reader);
}
More action! No need to go too much into details here: in a nutshell, we are using WIF to deserialize the (HTMLEncoded) string we got form AAL, containing the token for our service, into a proper SecurityToken instance thnat can then be plugged in the WIF/WCF combined pipeline.
 // Create a binding to use the bearer token thru a secure connection
WS2007FederationHttpBinding fedBinding =
    new WS2007FederationHttpBinding(
        WSFederationHttpSecurityMode.TransportWithMessageCredential);
 fedBinding.Security.Message.IssuedKeyType =
        SecurityKeyType.BearerKey;

// Create a channel factory
ChannelFactory<IEngager> factory2 =
    new ChannelFactory<IEngager>(fedBinding,
        new EndpointAddress("https://localhost:44327/Engager.svc"));

// Opt in to use WIF
factory2.Credentials.UseIdentityConfiguration = true;
Now the real WCF sorcery begins. You can think of this as the equivalent of what we did in config on the service, but here it just seemed more appealing to do it in code.
The first two lines create the binding and specify that is it TransportWithMessageCredential, where the credential is a bearer token.
The second block creates a channel factory, tied to the just-created binding and the endpoint of the service (taken from the project properties of the service). Note the HTTPS.
The final line specifies that we want to use the WIF pipeline, just like we did on the service side.
 // Create a channel injecting the token obtained via AAL
 IEngager channel2 =
       factory2.CreateChannelWithIssuedToken(st);
Here the WIF object model comes out again. We use the factory method to create a channel to the service, where we inject the token obtained via AAL and converted to SecurityToken to dovetail with the serialization operations thata re about to happen.
 // Call the service
lblResult.Content = channel2.Engage();
Finally, in a triumph of bad practices, we call the service and assign the result directly to the content of the label.
Yes, this method is terrible: we don’t cache the token for subsequent calls, we do exactly zero error handling, and so on… but hopefully it provides the essential code for accomplishing our goal. Let’s put it test.
Testing the Solution
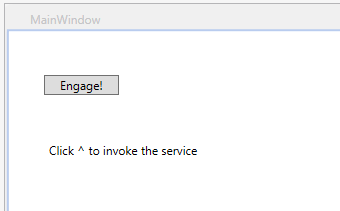
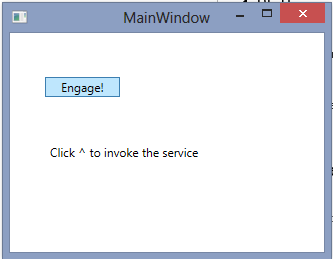
Let’s make the solution a multi-project start and hit F5. We get the client dialog:
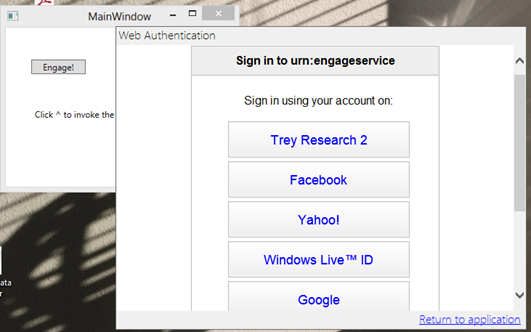
Hit Engage; you’ll see the following:
That’s good ol’ AAL kicking in and showing us the HRD page as configured for our RP in the ACS namespace lefederateur. I usually pick Facebook, given that I am pretty much guaranteed to be always logged in :-) and if you do…
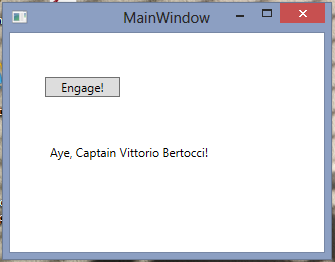
Behold, an especially poignant missive, carrying proof that my claims were successfully delivered, makes its way thru the ether (not really, it’s all on localhost) back to the client.
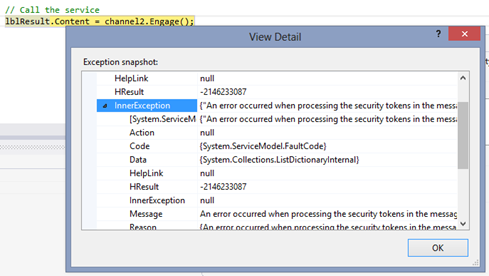
Great! But how do I know that I didn’t just do useless mumbo-jumbo, and I am actually checking incoming tokens? Here there’s an easy smoke test you can do. Go in the service web.config, delete one character from the issuer thumbprint and save; then run the solution again. As soon as you hit the button, you’ll promptly be hit by the following:
If you want even more details, you can turn on the WCF tracing on the service side and you’ll see that the pipeline fails exactly where you expect it to.
Summary
This post showed how you can take advantage of AAL for handling user authentication within your rich clients, and use the resulting token for invoking classic WCF services. We discussed how in my opinion this would be appropriate mostly when you have important reasons for sticking with classic services, and that the simpler route would be to take advantage of simpler flows (such as Web API & OAuth) whenever possible. I acknowledge that many of you do have important reasons; and given that most of you cannot directly tap on the deep knowledge and expertise in our team (Sri, Brent, I am looking at you guys :-)) I decided to publish this tutorial, knowing that you will make due diligence before applying it.
That said, I cannot hide that the fact that this scenario can be accomplished in relatively few lines of code makes me positively giddy. I still remember the effort it took to heavy-lift this through classic (== sans WIF) WCF, and besides being hard it was also simply not possible to connect to the providers who chose not to expose suitable WS-Trust STSes. AAL, and the browser popup approach in general, has enormous potential and I can’t wait to see what applications will achieve with it!
