Fun with FabrikamShipping SaaS I: Creating a Small Business Edition Instance
It’s been few months that we pulled the wrap off FabrikamShipping SaaS, and the response (example here) has been just great: I am glad you guys are finding the sample useful!
In fact, FabrikamShipping SaaS contains really a lot of interesting stuff and I am guilty of not having found the time to highlight the various scenarios, lessons learned and reusable little code gems it contains. Right now, the exploratory material is limited to the intro video, the recording of my session at TechEd Europe and the StartHere pages of the source code & enterprise companion packages.
We designed the online demo instance and the downloadable packages to be as user-friendly as we could, and in fact we have tens of people creating tenants every day, but it’s undeniable that some more documentation may help to zero on the most interesting scenarios. Hence, I am going to start writing more about the demo. Some times we’ll dive very deep in code and architecture, some other we’ll stay at higher level.
I’ll begin by walking you through the process of subscribing to a small business edition instance of FabrikamShipping: the beauty of this demo angle is that all you need to experience it is a browser, an internet connection and one or more accounts at Live, Google or Facebook. Despite of the nimble requirements, however, this demo path demonstrates many important concepts for SaaS and cloud based solutions: in fact, I am told it is the demo that most often my field colleagues use in their presentations, events and engagements.
Last thing before diving in: I am going to organize this as instructions you can follow for going thru the demo, almost as a script, so that you can get the big picture reasonably fast; I will expand on the details on later posts.
Subscribing to a Small Business Edition instance of FabrikamShipping
Let’s say that today you are Adam Carter: you work for Contoso7, a fictional startup, and you are responsible for the logistic operations. Part of the Contoso7 business entails sending products to their customers, and you are tasked with finding a solution for handling Contoso7’s shipping needs. You have no resources (or desire) to maintain software in-house for a commodity function such as shipping, hence you are on the hunt for a SaaS solution that can give you what you need just by pointing your browser to the right place.
Contoso7 employees are mostly remote; furthermore, there is a seasonal component in Contoso7 business which requires a lot of workers in the summer and significantly less stuff in the winter. As a result, Contoso7 does not keep accounts for those workers in a directory, but asks them to use their email and accounts from web providers such as Google, Live Id, or even Facebook.
In your hunt for the right solution, you stumble on FabrikamShipping: it turns out they offer a great shipping solution, delivered as a monthly subscription service to a customized instance of their application. The small business edition is super-affordable, and it supports authentication from web providers. It’s a go!
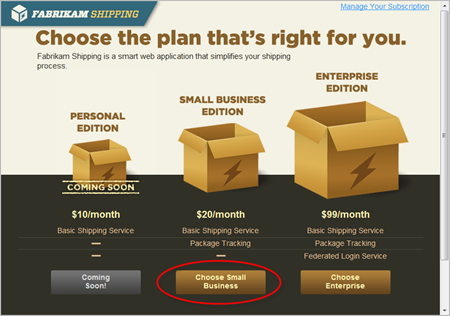
You navigate to the application home page at https://fabrikamshipping.cloudapp.net/, and sign up for one instance.
As mentioned, the Small Business Edition is the right fit for you; hence, you just click on the associated button.
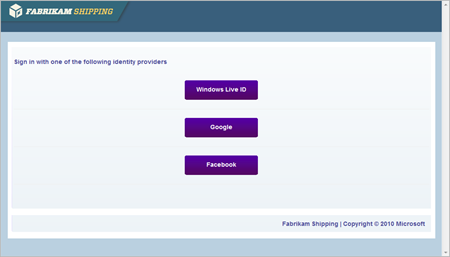
Before everything else, FabrikamShipping establishes a secure session: in order to define your instance, you’ll have to input information you may not want to share too widely! FabrikamShipping also needs to establish a business relationship with you: if you will successfully complete the onboarding process, the identity you use here will be the one associated to all the subscription administration activities.
You can choose to sign in from any of the identity providers offered above. FabrikamShipping trusts ACS to broker all its authentication need: in fact, the list of supported IPs comes from directly from the FabrikamShipping namespace in ACS. Pick any IP you like!
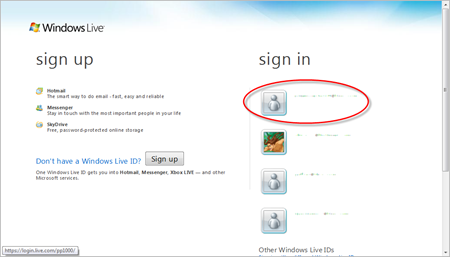
In this case, I have picked a live id. Note for the demoers: the identity you use at this point is associated to your subscription, and is also the way in which FabrikamShipping determines which instance you should administer when you come back to the management console. You can only have one instance associated to one identity, hence once you create a subscription with this identity you won’t be able to re-use the same identity for creating a NEW subscription until the tenant gets deleted (typically every 3 days).
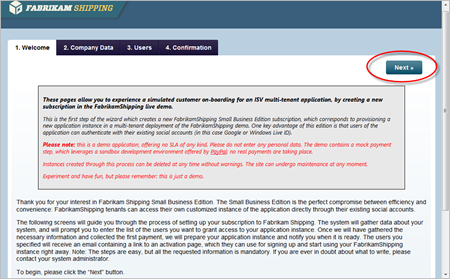
Once you authenticated, FabrikamShipping starts the secure session in which you’ll provide the details of your instance. The sequence of tabs you see on top of the page represent the sequence of steps you need to go through: the FabrikamShipping code contains a generic provisioning engine which can adapt to different provisioning processes to accommodate multiple editions, and it sports a generic UI engine which can adapt to it as well. The flow here is specific to the small business edition.
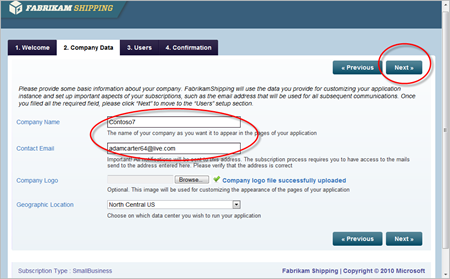
The first screen gathers basic information about your business: the name of the company, the email address at which you want to receive notifications, which Windows Azure data center you want your app to run on, and so on. Fill the form and hit Next.
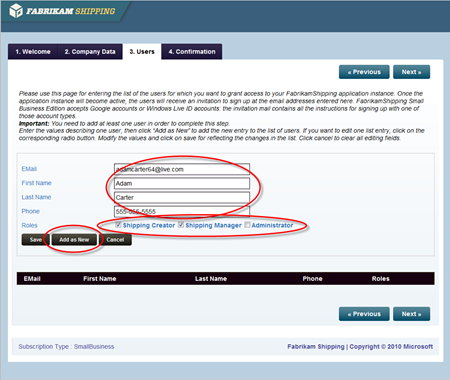
In this screen you can define the list of the users that will have access to your soon-to-appear application instance for Contoso7.
Users of a Small Business instance authenticate via web identity providers: this means that at authentication time you won’t receive a whole lot of information in form of claims, some times you’ll just get an identifier. However, in order to operate the shipping application every user need some profile information (name, phone, etc) and the level of access it will be granted to the application features (i.e., roles).
As a result, you as the subscription administrator need to enter that information about your users; furthermore, you need to specify for every user a valid email address so that FabrikamShipping can generate invitation emails with activation links in them (more details below).
In this case, I am adding myself (ie Adam Carter) as an application user (the subscription administrator is not added automatically) and using the same hotmail account I used before. Make sure you use an email address you actually have access to, or you won’t receive notifications you need for moving forward in the demo. Once you filled in all fields, you can click Add as New for adding the entry in the users’ list.
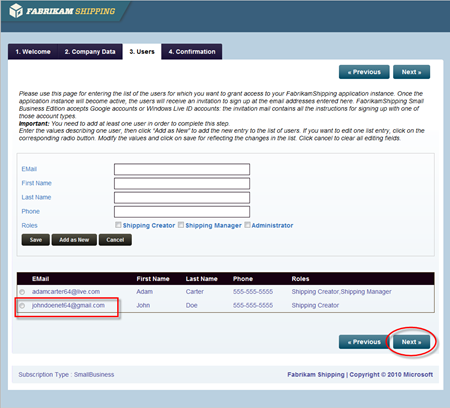
For good measure I always add another user for the instance, typically with a gmail or Facebook account. I like the idea of showing that the same instance of a SaaS app can be accessed by users coming from different IPs, something that before the rise of the social would have been considered weird at best ![]()
Once you are satisfied with your list of users, you can click Next.
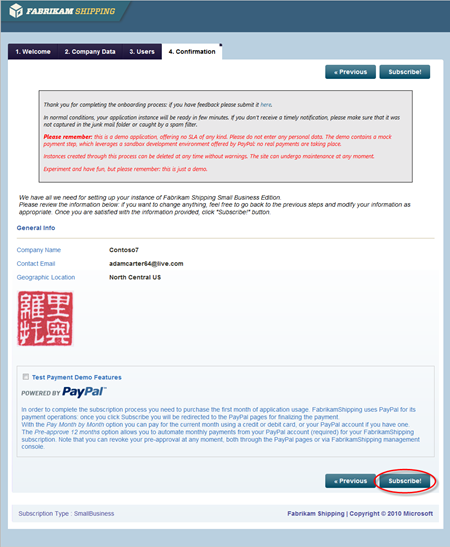
The last screen summarizes your main instance options: if you are satisfied, you can hit Subscribe and get FabrikamShipping to start the provisioning process which will create your instance.
Note: on a real-life solution this would be the moment to show the color of your money. FabrikamShipping is nicely integrated with the Adaptive Payment APIs and demonstrates both explicit payments and automated, preapproved charging from Windows Azure. I think it is real cool, and that it deserves a dedicated blog post: also, in order to work it requires you to have an account with the PayPal developer sandbox, hence this would add steps to the flow: more reasons to defer it to another post.
Alrighty, hit Subscribe!
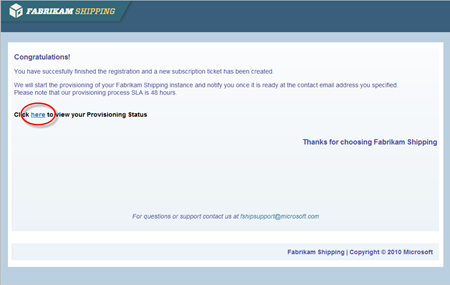
FabrikamShipping thanks you for your business, and tells you that your instance will be ready within 48 hours. In reality that’s the SLA for the enterprise edition, which I’ll describe in another post, for the Small Business one we are WAAAY faster. If you click on the link for verifying the provisioning status, you’ll have proof.
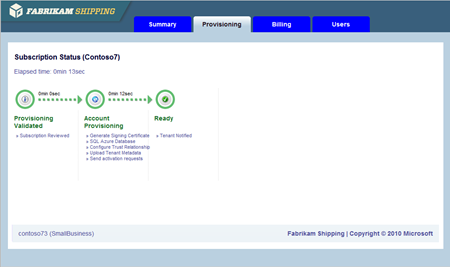
Here you entered the Management Console: now you are officially a Fabrikam customer, and you get to manage your instance.
The workflow you see above is, once again, a customizable component of the sample: the Enterprise edition one would be muuuch longer. In fact, you can just hit F5 a few times and you’ll see that the entire thing will turn green in typically less than 30 seconds. That means that your Contoso7 instance of FabrikamShipping is ready!
Now: what happened in those few seconds between hitting Subscribe and the workflow turning green? Quite a lot of things. The provisioning engine creates a dedicated instance of the app database in SQL Azure, creates the database of the profiles and the various invitation tickets, add the proper entry in the Windows Azure store which tracks tenants and options, creates dedicated certificates and upload them in ACS, creates entries in ACS for the new relying party and issuer, sends email notifications to the subscriber and invites to the users, and many other small things which are needed for presenting Contoso7 with a personalized instance of FabrikamShipping. There are so many interesting things taking place there that for this too we’ll need a specific post. The bottom line here is: the PaaS capabilities offered by the WIndows Azure platform are what made it possible for us to put together something so sophisticated as a sample, instead of requiring the armies of developers you’d need for implementing features like the ones above from scratch. With the management APIs from Windows Azure, SQL Azure and ACS we can literally build the provisioning process as if we’d be playing with Lego blocks.
Activating One Account and Accessing the Instance
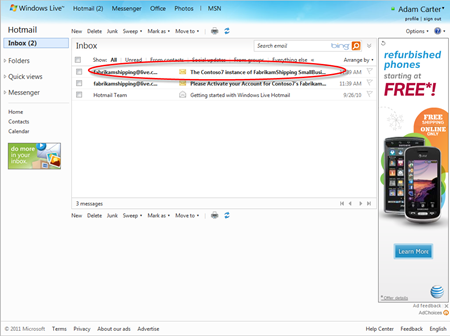
The instance is ready. Awesome! Now, how to start using it? The first thing Adam needs to do is check his email.
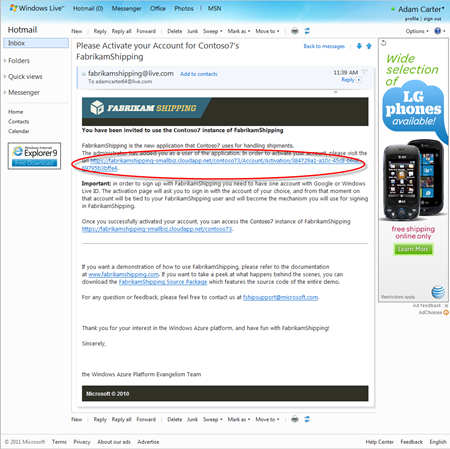
Above you can see that Adam received two mails from FabrikamShipping: let’s take a look to the first one.
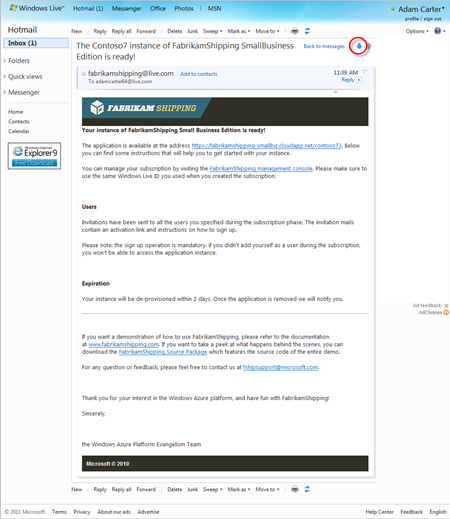
The first mail informs Adam, in his capacity of subscription manager, that the instance he paid for is now ready to start producing return on investment. It provides the address of the instance, that in good SaaS tradition is of the form https://<applicationname>/<tenant>, and explains how the instance work: here there’s the instance address, your users all received activation invitations, this is just a sample hence the instance will be gone in few days, and similar. Great. If we want to start using the app, Adam needs to drop the subscription manager hat and pick up the one of application user. For this, we need to open the next message.
This message is for Adam the user. It contains a link to an activation page (in fact we are using MVC) which will take care of associating the record in the profile with the token Adam will use for the sign-up. As you can imagine, the activation link is unique for every user and becomes useless once it’s been used. Let’s click on the activation link.
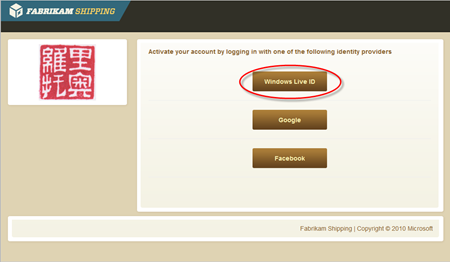
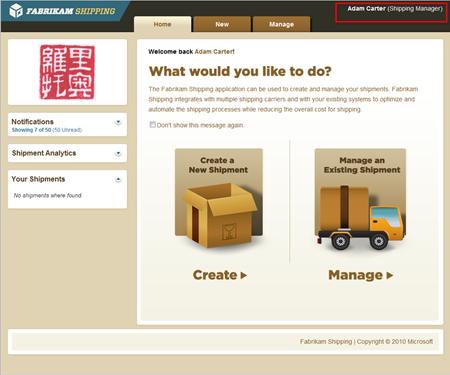
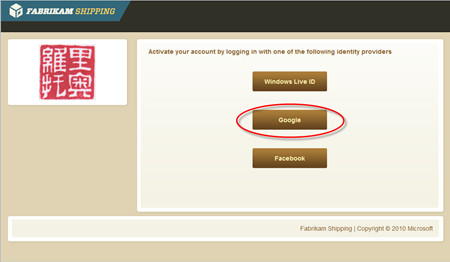
Here we are already on the Contoso7 instance, as you can see from the logo (here I uploaded a random image (not really random, it’s the logo of my WP7 free English-Chinese dictionary app (in fact, it’s my Chinese seal ![]() ))). Once again, the list of identity providers is rendered from a list dynamically provided by the ACS: although ACS provides a ready-to-use page for picking IPs, the approach shown here allows Fabrikam to maintain a consistent look and feel and give continuity of experience, customize the message to make the user aware of the significance of this specific step (sign-up), and so on. Take a peek at the source code to see how that’s done.
))). Once again, the list of identity providers is rendered from a list dynamically provided by the ACS: although ACS provides a ready-to-use page for picking IPs, the approach shown here allows Fabrikam to maintain a consistent look and feel and give continuity of experience, customize the message to make the user aware of the significance of this specific step (sign-up), and so on. Take a peek at the source code to see how that’s done.
Let’s say that Adam picks live id: as he is already authenticated with it from the former steps, the association happens automatically.
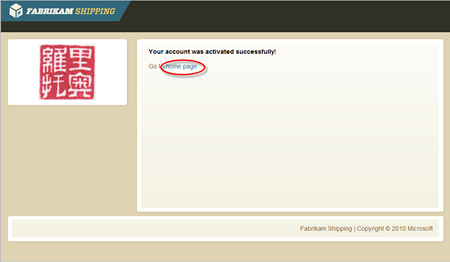
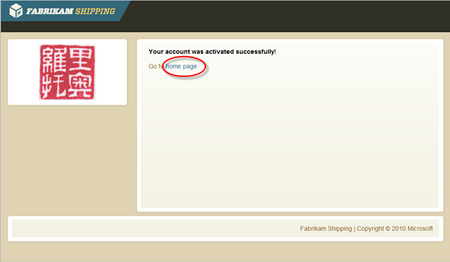
The page confirms that the current account has been associated to the profile; to prove it, we can now finally access the Contoso7 instance. We can go back to the mail and follow the provided link, or use directly the link in the page here.
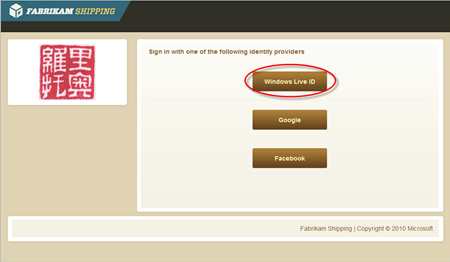
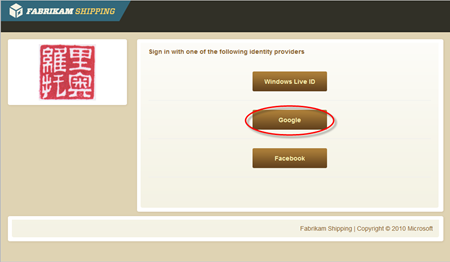
This is the page every Contoso7 user will see when landing on their instance: it may look very similar to the sign-up page above, but notice the different message clarifying that this is a sign-in screen.
As Adam is already authenticated with Live ID, as soon as he hits the link he gets redirected to ACS, gets a token and uses it to authenticate with the instance. Behind the scenes, Windows Identity Foundation uses a custom ClaimsAuthenticationManager to shred the incoming token: it verifies that the user is accessing the right tenant (tenant isolation is king), then retrieves form SQL Azure the profile data and adds them as claims in the current context (there are solid reasons for which we store those at the RP side, once again: stuff for another post). As a result, Adam gets all his attributes and roles dehydrated in the current context and the app can take advantage of claims based identity for customizing the experience and restrict access as appropriate. In practical terms, that means that Adam’s sender data are pre-populated: and that Adam can do pretty much what he wants with the app, since he is in the Shipping Manager role that he self-awarded to his user at subscription time.
In less than 5 minutes, if he is a fast typist, Adam got for his company a shipping solution; all the users already received instructions on how to get started, and Adam himself can already send packages around. Life is good!
Works with Google, too! And all the Others*
*in the Lost sense
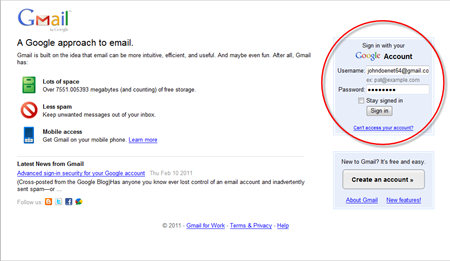
Let’s leave Adam for a moment and let’s walk few clicks in the Joe’s mouse. If you recall the subscription process, you’ll remember that Adam defined two users: himself and Joe. Joe is on gmail: let’s go take a look to what he got. If you are doing this from the same machine as before: remember to close all browsers or you risk to carry forward existing authentication sessions!
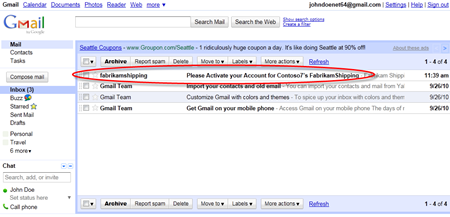
Joe is “just” a user, hence he received only the user activation email.
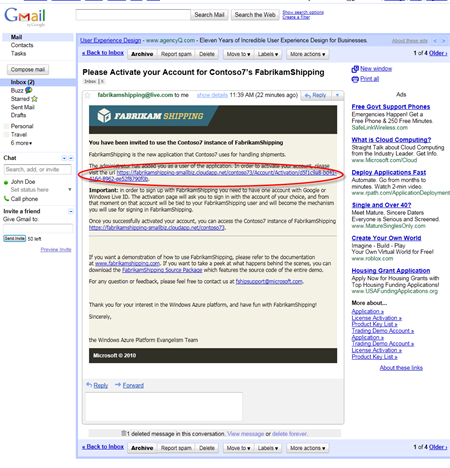
The mail is absolutely analogous to the activation mail received by Adam: the only differences are the activation link, specific to Joe’s profile, and how gmail renders HTML mails.
Let’s follow the activation link.
Joe gets the same sign-up UI we observed with Adam: but this time Joe has a gmail account, hence we’ll pick the Google option.
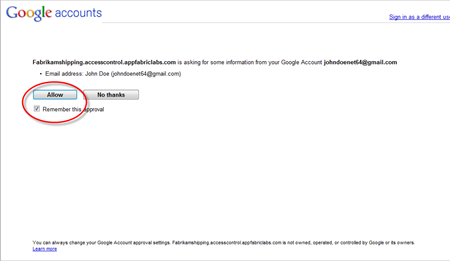
ACS connects with google via the OpenID protocol: the UI above is what google shows you when an application (in this case the ACS endpoint used by FabrikamShipping) requests an attribute exchange transaction, so that Joe can give or refuse his consent to the exchange. Of course Joe knows that the app is trusted, as he got a headsup from Adam, and he gives his consent. This will cause one token to flow to the ACS, which will transform it and make it available for the browser to authenticate with FabrikamShipping. From now on, we already know what will happen: the token will be matched with the profile connected to this activation page, a link will be established and the ticket will be voided. Joe just joined the Contoso7’s FabrikamShipping instance family!
And now, same drill as before: in order to access the instance, all Joe needs to do is click on the link above or use the link in the notification (better to bookmark it).
Joe picks google as his IP…
..and since he flagged “remember this approval” at sign-up time, he’ll just see the page above briefly flashing in the browser and will get authenticated without further clicks.
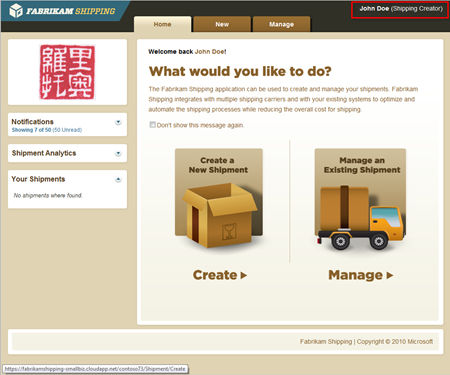
And here we are! Joe is logged in the Contoso7 instance of FabrikamShipping.
As you can see in the upper right corner, his role is Shipping Creator, as assigned by Adam at subscription time. That means that he can create new shipments, but he cannot modify existing ones. If you want to double check that, just go through the shipment creation wizard, verify that it works and then try to modify the newly created shipment: you’ll see that the first operation will succeed, and the second will fail. Close the browser, reopen the Contoso7 instance, sign in again as Adam and verify that you are instead able to do both creation and modifications. Of course the main SaaS explanatory value of this demo is in the provisioning rather than the application itself, but it’s nice to know that the instances itself actually use the claims as well.
Aaand that’s it for creating and consuming Small Business edition instances. Seems long? Well, it takes long to write it down: but with a good form filler, I can do the entire demo walkthrough above well under 3 minutes. Also: this is just one of the possible path, but you can add your own spins & variations (for example, I am sure that a lot of people will want to try using facebook). The source code is fully available, hence if you want to add new identity providers (yahoo, ADFS instances or arbitrary OpenID providers are all super-easy to add) you can definitely have fun with it.
Now that you saw the flow from the customer perspective, in one of the next installments we’ll take a look at some of the inner workings of our implementation: but now… it’s Saturday night, and I better leave the PC alone before they come to grab my hair and drag me away from it ![]()
