A visual tour of the .NET Access Control service via Azure Services Management Console
Happy Western-new year! Hope you enjoyed your holidays, and that you're back to work recharged & ready to authenticate/authorize everything in sight ;-)
I have a long piece I wrote back in December on my flights to Italy, but that's pretty long and somewhat philosophical: after the joys of yesterday's announcements at CES (have you seen Windows 7 yet? That's simply amazing!) I decided to start the year with something lighter.
Namely: today I'd like to walk you though a visual tour of the .NET Access Control Service. Remember the sample MMC from my team, which we released during PDC? Every evangelist in the team contributed the piece of functionality associated to everyone's focus area, and of course I got the identity parts. The MMC leverages the Access Control service management APIs for composing a single, comprehensive view of your solution settings: trusted issuers, claims transformation rules, claim types, expiration times and so on. That view is designed to allow you to understand with a single glance what's going on with the service: hence, it should be also a pretty useful tool for explaining how the Access Control service works in the first place. For checking if the view really succeeds in presenting things in a clear way, I'll refrain from adding all the silly sketches I usually draw in my posts and rely entirely on the MMC visualization (which, after all, is mainly one of my silly sketches made parametric and rendered in pretty WPF). Below we'll go though the experience of creating a .NET services solution with the Azure portal, then we will switch to the MMC and we'll use it to take a peek at the Access Control settings. This time we'll focus on the ServiceBus, and we'll use the Echo sample from the SDK for understanding the effects of the default settings. For the time being we will not change anything in the code or the settings themselves; in the next installments we'll be more playful. Ready? Let's go!
Solution setup
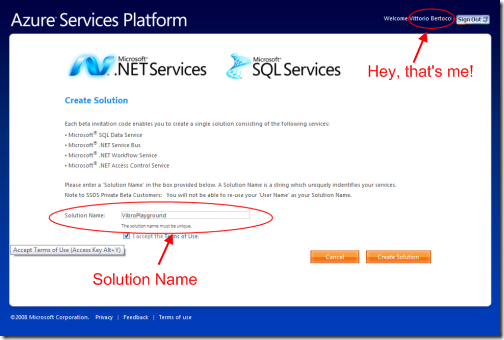
As you know by now, if you want to play with the .NET services you need to create a solution first. Jenny has an excellent walkthrough for creating a solution on her blog: I suggest you check it out if you want detailed instructions. Here I'll just show the screens where the solution name shows up, so that it will give you some sense of continuity.
Let's say that I successfully entered a new invitation code: first thing, I need to figure out the name of a solution. Remember, that name must be unique: for our little example I'll pick something "VibroPlayground", hoping that nobody picked it up yet.
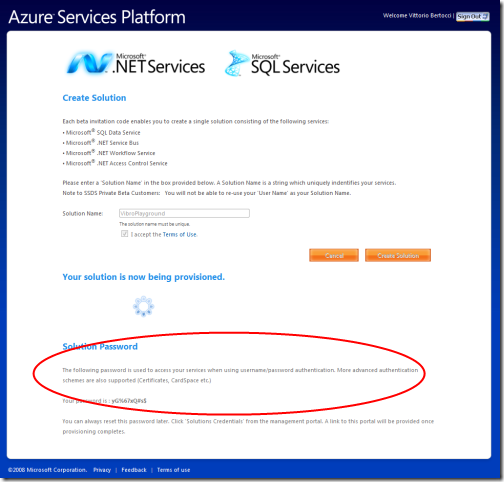
Hey, the solution name is available! Who would have thought... here it's being provisioned. Note that a password has been generated for me, we'll see in a moment what is it for.
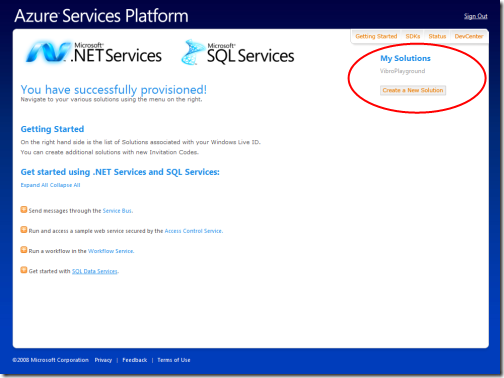
Success! My solution is ready and is now listed in the My SOlutions area.
If we click on the solution name, we'll end up in the management page:
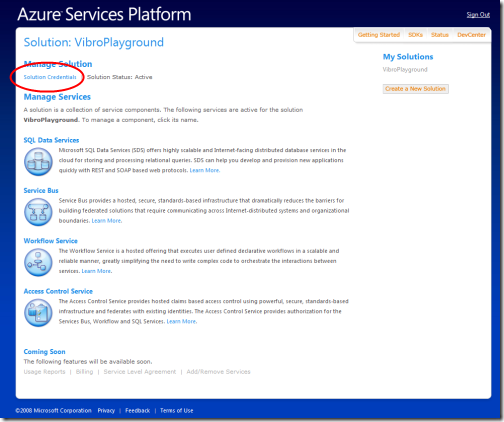
From here I can pull all the levers of my solution, for all the services offered. That's what we'd normally do, but in this post we'll use the management APIs via our custom MMC instead. The only thing we want to do from the portal is change the solution password to something easier to remember. Let's click on the solution credentials link.
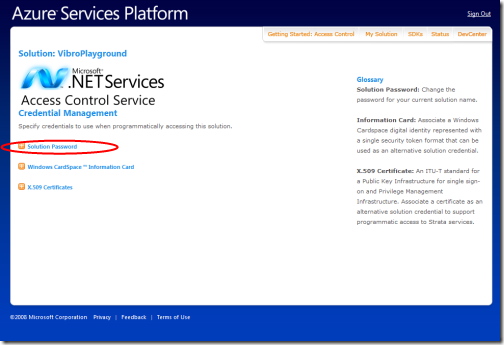
We land on a page from where we can manage the credentials associated to our solution. What does that mean, exactly? Let's say that the access control service will issue you a token if you'll use those credentials. What can you do with that token? Well, for starters it allows you to call the management APIs for modifying you solution settings; second, you can use the same token for things such as publishing services on the service bus and invoking the services themselves. We'll see the mechanics behind both later in the post.
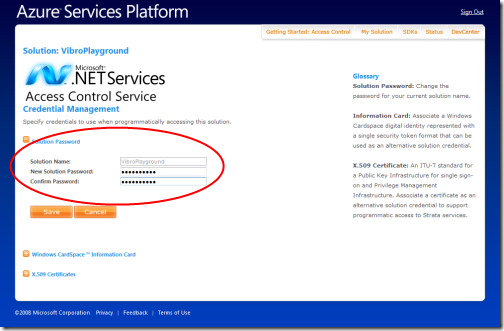
OK; since I have a horrible memory, let's change the solution password to something I can actually remember:
That's it! Normally at this point I would go back to the solution page and start managing via portal... but this time we'll use our MMC instead.
Examining our solution with the Azure Services Management Console
Let's minimize the browser and fire up our MMC. What? You didn't download it yet? You can get it from here: the install is very straightforward, thanks to the mighty dependency checker which helps you to resolve all the software & setting dependencies, and of course there's the full source code for your viewing pleasure.
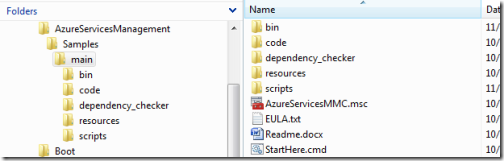
The typical installation will end up generating a folder like the following:
Go ahead and double click on AzureServicesMMC.msc, you'll get the following:
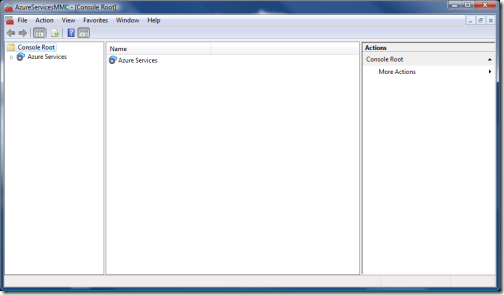
Pretty classic MMC, uh? A tree view on the left, a main panel, and an action pane on the right: everything is empty so far.
While the portal gives you access to all the solutions you associated to your LiveID account, the console manages one project at a time. If you try to expand the Azure Services node on the tree view, the console will try to tie the view to one solution. As a result, you'll be prompted to enter the solution credentials (namely, the password) that we changed earlier.
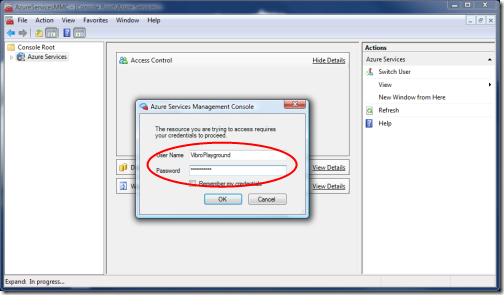
If you are connected to the Internet and you typed in the right credentials, you'll get the following:
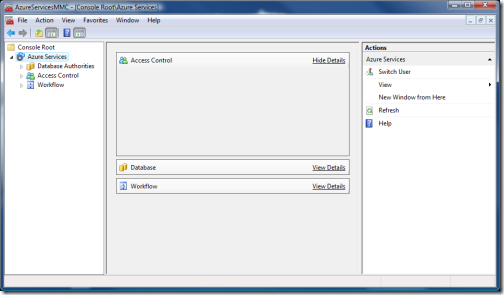
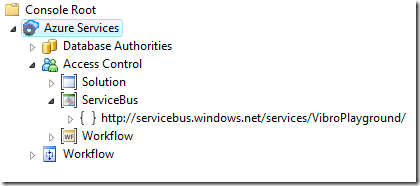
The tree on the left now shows all the services in your solution that can be managed with the console; the main pane is pretty much empty, which I believe is a bug in the current version; and on the right I have some actions like changing the current user. Here I may drill in any service, but I'll go straight to expand the access control node.
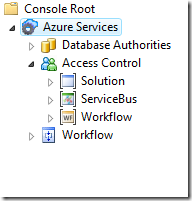
Here there's a zoom of what the expanded tree looks like. I have 3 sub nodes: Solution, ServiceBus and Workflow. We are getting to the meat of the service! Every node represents a logical instance of a R-STS: the Solution will issue tokens for generic usage (management API) and for when you want to use the Access Control for your own web site or service; the ServiceBus will issue tokens to be used with the service bus; and I am sure you can guess what the Workflow is for. The MMC allows us to manage any of those, and in the next posts we'll likely do so: for today we'll just take a look at the ServiceBus.
The Access Control default settings for the Service Bus
Let's expand the ServiceBus node:
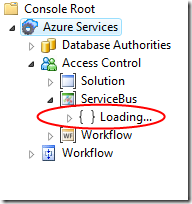
The loading may take some time, be patient. Once it completes, you'll see the following:
The URI you see below the ServiceBus node is a Scope. It represents a collection of settings and rules which will apply to all the services whose URI matches the scope URI itself. By default we have just this one scope, which ideally contains all others: any service you'll publish on the ServiceBus in this solution will start with https://servicebus.../VibroPlayground. That means that until you don't create sub scopes any message sent to your services will trigger the rules defined here. We'll stick with the default this time, since we promised we won't change anything; we'll play with sub scopes in the next posts.
OK, time to take a look to what constitutes a scope. Let's click on the subnode: you'll get the view below.
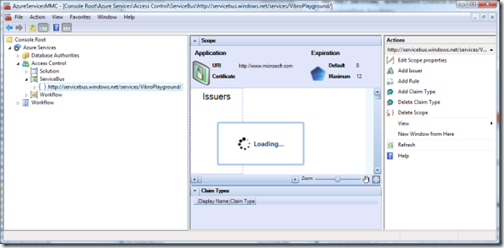
You'll see the "Loading" notification quite some time: don't worry, we cache everything so it takes long only the first time (if you want to see the MMC in action with cached settings check out this from ~45' on). If you've been patient, you'll get to the view below (netbook users, the image is 750 pixel wide: you've got to maximize the browser/aggregator to see it all).
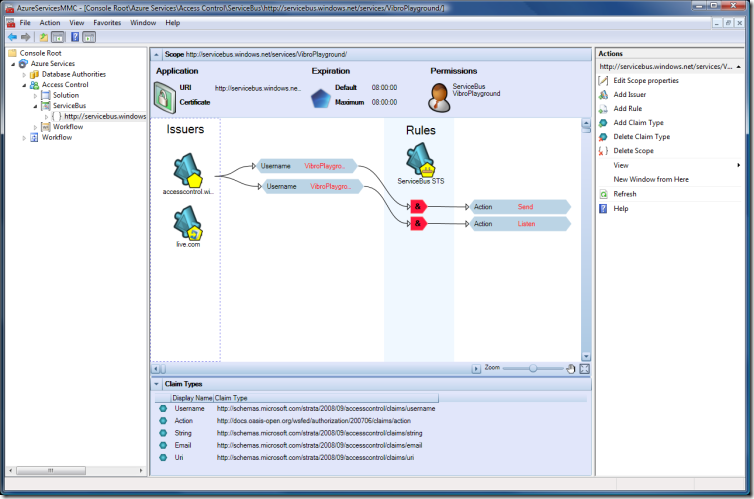
THIS is the core of what IMHO you need to understand for working with a scope: it should be all here. Let's describe the screen piece by piece
Main panel
Those are all the settings which apply to the current scope.
Application
The application area contains some generic settings:
- URI: the URI of the relying party you are configuring, the application consumer of the token that the current instance of R-STS will issue a token for
- Certificate: this would be the certificate associated to your relying party. If you want the tokens issued by the current R-STS to be encrypted, uploading a certificate here will provide the necessary cryptographic material (read: PUBLIC key of the RP) to do so. As you can see, the default is no certificate
- Expiration: The intended expiration times of the tokens issued by this R-STS
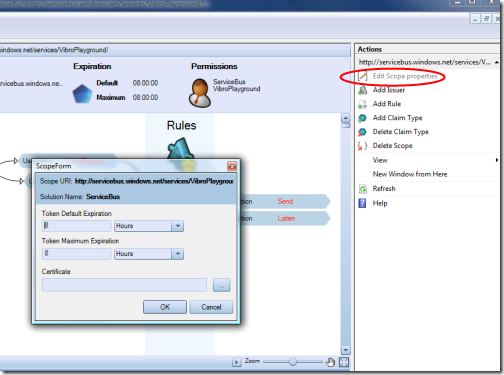
- Permissions: This is very interesting: in this setting you can specify which identities have the right to modify this scope settings. The default identities are the ServiceBus itself and the solution identity: in this case VibroPlayground, which happens to also be the identity we used for authenticating our management session.
Rules view
This is the core of the core: a lot of thinking went in this one, so please let us know if this works or if you'd like to see some changes.
On the left area you have a Issuers area, which includes all the identity providers that our R-STS recognizes as legitimate sources of claims. In this particular instance we have just the system issuers, that is to say all the issuers that the Access Control service recognizes by default minus the current R-STS associated to the ServiceBus. The little pentagon in their icon represents the fact that they are STSes and they issue tokens: you may notice that every pentagon has a further icon to represent the specific issuer, for example the Live ID logo for the live.com one; the STS with empty pentagon represents the R-STS of the solution. This area would also show custom STSes if would have defined some: they would be of a different color for differentiating them at a glance from the system ones. Again, we'll see more of it next time.
In the center, in the azure (no pun intended) vertical band Rules, we have the current R-STS, the issuer that will issue tokens for this scope following the rules defined here. As mentioned, for this scope this is the ServiceBus one.
The remaining graph represents the default rules that the Access Control created for this scope. Let's interpret the view, from top to bottom:
- We have a rule which takes in input a single claim from the solution STS
- it would appear that the rule should work as follows: if you get a token from the solution STS containing a claim "username", and the value of that claim is "VibroPlayground", then include in the output token a claim "Action" whose value is Send
- We have another rule, which again takes a single claim from the solution STS
- the rule structure is the same as the one already described, only the output claim value changes: now for the same input as above we'll provide a claim "Action" containing the value "Listen"
The little "&" in the chevron doesn't mean much if we have a single input claim condition, but it would apply if we'd have more than one. If we right click on the last chevron and choose "Edit Rule", we'll get the following:
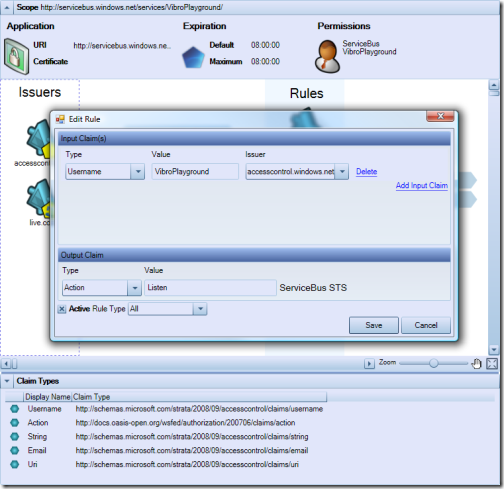
From here we can change all the rule settings we want: however notice how all the information included in this "table" view is in fact available in the graphic view, though the control view is more handy for edits.
Now we know what claims will be issued by our ServiceBus R-STS, and under which conditions: but what is the effect of those claims? Well, for the ServiceBus the Action claim is very special. Remember the discussion about authorization claims some time ago? Here the .NET services own not only the STS part, but also the messaging infrastructure which routes calls and handle addresses; that means that not only they can be an authorization decision point (by codifying their decisions in form of claims in the tokens they issue), they can be an authorization enforcement point by defining what a certain claim value means for the service and make it happen. For example: if you want to publish a service on the ServiceBus, you need to present a token issued by the ServiceBus STS which contains an instance of the claim Action with the value "Listen": which happens to be exactly the output of the 2nd rule. Symmetrically, if you want to invoke a service on the ServiceBus you need to present a token issued by the ServiceBus STS which contains an Action claim with value "Send". So what's the translation in plain English of the two default rules below? With your solution credentials you can publish services and invoke them, which is exactly what you'd expect from the default. We'll put this theory to test toward the end of the post; and we'll play with rules and expand our service audience in the next posts.
Of course this view enjoys all the usual WPF goodness: you can zoom, pan, center & resize, the works. The only thing that is missing is support for drag&drop, but I'll tell you a secret: the WPF control there DOES support the creation of rules by simple drag&drop, it simply doesn't work when hosted under MMC. For the time being ;-)
Claim Types
The bottom area of the main pane is reserved to the recognized claims types. Here you see the default system claims for the ServiceBus scope: of course you can add custom ones, and other scope types (like solution) will have different default claims.
Actions
When a scope is selected in the tree view, the Actions pane gets populated by various commands relative to the scope itself (like the Edit Scope Properties shown below as an example) or the lists it contains. Many of the commands here are also available by clicking directly on the visual elements in the main view.
Echo, echo, cho, o.....
That's it: we've touched pretty much on every default value and every aspect that can be pulled out via management API. To reinforce some of the concepts we encountered, let's take a quick look to the usual Echo sample from the SDK:
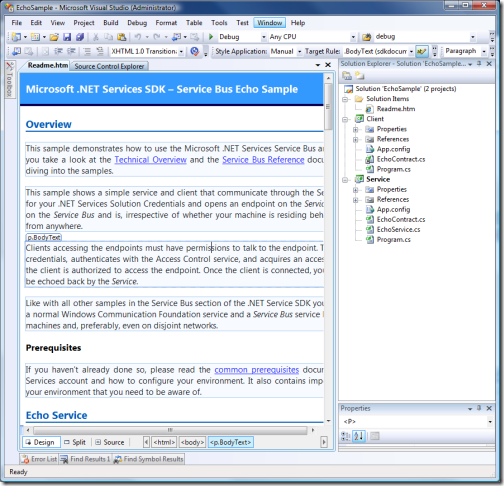
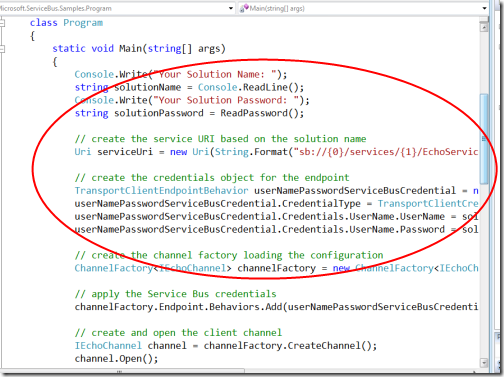
The 2 projects here both connect to the ServiceBus, and they both use the solution credentials for obtaining the token necessary to do so. Below there's the authentication code for the client; the service code is similar.
Let's run the two projects:
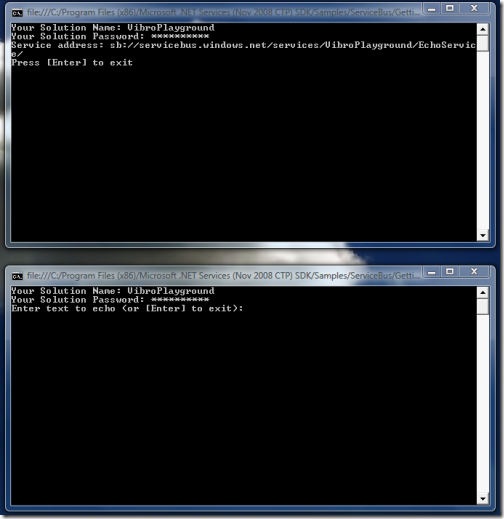
As mentioned, we use the solution credentials for both. The two projects want different things from the ServiceBus: the service wants to publish itself, while the client wants to invoke the service. From what we have seen of the rules above, do you think that the two processes have what it takes for succeeding in their intent? It's a big YES: the solution identity can both Listen and Send. In fact, the example works:
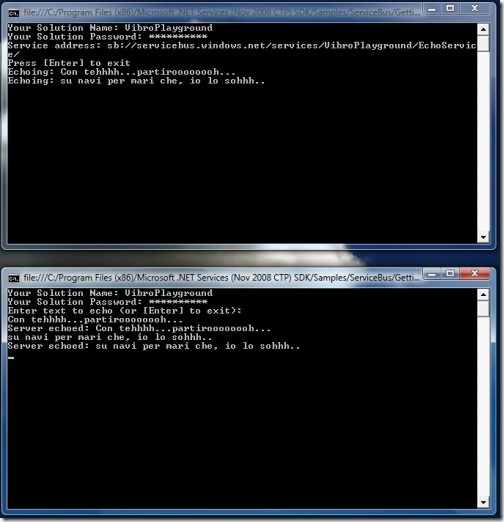
Ahh, that clicks! :-)
Next
Seeing is believing! I hope that this little tour helped you to reason about the Access Control service structure; I purposefully left out all the philosophy and tried to be as practical as possible, however if you read this you'll discover that all of the above is right on point. I also hope that the MMC will help you to further explore the potential of this great service. In future posts we'll play a bit harder, using the MMC for adding more identity provider, claim types and rules for enabling less trivial scenarios. If you have feedback... you know what to do :-)