Developing a minimal STS with ADFS "2" Identity Framework (Part III: Creating a Relying Party)
All right! Welcome to the last installment of this unusual multipart post: this time we are going to see how the ADFS "2" Identity Framework makes creating an RP a trivial task.
Previously, on Vibro.NET :
One of the comments to my breakout session at TechEd suggested that the demo I've shown was too simple to be realistic and that I probably skipped key development tasks: while, in fact, I coded the entire demo on stage. Since I can't show the recoding of the session directly from my blog, the next best thing was to create a walkthrough in which I more or less go through the same steps. In Part I I've shown how to write a simple STS; in Part II we explored how to issue cards associated with that STS; in this Part III we'll create an RP that consumes the tokens issued by our STS.
And now, the conclusion:
Creating an RP is pretty simple to begin with. You get a web page, you add a suitable HTML object tag with the policy that points to your STS of choice, you add server side code that authenticates the incoming token, and you're done. On the other hand, those are tasks that as of today you have to do every single time you create an RP: there's obviously an opportunity for supporting many of those tasks via tooling. Furthermore: the token validation process requires some attention. As of today on our platform we offer some sample code that can be used for the purpose (ever met TokenProcessor.cs), and in general WCF offers advanced capabilities that can be used for the task; however, this is suboptimal. Apart from the little matter of code quality & support, there is the fact that token processing is a fairly specialized task: if we can surface just the aspects that are relevant to the task, we can protect the developer from having to understand all the subtleties that programming at the WCF level entails. We should also integrate with other technologies & practices: for example, we may think that plugging in the membership provider mechanism may be a good idea.
Long story short: we are addressing those RP issues as well (but please remember, all this comes from a sneak peek and subject to change (including as a consequence from you feedback! If you have an opinion, please share it!)). ADFS "2" Identity Framework offers an HttpModule (already seen in Part I) that makes much of the validation work, and a set of visual controls that allow to define the authentication experience via simple point & click, in complete integration with Visual Studio. Sounds nice, eh?
Let's go ahead and see how we can use those features for writing a simple RP. In this case we will write a page which is facading some code that needs access to the claims our STS can provide; we are not going to use the token for signing in & creating a session. It would be pretty easy as well, but it's not what I've shown so I'm sticking to the script.
Let's create an RP via Point & Click
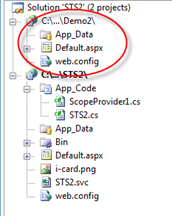
We need to add a new website to our solution; let's call it Demo2.
Next, we enable the httpmodule FederatedAuthentication, by modifying the web.config as shown in Part I.
Then, let's turn our attention to Default.aspx. We want to provide the user with a mean of sending us a security token containing the information we need for conducting our business. Let's see what we have in the tooklox, and if there's something that could help:
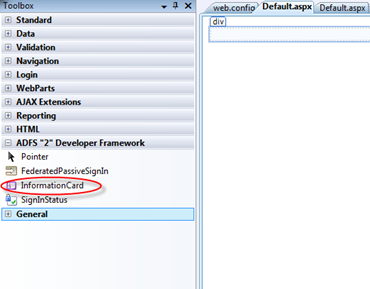
Well, look at that. There are a lot of interesting controls, that would deserve a post (or a series of post) of their own, but for the task we want to accomplish today the control InformationCard seems to be the best suited. Let's drag it on the page.
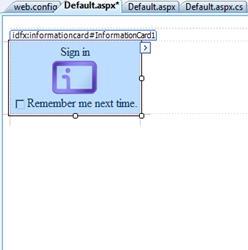
Here we go! Finally, a nice control for driving the CardSpace experience. As you can see for the look & feel, this is completely integrated with the Visual Studio experience: the ">" button on the right edge suggests that there's a wizard there:
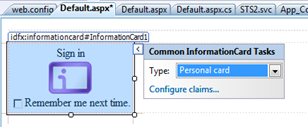
Nice. The control offers me an easy way of specifying which kind of card I want to ask for. The default is Personal Card, and that's reasonable; but in this case we are interested in accepting managed cards. Let's select it via the drop down and see what happens:
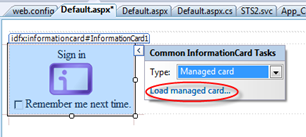
The option Configure Claims changed to Load managed card. Let's try it:
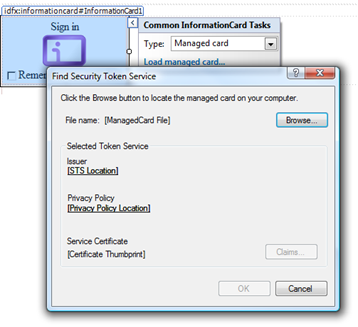
Interesting dialog, containing some of the key info about the token we'll accept. Let's load one of the cards issued by our IP:

As you can see highlighted, Information about the STS endpoint has been extracted from the card; and the Claims button is now enabled, suggesting that we can now select which claims we are interested into. Let's click on it:
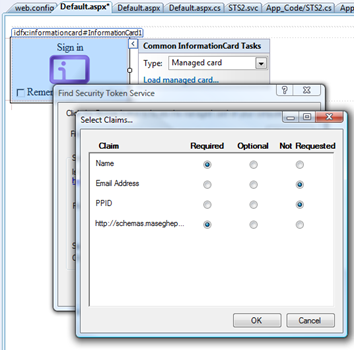
Very straightforward dialog. The set of claims correspond to what our STS is capable of emitting, and for every claim we can choose if we mandate it, consider that optional or not request it at all. Let's say that we want to have the name (first claim) and our custom claim accent (4th and last claim), so that our page can give personalized advices about public speaking: we just reflect our choice in the radio buttons and it's all set. It seems long, because I had to explain all the steps and take screenshots, but in fact it is braindead easy.
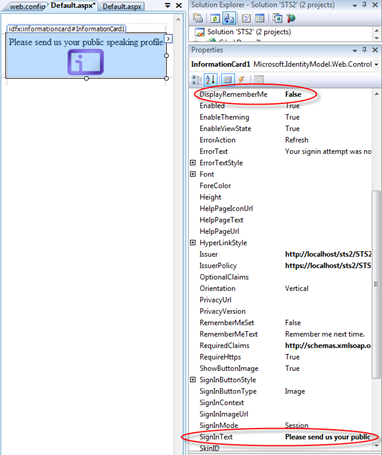
Now that we defined our policy, let's move our attention to the appearance of our control. We can use the many properties it features, for example here we changed the SignInText (since we the token we are asking will not be used for signing in) and we set DisplayRememberMe to false, since that would not makes sense in a non-signin scenario:
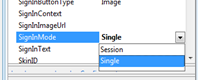
Very cool. The last thing left to address is the behavior of the control itself. As we said, we won't use this token for creating a session: this means we won't take advantage of any automated procedure for validating incoming tokens against a signin policy and we won't need to transparently create a session. The way of communicating this to our httpmodule is via the SignInMode property, that we will set to Single.
Next, we need to provide our logic. Where should we place it? Good news. ADFS "2" Identity Framework exposes a series of events which represent different stages in the token processing pipeline:
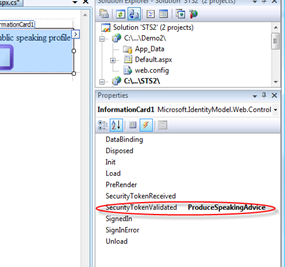
Some of those events do not make sense in our scenario (like SignedIn). The right place for our code is SecurityTokenValidated: I don't want to execute before validation, because that would be a waste of precious CPU in case of requests that are destined to fail. Let's type the name of our handler and let's hit enter for generating the handler.
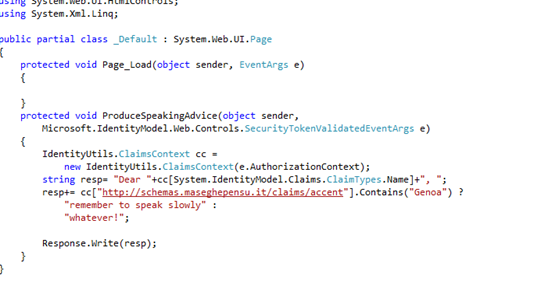
The code is the silliest you can think of: I just extract the claim and do something for reacting to the hardcoded values we set in the STS project.
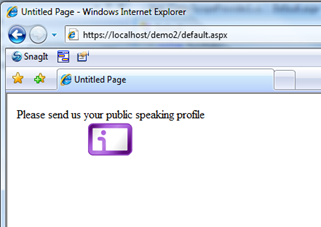
And we're done! Again: it seemed long because I had to take a screenshot every time something happened, but if you think about it this was ridiculously quick. Few clicks were enough for moving from the default asp.net default website project to an RP. Let's give it a try:
No surprises so far. Let's click on the button:
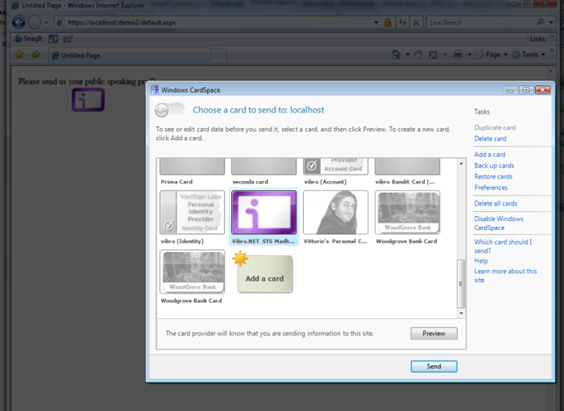
The only card that the website accept is exactly our card. Good sign. Let's go ahead and send it:
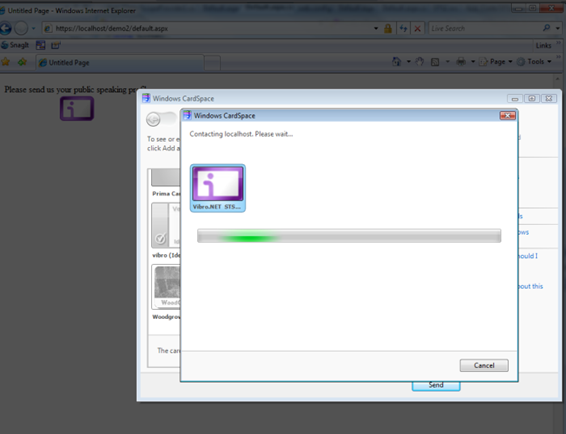
..ominous music...
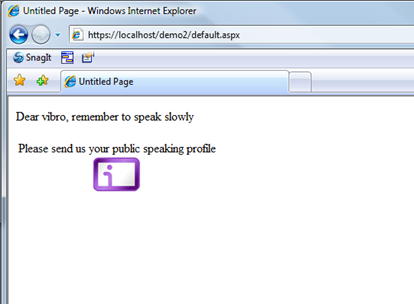
And here we are. The RP examined the claims emitted by the STS about me and run its complex logic for outputting this pearl of wisdom, that I'll hold dear for my next speaking engagement.
That's it: we closed out end to end scenario, and took the chance to showcase what ADFS "2" Identity Framework can do at this point in time (actually, I barely scratched the surface even at thsi point in time. It can do so much more!). It is work in progress, please don't forget it, but hopefully that gave you a glimpse on the fact that we are working on the development aspects of creating claim based solutions. If you have feedback or asks, please do not hesitate to drop us a line. As usual, the more (& the earlier) the better :-)
PS: I don't know if I'll blog more before leaving for vacation, and I don't know if I will blog while in Italy (somehow I doubt it): just in case, happy holidays! :-)