Lego Mindstorms EV3 Basic - Leveraging the Small Basic Graphics Window
[View:https://www.youtube.com/watch?v=myFKfOA4XbQ]
Small Basic Graphics Window
- Leveraging Small Basic's Graphics Window, you can build full GUI software programs that also interact with your EV3 robots!
Yes, I realized that I pretty much just stated what's in the title of this blog post, and how helpful is that? Not so much!
So this blog post will now dig into a number of resources that explain the GraphicsWindow so that you can get started with it (or at least imagine the possibilities of what you can do with Lego Mindstorms when you can combine your robotics with a full UI-focused application)...
Here are the articles we'll preview:
- Small Basic Curriculum: Lesson 2.1: Graphics Window - We jump into the Small Basic Teaching Curriculum to take a deeper dive on a GraphicsWindow lesson. Also the PowerPoint lesson downloads are at the bottom of the page!
- Small Basic Getting Started Guide: Chapter 6: Beginning Graphics - This is the GraphicsWindow self-serve lesson in the Getting Started Guide.
- Small Basic Reference Documentation: GraphicsWindow Object - Dig into the official reference documentation on this Small Basic object!
- Small Basic: GraphicsWindow Basics - This article from LitDev also provides a nice overview! Includes a quality French translation.
- The Developer’s Reference Guide to Small Basic: Chapter 5: GraphicsWindow Object - This excerpt from a book from Philip and Lou digs into the GraphicsWindow object!
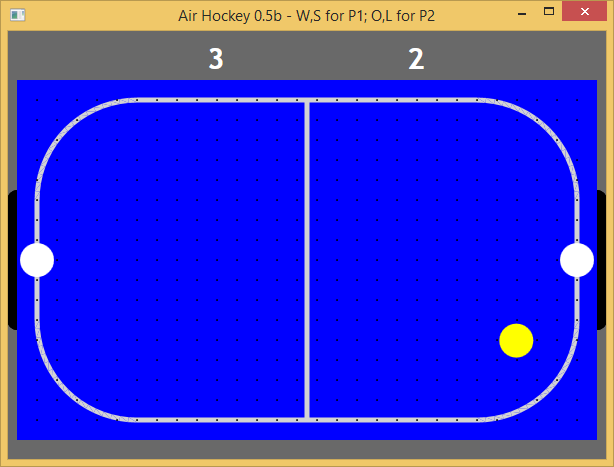
- Small Basic Game Programming - Air Hockey Game - A great example of a game sample from Nonki that takes advantage of the GraphicsWindow. Imagine programming a game like this that coincides with what your robots are doing!
- Small Basic #11: The Graphics Window - For a bit of history, Paul digs into the GraphicsWindow back in 2009.
Now let's dig into the preview of the Curriculum article:
Small Basic Curriculum: Lesson 2.1: Graphics Window
Graphics Window
In this lesson, you will learn about:
- Statements that use the GraphicsWindow object.
- Properties of the GraphicsWindow object.
- Operations of the GraphicsWindow object.
Introducing the Graphics Window
So far, you have used the text window to understand the fundamentals of programming using Small Basic.
In this lesson, you discover some exciting graphic capabilities that Small Basic offers.
.png "Graphics Window")
You start with a graphics window that you can display by using the GraphicsWindow object.
Read the rest: Small Basic Curriculum: Lesson 2.1: Graphics Window
And now a preview of the Getting Started Guide chapter:
Small Basic Getting Started Guide: Chapter 6: Beginning Graphics
Introducing GraphicsWindow
Just like we had TextWindow that allowed us to work with Text and Numbers, Small Basic also provides aGraphicsWindow that we can use to draw things. Let’s begin by displaying the GraphicsWindow.
GraphicsWindow.Show()
When you run this program, you’ll notice that instead of the usual black text window, you get a white Window like the one shown below. There’s nothing much to do on this window yet. But this will be the base window on which we’ll work on in this chapter. You can close this window by clicking on the ‘X’ button on the top right corner.
.jpg "Figure 6.1 - An empty Graphics Window")
Figure 6.1 - An empty Graphics Window
Setting up the Graphics Window
The graphics window allows you to customize its appearance to your desire. You can change the title, the background and its size. Let’s go ahead and modify it a bit, just to get familiar with the window.
GraphicsWindow.BackgroundColor = "SteelBlue" GraphicsWindow.Title = "My Graphics Window" GraphicsWindow.Width = 320 GraphicsWindow.Height = 200 GraphicsWindow.Show()
Here’s how the customized graphics window looks. You can change the background color to one of the many values listed in Appendix B. Play with these properties to see how you can modify the window’s appearance.
.jpg "Figure 6.2 - A Custom Graphics Window")
Figure 6.2 - A Custom Graphics Window
Read the rest: Small Basic Getting Started Guide: Chapter 6: Beginning Graphics
Next we'll preview LitDev's GraphicsWindow Basics article:
Small Basic: GraphicsWindow Basics
GraphicsWindow Layers
Layer 1 - Background
The bottom layer is just controlled by the GraphicsWindow.BackgroundColor property. When this property is changed the colour of the canvas changes and all drawings and shapes remain.
GraphicsWindow``.``BackgroundColor ``= ``"Black"
GraphicsWindow``.``DrawEllipse``(``100``,``100``,``50``,``50``)
Program``.``Delay``(``1000``)
GraphicsWindow``.``BackgroundColor ``= ``"Red"
Layer 2 - Drawings
On top of the background are stationary objects that can be drawn on the canvas. All of these are found in the GraphicsWindow.Draw… and GraphicsWindow.Fill… methods. These are good for objects that do not move and cannot be deleted or changed easily.
Read the rest: Small Basic: GraphicsWindow Basics
Next up, here's a preview of the Kidware book excerpt from Philip and Lou:
The Developer’s Reference Guide to Small Basic: Chapter 5: GraphicsWindow Object
We saw the text window is useful for input and output of text based information. In this chapter, we look at the object used to host most Small Basic programs – the GraphicsWindow. With this object, we can build very power applications. GraphicsWindow ObjectGraphicsWindow Coordinates: The GraphicsWindow object is a cornerstone of Small Basic programming. In the graphics window, we can draw lines, shapes, and text in many colors. We can host controls (buttons and text boxes). We can receive mouse and keyboard input from a user. The coordinate system used by the graphics window is:
|
This chapter is adapted from the book The Developer’s Reference Guide To Microsoft Small Basic by Philip Conrod and Lou Tylee. To purchase this book in its entirety, please see the Computer Science For Kids web site |
.png)
.png "The Developer’s Reference Guide")
The window is Width pixels wide and Height pixels high. We use two values (coordinates) to identify a single pixel in the window. The x (horizontal) coordinate increases from left to right, starting at 0. The y (vertical) coordinate increases from top to bottom, also starting at 0. Points in the region are referred to by the two coordinates enclosed in parentheses, or (x, y) .
Read the rest: The Developer’s Reference Guide to Small Basic: Chapter 5: GraphicsWindow Object
And, finally, here's an image of Nonki's Air Hockey sample to entice you to click it and build it for yourself:
Small Basic Game Programming - Air Hockey Game
There you go!
And you thought this would be a short blog post! Why did you think that? Why? Why? WHY????
Dig Deeper on Lego Mindstorms:
Lego Mindstorms EV3 extension for Small Basic - EV3 Basic!!!
Program your Lego Mindstorms EV3 Robots with actual Text-Based Coding!
FREE SOFTWARE: Lego Mindstorms EV3 Basic for Small Basic
Lego Mindstorms EV3 Basic - Small Basic is in 20 Languages!!!
Lego Mindstorms - EV3 Basic is the Easiest Installation!!
Lego Mindstorms EV3 Basic - Small Basic teaches you as you type!
Lego Mindstorms EV3 Basic - What are the social collaboration features?
Small and Basically yours,
- Ninja Ed