Using the new CRM theming in Unified Service Desk
One of the great ways to learn to use a tool is to make up fun and interesting projects that require the features of the solution. This article is an exercise in taking a cool new CRM web client feature and applying it to USD. While the outcome is useful in it's own right, the purpose of this exercise is to demonstrate some more advanced capabilities of the platform and to demonstrate some best practices as it applies to developing on Unified Service Desk. This entry assumes you already have experience with USD control development but want to take that knowledge to the next level. I hope you have fun with this exercise.
One of the cool new features in CRM is the theming support. It allows you to change the color schemes within the CRM UI and provide some level of personalization of the experience for the first time. It is available in the Settings section of CRM under the Customizations link. What I plan to do in this article is walk you through the steps of building a special custom hosted control action that can read the CRM theme and apply it to USD.
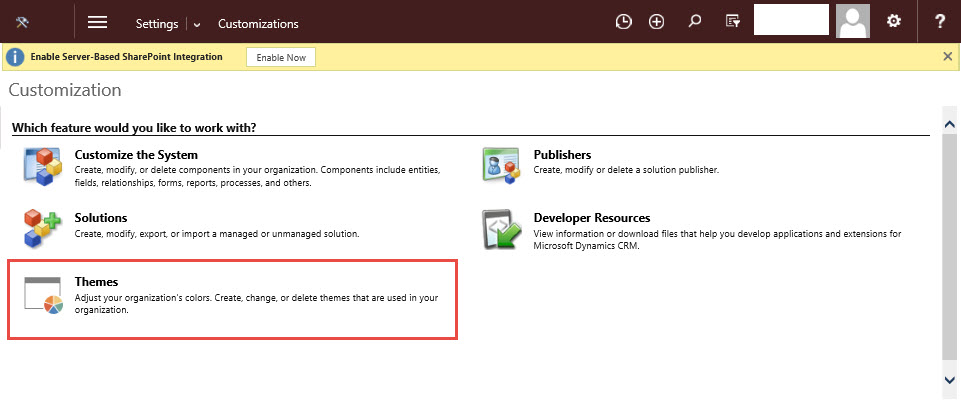
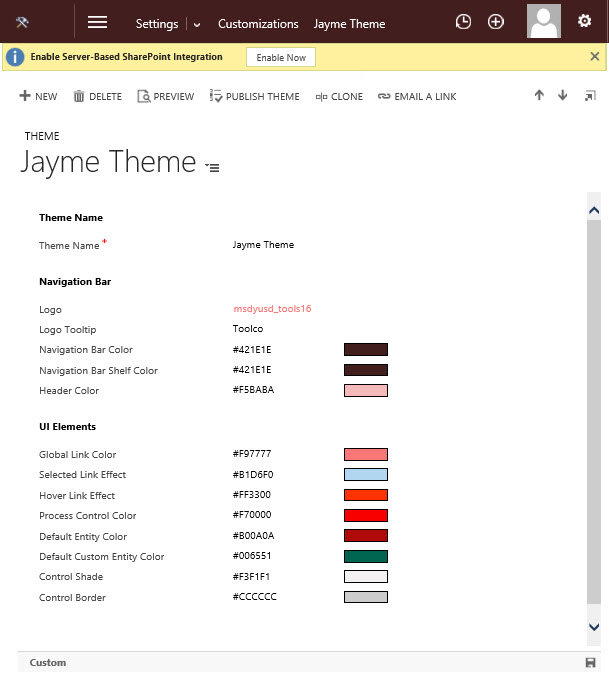
It will be useful for this exercise that you create a custom theme so that you can recognize which things are themed and which things are not affected by the theme both in the CRM web client and in Unified Service Desk. The attractiveness of this theme is not very important for this exercise as it is for development purposes that we are using it. Once we are done, we can revert the theme back to CRM's default or spend the time to create a new attractive theme as desired.
Create a Custom Hosted Control
Once we have a "development" theme created and published, we will want to create our custom hosted control that will house the code used to apply the CRM theme to USD itself. The creation of a USD hosted control is outside the scope of this article. Instead we will assume you have installed the USD templates and have created a new USD hosted control and did an initial build to ensure that it works. You should also plan to configure it to live on the hidden panel so it is not visible. The control will be providing a service rather than providing a specific UI component.
Start a LoadCRMTheme Action to your Control
In our DoAction override, we want to add our Action handler using your desired method.
if (args.Action.Equals("LoadCRMTheme", StringComparison.InvariantCultureIgnoreCase))
{ ...
The first thing we need to do is read the data from our CRM theme. It turns out that, this data is stored in a new entity so we can create a fetch query to obtain the data.
string fetchXml = @"<fetch version=""1.0"" output-format=""xml-platform"" mapping=""logical"" distinct=""false"">
<entity name=""{0}"">
<all-attributes/>
</entity>
</fetch>";
fetchXml =String.Format(fetchXml, "theme");
For our purposes and to support the anticipated expansion of this feature in future CRM releases, we are just reading all attributes. To read the data, we want to use the CRM tools that are built into USD. This is the supported way of querying CRM from within Unified Service Desk.
string pageCookie = "";
bool isMoreRecords = false;
EntityCollection result = _client.CrmInterface.GetEntityDataByFetchSearchEC(fetchXml, 50, 1, pageCookie, out pageCookie, out isMoreRecords);
if (result == null && _client.CrmInterface.LastCrmException != null)
{
diagLogger.Log(_client.CrmInterface.LastCrmException);
throw _client.CrmInterface.LastCrmException;
}
Now that we have the theme records, we want to see if we can locate the one marked default. The default flag is marked by a boolean field within the entity. We could add this check as a condition to our query but we don't anticipate a lot of themes so we can also step through the list to find the default one.
Entity defaultTheme = null;
foreach (Entity c in result.Entities)
{
foreach (KeyValuePair<string, object> a in c.Attributes)
{
if (a.Value != null)
{
if (a.Key.Equals("isdefaulttheme", StringComparison.InvariantCultureIgnoreCase) && (bool)a.Value == true)
defaultTheme = c;
}
}
}
Load the sample merge theme as an XML web resource in CRM.
Download the CRMResourceMerge.xml file attached to this blog entry. It is essentially the default theme file available in the USD SDK but with the colors for certain features replaced with replacement parameters.
<SolidColorBrushx:Key="WindowHeaderStyle"SolidColorBrush.Color="[[controlshade]]" />
We use the field names in the table as replacement parameters since we will pass the fields and their values from CRM as parameters to the function used to replace these. That will allow us to update the XML file later without modifying the code that is used to apply the theme. I chose what I thought was reasonable relationships between the themes in CRM and what the corresponding elements should be with that same color should be in USD. This relationship is controlled by where you put the replacement parameters in this XML file. Feel free to modify it as you see fit.
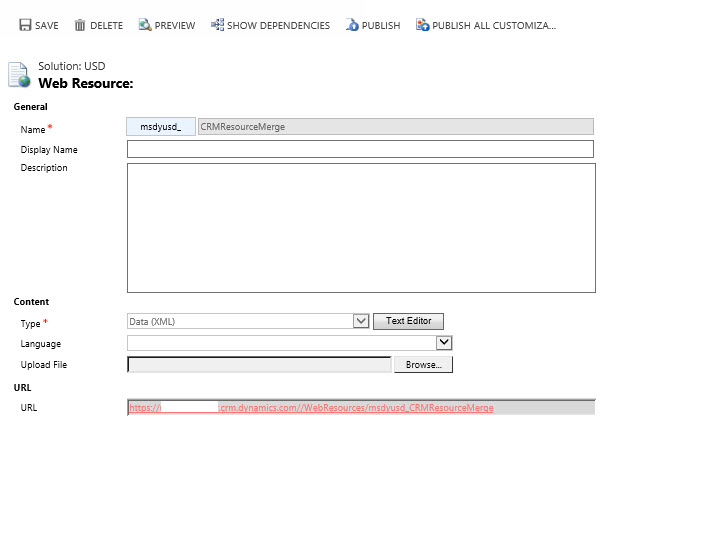
Create a new web resource and upload the XML file and publish it.
Load the XML Web Resource
Now that we have the XML file uploaded and published, we need to load it into the environment. The CRM Global Manager has a special function that can be used to obtain such a resource file with relative ease. Use the reference to the CRMWindowRouter in the base class (DynamicsBaseHostedControl) and cast it as CRMGlobalManager. The GetCRMWebResource function takes a single parameter, the name of the resource. Once we obtain the object, we need to convert to from the binary object returned by CRM to the original UTF8 encoding for a C# string.
string resourceMerge = String.Empty;
object objRes = ((CRMGlobalManager)CRMWindowRouter).GetCRMWebResource("msdyusd_CRMResourceMerge");
if (objRes != null)
{
byte[] b = Convert.FromBase64String((string)objRes);
resourceMerge = System.Text.Encoding.UTF8.GetString(b);
// trim the first char - not sure why CRM is adding it
resourceMerge = resourceMerge.Remove(0, 1);
}
NOTE: The first character will be garbled so you need to remove it with the last function. This is a workaround for this problem.
In order to create the parameter list from the entity table result, we use a function FromEntity that is available in USD. This ends up creating a name/value pair list with strings that is convenient for us when supplying the data parameters later.
DynamicsCustomerRecord custRec = ((AgentDesktopSession)localSession).Customer.DesktopCustomer asDynamicsCustomerRecord;
Dictionary<string, CRMApplicationData> data;
if (defaultTheme != null)
{
data = EntityDescription.FromEntity(defaultTheme).data;
}
elseif (result.Entities.Count > 0)
{
data = EntityDescription.FromEntity(result.Entities[0]).data;
}
else
{
throw new Exception("No selectable theme found in CRM");
}
Contrasting foreground color
There isn't a theme field in CRM for the foreground text color so unfortunately that means that if we use it to apply a dark color to tabs or other UI element with text, we need some way to choose a contrasting color. John Simmons created an interesting function to derive a contrasting foreground color and is available here. For completeness sake, I'm providing a copy of his function here.
public System.Drawing.Color IdealTextColor(System.Drawing.Color bg)
{
int nThreshold = 105;
int bgDelta = Convert.ToInt32((bg.R * 0.299) + (bg.G * 0.587) + (bg.B * 0.114));
System.Drawing.Color foreColor = (255 - bgDelta < nThreshold) ? System.Drawing.Color.Black : System.Drawing.Color.White;
return foreColor;
}
I make use of this to add a couple extra values to our name value pair list that we can use for values in the style we create.
data.Add("navbarshelftextcolor", new CRMApplicationData() { name = "navbarshelftextcolor", type = "string", value = cc.ConvertToString(IdealTextColor((System.Drawing.Color)cc.ConvertFromString(data["navbarshelfcolor"].value))) });
data.Add("navbarbackgroundtextcolor", new CRMApplicationData() { name = "navbarbackgroundtextcolor", type = "string", value = cc.ConvertToString(IdealTextColor((System.Drawing.Color)cc.ConvertFromString(data["navbarbackgroundcolor"].value))) });
Creating color parameters
Now that we have the data we need, we need to convert it to a format that we can use when calling the action call.
List<LookupRequestItem> lri = newList<LookupRequestItem>();
foreach (CRMApplicationData item in data.Values)
{
lri.Add(new LookupRequestItem() { Key = item.name, Value = item.value });
}
Creating the final theme
With the name/value parameters we have prepared, lets do the actual work of replacement.
resourceMerge = Utility.GetContextReplacedString(resourceMerge, CurrentContext, localSession, lri);
Applying the theme
Now that we have the theme file generated, we can call the SetTheme action on global manager to make the actual change. It is generally best practice to never call an action directly in USD, however, in this case we are calling an action on Global Manager and we know that in USD that it will always be there, no matter what. Notice how I do NOT use FireRequestAction that is part of CCA. The reason is that FireRequestAction calls do not show up in the USD debugger so they are difficult to diagnose if there is a problem. Instead we hook into the standard Action Call methods so the debugger logging occurs.
ActionDefinition ad = new ActionDefinition()
{
Application = ((DynamicsBaseHostedControl)CRMWindowRouter).ApplicationName,
Action ="SetTheme",
ActionData = resourceMerge,
Condition = ""
};
CRMWindowRouter.ExecuteActions(new List<ActionDefinition>() { { ad } }, String.Empty, new Dictionary<string, string>());
Finishing up
The last we need to do is add the LoadCRMTheme action to our control in CRM. You can add an Action Call to the DesktopReady Global Manager event to call the LoadCRMTheme if you wish or for testing sake, just call it using the USD debugger.
A little polish
While we have demonstrated how to apply the colors to USD, it would also be nice to pick up the image logo from the theme and use it in the top left corner of USD. To make this happen, we need a helper function that can walk the visual tree of our UI to find the image control.
protected Object FindVisualChildByName(UIElement child, string name)
{
if (child isDependencyObject)
{
string controlName = child.GetValue(Control.NameProperty) as string;
if (controlName == name)
return child;
}
FrameworkElement fe = child asFrameworkElement;
if (fe != null)
{
try { fe.ApplyTemplate(); }
catch { }
int childrenCount = VisualTreeHelper.GetChildrenCount(fe);
for (int i = 0; i < childrenCount; i++)
{
DependencyObject child1 = VisualTreeHelper.GetChild(child, i);
Object obj = FindVisualChildByName(child1 as UIElement, name);
if (obj != null)
return obj;
}
}
ContentControl c = child as ContentControl;
if (c != null)
{
Object obj = FindVisualChildByName(c.Content as UIElement, name);
if (obj != null)
return obj;
}
ItemsControl ic = child as ItemsControl;
if (ic != null)
{
foreach (Object elem in ic.Items)
{
if (elem is UIElement)
{
Object obj = FindVisualChildByName(elem as UIElement, name);
if (obj != null)
return obj;
}
}
}
return null;
}
I have to say that this function is a little convoluted but it does achieve the desired result. It is going to look for a control with a given name. To allow us to update the image, we will need to give the image a name, "Logo" so we can easily find it with the above code. Open up your Main Layout hosted control (Panel Layout). Change it to a XAML based custom layout if it isn't already set this way. Next locate the image that represents the logo and give it the name, "Logo," as in the following.
<Image Grid.Column="0" x:Name="Logo" Source="{Binding Source=msdyusd_Logo, Converter={StaticResource CRMImageLoader}}" Style="{DynamicResource ImageLogo}" />
Now that we have this element named and we have a function that we can use to find this image by name, we are ready to go ahead and update the image with the one from the CRM theme. This code should be added to the end of our LoadCRMTheme action.
Window w = Application.Current.MainWindow;
System.Windows.Controls.Image objLogo = (System.Windows.Controls.Image)FindVisualChildByName(w, "Logo");
if (objLogo != null)
{
CRMImageConverter ic = new CRMImageConverter();
string logoimagename = Utility.GetContextReplacedString("[[logoid.name]]", CurrentContext, localSession, lri);
((System.Windows.Controls.Image)objLogo).Source = (BitmapImage)ic.Convert(logoimagename, this.GetType(), null, System.Globalization.CultureInfo.CurrentCulture);
string logotooltip = Utility.GetContextReplacedString("[[logotooltip]]", CurrentContext, localSession, lri);
((System.Windows.Controls.Image)objLogo).ToolTip = logotooltip;
}
This code first locates the Logo image. If it is found, it creates a special class called CRMImageConverter that is used to load images from CRM Web Resources. Next it picks up the image resource name from the table result using replacement parameters as it is an easy way to extract the name field. Then using the converter, it obtains the image BitmapImage from CRM and assigns it as the image source for the control. As an added touch, we also add the tooltip to the image. The result looks like this.
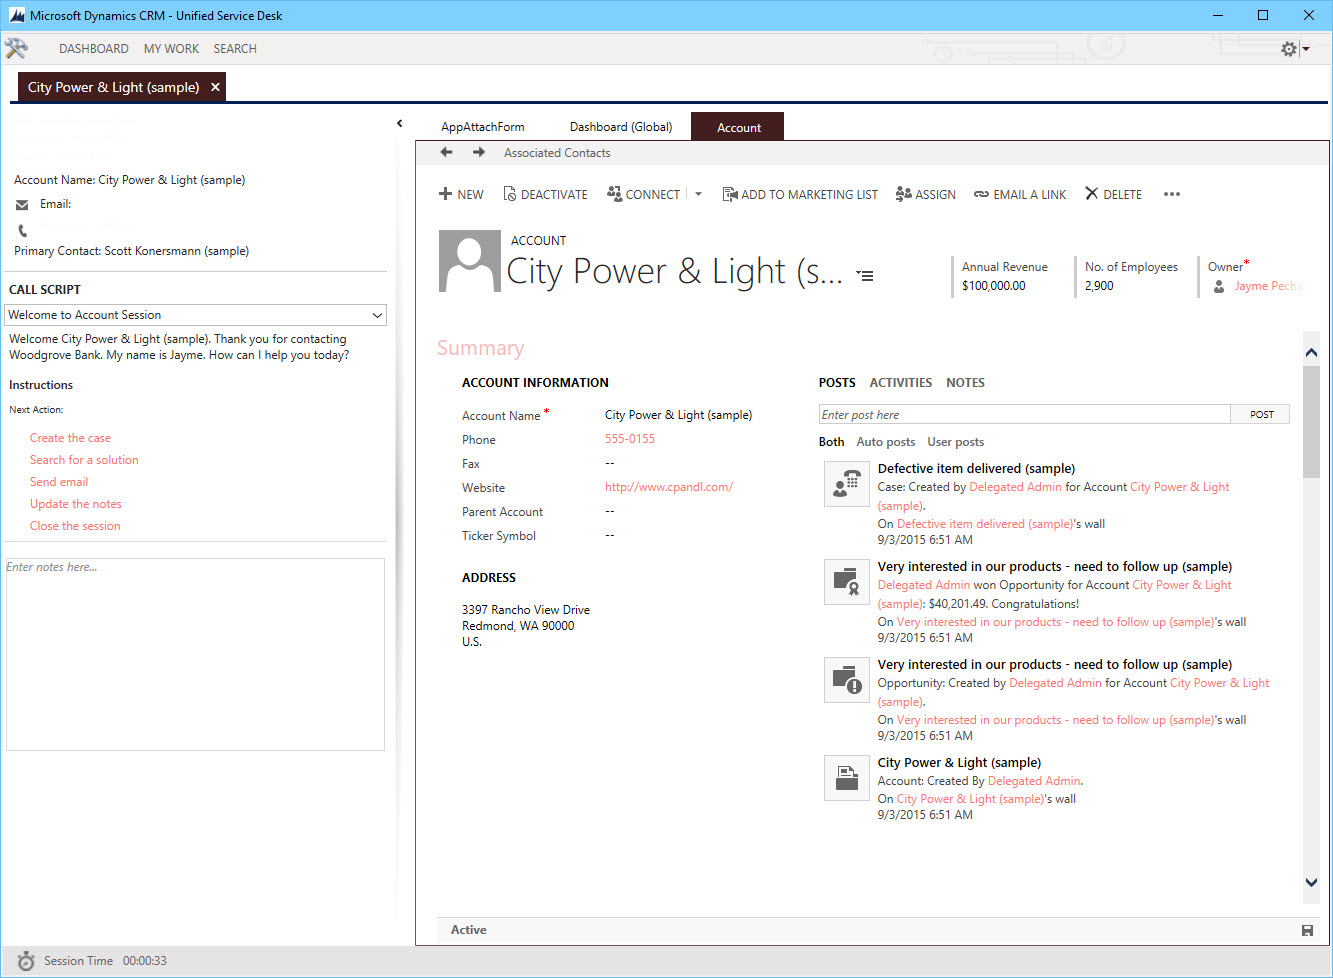
Hopefully this exercise has provided some useful insight into some more advanced capabilities of USD and how to piece things together to have some cool results. We covered topics here including custom themes, custom hosted controls, interacting with the WPF visual tree, inside knowledge of the CRM theming capability, replacement parameters and applying them through code, and how to call some special functions within USD code modules.