Resizing A Virtual PC Hard Drive
Holy Diver...
The other day I was working on one of my Virtual PC demo images, when I noticed I was running out of disk space. When I originally created the Virtual Hard Drive (.VHD) I just accepted the default size of 16GB without thinking, but more and more often I find I need to install other products such as SharePoint Server, BizTalk Server, PerformancePoint Server, which inevitably require extra disk space.
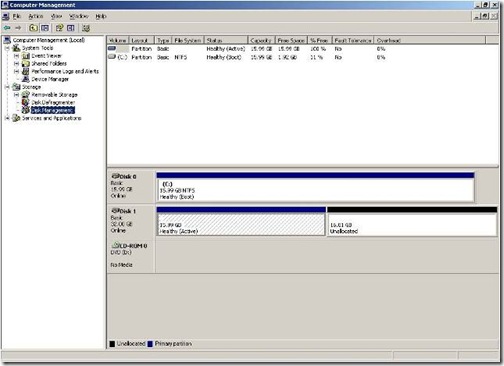
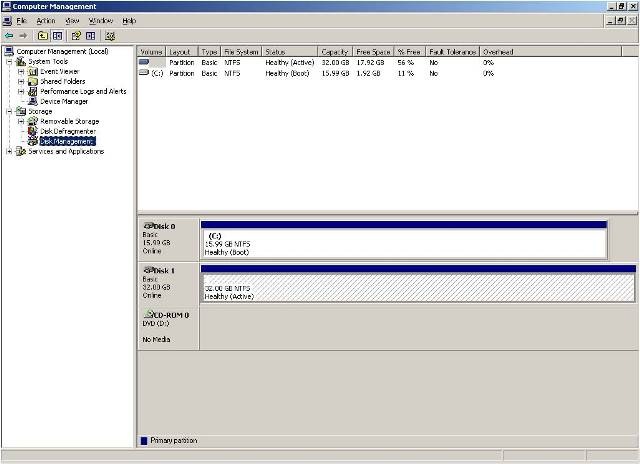
After a little "liveling" (what is the live.com equivalent of "googling"?) I found a great utility called VHD Resizer, which does exactly what its name suggests. Once I resized the drive to 32GB, I started up the image but found that my C: drive was still limited to 16GB. Using the Windows Disk Management tool, showed that disk had indeed been resized, leaving me with my original 16GB partition plus 16GB of unallocated space.
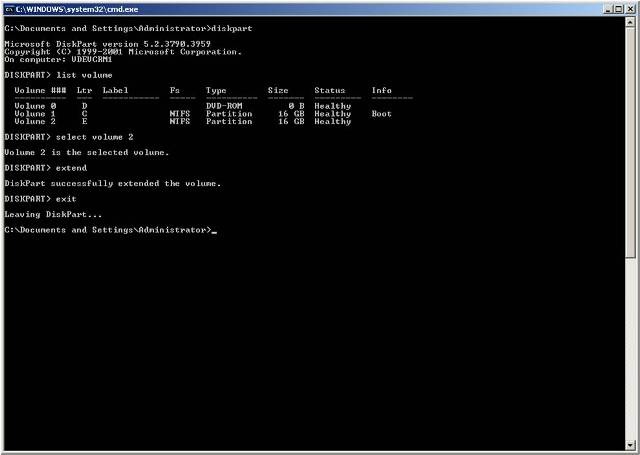
I tried to extend the partition using the DISKPART.EXE command line utility, but I quickly found out that you can't extend a boot partition. However, this morning I was chatting with Scott Vessey, a friend who works for a VMWare training partner Magirus, who shared a trick to get this to work.
Use VHD Resizer to create a new .VHD file from the original Virtual Machine .VHD file
Add the new .VHD as a second drive to the Virtual Machine
Start the Virtual Machine, run the Disk Management tool and rescan the drives to enable Windows to see this as an NTFS partition.
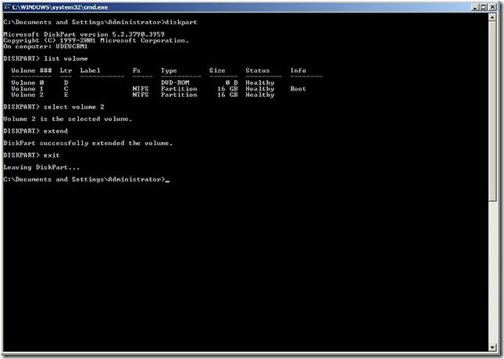
Start a command prompt and run "diskpart.exe". Select the correct volume and extend it.
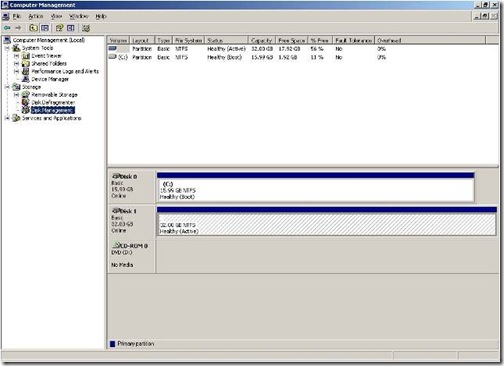
Refresh the Disk Management tool and you should now see the re-sized partition.
Shut down the Virtual Machine and re-configure it to use the newly re-sized .VHD file as the primary disk.
This posting is provided "AS IS" with no warranties, and confers no rights.