Provisioning an HDInsight Spark Cluster
Last week I attend a number of departmental meetings, during the day I had a number of presentation and was talking about Azure and the Azure Market Place which has over 1400 pre configured software images so it a great solution for providing pretty much every services you would ever need.
I did a few demos and then opened up to the audience with the question.
‘What would you like me to build?’
Well the instant response for the faculties technical manager was
A Hadoop Cluster
Well this is where I thought, do I have enough time to complete this task and finish of the other areas I wanted to talk about..
Well the answer is yes thanks to the new ARM template deployment which is now in Azure
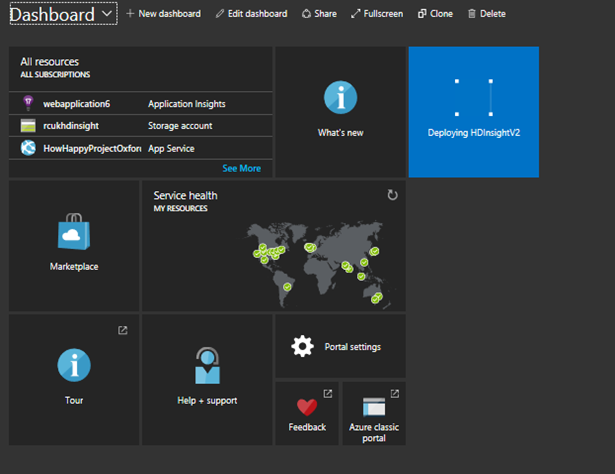
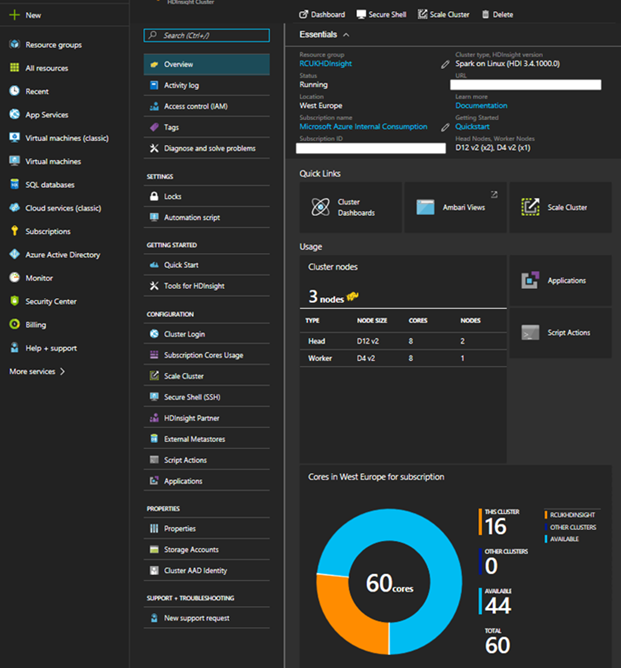
So the following tutorial is going to take you through deploying a 60 Core HDInsight Cluster.
The first task you must perform is to provision an HDInsight Spark cluster.
So what is HDInsight
HDInsight a cloud Spark and Hadoop service for the enterprise
HDInsight is the only fully-managed cloud Hadoop offering that provides optimized open source analytic clusters for Spark, Hive, MapReduce, HBase, Storm, Kafka, and R Server backed by a 99.9% Provision an HDInsight Cluster.
So Getting started
1. In a web browser, navigate to https://portal.azure.com, and if prompted, sign in using the Microsoft account that is associated with your Azure subscription.
2. In the Microsoft Azure portal, add a new HDInsight cluster with the following settings:
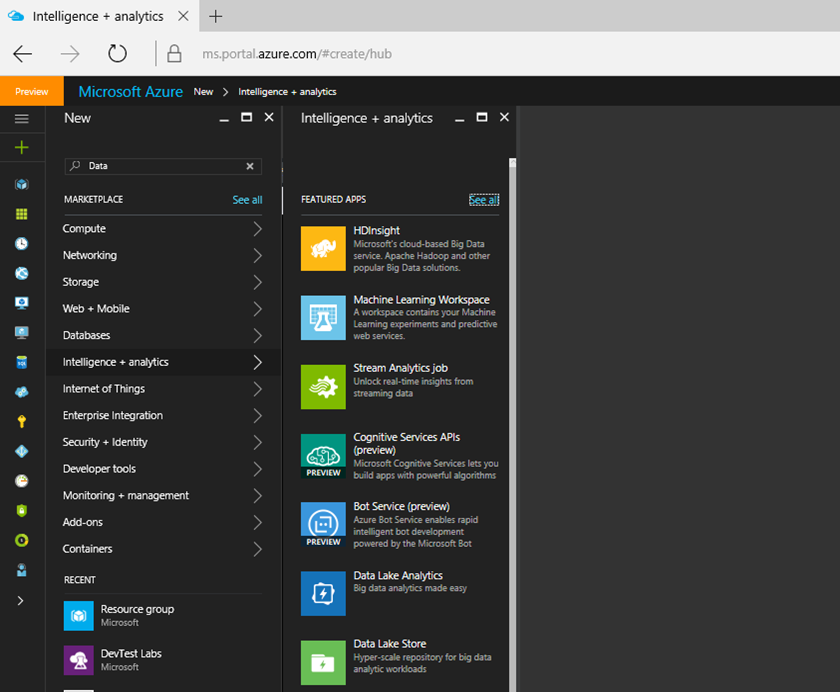
1. In the Microsoft Azure portal, in the Hub Menu, click New. Then in the Intelligence + Analytics menu, click HDInsight.
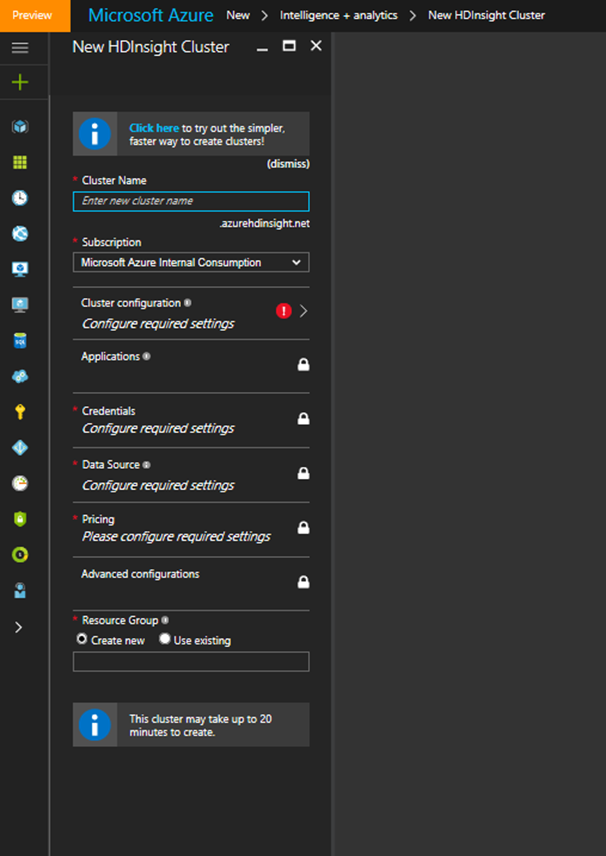
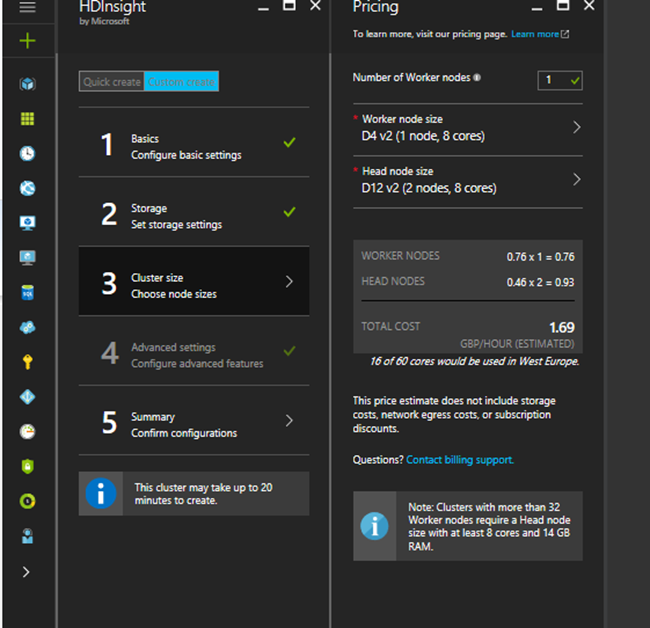
2. In the New HDInsight Cluster blade, enter the following settings, and then click Create there are a number of fields which need to completed or in step 3 you can try the new simpler and faster way
You need to populate the following fields
· Cluster Name: Enter a unique name (and make a note of it!)
· Cluster Type: Spark
· Cluster Operating System: Linux
· HDInsight Version: Choose the latest version of Spark
· Subscription: Select your Azure subscription
· Resource Group: Create a new resource group with a unique name
· Credentials:
1. Cluster Login Username: Enter a user name of your choice (and make a note of it!)
2. Cluster Login Password: Enter and confirm a strong password (and make a note of it!)
· SSH Username: Enter another user name of your choice (and make a note of it!)
· SSH Authentication Type: Password
· SSH Password: Enter and confirm a strong password (and make a note of it!)
· Data Source:
· Create a new storage account: Enter a unique name consisting of lower-case letters and numbers only (and make a note of it!)
· Choose Default Container: Enter the cluster name you specified previously
· Location: Select any available region
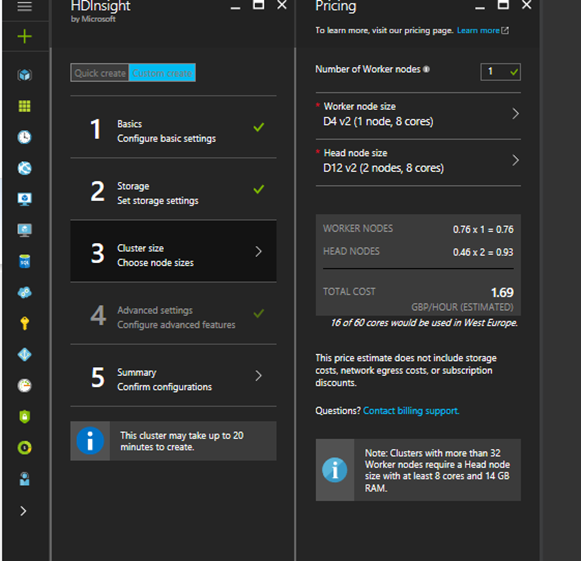
· Node Pricing Tiers:
· Number of Worker nodes: 1
· Worker Nodes Pricing Tier: Use the default selection
· Head Node Pricing Tier: Use the default selection
· Optional Configuration: None
· Pin to dashboard: Not selected
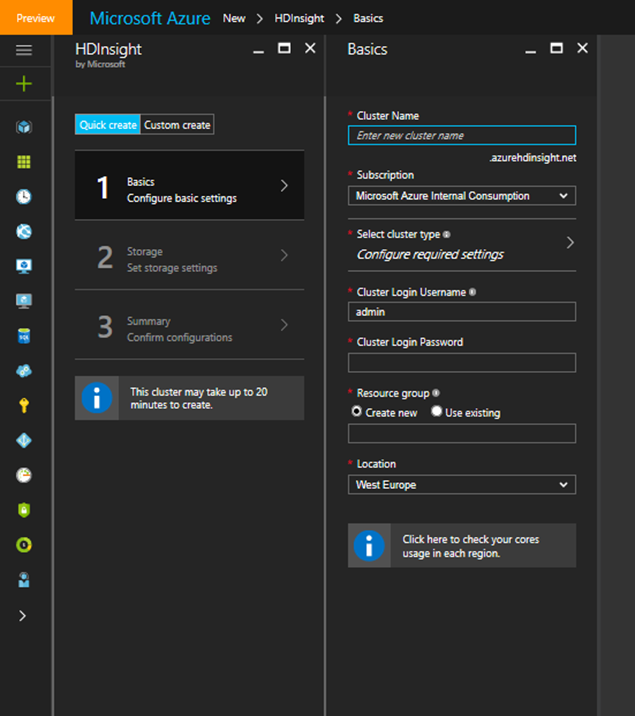
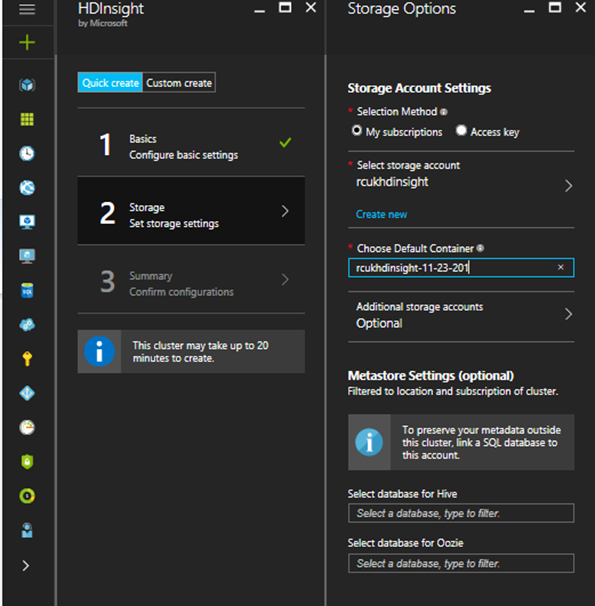
3. As you can imagine this may take some time to complete all these sections, so we have now released a much SIMPLER and FASTER way of deploying clusters
Simply click the try out the simpler, faster way art the top of the form
· Cluster Name: Enter a unique name (and make a note of it!)
· Subscription: Select your Azure subscription
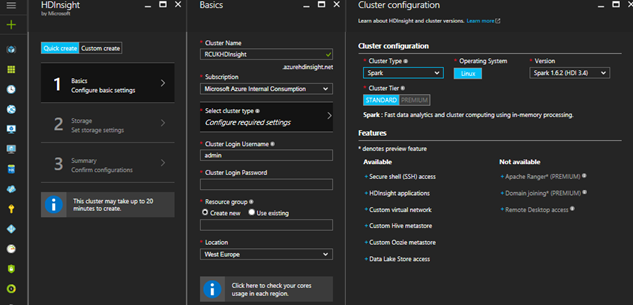
· Cluster Type: Spark
· Cluster Operating System: Linux
· HDInsight Version: Choose theversion of Spark
· Credentials:
· Cluster Login Username: Enter a user name of your choice (and make a note of it!)
· Cluster Login Password: Enter and confirm a strong password (and make a note of it!)
· Resource Group: Create a new resource group with a unique name
· Location: Choose a Data Center Location of the Cluster
· Data Source:
· Create a new storage account: Enter a unique name consisting of lower-case letters and numbers only (and make a note of it!)
· Choose Default Container: Enter the cluster name you specified previously with the date
·· Node Pricing Tiers:
· Number of Worker nodes: 1 you can change this from the default by simply editing the number of nodes
· Worker Nodes Pricing Tier: Use the default selection
· Head Node Pricing Tier: Use the default selection
Deploying the Cluster
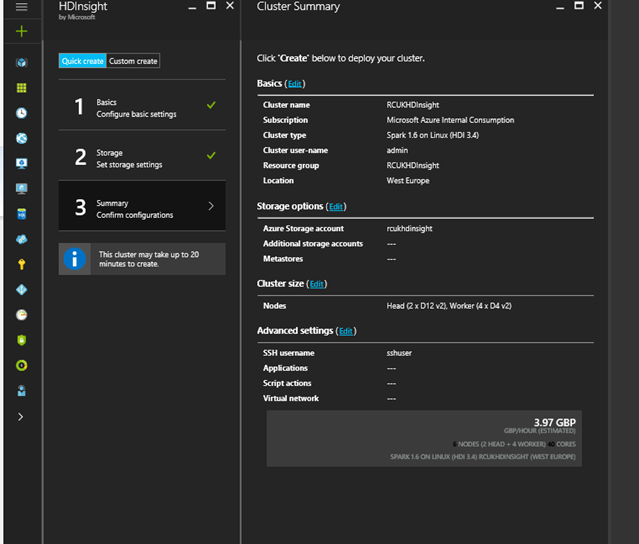
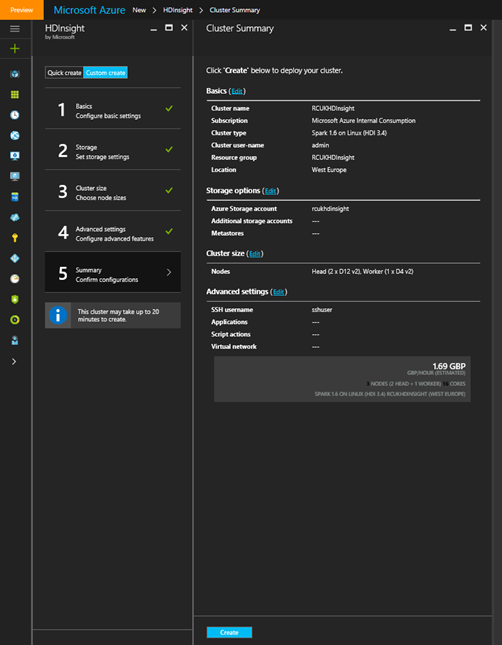
Simply press Create within 10 mins you will have your HDInsight Cluster ready
4. In the Azure portal, you can see that the deployment has started. Then wait for the cluster to be deployed (this can take a long time depending on the size of your cluster)
Note: As soon as an HDInsight cluster is running, the credit in your Azure subscription will start to be charged. So once you have finished with the Cluster follow the instructions in the Clean Up procedure at the end of the tutorial to delete your cluster in order to avoid additional costs as we can see the creation of the cluster is cost effective at £1.67/Hour .
View the HDInsight Cluster in the Azure Portal
1. In the Azure portal, browse to the Spark cluster you just created.
2. In the blade for your cluster, under Quick Links, click Cluster Dashboards.
3. In the Cluster Dashboards blade, note the dashboards that are available. These include a Jupyter Notebook that you will use later in this course.
Installing the Azure CLI
Install the Azure Cross-Platform Command-line Interface (CLI)
The Azure CLI is a command line interface for working with Azure services. There are versions available for Windows, Linux, and Mac OS X.
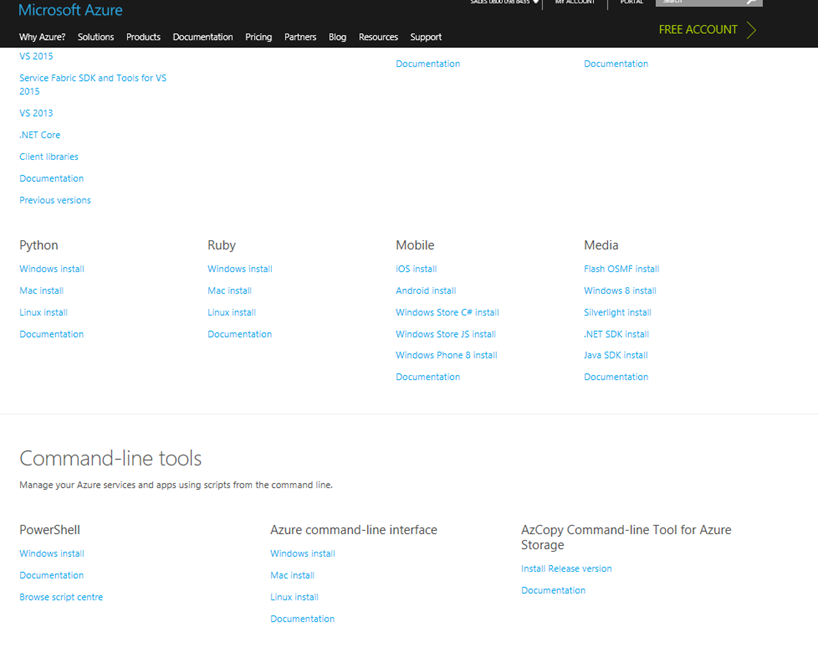
1. In a web browser, navigate to https:/azure.microsoft.com/downloads
2. In the Command-line Tools section, under Azure command-line interface, click on the Installer and read the Documentation and follow the instructions to install the Azure CLI on your client operating system.
Note: In up-to-date Windows and Mac OS X systems on which Node.js is already installed, you should simply download and run the installer package, and on Linux you may be able to use a package manager tool such as npm from the command line. On some Mac OS X systems and Linux distributions, you may need to install Node.js before installing the Azure CLI. Note that the specific steps to install these packages may vary depending on your Linux distribution. For more information about installing Node.js, see https://nodejs.org.
3. Restart your computer after installing the Azure CLI.
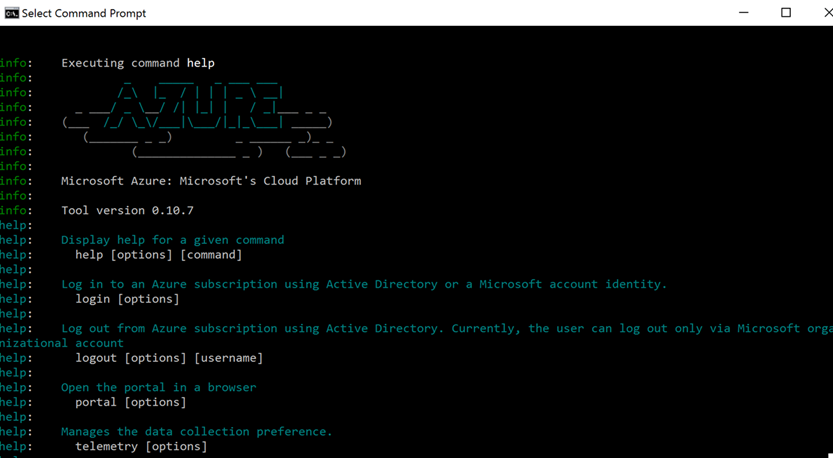
4. Open a command window (for example, Windows command prompt, Bash, or Terminal) and enter the following command to verify that the Azure CLI is installed correctly:
azure help
Using the Azure CLI
The azure command-line interface is a cross-platform tool that you can use to work with Azure services, including HDInsight.
You use the Azure CLI to upload data to the Azure blob store for processing with Hadoop, and then download the results for analysis on your local computer.
View Azure Service Information
1. Open a new command line window.
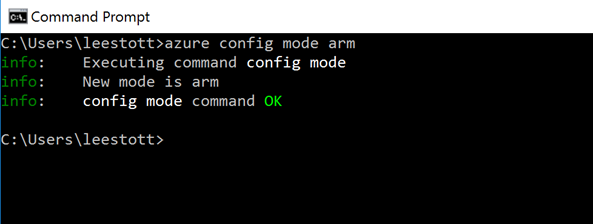
2. Enter the following command to switch the Azure CLI to resource manager mode.
azure config mode arm
Note: If a command not found error is displayed, ensure that you have followed the instructions in the setup guide to install the Azure CLI.
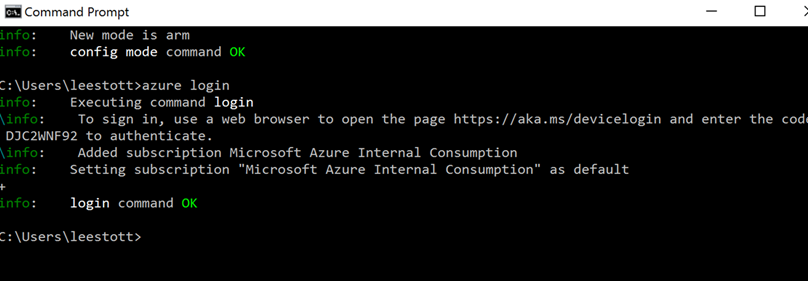
3. Enter the following command to log into your Azure subscription:
azure login
4. Follow the instructions that are displayed to browse to the Azure device login site and enter the authentication code provided. Then sign into your Azure subscription using your Microsoft account.
5. Enter the following command to view your Azure resources:
azure resource list
6. Verify that your HDInsight cluster and the related storage account are both listed. Note that the information provided includes the resource group name as well as the individual resource names.
7. Note the resource group and storage account name, you will need them in the next procedure.
Upload a File to Azure Blob Storage
1. Simply open the file location of the file you wish to use
2. Enter the following command on a single line to determine the connection string for your Azure storage account, specifying the storage account and resource group names you noted earlier:
azure storage account connectionstring show storage_account -g resource_group
3. Note the connection string, copying it to the clipboard if your command line tool supports it.
4. If you are working on a Windows client computer, enter the following command to set a system variable for the connection string:
SET AZURE_STORAGE_CONNECTION_STRING=your_connection_string
If you are using a Linux or Mac OS X client computer, enter the following command to set a system variable for the connection string (enter the connection string in quotation marks):
export AZURE_STORAGE_CONNECTION_STRING="your_connection_string"
5. Enter the following command on a single line to upload a .csv file for example to a blob named data.csv in the container used by your HDInsight cluster. Replace local_path with the local path to your .csv file (for example c:\HDInsight\upload\data.csv or HDInsight/upload/data.csv) and replace container with the name of the storage container used by your cluster (which should be the same as the cluster name + date in my example):
azure storage blob upload local_path container data.csv
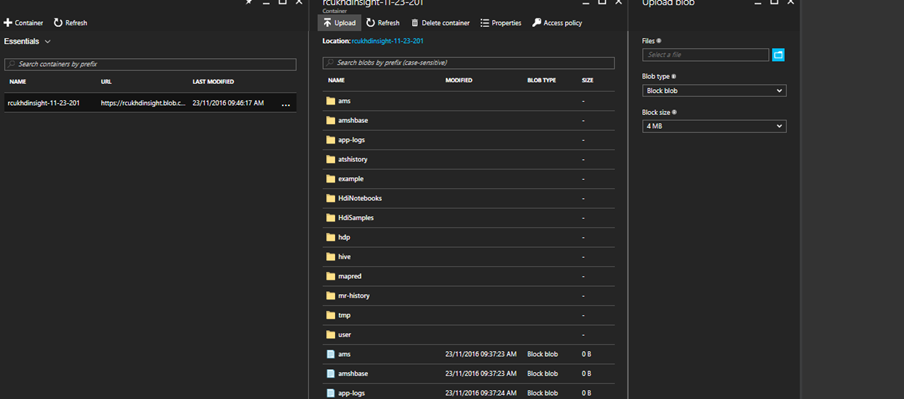
or you can upload a file from the Azure Portal by selecting upload within the container storage account
Now you have data in your storage account which can be utilsied by the HDInsight Cluster.
Deleting the Resource Group for your HDInsight Cluster
1. If it is not already open in a tab in your web browser, browse to the new Azure portal at https://portal.azure.com.
2. In the Azure portal, view your Resource groups and select the resource group you created for your cluster. This resource group contains your cluster and the associated storage account.
3. In the blade for your resource group, click Delete. When prompted to confirm the deletion, enter the resource group name and click Delete.
4. Wait for a notification that your resource group has been deleted
NB. If you leave the storage group in place your jupyter notebooks and blob will be unaffected so you can simply retuilise them again with new a HDInsight Cluster
Learning Resources for Big Data
If your interested in learning more about big data and using tools such as Spark, HDInsight see https://mva.microsoft.com
We also now have dedicated courses on both https://www.edx.org and a dedicated Data Science Microsoft Professional programme at https://aka.ms/dsdeg
Detailed walkthrough of HDInsight and Juypter Notebooks https://github.com/MSFTImagine/computerscience/blob/master/Workshop/7.%20HDInsight/HDInsight%20Spark%20HOL.md
To help you get more from HDInsight, Click the video to learn more about HDInsight.
Read our resource guides below to help you successfully run your first query:


